What did you do with your 4runner today?

Hoping to refresh my LCA with whiteline bushings and add the TC gussets and Taco Tabs. Should be bullet proof then. What rack did you go with? Did you follow a write up or just wing it? Thanks!

Sent from my SM-G986U using Tapatalk

I went with a remaned unit from the Rack Doctor. They offer a lifetime warranty if you ship your unit back to them in a timely manner so make sure to get the rack right before you start the process.

I watched the Eric the car guy's YT video as I have a V8. My front sway bar was already off and the extra things I did to get the rack out were to loosen the front diff mounts, and remove both inner tie rods, as well as remove the 2UZ-FE oil filter as it was in the way.

It should be a pretty easy process. I recommend locking your steering wheel in place once you remove the intermediate shaft. I turned the wheel on accident and broke my clock spring so now i dont have an airbag or horn.
 
I went with a remaned unit from the Rack Doctor. They offer a lifetime warranty if you ship your unit back to them in a timely manner so make sure to get the rack right before you start the process.


I watched the Eric the car guy's YT video as I have a V8. My front sway bar was already off and the extra things I did to get the rack out were to loosen the front diff mounts, and remove both inner tie rods, as well as remove the 2UZ-FE oil filter as it was in the way.


It should be a pretty easy process. I recommend locking your steering wheel in place once you remove the intermediate shaft. I turned the wheel on accident and broke my clock spring so now i dont have an airbag or horn.
Thanks for the info.

Sent from my SM-G986U using Tapatalk
 
Today I got in my OEM rear window exterior weatherstrip and got it installed. I knew it wasn’t in the best shape, it worse than I thought lol. Sits nice-N-tight against the glass now. It is a TOYOTA Genuine 68290-35031 Door Glass Weatherstrip Assembly

How difficult was that to install? Mine could probably be replaced.
 
I went with a remaned unit from the Rack Doctor. They offer a lifetime warranty if you ship your unit back to them in a timely manner so make sure to get the rack right before you start the process.

I watched the Eric the car guy's YT video as I have a V8. My front sway bar was already off and the extra things I did to get the rack out were to loosen the front diff mounts, and remove both inner tie rods, as well as remove the 2UZ-FE oil filter as it was in the way.

It should be a pretty easy process. I recommend locking your steering wheel in place once you remove the intermediate shaft. I turned the wheel on accident and broke my clock spring so now i dont have an airbag or horn.

I've used Rackdoctor a couple times with good results. Seem to be good people.

As for the clock spring, I had to replace 2 in the past (Jeep and Honda). One broke on it's own and the other broke when my youngest played with the wheel while the rack was out of that car, a Civic. I could have fixed both with a soldering iron as they both broke at the end of the wire. One I replaced and the other I think I did just repair by re-soldering the ends.
 
Replaced the TPMS sensors in my spare tire and programmed it to a new code. Stupid thing kept showing duplicate sensor in my scanner. So far so good! No more flashy flashy!
 
Front camera

Sorted out my front camera. Went with a Nakita front/rear camera. Great product. Anyway, I got a Toyota-like front camera button and used that to activate it. Screen I used is a Gentex mirror which dims, has homelink and compass. It's an anytime camera which is nice.

Here in PA, no front license plate is required so I hid it between the mounts. OF course, I have to paint it black.
reuERmAl.jpg


Button. Illuminates amber to match the rest of them.
TMu1arfl.jpg


Couldn't mount it more forward to get rid of the bottom grille, but that is fine by me. I just wanted a camera to get a good idea of what is in front of the vehicle.
az8pmzGl.jpg
 
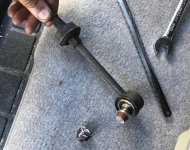
did a couple things today... nothing too ambitious. spent a good bit of time sawing through the rear endlink bolt as I stripped the washer and couldn't get enough grip to get the last few threads off.

https://www.toyota-4runner.org/attachment.php?attachmentid=363848&stc=1&d=1592619011

didn't have the right tools I guess. I had to take the hacksaw blade off the frame and saw with both hands for what felt like an hour to cut the bolt. I replaced the original OEM ones with Whiteline endlinks.

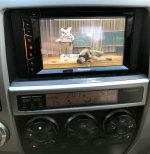
Then I replaced the headunit:
https://www.toyota-4runner.org/attachment.php?attachmentid=363849&stc=1&d=1592619155

Just a Pioneer AVH1550NEX. Going to miss the cassette option believe it or not. That Rivers Edge soundtrack was a real staple. I did the same USB mod to the smokers kit that [MENTION=293182]LinuxHack3r[/MENTION] did found here. I installed a Micro Bypass even though I don't think I'll ever watch movies while driving, but I wanted that option while everything was apart.

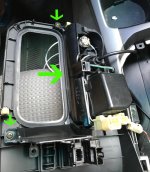
Speaking of which, just in case anyone else is a moron and buttoned up everything only to find they forgot to thread the USB cord from the smokers kit through the console trim, I found you can remove part of the underside of the trim (big arrow) by unscrewing three screws (2 seen here with the smaller arrows) and slide the kit through and not have to completely undo all the trim removal to fix a dumb mistake.

https://www.toyota-4runner.org/attachment.php?attachmentid=363850&stc=1&d=1592619488
 

Attachments

  • IMG_1693.jpg
    IMG_1693.jpg
    102.8 KB · Views: 471
  • IMG_1719.jpg
    IMG_1719.jpg
    62.5 KB · Views: 456
  • IMG_1717.jpg
    IMG_1717.jpg
    88.3 KB · Views: 471
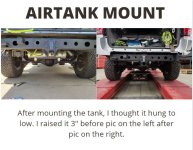
after installed my airtank, I thought it sat a little low, so today I moved it up 3" along with wrapping the hoses with Rescue tape.
More ground clearance the better lol
and I have some NITTO Trail Grapplers 285-75/17 (34.09) on the way, should be mounted, balanced and installed on Weds, can't wait :rockon:
 

Attachments

  • airtank.JPG
    airtank.JPG
    82.2 KB · Views: 358
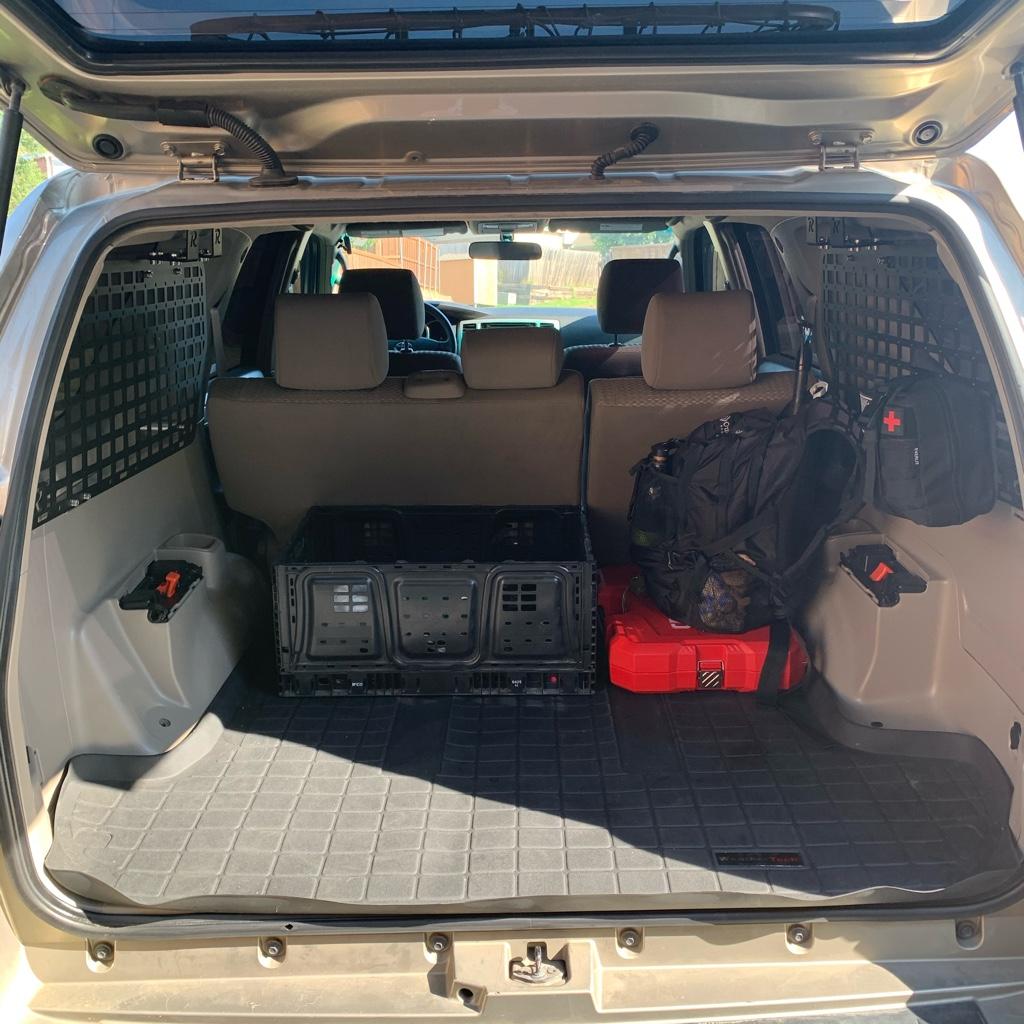
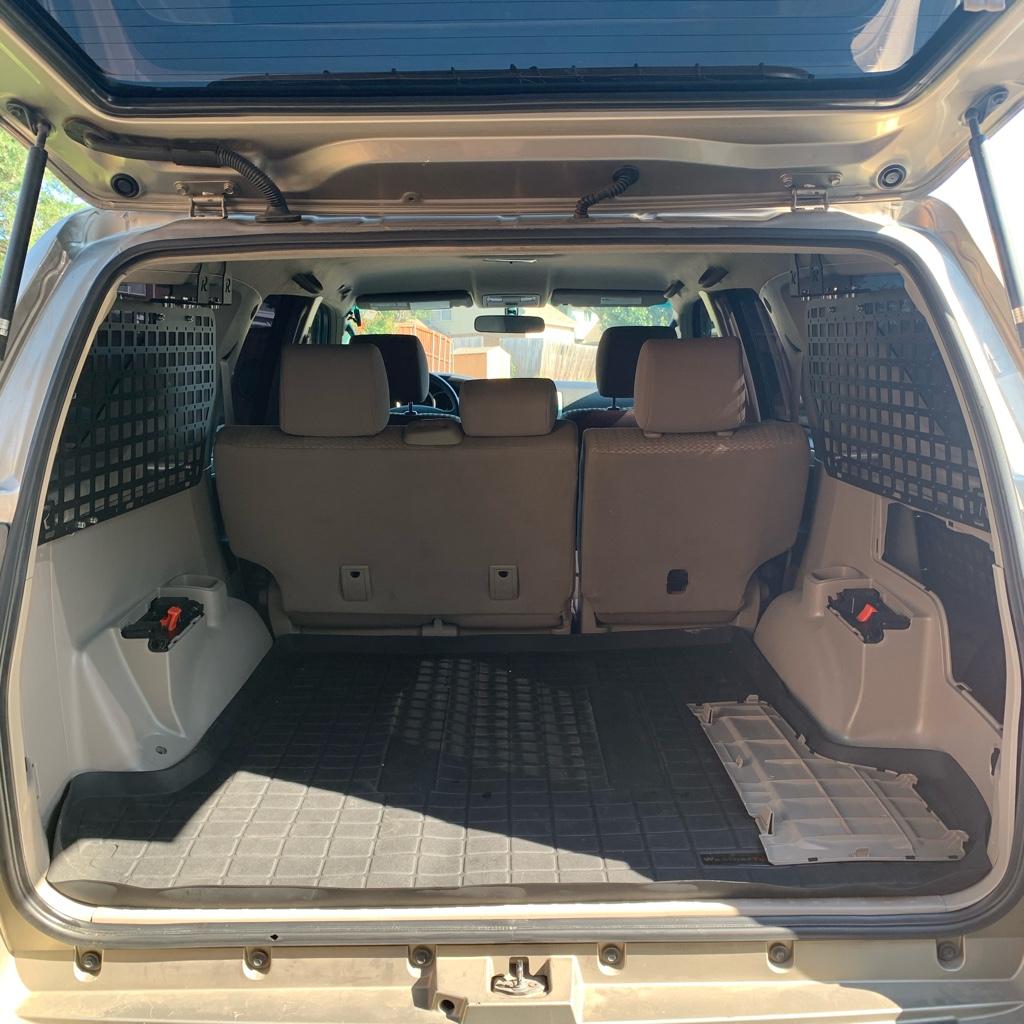
I finally finished my Modular Storage Panel install on my ‘08. I installed the Rago Fabrication panels in the cargo area, which did not go in as easily as I thought they would but they are very sturdy.
23c6bc552e7b5e47f2e71603d2e845be.jpg


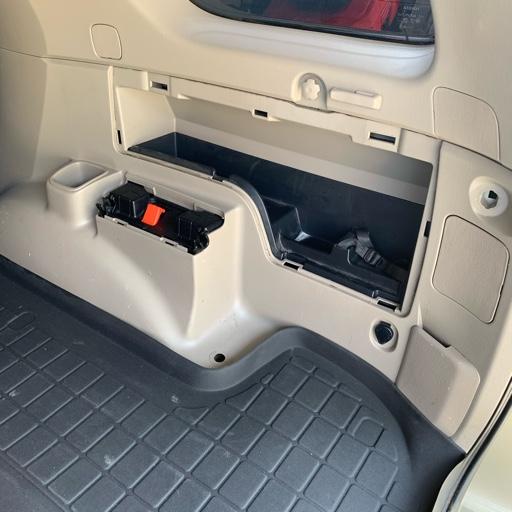
The longest part of this install was a custom install that I added to my cargo area- inside the passenger side compartment intended for fire extinguishers.

7f1ff448d3a0824d12e68913a4ec84f2.jpg

The biggest challenge was getting the right panel and getting it in there nice and sturdy so that I don’t have to listen to it rattle. Long term, I want to reinforce the hatch and make it a low-key safe.

0b6520ea23cc76868f65935eb4108542.jpg

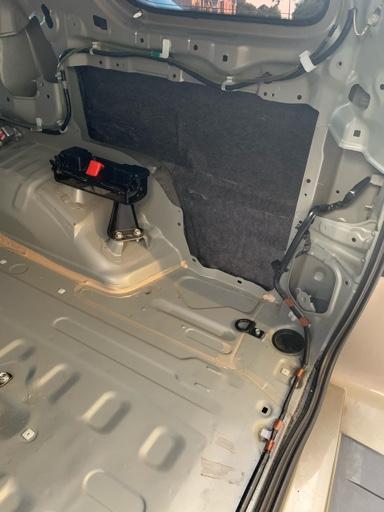
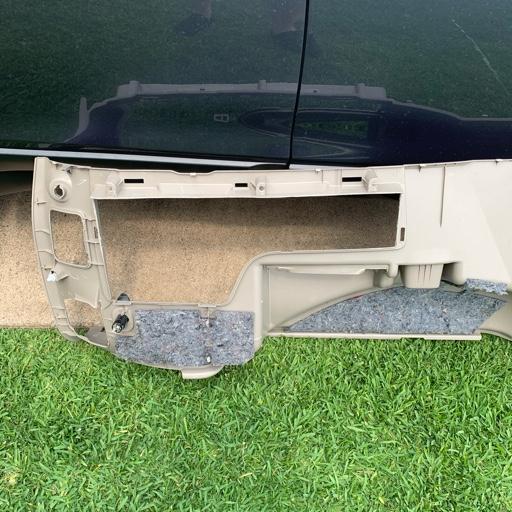
Heat barrier to protect anything stored inside. When it comes to installing this. I had to remove both the lower and upper panels so that I could take off the seatbelt. I was drilling and securing right behind it.

e808a7ae9665d5b1f9fe5f80d3e3876c.jpg

I had to trim the lower panel of the original compartment shape so that it would fit back on. Then I cleaned it of any plastic debris.

618149c76c80abf432fe4c1f765c1c79.jpg

You can see the panel behind there. It was tricky figuring out the holes, bolts, bushings, and lengths for the spacers to make an even and sturdy frame but it came out! The black “bucket” part of the original compartment was not put back in because they would have collided. I would have had to trim a fair amount off and I like the possibility of having space down on the right to stash or install something else (outlet?).

94d408e47b38a0e5204a3744e8f85322.jpg

All panels installed. The passenger side compartment hatch is my next step of the project. I have a special lock picked out for it and I am going to reinforce it and put hinges on it so that it can be pried from the bottom when locked. More to come!


Sent from my iPhone using Tapatalk
 
Last edited:
Well this was over the past week and a half, I installed my new Toytec lift, I got the BOSS 2.0 coil overs in the front and heavy duty swings (700 front, 200 rear) and extended travel shocks on the rear. It lifted my 4runner more than the 3/2 spacer lift I had before. It looks amazing and is well worth the time and money, I should have done this from the beginning. Now I am waiting on my new rims and tires to be delivered. Pics will come soon.
 
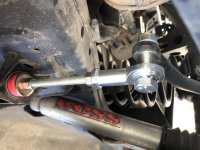
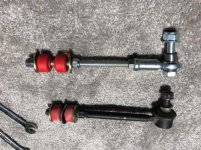
Started to give my 07 a bath until my pressure washer broke. Vacuumed the inside. Finished and installed my adjustable rear sway bar end links.
 

Attachments

  • 14DED9F5-9969-4C71-919D-5D190D19A39D.jpeg
    14DED9F5-9969-4C71-919D-5D190D19A39D.jpeg
    104.4 KB · Views: 372
  • 9876DDB0-990B-428E-838D-9A2F8F1A74D7.jpg
    9876DDB0-990B-428E-838D-9A2F8F1A74D7.jpg
    71.2 KB · Views: 375
My passenger side CV axle is busted and the LCA bushings are leaking grease.

What recommendations?
CVJ for the axle. I personally am going to rebuild my LCA with whiteline bushings and Moog ball joints. I want to go OEM replacements for them eventually but they're $$$

Sent from my SM-G986U using Tapatalk
 
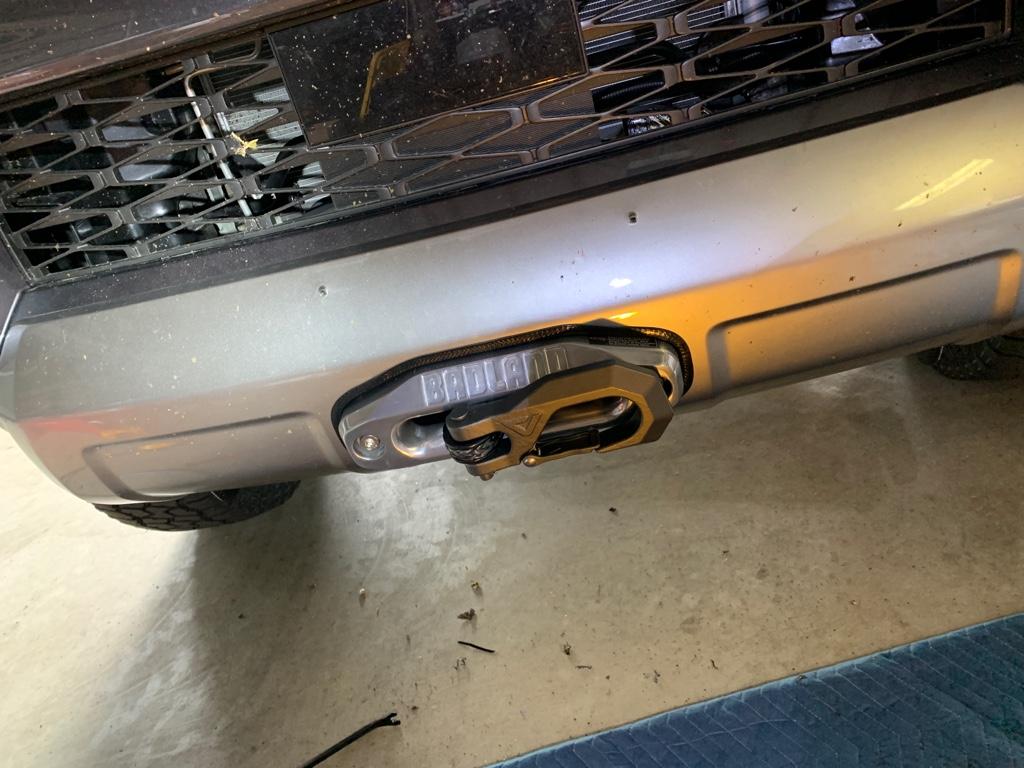
Installed Rago Fabrication Hidden Winch mount and Badlands Apex winch.

Very tight fit but the local Toyota dealership moved my hydraulic hardline out of the way for me. (Wanted them to do it just in case warranty issues, no charge)


7f479d1ae52cb9f643299191dbadb9b9.jpg


a75678f67349e8f1b003927572b040e1.jpg


Sent from my iPhone using Tapatalk
 

Members online

Forum statistics

Threads
278,316
Messages
3,554,120
Members
248,016
Latest member
Advally Service

Trending content

Back
Top