What did you do with your 4runner today?

Yeah, those just hold the pads in place. A slide pin is what you'll see on a single piston caliper (like the rears) where it's actually sealed and greased/plays a part in the braking.


But the pads move back and forth over them, right? So it’s good to keep them from getting crusty?
 
But the pads move back and forth over them, right? So it’s good to keep them from getting crusty?
Yeah, it's really just semantics. Always good to keep things free-moving when they should be. Those pins sticking won't hurt anything though (besides ease of replacement) since they're not actually controlling the movement of the pads.
 
Great question, and yes. Learned all this the hard way. :doh:

The bolt hole on the end of the crosspiece is centered on the 5th Gen, as shown here. On the 4th Gen part, it's offset to the rear.

U4xIW2s.jpg


For the skid plate itself, I could do a side-by-side since the 4th Gen part arrived today. These are standing on their sides so the measurements are front edge to rear edge. The 4th Gen plate is several inches longer and comes with a hardware bag containing spacers that are used the ensure it clears the exhaust. (Note: I should have had both arrows pointing to the right since the front edge of both pieces is on the left. I regret any confusion.)

Nth3am1.jpg


Installation tips:

1. Get out your floor jack if your have one and use it to hold the parts up while you bolt them on. No jack? Block them up with wood or have a helper. These suckers are heavy.

2. The passenger side frame bolt replaces the lower factory bolt for the exhaust hanger, so that hole is relatively clean. But the driver's side bolt hole is unused from the factory so it's likely got rust, dirt, and whatever else in it. If I was doing this over again, I would use compressed air to blow out the driver's side bolt hole then either spray some Fluid Film in there or put some anti-seize on the bolt - something to get the bolt in there a little easier. I ended up cranking it a quarter-turn or so at a time (tough to get a wrench in there) using so much force I was worried about breaking off the bolt.

Thank you for this. I am probably going to order the fuel tank skid this week. I imagine it'll be at least a month or so before I get the skids.

haha and I feel ya about RCI. Product is super legit but their service is okay. But I bet they are a small shop with low overhead.
 
Just Changed Front Rotors and Pads 2013 limited

Just hit 100K miles on our 2013 limited that we bought used 4.5 years ago. Hadn't touched the brakes since we bought it. Had never done a brake job. First wheel took me about 4 hours watching a youtube video but the second one only took an hour. Decent amount of pad left and old rotors looked fine. Will probably have them turned then hang on to them as back ups. Got a bunch of other services to do but actually looking forward to it. Great vehicles and pretty easy to work on.
 
The underseal company I had a booking with cancelled, so I have had to winterise my truck myself. What an absolutely hateful job.

Products used:

Brushed on XCP Rust Blocker exterior surfaces. (Semi-permanent product)
Bilt Hamber Dynax S50 aerosol for box sections/internal areas

The only good point is it has never seen salt so I haven't had to do any prep.

If I'm lucky it will only take me the rest of the week!!

 
Last edited:
Got notified that my RCI transfer skid plate got shipped today and it'll arrive by the end of this week! I got so hyped from that notification that I ordered the fuel tank skid as well.
 
Installed my RCI skids today. Front, transmission and t-case. It was pretty straight forward and everything lined up well.
One question though. The T-case comes with a small skid plate on it from factory. Do you leave that on? I kept it on but noticed that the RCI crossmember comes in contact with it. I didnt see in the instructions to remove it and most vids online show people kept it. Just want to make sure.

Example pic, but from a 5th gen.
53FssEI.png
 
Last edited:
While we're on the topic of transfer case skids, I just ordered one from RCI because of their 15% sale. Never liked how exposed the transfer case is in stock form--this will give me peace of mind knowing it's protected from the elements.
 
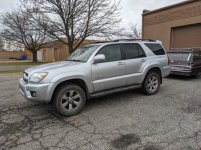
TL;DR: bought one, fixing things up over the coming months. I write walls, apologies in advanced.
PXL_20211120_170657000.jpg
Bought the thing (I think I overpaid a bit at $14.5k) with 192k on it, but it's a southern KY truck with a reasonably clean frame, and I anticipate keeping it for quite some time. I'm not sure when the mod bug will bite WRT lift kit/knobby tires/going ham with it, as it's nice to have a vehicle that's stock and otherwise remains that way.
PXL_20211124_235814273.jpg

PXL_20211125_170736471.jpg
Fixed:
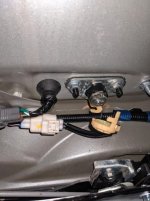
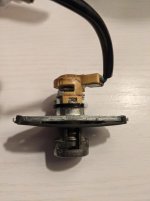
broken rear window up/down switch. If that fails again, I may try to source one, but here's to not having to do that. PO was back in the trunk to fix the handle/open switch for the trunk, so either it was broken under their watch, or just became brittle due to age. I re-super glued it and threw the ziptie around the ears to add in some additional "bracing" if I can call it that.
PXL_20211126_192016480.jpg
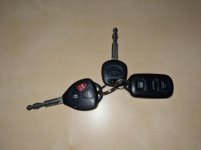
Programmed/had cut the spare key, as PO only provided the one original set. Easy peasy, bloke at Lowes was helpful and cut the key no issues. Worked a treat without any hiccups. Installed a 2032 battery up from the 2025(?) that was in there since that was DOA. A bit salty as the chip has the button for the rear window on it, but the case is obviously lacking the cutout/botton. I'm not sure how often I'll use that feature, we'll see come the summertime. Might locate another key from a Camry or the sorts for its case. Might be a means for a junkyard run if I'm feeling spritely.

Parts-cannoned the following:
timing belt kit (no history of that having been done...)
accessory belt kit (precautionary)
fluids (diffs, transmission, oil, brake fluid, P/S) (force of habit)
filters (oil, engine, cabin) (same habit)
spark plugs (can't hurt)

On my shortlist outside of the parts cannon is rebooting the front CVs (both inners torn, PO provided 5th gen boots/fluids) and taking it to get Krowned. The 4R will primarily be a tow vehicle for me, which the PO hooked me up with rear bags, a RedArc TBC, and IIRC, FJC rear springs? (foggy on exact details)

All in, looking forward to getting dirty with an SUV for a change.

 

Attachments

  • PXL_20211120_170657000.jpg
    PXL_20211120_170657000.jpg
    102.7 KB · Views: 396
  • PXL_20211124_235814273.jpg
    PXL_20211124_235814273.jpg
    99.5 KB · Views: 403
  • PXL_20211125_170736471.jpg
    PXL_20211125_170736471.jpg
    51.4 KB · Views: 403
  • PXL_20211126_192016480.jpg
    PXL_20211126_192016480.jpg
    34.9 KB · Views: 420
Today I

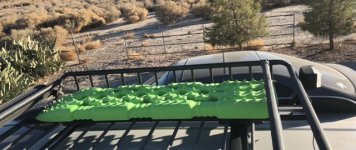
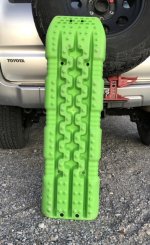
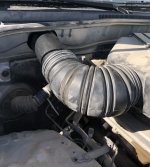
Made some simple brackets to attach the traction board I found on the highway last week to my roof rack. Also modded the intake into the cowl. Made some room in the fender well for the washer reservoir. Eventually an air compressor and additional battery will fill the rest of that spot. For now though I have a True North weld together bumper on the way and plan on moving the reservoir when that gets here.
 

Attachments

  • C05AF62A-18B8-411B-843A-933FE0B34B6A.jpeg
    C05AF62A-18B8-411B-843A-933FE0B34B6A.jpeg
    88.8 KB · Views: 357
  • 56AB1BF9-FEBB-4FF6-AC93-C4CACB844A46.jpeg
    56AB1BF9-FEBB-4FF6-AC93-C4CACB844A46.jpeg
    110.9 KB · Views: 356
  • B52ADBB8-D0E7-4C18-AF2E-4C5D51BC2DDE.jpeg
    B52ADBB8-D0E7-4C18-AF2E-4C5D51BC2DDE.jpeg
    117.1 KB · Views: 352
Last edited:
Sunroof noise/rattle

Well I finally decided to find a permanent solution to the every increasing sunroof rattle on my 2003 Limited V8.
I’m the original owner and this 4th Gen has been awesome, with the exception of the sunroof rattle. And it’s only gotten worse over the years. Shoot me if I had spend more than a minute on a washboard road.
Oh I’ve done some other things I’ve picked up on this forum and they helped some, but nothing has lasted.
And I didn’t want to seal it up completely. I really enjoy being able to open it up in very scenic locations like Yosemite valley, Zion or the Coastal NorCal giant redwoods.
Well another forum member mentioned “glue sticks” as props to support the sunroof and I thought I would go this direction
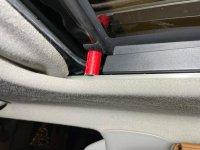
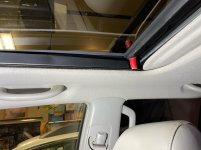
So here is what I did. I took some 3/4” wood dowels and cut two lengths at 1 and 5/16 inches. I put some self adhesive Velcro strips and put one on the Sunroof and the other on the top of the dowel. This is to keep it in place and not have it scoot out.
I put another “soft” piece of the Velcro on the bottom of the dowel to minimize and noise were it sits. I pushed up slightly and insert the dowel on top of the tracks and it takes the weight on the sunroof.. and it creates a tiny amount of pressure upward on the sunroof and magic presto, no rattle.
I painted the dowels red and put a piece of red tape over the switch as a reminder to remove the dowels before operating the sunroof. I only put adhesive Velcro on the sunroof, and by leaving the top of the track clean the sunroof still operates completely.
Pictures should help explain.
Today I did a good 8+ miles on various terrain and a ton of washboard. No rattle and I can’t be happier.
Thanks to this forum and the inspiration I get.
FYI. Starting to work on an onboard air and a 2 tire inflation/deflation & Pressure balance system. One that will take multiple inflation delivery methods. And where all components can be linked together with a minimum of items to reach out and inflate another tire up to 50 feet away. More to come.
 

Attachments

  • 5A027310-63B9-449A-8950-760D31D8C963.jpg
    5A027310-63B9-449A-8950-760D31D8C963.jpg
    136.7 KB · Views: 343
  • 71039AB7-3C44-4124-AA29-A505B398F471.jpg
    71039AB7-3C44-4124-AA29-A505B398F471.jpg
    134.4 KB · Views: 336
  • 9A15C8A1-BA29-417C-9734-739A325BA722.jpg
    9A15C8A1-BA29-417C-9734-739A325BA722.jpg
    131.2 KB · Views: 331
Got a new yota1 engine to swap

Im just about to start swapping out my engine with a newly rebuilt one from yota1 performance. I have a supercharger that I rebuilt as well and will be adding that. Also would like to find some headers but am having troubles on which ones to get. Anyone have any suggestions? Id much appreciate it!
Thanks
 
Im just about to start swapping out my engine with a newly rebuilt one from yota1 performance. I have a supercharger that I rebuilt as well and will be adding that. Also would like to find some headers but am having troubles on which ones to get. Anyone have any suggestions? Id much appreciate it!
Thanks

Which engine?

4th Gen?
 
Last edited:
Worked on replacing the serpentine belt/tensioner/idler pulley. Man this is a major job on the V8! Have to pull fan/shroud/PS pump/alternator/cam cover to get the tensioner out. Started Saturday night for 3 hours, Sunday for 4 hours, and just ready to pull alternator today. Took 3 hours just to get fan unbolted and off of the hub.
Yeah, I know most of you with V8s have done this whole job in an hour and a half!
 

Members online

Forum statistics

Threads
278,316
Messages
3,554,120
Members
248,016
Latest member
Advally Service

Trending content

Back
Top