What did you do with your 4runner today?

2qMjDBQL


New Sherpa Rack and Lightbar!
 
Last edited:
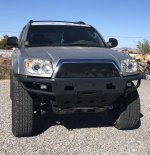
Stripped the plasti-dip and paint off of my grille surround after [MENTION=122249]originalg00kster[/MENTION] told me it looked like shit without saying it looked like shit lol. Good looking out my dude! Still doesn’t look that great but it’ll do for now. Cleaned some of the yellowing off my headlights and I have a restore kit that I’ll use this weekend if I have time. I should just replace the assemblies entirely, maybe soon.
Tip: never paint over Plasti-dip. It makes it a total pita to remove, or never use plasti-derp to begin with?
 

Attachments

  • C903038D-9BD5-4A3F-B3FF-1352AA904C31.jpg
    C903038D-9BD5-4A3F-B3FF-1352AA904C31.jpg
    132.3 KB · Views: 289
Last edited:
Stripped the plasti-dip and paint off of my grille surround after [MENTION=122249]originalg00kster[/MENTION] told me it looked like shit without saying it looked like shit lol. Good looking out my dude! Still doesn’t look that great but it’ll do for now. Cleaned some of the yellowing off my headlights and I have a restore kit that I’ll use this weekend if I have time. I should just replace the assemblies entirely, maybe soon.
Tip: never paint over Plasti-dip. It makes it a total pita to remove, or never use plasti-derp to begin with?

HAHA! bro, I didn't say but you know what I meant. Enjoy the process, its a marathon not a sprint!
 
Glovebox Blackout (Complete)

Finally got around to painting the side piece of the glovebox that tucks into the passenger door. Unfortunately this piece is part of the entire dash panel and to my knowledge can't be removed without major disassembly.

I taped the area off the best I could and use plastic bags to cover the door and interior from overspray. It went smoother than expected and the end result looks a lot better than it used to! I don't have a great photo of the before but in the highlighted area you can see the visual inconsistency.

I'm installing my new suspension today so praying I don't spend the day cursing! Hopefully will have some cool pics tomorrow. If you're curious what all I'm installing:
  • FJ Front Strut Assembly w/ 1/2" spacer
  • Ironman 4X4 Forged Aluminum UCAs
  • Bilstein 4600 Rear Shocks
  • FJ Rear Springs
  • Front Stabilizer Links
  • Rear Stabilizer Links from a '92 4Runner (1" Longer)
  • Ark Splash Guards
  • RCI LCA Skid Plates (Aluminum)

Right now my front tire-to-fender measurement is sitting at 4" and my rear tire-to-fender measurement is just under 7.5" so I'm hoping to get these numbers closer to ~6" and ~8" respectively with the new parts.

Have a good weekend everyone!

IMG-5964.jpg

IMG-5961.jpg
 
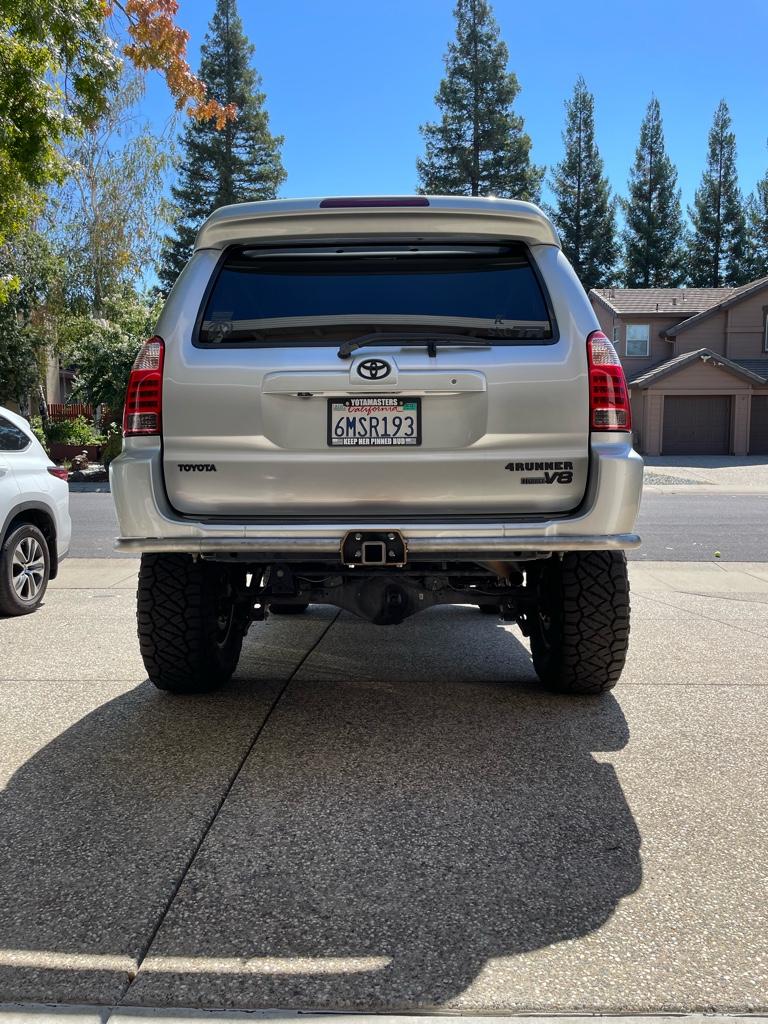
Got some more done on the new bumper. Decided I like when tube sits right below plastic instead of outside of it like my CAD model. Very difficult making good looking rear bumpers on these trucks!

9ebffd4792688f5407d5bd1887cf6ec0.jpg

0b708867c081417281b56a314cb144f3.jpg

55ec331fdd2b913b8def3995c1c14f6a.jpg
 
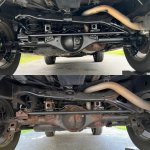
Almost finished with the rear. Just need to hit with RP342 and then spray the frame and inside with Fluid Film.
 

Attachments

  • BeforeandAfter.jpg
    BeforeandAfter.jpg
    130.9 KB · Views: 471
Suspension Lift

I got my new suspension installed last weekend. Overall the install went okay.

The front was relatively easy but I have a tendency to try removing as little as possible and wasting time trying to make it work when it'd just be easier to remove more. For example, the steering tie rod needs to be disconnected and the sway bar removed (or at least rotated out of the way). I also found the battery needed to be removed to get the UCA bolt out.
Luckily none of the bolts gave me too much trouble or needed to be drilled out! :whoo:

The rear actually gave me more issues. I had read the Moog springs for the FJ won't fit the perch on the 4Runner so I ordered ACDelco springs in hopes it was a Moog-specific thing but it was not. The perch on the 4Runner is almost egg-shaped and the aftermarket FJ springs narrow down too much to properly seat. I ended up grinding down the perch as much as I could to remove any buildup or rust that may be hanging it up but I was never able to get them to seat as well as the OEM springs. I got the end of the springs to rest at the stop so there's really no way they can fall out. They just barely don't fit so when driving it I made sure to hit some rough patches to use the weight of the vehicle to seat them. It rides well, no weird sounds or harshness so I'm not overly concerned. But I would've spent the extra money for proper springs to save myself the time.

Overall the job took me from 10am to just after 10pm to wrap up. I also used the opportunity to grind and coat my frame and freshen things up. It just didn't feel right putting such nice parts in the crusty wheel wells!

I got the vehicle aligned and unfortunately my LCA bolts are seized so they were unable to adjust my caster. That was the one adjustment I was hoping for so I could clear my front mudflaps better but alas, there's more work to be done! Next summer I will have to plan on replacing my LCA's, CV axles, and bump stops.

Measurements before (top of tire to fender):
Front: 4"
Rear: 7.5"

Measurements after:
Front: 6.5" (7" before settling)
Rear: 9"

I got more rear lift than I was expecting so the rake is still a bit more than I wanted but the overall height is so much better I don't really mind. Once I get 33" tires it'll be perfect. It's cool to park next to a 5th gen and be taller than it and to be level with full-size trucks on the road. The handling hasn't changed too much which is to be expected just swapping OEM-spec FJ parts but one of my rear shocks had completely failed so I've noticed a lot more stability and the vehicle is much more controlled on rough terrain. Bumps don't rattle the whole vehicle and linger anymore.

Now let's get to some pics

Before
IMG-5965.jpg


During
IMG-5966.jpg


After
IMG-5967.jpg


Old 230K mile components
IMG-5985.jpg


UCA visible from the wheel well
IMG-5977.jpg


Bilstein poking out the rear wheel well
IMG-5979.jpg
 
Clay bar, strip wash and ceramic coated.
ca03b60dfb7aa0ce224061147ab1bc5f.jpg

6f550f33aa9f536ed0e52252876ff5de.jpg


Also upgraded steering rack bolts to 1/2” grade 8. Had to drill out the frame to make it work but the metal sleeves in the poly rack bushings have a 1/2” ID so it only made sense. Stock bolts measured .440” .
233ae1be6bfa6581202319ed1dee47dd.jpg

e6fd0a6e3ef14aa6cdab12d523438f9f.jpg


Really hoping this was the last thing I needed to do to get rid of the sloppy steering!
 
Just went for a drive, other than my shock tune being way to stiff for a DD, no more clunking! Epic! Now to dive back into those shocks…
 
i swapped out my moog fj rears for some bilstein b12, no regrets, the moogs were a little soft in the rear with my constant 200 pound load.

I got my new suspension installed last weekend. Overall the install went okay.

The front was relatively easy but I have a tendency to try removing as little as possible and wasting time trying to make it work when it'd just be easier to remove more. For example, the steering tie rod needs to be disconnected and the sway bar removed (or at least rotated out of the way). I also found the battery needed to be removed to get the UCA bolt out.
Luckily none of the bolts gave me too much trouble or needed to be drilled out! :whoo:

The rear actually gave me more issues. I had read the Moog springs for the FJ won't fit the perch on the 4Runner so I ordered ACDelco springs in hopes it was a Moog-specific thing but it was not. The perch on the 4Runner is almost egg-shaped and the aftermarket FJ springs narrow down too much to properly seat. I ended up grinding down the perch as much as I could to remove any buildup or rust that may be hanging it up but I was never able to get them to seat as well as the OEM springs. I got the end of the springs to rest at the stop so there's really no way they can fall out. They just barely don't fit so when driving it I made sure to hit some rough patches to use the weight of the vehicle to seat them. It rides well, no weird sounds or harshness so I'm not overly concerned. But I would've spent the extra money for proper springs to save myself the time.

Overall the job took me from 10am to just after 10pm to wrap up. I also used the opportunity to grind and coat my frame and freshen things up. It just didn't feel right putting such nice parts in the crusty wheel wells!

I got the vehicle aligned and unfortunately my LCA bolts are seized so they were unable to adjust my caster. That was the one adjustment I was hoping for so I could clear my front mudflaps better but alas, there's more work to be done! Next summer I will have to plan on replacing my LCA's, CV axles, and bump stops.

Measurements before (top of tire to fender):
Front: 4"
Rear: 7.5"

Measurements after:
Front: 6.5" (7" before settling)
Rear: 9"

I got more rear lift than I was expecting so the rake is still a bit more than I wanted but the overall height is so much better I don't really mind. Once I get 33" tires it'll be perfect. It's cool to park next to a 5th gen and be taller than it and to be level with full-size trucks on the road. The handling hasn't changed too much which is to be expected just swapping OEM-spec FJ parts but one of my rear shocks had completely failed so I've noticed a lot more stability and the vehicle is much more controlled on rough terrain. Bumps don't rattle the whole vehicle and linger anymore.

Now let's get to some pics

Before
IMG-5965.jpg


During
IMG-5966.jpg


After
IMG-5967.jpg


Old 230K mile components
IMG-5985.jpg


UCA visible from the wheel well
IMG-5977.jpg


Bilstein poking out the rear wheel well

IMG-5979.jpg
 
Thanks! I'd like to add more protection around the sides but probably just leave it for now. Plus there isn't much room to land a tube on top hah

Love the rear tube armor but are you concerned about moisture collecting at the meeting point since the tube is so snug to the bumper?
 
Used the Meguiars headlight resto kit on my ugly ass yellow stock headlights. I preempted the polish by wet sanding first with 2000 grit then 3000 grit. My headlights haven’t looked this good in probably 8 years.
 
I recently purchased one that was stolen in the past. I had to splice the horn harness wires and place a 10 amp fuse in the SECU/ HORN compartment due to it being taken out.
 

Members online

Forum statistics

Threads
278,316
Messages
3,554,112
Members
248,016
Latest member
Advally Service

Trending content

Back
Top