

rubiron05
New member
I followed the steps outlined by 496_BB for wheel painting and I have to say they have turned out GREAT!!! Thanks 496_BB for the write up.
I started out by using a 2" and 1" wire wheel that I bought from Home Depot. They made pretty quick work in removing the old coating from the wheels.
Here is what my wheels looked like:
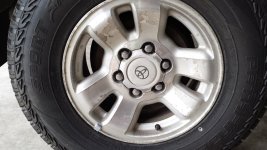
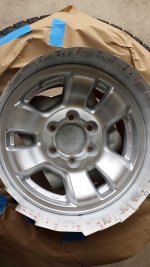
I used the wire wheels to remove as much of the old coating as possible. I then followed up with 100 grit 3M "red" sand paper to get to the spots the wire wheel couldn't. I then followed up with 320 grit to remove any deep scratches followed by some 600 grit to smooth out the surfaces. Here is what the wheels look like prior spraying:
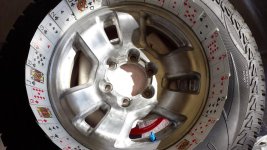
I used the same Rust-Oleum products that 496_BB used: Self Etching Primer; (White) Clean Metal Primer; (Silver) High Performance Wheel paint; and finally Clear Coat.
Self Etching Primer:
I sprayed one very light coat (following the dry times on the can) followed by a second heavier coat and then finally a third heavy coat.
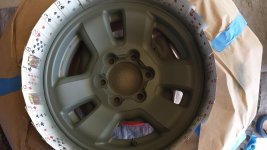
Clean Metal Primer:
I repeated the process that I did for the etching primer. Note: The clean metal primer recommends a 48 hour drying process but after speaking with a buddy of mine that does body work for a living, he said that as long as it's dry to the touch you should be fine. After all coats were applied, I waited a good 12 hours before applying the color coat.
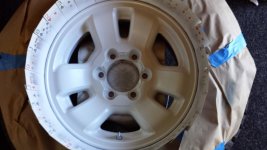
Color Coat:
Again followed the process for the other coats. I ended up applying a total of three "good" coats of color following the drying times on the can.
Clear Coat:
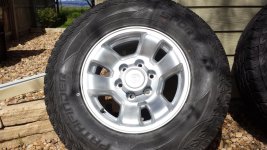
For the clear coat I applied 4 good coats as this is the protecting layer for the color.
Center caps:
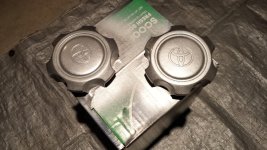
I sanded down the center caps with 320 and 600 grit sand paper. I used the same primer and paint that I used on the wheels. The primer doesn't say "plastic" like the paint does but I wasn't going to go buy another can of primer.
I want to thank 496_BB for his write up. I'm very pleased with how they turned out. I don't know longevity as I just finished.
I started out by using a 2" and 1" wire wheel that I bought from Home Depot. They made pretty quick work in removing the old coating from the wheels.
Here is what my wheels looked like:
I used the wire wheels to remove as much of the old coating as possible. I then followed up with 100 grit 3M "red" sand paper to get to the spots the wire wheel couldn't. I then followed up with 320 grit to remove any deep scratches followed by some 600 grit to smooth out the surfaces. Here is what the wheels look like prior spraying:
I used the same Rust-Oleum products that 496_BB used: Self Etching Primer; (White) Clean Metal Primer; (Silver) High Performance Wheel paint; and finally Clear Coat.
Self Etching Primer:
I sprayed one very light coat (following the dry times on the can) followed by a second heavier coat and then finally a third heavy coat.
Clean Metal Primer:
I repeated the process that I did for the etching primer. Note: The clean metal primer recommends a 48 hour drying process but after speaking with a buddy of mine that does body work for a living, he said that as long as it's dry to the touch you should be fine. After all coats were applied, I waited a good 12 hours before applying the color coat.
Color Coat:
Again followed the process for the other coats. I ended up applying a total of three "good" coats of color following the drying times on the can.
Clear Coat:
For the clear coat I applied 4 good coats as this is the protecting layer for the color.
Center caps:
I sanded down the center caps with 320 and 600 grit sand paper. I used the same primer and paint that I used on the wheels. The primer doesn't say "plastic" like the paint does but I wasn't going to go buy another can of primer.
I want to thank 496_BB for his write up. I'm very pleased with how they turned out. I don't know longevity as I just finished.









