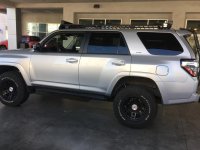
Wild_Turkey 2015 T4R SR5 Premium Build

Actually, that may or may not work. I didn't have an E-Locker to route, but I thought that I saw a coupler used in another build. Check out this link MTN4RNR Breather Mod where [MENTION=129593]MTN4RNR[/MENTION] used 2 breathers. They will both still fit in the taillight compartment.

Ordering Parts now. Will post pics as soon as I am done!
 
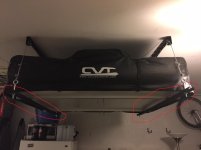
Racor Hoist Modification?

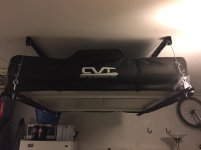
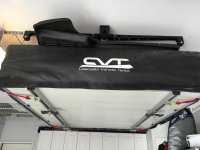
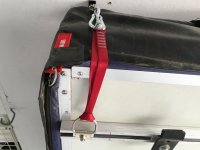
I've been looking to setup a hoist system for my roof top tent and I literally found the same racor on Amazon earlier today, but the 4'x4' dimensions seemed off. It looks like the racor has some type of a metal base plate that comes with their kit, but in looking at your pictures you have two steel beams that are use that extend the arms out a bit. Where did you get those steel beams? Did you fabricate them or find them at a store? They seem to be the perfect length to extend the cables out so the CVT can rest on the cross beams without being squished. Any insights would be helpful. Thank you!
 

Attachments

  • hoist.jpg
    hoist.jpg
    118.8 KB · Views: 1,607
I've been looking to setup a hoist system for my roof top tent and I literally found the same racor on Amazon earlier today, but the 4'x4' dimensions seemed off. It looks like the racor has some type of a metal base plate that comes with their kit, but in looking at your pictures you have two steel beams that are use that extend the arms out a bit. Where did you get those steel beams? Did you fabricate them or find them at a store? They seem to be the perfect length to extend the cables out so the CVT can rest on the cross beams without being squished. Any insights would be helpful. Thank you!

I bought the unistrut at Home Depot and cut it to length. The bars that come with the lift are a bit wimpy, too. If I did it over again, I would buy the heavier gauge unistrut which is square. That way the weight of the unloaded bar is enough to keep tension on the cables when winding the lift back up without the tent. You should be able to find it either in the shelving or electrical conduit area. Can't remember.

The lift is great...highly recommend this setup.
 
I bought the unistrut at Home Depot and cut it to length. The bars that come with the lift are a bit wimpy, too. If I did it over again, I would buy the heavier gauge unistrut which is square. That way the weight of the unloaded bar is enough to keep tension on the cables when winding the lift back up without the tent. You should be able to find it either in the shelving or electrical conduit area. Can't remember.

The lift is great...highly recommend this setup.
Awesome, thank you! Your solution is much more eloquent than what I was thinking of doing!!
 
Midland 75-822 CB Intall

Finally getting around to posting some info on my CB install. I decided to go with the Midland 75-822. I liked the Midland because you can also use it as a hand held unit when on a hike. I like options.

Kit List:

Midland 75-822
Firestik K-8R18 18' fire flex cable
Firestik FS-3B tunable tip 2'
Firestik k-64 plated 3-way mount
Firestik ssheavy Spring
UHF Bulkhead connector

First off, check your continuity on your coax cable. I did not and got burned. I had the cable run and soldered the connector on the other end...navin. That was frustrating.

I like the fire flex cable because of the clean flat connector that mounts to the Firestik 3-way mount. You have to solder the connector on at the end, but it makes it easier to route it through the headliner and cabin to not have the large barrel connector already installed.

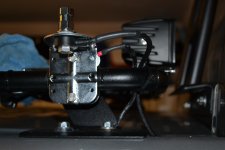
1) Secure the 3-way mount to your roof rack.
2) run a ground wire from the mount to ground. I used one of the mounting bolts, which isn't a great ground, but is ok. I'm getting SWR just under 2.
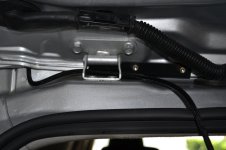
3) Route the coax through the headliner and cabin like others have written up in the past.
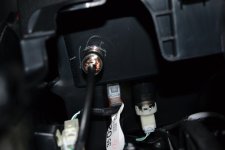
4) I brought the coax into the shifter console, then soldered my barrel connector.
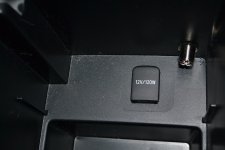
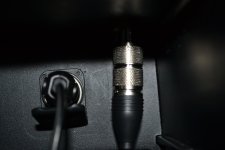
5) I drilled through the center console wall and installed a bulkhead connector
6) Connect fire flex coax to shifter console side of bulkhead connector
7) Install and tune antenna
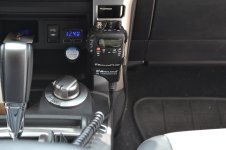
8) I just used some velcro to mount my CB to the lower dash. It's very secure and kept me from having to drill any visible holes.

I originally had the 3' antenna, but it stuck up too high. I replaced it with a 2' antenna and I like it much better. The range doesn't seem as good, but it's good enough for convoy chatter.
 

Attachments

  • DSC_0153.jpg
    DSC_0153.jpg
    124.5 KB · Views: 1,261
  • DSC_0150.jpg
    DSC_0150.jpg
    126.8 KB · Views: 1,208
  • DSC_0159.jpg
    DSC_0159.jpg
    142.8 KB · Views: 1,225
  • DSC_0161.jpg
    DSC_0161.jpg
    119.2 KB · Views: 1,209
  • DSC_0163.jpg
    DSC_0163.jpg
    131.2 KB · Views: 1,191
  • DSC_0180.jpg
    DSC_0180.jpg
    121.3 KB · Views: 1,215
  • Alabama Hills.jpg
    Alabama Hills.jpg
    136.4 KB · Views: 1,156
Last edited:
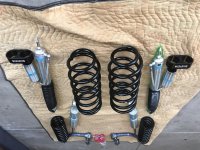
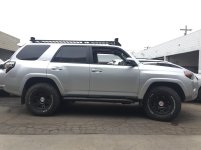
Bilstein 6112/5160

I had analysis paralysis when deciding on a suspension. I thought I wanted to wait for the OME BP-51's to be released for the 4Runner, then looked at Fox, and finally decided to go with the Bilstein 6112/5160 setup. We use this rig for getting outdoors and off-road, but I don't see myself racing the Baja 1000. This is my daily driver and spends 95% of the time on pavement. So rather than drop the coin on a high end race suspension that I would need to rebuild every 50k miles or so, I decided to go with a more basic setup with rear reservoirs. The Toyota TRD guru Ted Moncure is a friend of a couple friends and he recommended the setup for my application. That's good enough for me!

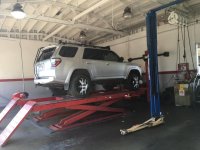
I know a lot of guys do this install themselves, but my schedule has been crazy with travel and I couldn't risk getting stuck over the weekend mid install. I priced the install at a couple of 4x4 shops and Cabe Toyota in Long Beach where I bought the 4Runner. The dealer came in close to the same, so I opted to get my install done there. They were great.

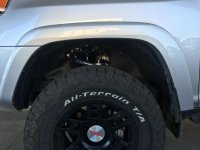
Front - Bilstein 6112 set at 4th perch (Got 2.25"-2.5" like everyone else)
Rear - Bilstein 5160 with Icon 2" springs (Got 1.75"-2")
Total Chaos UCA

Very happy with the ride so far and hitting the dirt this weekend to really check them out!
 

Attachments

  • image1.jpg
    image1.jpg
    137.8 KB · Views: 1,182
  • IMG_2142.jpg
    IMG_2142.jpg
    125.2 KB · Views: 1,403
  • IMG_2152.jpg
    IMG_2152.jpg
    122.2 KB · Views: 1,220
  • IMG_2153.jpg
    IMG_2153.jpg
    116.9 KB · Views: 1,246
  • IMG_2151.jpg
    IMG_2151.jpg
    126.5 KB · Views: 1,193
[MENTION=130932]wild_turkey[/MENTION]

Is the area you have the stickers OEM on the trucks with 3rd row or did you put that in?

185969d1452054492-wild_turkey-2015-toyota-4runner-sr5-premium-build-img_1770.jpg
 
RTT Lift 2.0

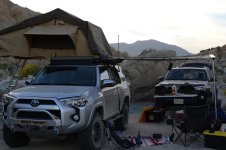
When we purchased our RTT, I also installed a Racor lift to both help with loading/unloading the tent and storage. My first install used unistrut as cross support, which worked great with our old Yakima crossbar setup. I could lower the tent onto the crossbars, then slide the unistrut bars out from under the tent with little issue.

However, once I upgraded to the Baja Flat Utility Rack (full length, lower profile), it was really difficult to get the unistrut out from under the tent as the unistrut was pinned between the tent and the Baja Rack. I needed a lower profile rack to still roll out of the garage with the RTT post suspension lift. I still have to take off the top section of the ladder, which allows me to barely squeeze out. I just throw it in the back of the rig and put it back on when we get to camp.

RTT Lift 2.0!

I only use 4 of the 8 bolts that came with the RTT, which left 4 unused metal plates (the ones that engage the RTT track).

Kit list:

Qty 4 RTT plates (surplus)
Qty 4 D-Ring Tie Downs from Home Depot ($3 each)
Qty 4 30 cm Nylon Runners from REI ($3 each)
Qty 4 Carabiners from Home Depot ($2 or $3 each)

For $36 of hardware, this upgrade makes loading and unloading the tent a snap. Now the RTT rails are the first piece to engage the flat rack. I unhook the carabiners, unloop the Nylon Runners, and bolt down the tent using the Baja Rack RTT mounts.

The nylon runners are rated to 22kN each, which is about 5k lbs. The weakest link in the system is probably the aluminum track, so I’ll keep an eye on it to make sure it doesn’t start to spread.

 

Attachments

  • IMG_1574.jpg
    IMG_1574.jpg
    111.9 KB · Views: 1,341
  • IMG_2382.jpg
    IMG_2382.jpg
    121 KB · Views: 1,032
  • IMG_2383.jpg
    IMG_2383.jpg
    130.6 KB · Views: 1,016
Fourtreks Awning Bracket Anti-rotation

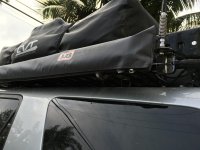
I love the shade our ARB awning provides when we’re camping. It’s also nice to setup our camp kitchen under it in the event we get rain. I bought the FourTreks mounts for our Baja Flat Utility Rack. The problem with mounting an awning to a mount that only engages the tubing is that it is difficult to get enough friction on the mounting clamps to avoid rotation of the awning.

I tried adding a rubber sleeve between the bar and mount, which worked fine on-road, but didn’t hold up to the jarring off-road. By the end of the trip, the awning was sitting against the paint, which was no bueno.

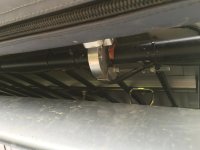
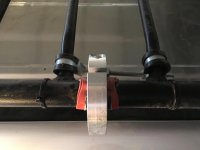
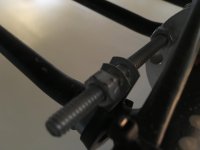
The solution is a couple of rubber coated metal clamps, long ¼-20 bolt, and some ¼” nuts. By placing the rubber coated clamps around the crossbars, then threading the bolt through the clamps and one of the 2 open holes on the back of the FourTrek mount, I was able to keep my awning from rotating down. We just tested it out with 70 miles of off-roading and the awning didn’t budge!
 

Attachments

  • IMG_2370.jpg
    IMG_2370.jpg
    128.2 KB · Views: 999
  • IMG_2372.jpg
    IMG_2372.jpg
    113.3 KB · Views: 1,000
  • IMG_2373.jpg
    IMG_2373.jpg
    153.8 KB · Views: 1,004
  • IMG_2374.jpg
    IMG_2374.jpg
    160.5 KB · Views: 991
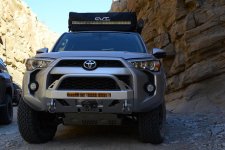
C4 Fab Lo Pro Winch Bumper

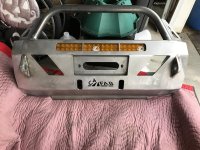
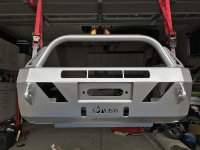
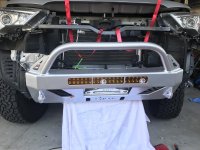
I've really enjoyed my @c4_fabrication rock sliders and fuel tank skid. The quality and attention to detail by Caleb and his team is top notch. When I saw that C4Fab developed a winch bumper, I knew I would eventually install it on the rig. Since we are expecting our first in May, I decided to knock it out while I still had some time to myself!

I hesitated because the bumper was designed to work with the BajaDesigns single row 20" or 30" light bar. I already had a KC 20" and didn't see forking over another $800 for a new light bar. Caleb at C4Fab asked me to send my existing light bar and he would custom fit some light mounts. What a guy!

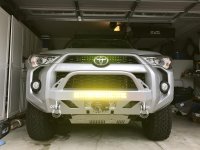
The install went pretty smooth and the instructions are already well documented. I went with the full height bar with gussets and decided to color match to the classic silver using DupliColor Perfect Match. I'm really happy with the results!

I'm running the Bilstein 6112 up front on the 4th circlip. The suspension setup handled the extra weight of the bumper and Smittybilt 9.5k Synthetic winch no problem.
 

Attachments

  • IMG_2906.jpg
    IMG_2906.jpg
    137.3 KB · Views: 797
  • IMG_2921.jpg
    IMG_2921.jpg
    115.5 KB · Views: 876
  • IMG_2932.jpg
    IMG_2932.jpg
    129.3 KB · Views: 796
  • IMG_2949.jpg
    IMG_2949.jpg
    125.6 KB · Views: 844
  • DSC_0445.jpg
    DSC_0445.jpg
    136.4 KB · Views: 808
  • DSC_0415.jpg
    DSC_0415.jpg
    132.7 KB · Views: 862
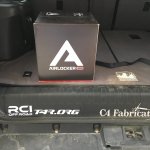
ARB Air Locker

This also happened a few months back. Rear locker and 3rd row, yes please!
 

Attachments

  • IMG_3051.jpg
    IMG_3051.jpg
    127.2 KB · Views: 1,211
  • IMG_2387.jpg
    IMG_2387.jpg
    126.8 KB · Views: 1,201
Looking great! How are you liking the bumper and what are your thoughts on the smitybilt winch? Is the suspension upgrade required to handle the extra weight with the bumper?
 
Looking great! How are you liking the bumper and what are your thoughts on the smitybilt winch? Is the suspension upgrade required to handle the extra weight with the bumper?

Thanks! I couldn't be happier with the @c4fabrication low pro bumper. It ties in great with the oem styling, provides extra protection, and allows the integration of the winch and light bar. I'm glad I went color match with the silver...definitely looks clean.

The winch seems fine. Haven't had to use it yet, but the price was right for the synthetic. I easily pulled my brother in laws t4r up the hill when I was spooling it up with tension.

As for the weight of the bumper, it's noticeable, but didn't require a suspension upgrade from the bilstein 6112 setup I had previously installed. You removed the the factory crash bar and crumple points, which probably weigh 40 lbs on their own. I'd say the net weight addition for the bumper and winch is about 80 lbs. I can't detect any additional sag from the weight visually, but I'd say it is probably 1/4". Go for it!
 
Last edited:

Members online

Forum statistics

Threads
278,316
Messages
3,554,120
Members
248,016
Latest member
Advally Service

Trending content

Back
Top