Will Wet Okole heated seat covers work with Toyota factory switches?

Ok I just need one more part. I need the f2 connector part number. once I have this I can order these parts and begin testing the controller.

I have found all the other parts, connectors, repair wires and where to buy them at also.

I've been looking into this for a little while as well...

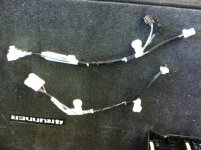
T4R's without seat heaters have part #82223-35050 you need to swap that part for part# 82223-35060

The part number for the piece of the wiring harness that connects the factory switches to the rest of the harness is 82223-35060. Once you install this harness part and the switches, they (the switches) will have back lighting when the headlights are on and the on/off LED on each switch will work properly.

Part #82223-35050 only connects the rear window switch to the main harness.
Part #82223-35060 has 2 added pigtails for the 2 seat heater switches.
 

Attachments

  • photo.jpg
    photo.jpg
    66.3 KB · Views: 3,718
Ok I just need one more part. I need the f2 connector part number. once I have this I can order these parts and begin testing the controller.

I have found all the other parts, connectors, repair wires and where to buy them at also.

One more note, www.toyotapartszone.com has cheaper prices on the parts listed in the post above.

The OP listed part #87501-60030 for $89.20
www.toyotapartszone it's listed at $72.71
 
Last edited:
I've been looking into this for a little while as well...

T4R's without seat heaters have part #82223-35050 you need to swap that part for part# 82223-35060

The part number for the piece of the wiring harness that connects the factory switches to the rest of the harness is 82223-35060. Once you install this harness part and the switches, they (the switches) will have back lighting when the headlights are on and the on/off LED on each switch will work properly.

Part #82223-35050 only connects the rear window switch to the main harness.
Part #82223-35060 has 2 added pigtails for the 2 seat heater switches.


How are the sub controller connected? Is their another harness to connect them or do you need to make up a harness ? Some of my parts are on back order but as soon as they come in I plan to begin testing.
 
How are the sub controller connected? Is their another harness to connect them or do you need to make up a harness ? Some of my parts are on back order but as soon as they come in I plan to begin testing.

I found the part because I was also looking at adding some aftermarket seat heaters and I wanted to use the stock OEM switches. So I pulled my TE apart and found the little pigtail in mine only connected the window switch.

My little pigtail had the part number label still on it, so I started looking at the wiring diagram and noticed 2 part numbers for the same thing. One of them matched mine, with no switches, so the other part number had to be for the harness that connected to the switches.

For the $20 the part cost I was willing to order it and take a chance. It was exactly what I needed.

I installed it (new pigtail) and the switches and it works perfectly. They light up at night with the headlights, the on off light works.....but I still have not figured out how the seat heaters connect to the rest of the system...I tried a few ideas to get them wired in, but so far no luck.

I didn't see the sub controllers on the wiring diagram, so i never messed with them. My guess is that it will just plug right in someplace or we will need to order another pigtail of some kind to make it work.

I haven't had any time to get back to it since my initial try and when i saw your post, I thought I would try to help out. I just ordered the sub controller so when mine arrives i will take another crack at it.
 
Just an update

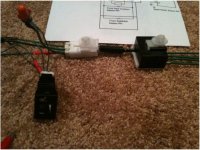
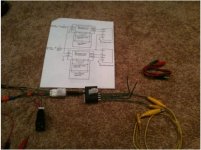
I have begun testing the switch and sub-controller.

What I can tell so far is the switch and the thermistor work together to balance the voltage applied to the heating element.

It appears that when the thermistor's resistance reaches a value equal to (or a power of) the heating element the sub-controller shuts off. when the heating element cools down the thermistor's resistance changes and turns the sub-controller back on.

Depending on where you set the switch, full voltage (12VDC) is applied to the heating element. When the heating element heats up and changes the resistance of the thermistor the sub-controller is shut off.

So you set the switch position and the thermistor controls when the voltage is applied to the heating element in an on and off manner.

I am not 100% sure of this but this is my first pass. I am still waiting on my Wet Okole's to arrive.

Sorry for the crappy pictures, but it's getting late.
 

Attachments

  • Untitled1.jpg
    Untitled1.jpg
    95.3 KB · Views: 3,716
  • Untitled2.jpg
    Untitled2.jpg
    88.9 KB · Views: 3,470
update

Ok my Wet Okole seat covers arrived today.

I installed the driver seat cover and want to do some testing with the stock setup from Okole. (i.e. controller temp settings and heat/temp output.

A Quick test on high and the WO unit heated up to 130 Deg F. This unit has 3 settings.

I have the passenger cover setup in my basement and began some testing on it tonight. I had some good results. The resistance values from the WO heating elements are very close to the stock Toyota heater element, this is good from a current (Amps) point of view because the controller will carry the same amount of amps. I plugged the WO heating element into the Toyota sub controller and was running the unit. I currently only have on/off control but once I hook up a thermistor I should be able to get variable control. The real question is how much variation.

I bought 2 different 10K thermistor to start with. I should have them in a few days.

Once I get the Toyota controller working with Wet Okole's I hope to roll it out to other brands of heating elements.
 
Ok it works!

Ok it works!

I need to work out a few minor details but I am able to get the Toyota switch and sub controller to work with the Wet Okole's (WO) heating elements. I will be doing a full write up as soon as I can finish all the loose ends.

The Toyota controller works better then the WO controller. Even tho the WO seat heater has 3 settings on their controller there is very little temperature difference / change between the settings.

Using the Toyota switch I took measurements at Low, Medium and High (appox) settings on the switch.

This data may change but here is what I have so far.

Toyota Switch settings
Low (just clicked on) = 98 - 102 Deg F
Med (mid way) = 116 - 121 Deg F
High (max) = 130 - 136 Deg F

More to come.
 
Ok, I am done with the Driver side. The system is working but I plan to test the "installed" setup for a few day to make sure everything is working.

The key to the Toyota switch and sub-controller is the thermistor.

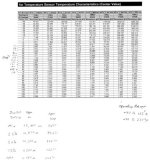
Using a 20K Thermistor (Digi-key part # 490-4668-ND) you will get the following values per switch setting.

Switch Setting = Temp

Min = 95 Deg F
25% = 99.5 Deg F
50% = 104 Deg F
75% = 122 Deg F
Max = 145 Deg F

What this means is using this thermistor the sub-controller will turn on and off at these temperatures. (I ended up testing around 10 different thermistors until I found one that worked in the temperature range I wanted)

Thermistor info

Digi-Key - 490-4668-ND (Manufacturer - NTSD1WB203FPB50)

It looks like the Toyota switch, sub-controller (and Digi-key Thermistor) can easily be use with other seat heater. the only issue you need to keep an eye on is how much current your heating elements will draw. The Wet Okole's only draw around 4 amps per seat.

When I have time I will do a full write-up until then if you want to do this project PM me and I can help you out.

One last note, I have confirmed that the TE and SR5 "DO NOT" have the same "base" harness setup and if you plan to do this mod on a SR5 you will need to create your own harness (only a few wires). The Part #82223-35060 will not work as a plug and play but you can use it for the connectors as it is much cheaper then buying the parts alone.
 
Step 1 (Parts, some notes, disclosure, warnings and skills needed)

Step 1 (Parts, some notes, disclosure, warnings and skills needed)

Ok it's going to take me a few day to do the full write up so please bear with me. I am going to need to do it in a few post. Since a few people have already contacted me for a parts list I figured I will start with that.

This write up will be for using Wet Okole heated seat covers with the Toyota switch and sub-controller.

Wet Okole parts
Seat covers with the seat heater option


Toyota Parts

1 x Left hand switch - 84751-35110
1 x Right hand switch - 84751-35120
1 x wire harness - 82223-35060 (used to connect the switched to the truck, Note if you have a Trail this will be a plug and play part (you will only need to cut 4 wires in this harness), if you have an SR5 you will need to cut this harness up and use the connectors to make your own harness, this item is only $14)

2 x Sub-controllers - 87501-60030 (one for each seat)
2 x sub-controller connectors - 90980-10797
16 x Repair wire - 82998-12340 (used for above connector and sub-controller)
(Please note there is one connector that I can not find, in place of using a connector I used 4 repair wires noted above with heat shrink tubing to secure them to the sub-controller.) I believe that connector is part of the toyota heating element and not offered as a single part.


Non Toyota parts

2 x 20K Ohm NTC Thermistor
Digi-Key - 490-4668-ND (Manufacturer - NTSD1WB203FPB50)
(This is only the thermistor you will need to solder this to appox 30 inches of 20 AWG zip wire and use heat shrink tubing to secure the setup. These will get placed next to the "Seat Back" heating elements. Please NOTE with the Wet Okole's you must place them in the seat back NOT the Seat bottom)


Zip wire
25 feet (appox.) of 16 Awg wire - 16 AWG "AUTO ZIP" WIRE | AllElectronics.com (used for power runs to the sub-controllers and to the heating elements)

25 Feet (appox.) of 20 Awg - 20 AWG RED/BLACK AUTO ZIP CORD | AllElectronics.com (used for the thermistor, left and right switches and to make up harnesses)


Radio Shack parts (optional but very helpful)

2 x - RadioShack® 4-Position Female Polarized Connector Model: 274-234 | Catalog #: 274-234

2 x - RadioShack® 4-Position Male Polarized Connector Model: 274-224 | Catalog #: 274-224

1 x - RadioShack® 6-Position Female Polarized Connector Model: 274-236 | Catalog #: 274-236


1 x - RadioShack® 6-Position Male Polarized Connector Model: 274-226 | Catalog #: 274-226

1 x - 1/4" Fully Insulated Quick Disconnects (10-Pack) Model: 64-3133 | Catalog #: 64-3133

1 x - 1/4" Fully Insulated Quick Disconnects (10-Pack) Model: 64-3131 | Catalog #: 64-3131

1 x Silver-Bearing Solder (1 Oz.) Model: 64-035 | Catalog #: 64-035 (used to secure small wires to the molex connectors noted above, and to connect the thermistor to the wire lead.

1 x Heat-shrink Tubing Set (36-Pack) Model: 278-1611 | Catalog #: 278-1611
(used for finishing off connector ends and marking wires)

I would also recommend electrical tape in several colors to keep track of wires when making up harnesses.


Tools needed/optional

Crimper's for Molex connectors and Insulated Quick Disconnects noted above

(optional) Radio Shack Pin Extractor Model: 274-223 | Catalog #: 274-223 (for molex connectors noted above)

Soldering iron

Heat gun or hair dryer for heat shring tubing

Wires cutters and a good pair of wire strippers at least one that will do 22, 18 and 16 Awg. Trust me this will make the project go much easier.

(optional) Digital multi meter


Skills

- Some electrical knowledge
- Able to read toyota's electrical prints
- some soldering skills (to make up the thermistor lead and secure small wires to the molex connectors)


Info packet from me. I plan to make up a PDF file with the wiring diagrams from toyota (in color) and spec sheet's.

 
Part 2 (Thermistor build and install)

Part 2 (Thermistor build and install)

The thermistor costs around .71 cents, so buy a few if you are not good at soldering.

Parts needed for this step

20K Ohm NTC Thermistor - Digi-Key part # 490-4668-ND
20 AWG RED/BLACK AUTO ZIP CORD | AllElectronics.com
1 x - RadioShack® 4-Position Female Polarized Connector Model: 274-234 | Catalog #: 274-234
solder and soldering iron
Graffer or Duct tape
Heat shrink tubing

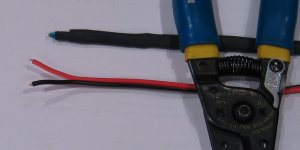
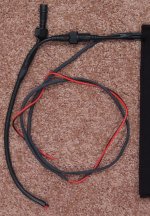
The thermistor needs to be soldered to 40" of 20 Awg zip wire.

The other end will be terminated into the center 2 pins of the 4 pin female Molex connector.

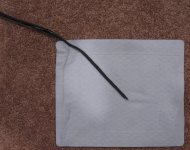
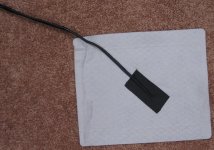
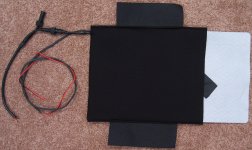
Once this is complete the thermistor gets taped to the back side of the "seat back heater" This places the thermistor between the Toyota seat and the Wet Okole heating element. (this way you will not feel the wire)
 

Attachments

  • IMG_3585.JPG
    IMG_3585.JPG
    132.4 KB · Views: 2,788
  • IMG_3586.jpg
    IMG_3586.jpg
    128.9 KB · Views: 2,730
  • IMG_3588.jpg
    IMG_3588.jpg
    135.6 KB · Views: 2,986
  • IMG_3589.jpg
    IMG_3589.jpg
    139.2 KB · Views: 2,924
  • IMG_3590.jpg
    IMG_3590.jpg
    144 KB · Views: 2,679
  • IMG_3596.jpg
    IMG_3596.jpg
    144.8 KB · Views: 3,175
Part 3 (sub-controller build)

Part 3 (sub-controller build)

Parts needed for this section

1 x Sub-controller - 87501-60030
8 x Repair wires - 82998-12340
1 x sub-controller connector - 90980-10797

16 Awg wire
20 Awg wire

1 x - 1/4" Fully Insulated Quick Disconnects (10-Pack) Model: 64-3133 | Catalog #: 64-3133

1 x - 1/4" Fully Insulated Quick Disconnects (10-Pack) Model: 64-3131 | Catalog #: 64-3131

heat shrink tubing

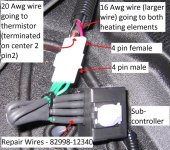
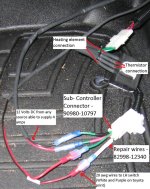
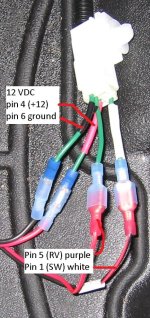
This section is just adding wire and connectors to the sub-controller, the pictures tell the story. Having the Toyota print on hand will help.

I was not able to find the connector for the one side of the sub controller (thermistor and heating element side). I had to used 2-3 layers of heat shrink tubing around the repair wire. Between the friction from the repair wire pin and the heat shrink tubing the connection is good.

This whole setup, once complete will be stored under the seat. one end of this setup goes to the seat cover (thermistor and heating element) the other end goes to the center console to connect up with the Toyota switch.
 

Attachments

  • IMG_3593.jpg
    IMG_3593.jpg
    140.2 KB · Views: 3,515
  • IMG_3600.jpg
    IMG_3600.jpg
    121.3 KB · Views: 2,750
Sixteen (16) of these? or is that a typo? @ $5 bucks a pop.....?

16 is the correct number if you want to do both seats. One sub-controller will take 8. Yea the price of these things just SUCKS!!!

Remember I took a big chance buying all this stuff hoping I could get it to work. At first I only got enough parts to do one side.

your lucky! before you found the pig tail for the center console (for 14 bucks) I had to buy the left hand switch connector and 6 repair wires. those repair wires are even more at $11 each!! I spent a lot of money researching this mod. But in the process and thanks to you I/we can save everyone $66.00

It's best to start with the driver seat first.
 
Part 4(a) Trail harness setup

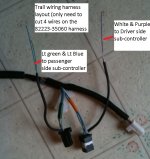
Ok if you own a Trail you can use the whole wire harness - 82223-35060. You will still need to cut 4 wires on this harness. It seems like the Trail has a base harness system that is closer to the Limited than to the SR5.

I own an SR5 and had to cut all 12 wires and use just the connectors and wires (see next post).

If you own a Trail you will need to cut the white and purple wires on the driver side connector (10 pin connector, uses only 6 pins) and cut the Lt green and Lt blue on the passenger side connector (6 pin connector)

I would make the cut about 6 inches back from the switch connectors, this will give you enough length to work with when you need to connect them to 20Awg wire to go to the sub-controller under each seat.
 

Attachments

  • trail.jpg
    trail.jpg
    122.5 KB · Views: 2,725
Part 4(b) SR5 harness layout and install

Ok, if you own a SR5 you will need to take the 82223-35060 wire harness and cut all 6 wires for the LH switch and all 6 wires for the RH switch and use them (the connectors and attached wires) to make up a harness.

When you cut the wires make sure you cut at least 6 inches (or more) back from the connectors so you have wire to work with. For this setup I would keep your stock harness lead (the one that came with your truck and powers the rear window switch) in place.

Parts needed for this section

1 x Left hand switch - 84751-35110
1 x Right hand switch - 84751-35120 (if you are doing both seats)
1 x wire harness - 82223-35060 (only $14)
1 x - RadioShack® 6-Position Female Polarized Connector Model: 274-236 | Catalog #: 274-236
1 x - RadioShack® 6-Position Male Polarized Connector Model: 274-226 | Catalog #: 274-226
16 Awg
20 Awg
Solder
Heat-shrink Tubing Set
Tape to keep track of wire colors

The wires from the 82223-35060 harness are very small and when you try to crimp them they can easily fall out. I recommend soldering them before you crimp them into the 6 pin radio shack connector. In fact any crimp connection you make I would solder to help provide a good electrical and mechanical connection.

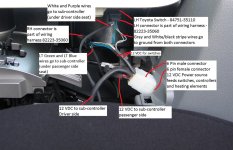
In the following pictures my power source is from my center console. I ran a 20 Amp (12 Awg) line from the battery to my center console to run an inverter so this is where I got power from. The 6 pin radio shack connector is used as a power distribution point, 3 pins are ground and 3 pins are +12VDC.

This system (using Wet Okole heated seat covers and the Toyota switches and sub-controller) draws around 7 to 8 amps. Right now I only have one switch installed so I am drawing 3.5 to 4 amps right now.

In the pictures below the power runs are done with 16 Awg wire, the control wires (from the 82223-35060 wire harness are 20 Awg wire.
 

Attachments

  • IMG_3602.jpg
    IMG_3602.jpg
    137 KB · Views: 3,864
  • IMG_3605.jpg
    IMG_3605.jpg
    135.1 KB · Views: 2,986
  • IMG_3607.jpg
    IMG_3607.jpg
    133.7 KB · Views: 2,932
  • IMG_3611.jpg
    IMG_3611.jpg
    124 KB · Views: 2,763
Part 5 (sub-controller final location)

Part 5 (sub-controller final location)

Ok the last step is to place the sub-controller under the seat.

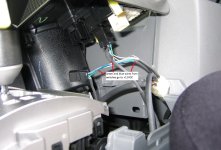
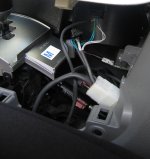
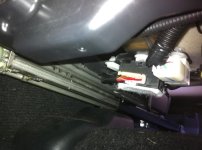
This picture comes from nashman69g, (thank you) it's a picture of the sub-controller under the driver's seat.

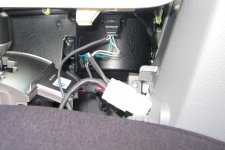
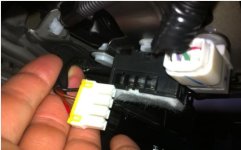
The second picture is of the connector I was not able to find.
 

Attachments

  • sub-controller.jpg
    sub-controller.jpg
    73.2 KB · Views: 2,821
  • sub2.jpg
    sub2.jpg
    46.2 KB · Views: 2,814
:cheers:
Thanks for the hard work...

Now, I need to do this for the memory seats...I'm still looking for the seat switch without spending $400+ so I can reverse engineer it (hopefully)...One day...
 

Members online

Forum statistics

Threads
278,315
Messages
3,554,130
Members
248,016
Latest member
Advally Service

Trending content

Back
Top