Step 1 (Parts, some notes, disclosure, warnings and skills needed)
Step 1 (Parts, some notes, disclosure, warnings and skills needed)
Ok it's going to take me a few day to do the full write up so please bear with me. I am going to need to do it in a few post. Since a few people have already contacted me for a parts list I figured I will start with that.
This write up will be for using Wet Okole heated seat covers with the Toyota switch and sub-controller.
Wet Okole parts
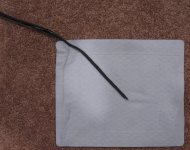
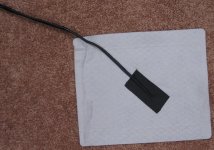
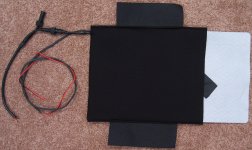
Seat covers with the seat heater option
Toyota Parts
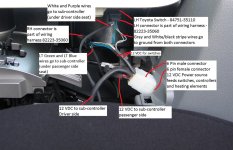
1 x Left hand switch - 84751-35110
1 x Right hand switch - 84751-35120
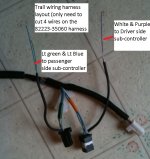
1 x wire harness - 82223-35060 (used to connect the switched to the truck, Note if you have a Trail this will be a plug and play part (you will only need to cut 4 wires in this harness), if you have an SR5 you will need to cut this harness up and use the connectors to make your own harness, this item is only $14)
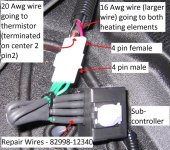
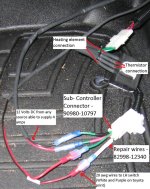
2 x Sub-controllers - 87501-60030 (one for each seat)
2 x sub-controller connectors - 90980-10797
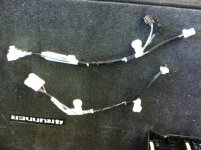
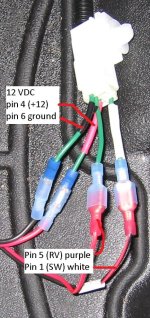
16 x Repair wire - 82998-12340 (used for above connector and sub-controller)
(Please note there is one connector that I can not find, in place of using a connector I used 4 repair wires noted above with heat shrink tubing to secure them to the sub-controller.) I believe that connector is part of the toyota heating element and not offered as a single part.
Non Toyota parts
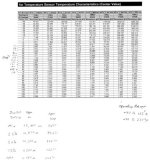
2 x 20K Ohm NTC Thermistor
Digi-Key - 490-4668-ND (Manufacturer - NTSD1WB203FPB50)
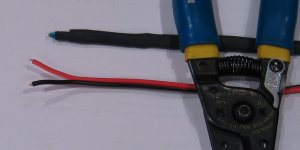
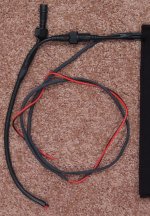
(This is only the thermistor you will need to solder this to appox 30 inches of 20 AWG zip wire and use heat shrink tubing to secure the setup. These will get placed next to the "Seat Back" heating elements. Please NOTE with the Wet Okole's you must place them in the seat back NOT the Seat bottom)
Zip wire
25 feet (appox.) of 16 Awg wire -
16 AWG "AUTO ZIP" WIRE | AllElectronics.com (used for power runs to the sub-controllers and to the heating elements)
25 Feet (appox.) of 20 Awg -
20 AWG RED/BLACK AUTO ZIP CORD | AllElectronics.com (used for the thermistor, left and right switches and to make up harnesses)
Radio Shack parts (optional but very helpful)
2 x - RadioShack® 4-Position Female Polarized Connector Model: 274-234 | Catalog #: 274-234
2 x - RadioShack® 4-Position Male Polarized Connector Model: 274-224 | Catalog #: 274-224
1 x - RadioShack® 6-Position Female Polarized Connector Model: 274-236 | Catalog #: 274-236
1 x - RadioShack® 6-Position Male Polarized Connector Model: 274-226 | Catalog #: 274-226
1 x - 1/4" Fully Insulated Quick Disconnects (10-Pack) Model: 64-3133 | Catalog #: 64-3133
1 x - 1/4" Fully Insulated Quick Disconnects (10-Pack) Model: 64-3131 | Catalog #: 64-3131
1 x Silver-Bearing Solder (1 Oz.) Model: 64-035 | Catalog #: 64-035 (used to secure small wires to the molex connectors noted above, and to connect the thermistor to the wire lead.
1 x Heat-shrink Tubing Set (36-Pack) Model: 278-1611 | Catalog #: 278-1611
(used for finishing off connector ends and marking wires)
I would also recommend electrical tape in several colors to keep track of wires when making up harnesses.
Tools needed/optional
Crimper's for Molex connectors and Insulated Quick Disconnects noted above
(optional) Radio Shack Pin Extractor Model: 274-223 | Catalog #: 274-223 (for molex connectors noted above)
Soldering iron
Heat gun or hair dryer for heat shring tubing
Wires cutters and a good pair of wire strippers at least one that will do 22, 18 and 16 Awg. Trust me this will make the project go much easier.
(optional) Digital multi meter
Skills
- Some electrical knowledge
- Able to read toyota's electrical prints
- some soldering skills (to make up the thermistor lead and secure small wires to the molex connectors)
Info packet from me. I plan to make up a PDF file with the wiring diagrams from toyota (in color) and spec sheet's.