 07-15-2020, 10:16 AM
|
#1
|
 |
Senior Member
|
|
Join Date: Sep 2019
Location: Lafayette, IN
Posts: 1,032
|
|
|
Senior Member
Join Date: Sep 2019
Location: Lafayette, IN
Posts: 1,032
|
 CV Reboot Tutorial with Boot Stretch (80+ Pictures)
In case anything happens to this thread, it has been saved in the WayBack Machine: https://web.archive.org/web/20200715...-pictures.html
Introduction
Hello All, recently rebooted and replaced a CV axle for my 2005 4runner and wanted to do another tutorial on the process. I really enjoy making these writeups, and I hope they're informative and helpful. Mechanic work can be daunting to a beginner, so I want to make some really detailed content and show every step to help others get started. This is part of the reason that I tend to go overboard on pictures. I also decided separate tutorials for rebooting and removal/installation would be best, since not everyone is going to want to reboot their old CVs. Let me know if you have any questions, that is what this thread is for!
CV Removal, New Seal Installation, and Reinstall Tutorial: CV Replacement Tutorial with New Seals (120+ Pictures)
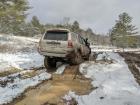
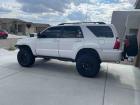
Teaser Pictures:
    Step Directory (Jumps in Current Tab)
Parts
Step Directory (Jumps in Current Tab)
Parts | Return to Steps- CV Axle in need of Rebuild- I picked up an OEM axle from a local junkyard for $32, since my old one was toast. It actually looks to be in really good shape, but I want to reboot since its true condition is unknown
- Toyota Boot Kit- 4th gen Inner and Outer: 04427-60141. 4th gen Inner only: 04437-60042. 5th gen boot kit with improved inner boot 04427-60131 with GREAT pictures provided by
@BagiMT
and
@phatcheeks
that can be seen in post #29 and post #40 of this thread. I'd heard of this upgrade, but after seeing their pictures, definitely the way I would recommend! All kits should include new boot clamps, c-clips, and the proper grease packs.
- Worm Drive CV Clamps- The boot kit comes with crimp style clamps, but the crimping tools were more expensive than buying the worm clamps. Each axle will need x2 25-40mm clamps and x2 90-110mm clamps. I bought this kit from eBay with clamps for 2 axles: Set of 8-Toyota 4Runner CV Axle Repair Clamps Kit. Thanks to
@Drift Monkey
for the idea!
Here is a layout of all the parts, I think this picture does a good job showing everything needed and their locations. The key takeaway is that the inner joint is on the diff side, uses the brown grease, and has the 4 rib neoprene boot. Whereas the outer joint is the wheel side, uses the black grease, and has the 6 rib plastic boot. I'll cover these in more detail later.
 Tools
Tools | Return to Steps- Safety Glasses- Don't want to lose an eye to a snap ring!
- Flat Head Screwdriver
- Philips Head Screwdriver
- Slip Joint Pliers
- Locking Ring Expansion Pliers- These are different than snap ring pliers and have squared off teeth: Lock Ring Pliers. I used snap ring pliers and they worked, but were a tad difficult to use. Thanks to
@montijo505
for the suggestion, see Post #9 and #10 for picture comparison
Consumables | Return to Steps- Tarp or Dropcloth
- Trash bags
- Disposable Gloves
- Paper Towels
- Brake Parts Cleaner or Heavy Degreaser
Step 1: Setup a Clean Work Area | Return to Steps
There's a lot of grease involved in this process, pick an area that can be cleaned easily. I suggest tearing open a trash bag and taping it down to the floor to make cleanup easier and prevent grease from getting into the surface.
 Step 2: Separate Inner Joint
 | Return to Steps
The easiest way to remove the clamps and boots is to destroy them all and cut off the boots. Although quick, that method has the potential to get really messy. I decided to take the more careful route and undo all the clamps.
Large Clamp Inner Joint
These clamps are pretty simple to remove. I bent each side of the clamp folds out with a screwdriver, and the clamp released. Separating the clamp around the entire boot will make removing both easier.
   Small Clamp Inner Joint
I used a screwdriver to pry up a small retention tab, and then pliers to unhook the clamp from the integrated teeth.
   Remove Inner Bearing Cup
The Inner Bearing Cup is separable from the entire axle. This, combined with the tripod joint accounts for the slight inner and outer movement in the CV with suspension articulation. Once the clamp is off, the boot is easily removable with some light pressure from your hands
 
Last edited by y=mx+b; 03-21-2021 at 10:25 PM.
|

|
 Reply With Quote Reply With Quote
|
|
07-15-2020, 10:17 AM
|
#2
|
|
Senior Member
|
|
Join Date: Sep 2019
Location: Lafayette, IN
Posts: 1,032
|
|
|
Senior Member
Join Date: Sep 2019
Location: Lafayette, IN
Posts: 1,032
|
CV Reboot Tutorial with Boot Stretch (80+ Pictures) Continued
Step 3: Disassemble and Clean Inner Joint | Return to Steps
After the Inner Bearing Cup was separated, I began cleaning everything out. I did a little experiment between foaming engine degreaser and brake parts cleaner since my local Walmart is always low on brake cleaner. Both work about the same, but the foam was a better visual aid. Now is a good time to put on those gloves, theres a lot of grease in this bad boy!
   
After cleaning the inner bearing cup, I gave a preliminary cleaning on the tripod joint.
  Step 4: Remove Tripod Bearing and Clean
 | Return to Steps
Now that the tripod joint has been cleaned, the snap ring should be exposed. I began by marking the axle shaft and tripod, so they'll go back in the same orientation.
 Remove Tripod
This snap ring doesn't have detent holes like normal, instead the ends are tapered inward. Keep this in mind when removing. I separated the snap ring enough to get one side over the shaft and a screwdriver behind it. Rotating the screwdriver caused the snap ring to shoot off the axle. Maybe not the safest or best procedure, but I was getting frustrated with the snap ring falling off the pliers.
   
The tripod can then be removed from the axle shaft. I was able to pull mine off by hand, but any previous water intrusion or corrosion could make this more difficult.
Remove Inner Boot
The inner boot can also be removed once the tripod is out. The boot may be stuck down in its channel, I used my thumb to push it out. This also gives us a look at where the boot stretch will occur. On reassembly, we will clamp the boot beyond the channel to prevent the ribs from rubbing on themselves or the axle shaft.
   Clean Tripod Bearing
I then sprayed down the tripod with the degreaser to clean out any old grease. The boot kits come with all new grease, so we will be repacking this later down the road.

Last edited by y=mx+b; 07-15-2020 at 10:20 AM.
|
|
|
Reply With Quote
|
|
07-15-2020, 10:17 AM
|
#3
|
|
Senior Member
|
|
Join Date: Sep 2019
Location: Lafayette, IN
Posts: 1,032
|
|
|
Senior Member
Join Date: Sep 2019
Location: Lafayette, IN
Posts: 1,032
|
CV Reboot Tutorial with Boot Stretch (80+ Pictures) Continued
Last edited by y=mx+b; 07-15-2020 at 10:21 AM.
|
|
|
Reply With Quote
|
|
07-15-2020, 10:17 AM
|
#4
|
|
Senior Member
|
|
Join Date: Sep 2019
Location: Lafayette, IN
Posts: 1,032
|
|
|
Senior Member
Join Date: Sep 2019
Location: Lafayette, IN
Posts: 1,032
|
CV Reboot Tutorial with Boot Stretch (80+ Pictures) Continued
Step 7: Regrease and Reboot Outer Joint | Return to Steps
Regrease
There should be 2 different greases in the boot kit: A black and a yellow grease. The outer joint is the black grease and in my particular kit, it was labeled RAREMAX UBZ (94187) and is Toyota PN 90999-94186. I began by squeezing a small plop onto the center ball carrier and spreading it around. I then articulated the joint to all angles to spread the grease.
  
I kept adding more grease and working it into the joint until the packet was empty. Each dose of grease was added with the CV at a different angle to ensure even coverage. I was surprised at the amount of grease that was slurped down into the joint, but there was plenty in the packet. When it was empty, there was a lot of grease in the joint and a decent amount that was piled on top
   Reboot Outer Joint
After the grease has been completely worked into the joint, the boot can be added. The outer boot has 6 ribs, is made of a plastic type material, and the larger diameter is perfectly round. I say this to differentiate it from the inner boot, which has 4 ribs, is made of a neoprene material, and the larger diameter has extra material to fit the tri-lobal inner joint.
Simply slide the boot down over the axle and fit it around the outer joint housing. The larger diameter should fit into a small channel on the CV. The smaller diameter will fit into a channel on the axle. I chose to not stretch the outer boot, since its a better material and I was worried about the boot straining at full steering lock. The hose clamps were then tightened on the boots, set opposite of each other to try and keep everything balanced.
   Step 8: Queue Inner Boot and Reinstall Tripod
 | Return to Steps
Inner Boot
I first slid the inner boot onto the axle and pushed it all the way down to get it out of the way. The outer boot has already been installed, but as a reminder, the inner boot has 4 ribs, is made of a neoprene material, and the larger diameter has extra material to fit the tri-lobal bearing cup. I found the best technique for getting the boot over the channels was to get my hand inside the boot and push the lip with my thumb.
  Tripod Install
Remember the marks we made when removing the tripod earlier? We want to get these lined back up so everything goes back just the way it came apart
  Tripod Snap Ring
Just as we struggled to remove the snap ring, now we must struggle to reinstall it. The boot kit should have come with a new one, so don’t reuse the old clip. I started to roll it in like a piston ring, but this ring is a bit too rigid to do it all this way. Once it was started, I used the snap ring pliers to open it up a tad further and seat it in the groove.
   
Last edited by y=mx+b; 07-17-2020 at 11:26 AM.
|
|
|
Reply With Quote
|
|
07-15-2020, 10:18 AM
|
#5
|
|
Senior Member
|
|
Join Date: Sep 2019
Location: Lafayette, IN
Posts: 1,032
|
|
|
Senior Member
Join Date: Sep 2019
Location: Lafayette, IN
Posts: 1,032
|
CV Reboot Tutorial with Boot Stretch (80+ Pictures) Continued
Step 9: Regrease and Stretch Inner Boot | Return to Steps
Boot Stretch Background Info
The inner boot fails when its ribs rub against each other, slowly abrading itself until the boot splits. To reduce the chance of boot rubbage, we can stretch the boot's on the small diameter side. The boot normally sits on the axle in the groove shown on the left, but we want to stretch the boot to sit beyond the groove as shown on the right
  Inner Joint Grease
The inner joint uses the yellow/brown grease and in my particular kit, it was labeled RAREMAX SLF (94161) and is Toyota PN 90999-94161.
 Pack Tripod with Grease
Since we cleaned out the tripod on disassembly, we want to repack it with grease. I made a plop in the center of one bearing and smeared it into the bearing. Making sure to rotate and articulate the bearing is important to getting everything properly greased before reassembly. Do this to all 3 bearings on the tripod.
   Grease Inner Bearing Cup
Once the grease has been packed into the tripod bearings, the rest goes into the inner joint bearing cup. I smeared the grease up and down the walls of the cup where the tripod bearing will interface. I also dunked the inner joint in and removed it to get grease smeared everywhere. Once everything is greased to your satisfaction, the tripod can be inserted for the final time.
  Inner Boot Install and Stretch
Once the tripod was installed in the inner joint, I flipped the axle so that side was up. I could then pull the larger end of the boot over the inner joint and clamp. The small hose clamp needed to be unscrewed completely to get it around the axle. I clamped the small end of the boot just before the original groove. After reinstall in the 4runner, it would be a good idea to reevaluate the amount of stretch and adjust the inner joint small hose clamp as needed. Just as before, I alternated the screw end of the hose clamp to try and keep everything balanced.
   Step 10: Replace Differential C-Clip
 | Return to Steps
Clip Removal
A new c-clip was included in the boot kit, so I replaced it while I had the axle out. I used the snap ring pliers to expand the c-clip enough to get a screwdriver behind it. Turning the screwdriver, I was able to wiggle one end of the clip towards the end of the axle. A bit more wiggling and it shot off the axle. Remember your safety glasses kids!
   Reinstall New Clip
I set the ring in place and used some slip joint pliers to grab around both the clip and the axle. This worked really well, you can see the clip snapped right in before I could even get a picture of it with the pliers!
  Congratulations!
Hooray, you rebuilt your CV for only an hour or so of work and around $60! Hopefully this process was not very hard, only tad messy. Let me know if you have any questions, and please post some pics of your CV reboot action!
Last edited by y=mx+b; 07-15-2020 at 01:05 PM.
|
|
|
Reply With Quote
|
|
07-15-2020, 12:12 PM
|
#6
|
 |
Member
|
|
Join Date: Aug 2019
Location: Louisville, KY
Posts: 258
Real Name: Aaron
|
|
|
Member
Join Date: Aug 2019
Location: Louisville, KY
Posts: 258
Real Name: Aaron
|
Your write-ups make my OCD self super happy lol. I don't even need to do this and you've got me wanting to try!
Quote:
Originally Posted by y=mx+b

After reinstall in the 4runner, it would be a good idea to reevaluate the amount of stretch and adjust the inner joint small hose clamp as needed.
|
Also this is a really good little note for people to really get the most life out of the boot based on how much lift they have.
__________________
2007 4Runner Limited V8
| 2.5 Fox 3" lift w/ remotes & DSC | Dobinson 677V rear | SPC UCAs | 1" BL | SCS F5 | 315/70 DuraTracs | Prinsu full rack | RLC rear bumper/swingout | C4 front bumper | Warn VR8-S | F55 fairlead/Flatlink-E | Rocksteady skids | ARB 2500 awning | Dometic CFX 40W | Partner Steel 22" stove | Adventure Index drawer/sleeping platform | ARB twin compressor | Odyssey 34R dual batteries | Blue Sea SI ACR/fuse panel/USB | Renogy 100W Eclipse | Baja Designs Squadron R & S2 | G5R retrofits | Doug Thorley headers/Y pipe | weBoost OTR |
|
|
|
Reply With Quote
|
|
07-15-2020, 01:40 PM
|
#7
|
|
Senior Member
|
|
Join Date: Sep 2019
Location: Lafayette, IN
Posts: 1,032
|
|
|
Senior Member
Join Date: Sep 2019
Location: Lafayette, IN
Posts: 1,032
|
Quote:
Originally Posted by juniorpigeon
your write-ups make my ocd self super happy lol. I don't even need to do this and you've got me wanting to try!
Quote:
Originally Posted by y=mx+b
After reinstall in the 4runner, it would be a good idea to reevaluate the amount of stretch and adjust the inner joint small hose clamp as needed.
|
Also this is a really good little note for people to really get the most life out of the boot based on how much lift they have. |
Thanks, that means a lot! I think I tend to overdo it on pictures, so the directory system make everything navigate-able without scrolling forever lol. Now that I've got it formulated the way I like, I can just copy and paste the template to streamline making more writeups.
Thanks for the insight on the boot adjustment too! I was figuring that with varying amounts of lift, the tripod will be in a different position and stretch the boot differently. Good to have feedback that this is something to look out for, I bolded it so the quick readers should notice it too. Once I get it installed, I'll try and update that part to show what I did.
|
|
|
Reply With Quote
|
|
07-15-2020, 01:58 PM
|
#8
|
|
Member
|
|
Join Date: Dec 2013
Location: Atlanta GA
Posts: 441
|
|
|
Member
Join Date: Dec 2013
Location: Atlanta GA
Posts: 441
|
__________________
'09 V8 Limited | Dobinsons Lift | Front: 3" - C59-302 + GS59-220 | Rear: 2.5" - C59-675V + GS59-701 | Tires | Ridge Grappler 275/65/18XL | Wheels | Method Standard Machined Finish 18x9 -12 offset | SPC UCAs | DT Long Tubes | GSport 2.5" Cats | DT Y-Pipe | Magnaflow Cat Back | 2.5" Vibrant Ultra Quiet Resonator
|
|
|
Reply With Quote
|
|
07-15-2020, 06:27 PM
|
#9
|
 |
Senior Member
|
|
Join Date: May 2014
Location: Rio Rancho, New Mexico
Posts: 2,052
|
|
|
Senior Member
Join Date: May 2014
Location: Rio Rancho, New Mexico
Posts: 2,052
|
As usual, nice write up man, you've been killing it!
Definitely suggest a pair of lock ring pliers, like the ones pictured below. Make quick work of getting the ring off/on the tripod and under $20. You'll do this again in the future, ask me how I know......... 
Sent from my SM-G986U using Tapatalk
|
|
|
Reply With Quote
|
|
07-15-2020, 07:35 PM
|
#10
|
|
Senior Member
|
|
Join Date: Sep 2019
Location: Lafayette, IN
Posts: 1,032
|
|
|
Senior Member
Join Date: Sep 2019
Location: Lafayette, IN
Posts: 1,032
|
Quote:
Originally Posted by montijo505
As usual, nice write up man, you've been killing it!
Definitely suggest a pair of lock ring pliers, like the ones pictured below. Make quick work of getting the ring off/on the tripod and under $20. You'll do this again in the future, ask me how I know.........
|
Thanks, appreciate the kind words! I like the teeth on those, that would have come in handy for biting the ring and keeping it from flying off. Next time I do this, I'll have to get a pair! I was using what I guess are technically snap ring pliers and this is really a locking ring. Mine had round tips which is great for snap rings, but not so good for this locking ring. I'll update the tool section to reflect this better tool.
My snap ring pliers with round tips:

|
|
|
Reply With Quote
|
|
07-15-2020, 08:43 PM
|
#11
|
 |
Member
|
|
Join Date: Nov 2014
Location: Austin, TX
Posts: 618
|
|
|
Member
Join Date: Nov 2014
Location: Austin, TX
Posts: 618
|
Those look awesomely familiar.

Great write up, I managed with just the snap ring pliers as well, but it wasn't "easy" lol.
__________________
2006 4Runner Sport Edition V8 4WD
|
|
|
Reply With Quote
|
|
07-15-2020, 11:14 PM
|
#12
|
|
Senior Member
|
|
Join Date: Sep 2019
Location: Lafayette, IN
Posts: 1,032
|
|
|
Senior Member
Join Date: Sep 2019
Location: Lafayette, IN
Posts: 1,032
|
Quote:
Originally Posted by Drift Monkey
Those look awesomely familiar.
Great write up, I managed with just the snap ring pliers as well, but it wasn't "easy" lol.
|
Thanks, I was reading through your posts before diving into mine and they helped to get the ball rolling. I may or may not have borrowed the worm clamp idea from you haha. I went back and tagged you up in the parts section, since I can't take credit for the idea. Also funny to connect people between different 4runner groups too lol.
Glad the write up seemed on par with your experience too. Snap ring plier struggle gang 
Last edited by y=mx+b; 07-15-2020 at 11:28 PM.
|
|
|
Reply With Quote
|
|
07-16-2020, 12:32 AM
|
#13
|
|
Member
|
|
Join Date: Nov 2014
Location: Austin, TX
Posts: 618
|
|
|
Member
Join Date: Nov 2014
Location: Austin, TX
Posts: 618
|
Quote:
Originally Posted by y=mx+b
Thanks, I was reading through your posts before diving into mine and they helped to get the ball rolling. I may or may not have borrowed the worm clamp idea from you haha. I went back and tagged you up in the parts section, since I can't take credit for the idea. Also funny to connect people between different 4runner groups too lol.
Glad the write up seemed on par with your experience too. Snap ring plier struggle gang |
Yeah, you probably know me from the Familia group on fb! 
__________________
2006 4Runner Sport Edition V8 4WD
|
|
|
Reply With Quote
|
|
07-17-2020, 10:25 AM
|
#14
|
|
Member
|
|
Join Date: Apr 2011
Location: WI
Posts: 86
|
|
|
Member
Join Date: Apr 2011
Location: WI
Posts: 86
|
This is an awesome write up. Thank you very much. It makes me feel like I can do this too  .
__________________
Shootersanks
-2007 Shadow Mica SE 4Runner
|
|
|
Reply With Quote
|
|
07-17-2020, 11:37 AM
|
#15
|
|
Senior Member
|
|
Join Date: Sep 2019
Location: Lafayette, IN
Posts: 1,032
|
|
|
Senior Member
Join Date: Sep 2019
Location: Lafayette, IN
Posts: 1,032
|
Quote:
Originally Posted by shootersanks
This is an awesome write up. Thank you very much. It makes me feel like I can do this too . |
Thanks, hearing that makes me feel good! My goal was to make this as approachable as possible, so that everyone would have the confidence to complete the project. I'll have another tutorial soon on the old CV removal and installing this rebuild one, to complete the whole job. I pretty much had no 4runner/car/vehicle knowledge until I started reading this forum a year-ish ago. I learned a lot here, so this is a way I can give back!
|
|
|
Reply With Quote
|
 Posting Rules
|
You may not post new threads
You may not post replies
You may not post attachments
You may not edit your posts
HTML code is On
|
|
|
|


 Linear Mode


