

You are using an out of date browser. It may not display this or other websites correctly.
You should upgrade or use an alternative browser.
You should upgrade or use an alternative browser.
1984 4runner build
- Thread starter CAN-03runner
- Start date
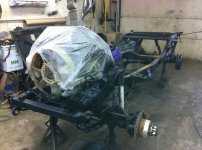
Hello old frame, meet some new paint. U lohke mmmmArVALus! Wait until you meet new energy suspension body mount bushings, and a 2 inch body lift.
That thing looks beautiful!! Good job!! You should keep your old doors and make some half doors with them


CAN-03runner
New member
Looks good!
Why the body lift? Looks like its already sitting pretty tall. Drive train lift?
Yeah i know but somehow I got convinced to put in a body lift too. After this the next major work is duals or at least a single with 4.7's. So as I work through that, and figure out what is involved, and gather parts, I would plan it with a drive train lift too. EDIT*** the body donor had a gear drive T-case. One of 2 sourced.
I'm a little afraid too that it will be too tall. But I might need to experience it a learn for myself. If it is too tall I can always remove it.
Right now, my front passenger tire gets all cut up by the wheel well pinch welds when it flexes. I'll try this, and then maybe some cutting of the fender well, and hammering back the pinch welds. It's a learning experience I suppose.
Last edited:
CAN-03runner
New member
Just some simple BlackBerry pictures from inside my garage. Not the best angles. Still sitting on 31" winter tires now. But it is done!
-1984 body, swapped out for an 1986 body.
-Frame painted, and rust proofed.
-Body mount bushing replaced with new ones.
-2 inch body lift.
-Brake lines replaced. They were so old and britle they broke off. It's even better this way anyway.
https://picasaweb.google.com/captai...authkey=Gv1sRgCL6QyYbE1P2T4gE&feat=directlink
Better outside pictures, when it stops being -20 outside.
-1984 body, swapped out for an 1986 body.
-Frame painted, and rust proofed.
-Body mount bushing replaced with new ones.
-2 inch body lift.
-Brake lines replaced. They were so old and britle they broke off. It's even better this way anyway.
https://picasaweb.google.com/captai...authkey=Gv1sRgCL6QyYbE1P2T4gE&feat=directlink
Better outside pictures, when it stops being -20 outside.
CAN-03runner
New member
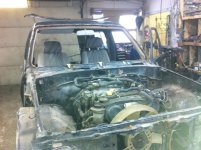
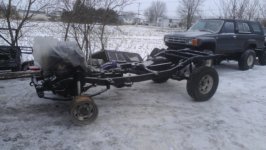
Some more pictures of this build. Here the body was off. This was the BAD body. I'm not sure how the windshield never flew off and the doors remained on the hinges.
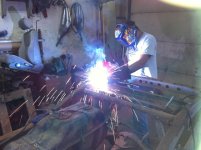
The frame got some good hammering all over it, trying to find any weak spots and to make the dirt and loose rust fall off. The cross memeber that was welded in to attach my rear shocks also got a rework. Since the body was off, it was easier to weld all around it. For a while I was contemplating just leaving the good body on the 1986 and doing a solid axle swap. But while the body was great, the frame was rotten. It didn't even need hammering. You could push your finger through it some places. The 1984, had rotten body, but pretty decent frame for a Canadian 1984 truck. That is many years road salt. Only one section needed to have a piece cut out and new steel welded in.
1986 4cyl Engine and transmission sold. Top shift transfercase and the entire rear axle kept. Frame sent to scrap metal. A bunch of other spares made like door windows, front grill, mirrors, door and window mechanisim, light covers etc..
Slide show link here: https://picasaweb.google.com/captainp33/FrameWork?authuser=0&authkey=Gv1sRgCOOUur7HzsbLwQE&feat=directlink
teaser previw pic below.
The frame got some good hammering all over it, trying to find any weak spots and to make the dirt and loose rust fall off. The cross memeber that was welded in to attach my rear shocks also got a rework. Since the body was off, it was easier to weld all around it. For a while I was contemplating just leaving the good body on the 1986 and doing a solid axle swap. But while the body was great, the frame was rotten. It didn't even need hammering. You could push your finger through it some places. The 1984, had rotten body, but pretty decent frame for a Canadian 1984 truck. That is many years road salt. Only one section needed to have a piece cut out and new steel welded in.
1986 4cyl Engine and transmission sold. Top shift transfercase and the entire rear axle kept. Frame sent to scrap metal. A bunch of other spares made like door windows, front grill, mirrors, door and window mechanisim, light covers etc..
Slide show link here: https://picasaweb.google.com/captainp33/FrameWork?authuser=0&authkey=Gv1sRgCOOUur7HzsbLwQE&feat=directlink
teaser previw pic below.
Attachments
Last edited:
CAN-03runner
New member
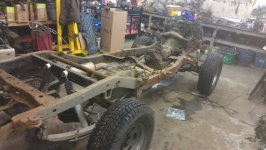
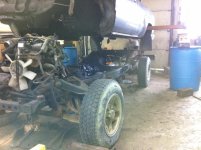
The nice grey body is the donor body. On closer inspection after i bought it, and had possesion of it for a while and started work on it, it became obvious that it had been repainted at some point. Previous owner was 2nd or 3rd, 4th owner...who knows. Anyways, before I paid for it, the carpeting and all the side panels, and rear seats were removed. So that the floor tub and inner fender panels could be inspected. They had been treated with rust proof grease and were like mint except for the vaseline type rust proofing.
A link to a bunch more slide show pictures below:
https://picasaweb.google.com/captainp33/BodySwap2?authuser=0&authkey=Gv1sRgCPPRjZ-z9ergGw&feat=directlink
teaser pcis attached.
A link to a bunch more slide show pictures below:
https://picasaweb.google.com/captainp33/BodySwap2?authuser=0&authkey=Gv1sRgCPPRjZ-z9ergGw&feat=directlink
teaser pcis attached.
Attachments
Last edited:
CAN-03runner
New member
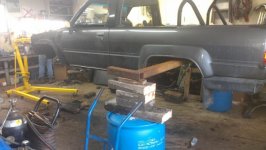
These are pictures of removing the good body. No body removal tool available here. :shrug: So an engine hoist/puller and a steel beam on top of blocks, on top of barrels was the device of choice.:hatsoff:
Teaser pic attached.
Slide show to other pics in the link below:
https://picasaweb.google.com/captainp33/BodyRemoved?authuser=0&authkey=Gv1sRgCPPLxqvawLOvzAE&feat=directlink
Teaser pic attached.
Slide show to other pics in the link below:
https://picasaweb.google.com/captainp33/BodyRemoved?authuser=0&authkey=Gv1sRgCPPLxqvawLOvzAE&feat=directlink
Attachments
CAN-03runner
New member
Let's hope your gas tank was empty with those cut lines :bigok:
MOAR PICS!! Good job!
It was pretty empty.
CAN-03runner
New member
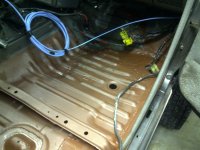
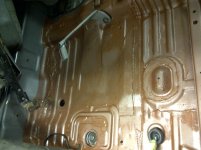
As best I could I removed the tar sound proofing material on the floor of the tub. I left some on the floor bacause it is just so difficult or awkward to remove. But this is more up at the top where the sourounding metal look prestine. I removed the edges, if I saw rust I kept removing, if it was prestine I let it on. Under the feet area and under the seats, I removed all of it.
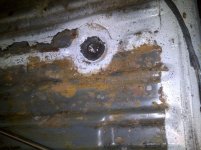
The kind of rust I saw looked like this. I used a dremel with a the grinding/sanding/cutting wheels. It worked good to remove the rust. It revealed shinny metal below it and not a rust hole all the way through. The underside of this tub had been coated with rust proofing, looks like a vaseline. I hope it did it's job. Banging on it produced a nice solid sound, not a dead sound. The dremel worked well because with the angled head attachment it was light weight to hold and easy to manouver. I think my full size grinder would have worked quicker but too powerfull and heavy for delicate grinding in the tub floor.
The kind of rust I saw looked like this. I used a dremel with a the grinding/sanding/cutting wheels. It worked good to remove the rust. It revealed shinny metal below it and not a rust hole all the way through. The underside of this tub had been coated with rust proofing, looks like a vaseline. I hope it did it's job. Banging on it produced a nice solid sound, not a dead sound. The dremel worked well because with the angled head attachment it was light weight to hold and easy to manouver. I think my full size grinder would have worked quicker but too powerfull and heavy for delicate grinding in the tub floor.
Attachments
CAN-03runner
New member
The floors look good! I used an air hammer with a chisel tip to get rid of all my sound deadening. It came up easy as heck! It probably took a whole 20 minutes to get it all out.
When you do your rust proofing, take a peek inside the body where the interior panels cover. I didn't have any rust in my body but it was dirty which could lead to bad rust. I will probably coat my inner fender/body area this week some time or this weekend.
When you do your rust proofing, take a peek inside the body where the interior panels cover. I didn't have any rust in my body but it was dirty which could lead to bad rust. I will probably coat my inner fender/body area this week some time or this weekend.
CAN-03runner
New member
I also started working on the fenders. Not sure why. But everyone says to remove the chorom trim. I also had some rust on the bottom corner of both rear fenders. So I started cuting out the rust, and I was going to patch/bondo it back. Pretty simple. And hit the trails.
But no...
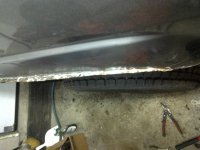
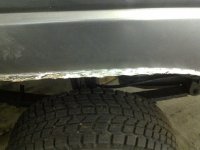
It got way too fun cutting stuff out that I started peeling back the pinch weld/fold of the wheel well opening. It was rusty. But again, not horrible, and I could have left it alone and done this work later when/if the rust spread. Or when I actually had the time to do it. But I couldn't.
Then I got the idea that I was going to cut them out anyways. But that was dumb. Because I only have 33" and probably will only go to 35" or I would have to change to something else other than my 4.88 gears. I still ended up cutting out the rusty metal of that folded in lip. All this work ended up making a big separation between the outer fender metal and the inner fender metal.
So I got another idea. I'm not sure I've seen this before. Maybe it is dumbass, and maybe I should just go all the way. But I got this idea to fold that outer fender outward instead of back inside or weld matel back to reform that outer fender lip fold.
So folded outwards it will actually act as fender flares. I went bent up about an inch. There isn't an inch of "fender flare" since I cut out the rusty metal but I bent up about an inch. So then the inner fender I also bent and hammered it outward to meet the outer fender metal. now I can just weld it together or rivet it together and also extend them a little to make them uniform all the way around. Then bondo and shape them.
I need fender flares to cover my tires. The cops around here are on the hunt with tape measures for non conforming 4x4 mods and accessories.
This is what it looks now. Good idea? Or bad? Only started on so far. I think it will end up nice.
But no...
It got way too fun cutting stuff out that I started peeling back the pinch weld/fold of the wheel well opening. It was rusty. But again, not horrible, and I could have left it alone and done this work later when/if the rust spread. Or when I actually had the time to do it. But I couldn't.
Then I got the idea that I was going to cut them out anyways. But that was dumb. Because I only have 33" and probably will only go to 35" or I would have to change to something else other than my 4.88 gears. I still ended up cutting out the rusty metal of that folded in lip. All this work ended up making a big separation between the outer fender metal and the inner fender metal.
So I got another idea. I'm not sure I've seen this before. Maybe it is dumbass, and maybe I should just go all the way. But I got this idea to fold that outer fender outward instead of back inside or weld matel back to reform that outer fender lip fold.
So folded outwards it will actually act as fender flares. I went bent up about an inch. There isn't an inch of "fender flare" since I cut out the rusty metal but I bent up about an inch. So then the inner fender I also bent and hammered it outward to meet the outer fender metal. now I can just weld it together or rivet it together and also extend them a little to make them uniform all the way around. Then bondo and shape them.
I need fender flares to cover my tires. The cops around here are on the hunt with tape measures for non conforming 4x4 mods and accessories.
This is what it looks now. Good idea? Or bad? Only started on so far. I think it will end up nice.
Attachments
There's a dude on yotatech (Dirtco) who cut his fenders from a 1st gen runner. When he put them back together he got some 1/4" rod and welded the lip of the fender to that. It made a cleaner weld and it added some strength to a weak part of the body. Just another idea.
You do good work. Keep it up!
You do good work. Keep it up!
CAN-03runner
New member
The floors look good! I used an air hammer with a chisel tip to get rid of all my sound deadening. It came up easy as heck! It probably took a whole 20 minutes to get it all out.
When you do your rust proofing, take a peek inside the body where the interior panels cover. I didn't have any rust in my body but it was dirty which could lead to bad rust. I will probably coat my inner fender/body area this week some time or this weekend.
Turned out I had rust where the innner and outer fender seal...:cry2:
CAN-03runner
New member
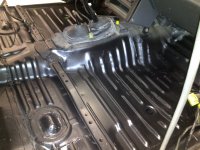
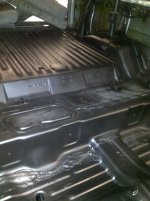
Floors painted black with bedliner. I'm not sure i would do that again. Instructions say to prime first. I did. Make sure it is dry. Was dry for weeks. Clean. I cleaned. But on some spots, the liner acted like paint remover and bubbled and peeled off the primer. Just a few quater size spots. Who knows. Now that it is real dry, it is alright. I'm not impressed with it. Maybe I didn't apply it thick enough.
Looks nice though.
Looks nice though.
Attachments
CAN-03runner
New member
CAN-03runner
New member
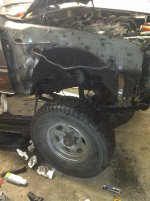
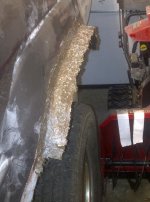
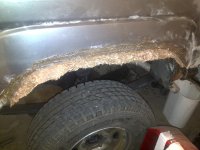
The latest on the homemade fender flares.
With the inner and outer fenders, cut and bent outwards, it created a little ledge. I sanded off the paint, and applied bondo hair fibre glass. First I layed down a mesh, to extend the flare, provide a platform and serve as a guide. Then I applied the fibre glass bondo hair. That suff it real sticky. And pretty strong.
People have said fibre glass will break and chip. I have said it is a trail truck. I'll just put more fibre glass to repair. But it seems to keep some of it's flexability. First time using this stuff. The flares are not really uniform. But again...I say it is a trail truck. It needs to look that way. I will apply more layers, sand it and trim the edge straight and it will become uniform.
This, unlike the truck liner, I would recomend. This was a good idea i think.
With the inner and outer fenders, cut and bent outwards, it created a little ledge. I sanded off the paint, and applied bondo hair fibre glass. First I layed down a mesh, to extend the flare, provide a platform and serve as a guide. Then I applied the fibre glass bondo hair. That suff it real sticky. And pretty strong.
People have said fibre glass will break and chip. I have said it is a trail truck. I'll just put more fibre glass to repair. But it seems to keep some of it's flexability. First time using this stuff. The flares are not really uniform. But again...I say it is a trail truck. It needs to look that way.
I will apply more layers, sand it and trim the edge straight and it will become uniform.This, unlike the truck liner, I would recomend. This was a good idea i think.
Attachments
CAN-03runner
New member
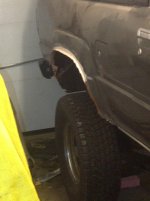
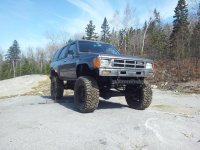
So I haven't updated this in a while. The rear home made fender flares came out like junk. But I'm not looking to win beauty contests.
Actually, I think the idea was not bad. Instead of just cutting the fender, I folded it out, covered it with fibre glass and made them wider. Very bumpy fibre glass. Oh well, I can add more glass or putty to make them smooth. But for now, I took that rubber stuff you put on the base of walls, and bolted it down with stainless bolts. Not pretty, but makes me street legal.
Actually, I think the idea was not bad. Instead of just cutting the fender, I folded it out, covered it with fibre glass and made them wider. Very bumpy fibre glass. Oh well, I can add more glass or putty to make them smooth. But for now, I took that rubber stuff you put on the base of walls, and bolted it down with stainless bolts. Not pretty, but makes me street legal.
Attachments
Last edited:
Similar threads

- Replies
- 0
- Views
- 793
- Replies
- 1
- Views
- 13K

