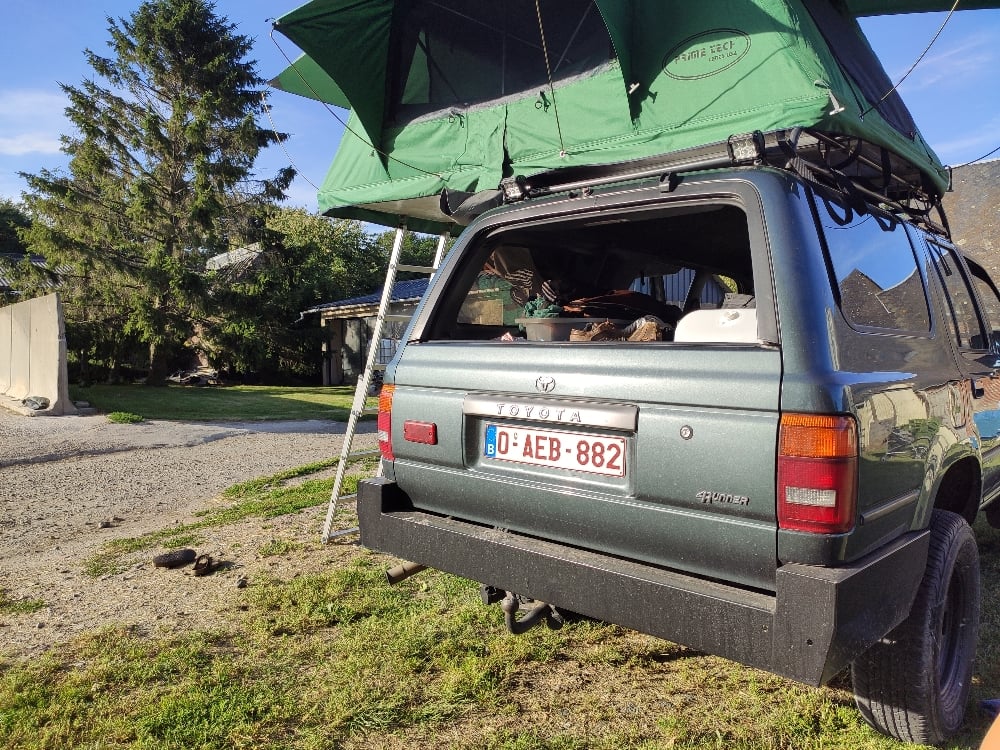
1992 T4R 2LT slow build

No problem! Not everything is posted here and i have a ton of other pictures but i can't upload them all.

I'm working on a how-to for extra back-up led's and will post it here in detail as soon as i get my parts delivered...
 
Ok, i wanted to post an how-to on how to install extra back-up light but i lost quit a few pictures. I'm not in the mood of taking everything apart just to take pictures again so here's what i have.

The goal was to install some extra back-up lights so i can actualy see something when backing up in the dark. Parking space in europe is quit narrow...
Then i thought 'why not use them as work/camping light also'.

So, i needed the LED's the go on automaticaly when put in reverse AND go on manually without the engine running.

I'm not an experienced electrician but i managed to make my own (very simple) wiring diagram:

extraverlichting.jpg


So we need to splice the original wire from the original back-up light to power the relais. I did it all the way from the back.

IMG_20200401_152929.jpg


IMG_20200401_152923.jpg


The color-scheme here is red/blue. Yours can be different. Use a multimeter! I spliced the wire behind the panel on the inside.

The wire is routed to the front under the carpet.

IMG_20200401_162046.jpg

(getting crowded under there...)

Before you proceed, it's a good idea to test that wiring diagram. So i frankensteined it all together and verified that it worked.

IMG_20200401_161355.jpg


I have a secondary battery so i tapped the 12v supply from it's fusebox.

IMG_20200401_114523.jpg


Everything is fitted under the dashboard on the drivers side. (NOT the fusebox, it's best to place fuses as close to the battery as possible)

I had to figure out a way to get the 12v supply wire to the roof. And i don't want to drill another hole in it. A popular solution is to route the wire behind the rubber door seal and that's what i did.

IMG_20200404_094509.jpg


Into my retro roof rack...

IMG_20200404_094531.jpg


And out again to a splice-box.

IMG-20200404-094616.jpg


For the switch i used 4-position switch. 0, 1, 2, 3.

0: open
1: open (not connected, reserve)
2: ON when in reverse
3: ON manually

IMG-20200404-094346.jpg


Note: I used 1,5mm² wire because the LED's are 36W only. That's 3A so 1,5mm² is enough. Again, your's may need to be thicker depending on what you're hooking up.


That's it, now i just have to wait and see for the first time when i need them :)

IMG-20200326-180921.jpg


IMG-20200326-180845.jpg


And gave my cell phone car mount an upgrade...

IMG_20200404_094426.jpg


Cheers.
 
Got the second battery installed some time ago but never posted pics, so here they go...


75Ah and 650 CCA so when my main battery is dead, i can still use this second one to start the engine. I'm searching for a decent battery box.
IMG-20200401-114719.jpg


Battery combiner installed.
IMG-20200401-114600.jpg


Wiring.
cyrix-ct.jpg


The idea came up last summer when we were camping and had no cold ru.., uhm i mean, milk... Now our (small) fridge can last 36 hours before the battery is out of juice. :mod:
 
Last edited:
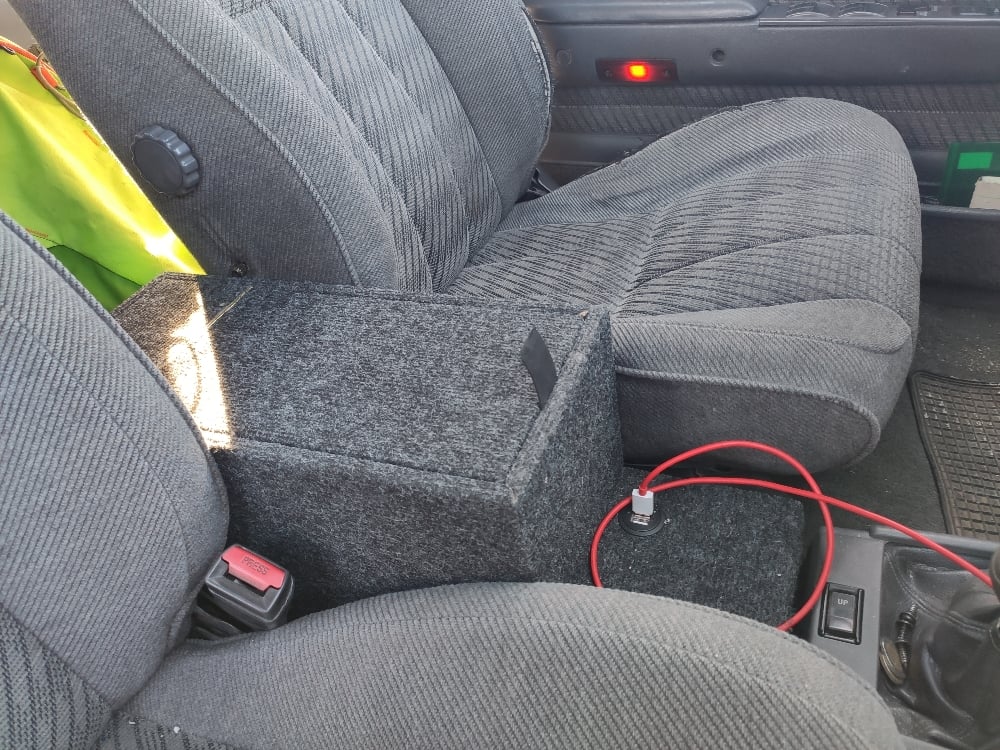
Working on a diy center console.

IMG_20200523_163321.jpg


IMG_20200523_171330.jpg


IMG_20200523_171343.jpg


IMG_20200523_171358.jpg


IMG_20200523_171733.jpg


IMG_20200523_215738.jpg


IMG_20200523_220401.jpg


I'm not yet sure what i want exactly but cupholders and cooling compartment are on the list. More ideas are welcome.
 
Nice work and nice truck! Might consider putting a rubber boot over your positive battery terminal. I've had a clamp come loose and short pos to ground before, fried my battery and almost started a fire. Wouldn't want to burn up all your hard work.

You may also want to get something behind that rust area or it will continue to spread under the paint. Bondo is hygroscopic so it's best to put fiberglass down first and bondo over, if possible. Also check behind the bumper on you rear quarters if you haven't, that's usually the first area to rust but impossible to spot without pulling the bumper corners.
Here's my writeup on a permanent rustproofing solution - Ultimate oil undercoating guide (DIY Waxoyl) but any non-solidifying oil will work well enough for most of a winter. Would def recommend drilling into the body and fogging the area behind that rust with something, then grease the hole and insert a body plug. Someone mentioned POR15, that will put off rust repair but is not a long term solution and has been known to cause more issues than it solved.
 
Nice work and nice truck! Might consider putting a rubber boot over your positive battery terminal.

Yes, it's true. It's one of those simple but important things i have to do. Like many other small stuff. :)

Also check behind the bumper on you rear quarters if you haven't, that's usually the first area to rust but impossible to spot without pulling the bumper corners.
Check :thumb:

IMG_20200524_193148.jpg


IMG_20200524_193204.jpg

*i have to do something about that exhaust-pipe...


That is the last rust-spot on the entire vehicle.
The rear bumper was removed 7 weeks ago because i wanted to install one with a swignout arm but then some virus happend... I'm driving without a bumper ever since... If all goes well, i get the new bumper next week. (fingers crossed)

We (a few friends and i) actually just use WD40 and spray the entire underbody with it twice a year. Just before and after the winter. And we use alot of it. We literally take a shower of WD40 while standing under the car wearing dust-masks. Our government-officials at car-centra don't like permanent undercoutings because they can't see what's underneath. And i don't like it either because they start hammering your chassis all over the place :nono:

IMG_20191025_210239.jpg


IMG_20191025_210258.jpg


IMG_20191025_210317.jpg


IMG_20191025_210335.jpg


The inside of the rear fenders can be reached by removing the small cargo-panel/box. I modified them so i can take them out without removing the entire sidepanels.

I read your post and i'm now converting it to the metric system :) The inside of the doorpanels is something i'm also afraid of. There are two small draining holes at the bottom that i use to apply WD40 but i feel i might use something more permanent there.
 
Last edited:
Coolbox is sort of finished...

IMG_20200530_211349.jpg


IMG_20200530_211202.jpg


We tested it @ 25°C outside temp (inside was hotter) and it was cold but not as cold out dometic compressor-fridge. But that's ok.

Now i need to connect the wires as i'm not using the cigarette plug. This will be wired to a switch and the secondary battery.

And because of this new middle console the USB charger has to be relocated so i still have some little work to do.
 
I know it has been a few years but I recently purchased the same truck. Mine is 89 right hand drive from Japan and only 99k km on the clock. I'd love to pick your brain a bit. I have two other 3rd gens , a 99 and a 98 both with 6 cylinder gas engine.
 
Not much has happend lately. The rear bumper is half done. The swingout arm itself is not ready yet. But we're on a roadtrip through France now so it will have to wait until august.

The new middle console does it's job.
661ac0cbe19926f3f37c8bd4b4621408.jpg
cf57b9d6c841d20a4e8dc088cdb7e125.jpg
5f0f85cd9b4519ccc1d2400cb7e03baa.jpg
 
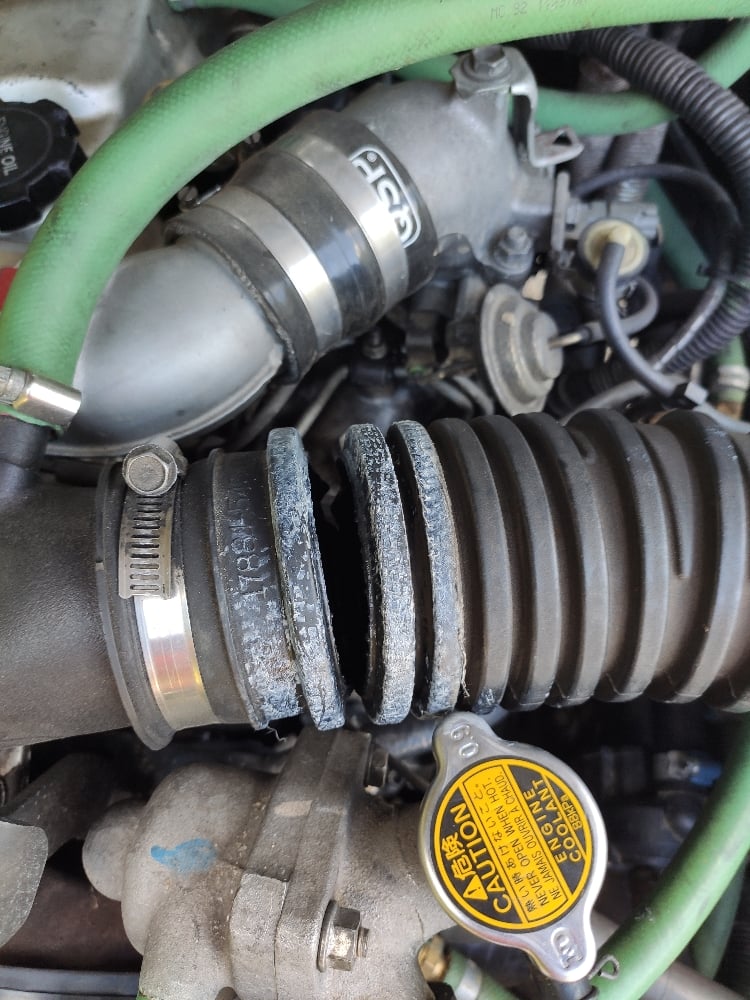
We're on our way back from holiday. Started this morning in Italy. Just when we crossed the French border the air intake duct/hose cracked. Not a mayor problem but we still got 500km to go. Alot of dirty air will be sucked in.
bb3c56077828bcb40120832efad7cae5.jpg
 
Ok, the air duct may be cracked but with it we got a noticable difference in power. Well, it's not that he gained 10hp or so but there is definitely a 'smoother' ride when going uphill for example. Also less black smoke when pulling op a little harder then normal. The sound on the other hand is more like riding a tractor...

This is logical because the engine just gets more air but i didn't expect it to be so noticable.

So, i'm going to try and open airfilter and see how it compares. A new air intake hose costs about €50 +transport which is too much because it will crack again within 2 years so i'm not gonna bother...
 
this is a wonderful thread! I am brand new to the T4R world, but I am about to possibly make the purchase on a 1991 Toyota Hilux Surf that was imported from Japan with a right hand side drive. still contemplating the amount of work I will need to do on it (without much experience) but it is just such a sweet looking car and asking price is $8000 USD with only 134,500 miles (2164567 km) on it.

thank you for posting all these pictures and how you resolved your problems, it definitely gives me lots of inspiration!
 
Thank you. Are you looking for a diesel or pertrol engine? (Denver USA or UK?) I don't know about the 3VZE but i can tell you that the 2LT (without the 'E') is a very reliable engine. It comes very close to the 22RE :) However, it's slow. The 3VZE has more power.

Speaking of power. I installed an open air filter today. Definitely +50 horse power! :guitar3:

No, that would be to easy. But the engine revs more easy and smoother then before. I did e little test drive and the difference is noticeable.

But, there is also a downside. She may get more air but the air itself is also less cleaner. I don't know how or if this will have any affect on the engine. What i do know is to inspect the airfilter on a monthly basis and possibly change it more often.

Another problem is the PCV system (not much of a 'system' with this engine:) ). Normally a return hose is connected from the crankcase to the air intake system in order to re-burn toxic gasses. I still have to tap a new connector to connect that hose. For now it just ventilates into open air. This must be fixed very soon as i do care a little about the environment and i won't pass road-regulations.

Picture time:

Catch-can cleaned after 3000km holiday trip.

DSC00777.jpg


DSC00778.jpg


DSC00783.jpg


And the new 'tuning' :rolleyes: air filter.

DSC00779.jpg


DSC00781.jpg


DSC00784.jpg


In the meantime... I'm still waiting for my new rear bumper. It is scheduled for the end of this month. Fingers crossed!
 
Well, i had to go to annual car control last week and the 4runner didn't pass. I got a 'red card' as we call it here in Belgium. the car didn't pass because of three things:
  1. suspension check: difference between left and right is to high - bad shocks
  2. steering: play on outer tie rod - bad left tie rod
  3. mud flaps: no mud flaps/splash guards installed

  1. this surprises me because the shocks were replaced at 306.802km on the 4 october, 2019. They have only 10.000km on them.
  2. nothing wrong here. This is normal wear. Afaik these are the original ones.
  3. the new bumper is still not finished so i installed temporary mud flaps.

So i ordered some parts:

autodoc35189962.jpg


Mudflaps are already installed:

IMG_20200822_142437.jpg


IMG_20200822_142503.jpg


IMG_20200822_151401.jpg


IMG_20200822_151419.jpg


IMG_20200822_151459.jpg
 
Thanks. I started replacing the outer tie rods. The first one wasn't very cooperative...

Just some basic tools needed to remove the outer tie rod:

IMG-20200824-203458.jpg


The boot was still intact but got smashed during the process:

IMG-20200824-201641.jpg


IMG-20200824-180530.jpg


My initial plan was to replace all the tie rods but there is a saying: 'don't fix it if it isn't broken'.
 
Last edited:
So, second visit to annual car control. (how do you name this in english?)

Tie rods and mudflaps were ok but suspension was still a problem. 3 officials gathered around and under my vehicle.

One of them approached me and said: "your springs are missing...".


:suspicious:


Seriously. I, myself, had to explain that a 4runner uses torsionbars instead of springs. I was flabbergasted! (love that word)
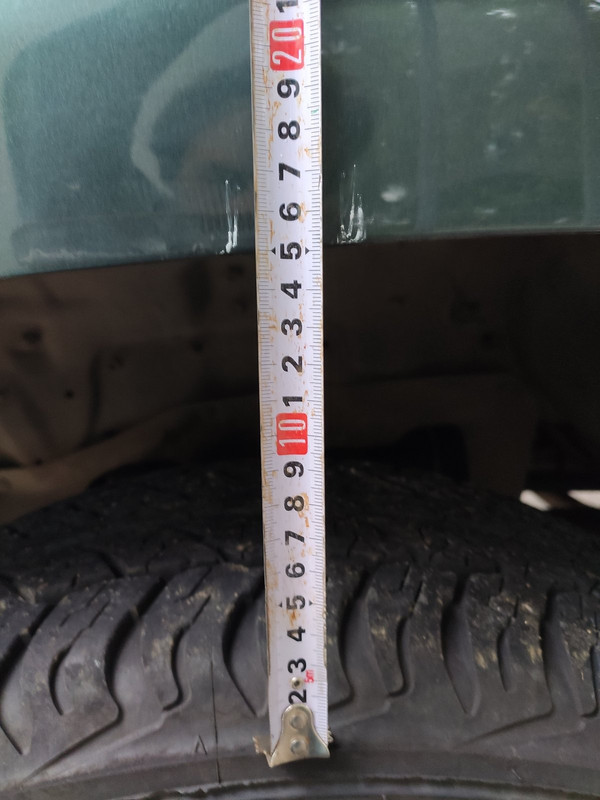
Anyway, i still did not pass the test so i have to go back for a 3 visit so i lowered the torsionbars and deflated the tires to 2.0bar (29psi).

IMG-20200827-192657.jpg


IMG-20200827-193405.jpg


IMG-20200827-193415.jpg


IMG-20200827-200027.jpg
 
Turned out one of the front shocks was bad so i replaced them both. But i couldn't torque them down all the way because the thread was too short. We (a local mechanic and i) verified the MPN which was correct so we didn't order the wrong product. This likely was a production error or something.

IMG-20200908-112557.jpg


Anyway. We made the thread longer and all was good.

Some other things i fixed:

Faulty speaker wire. Pinched between rear panel and body.

IMG-20200830-112131.jpg


Replaced some more vital parts:

Timing belt, idler pulley, idler gear pulley, tensioner and waterpump. There was some minor rust on the inside of the waterpump but nothing sandpaper couldn't solve. The cooling fluid was also in good condition so no worries there.

IMG-20201019-192301.jpg


IMG-20201019-192309.jpg


IMG-20201019-192316.jpg


IMG-20201019-192336.jpg


IMG-20201019-202521.jpg


Bolts from tensioner had a little surface rust.

IMG-20201019-192359.jpg


IMG-20201019-192404.jpg


Last 3 weeks the 4runnes had cold start problems. I had to let the engine turn 6 to 8 times before he started. With lots of white/grey smoke as a result. So i checked the glow plugs by removing them from the block to test them with a seperate 12v battery. All of them worked so the problem was elsewhere.

The 80amp fuse was also good but after testing we measured 0.0v on the supply rail. The problem was a melted isolation washer between the rail and engine block.

DSC00786.jpg


DSC00787.jpg


Starts within a second now. So before removing the air duct and 4 glowplugs, be sure to check voltage before and after the rail.
 

Members online

No members online now.

Forum statistics

Threads
278,312
Messages
3,554,089
Members
248,016
Latest member
Advally Service

Trending content

Back
Top