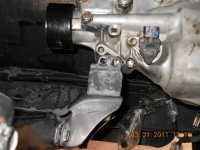
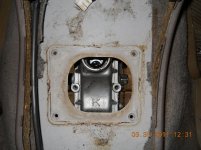
2000 4runner 4cyl. auto to manual transmision swap

Parts coming in...

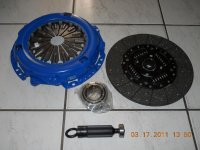
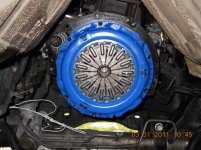
F1 Racing state 1 clutch kit from good old ebay for $106 shipped. I think it's pretty good and you can't beat that price.!
 

Attachments

  • DSCN0987.jpg
    DSCN0987.jpg
    126.8 KB · Views: 1,792
Flywheel bolts

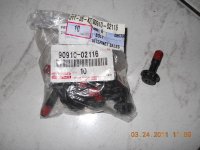
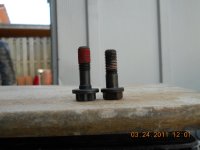
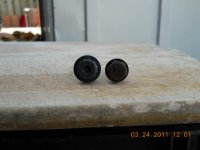
Here is the p/n for the flywheel bolts for a 3RZ engine: 90910-02116. The bolts for the flexplate are not the same as the flywheel bolts, so you're going to have to buy them. The flexplate bolts measure about 30mm from under the head to the end of the threads. The flywheel bolts measure about 33mm, they were $2.04 each from an online Toyota dealer which is the dealer I'm getting all my hardware and misc. items; they got better prices than if I were to buy them from the counter. This might be just too much info but for future planning, the head of the bolts for the flexplate are six point, the flywheel bolts are 12 point so, you're going to need a 12 point socket to torque the new flywheel bolts just in case you don't happen to have one.
 

Attachments

  • DSCN1009.jpg
    DSCN1009.jpg
    130.2 KB · Views: 1,800
  • DSCN1011.jpg
    DSCN1011.jpg
    113.7 KB · Views: 1,828
  • DSCN1012.jpg
    DSCN1012.jpg
    120 KB · Views: 1,698
Last edited:
Flywheel installed.

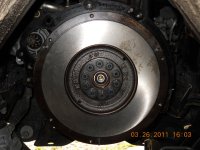
Flywheel installed. Bolts torqued to 19 ft.lbs on 1st pass and then 90º for a 3RZ engine. This is what the manual says, I didn't quite give it the 90º degrees. My calibrated arm said it was too much. I really don't trust that. Even though they're new bolts, I did not want to take a chance and strip the threads or mess up the crankshaft. Again, this torque specs I got from a Toyota Haynes manual and from an online source at ncttora.com, both torque specs matched. I still did not want to go the full 90º degrees.!!! I got most of the parts already just haven't had time to do anything. Notice the new pilot bearing in the middle of the flywheel, I used a socket that had the same outside diameter (well maybe a few mm's smaller) as the pilot bearing. I sprayed some WD-40 on the flywheel so it doesn't rust until I get to install the clutch and the tranny. No, I won't forget to wipe it clean with alcohol before I install the clutch.

 

Attachments

  • DSCN1016.jpg
    DSCN1016.jpg
    133.7 KB · Views: 1,662
Last edited:
2000 4runner 4 cylinder

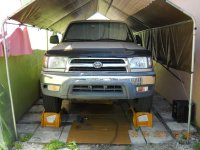
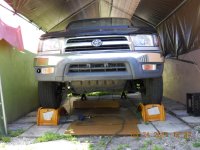
A couple of pictures of the vehicle.
 

Attachments

  • DSCN1014.jpg
    DSCN1014.jpg
    135 KB · Views: 1,789
  • DSCN1015.jpg
    DSCN1015.jpg
    134.8 KB · Views: 1,819
Though, if I do this, I don't want to use the W59 transmission. I'd rather use the R series from the 2TR 2.7 motor, a much stronger transmission. I don't know what would go into making that work, though.
 
Though, if I do this, I don't want to use the W59 transmission. I'd rather use the R series from the 2TR 2.7 motor, a much stronger transmission. I don't know what would go into making that work, though.

I went this route since the the 2000 4runner manual version uses the W59 tranny, so it's strong enough for my 4runner. I did not want to do any cutting of the driveshaft with the R series and God knows what else to make it fit. I wanted my swap to go as smooth as possible without having to make a lot of modifications. It's up to you... I try to keep things simple.
 
Last edited:
Wow this is an amazing project I am looking forward to seeing your truck up and running. Keep posting pictures and good luck buddy.
 
It's definetley cool, you should plastidip your front bumper valence. get some spare clutch pedal bushings, these clutch pedals eat right threw them.
 
I can only do so much at one time....

It's definetley cool, you should plastidip your front bumper valence. get some spare clutch pedal bushings, these clutch pedals eat right threw them.

Yeah... I'll probably get to the front bumper when I'm done with the swap. I hope to install the clutch and the tranny this week and regarding the clutch pedal, I already ordered some bushings for the clutch pedal, but not for the big spring that seats in the middle of the bracket. I'm working on a brass bushing just like a lot of people have done to fix this common problem.. I'll be posting pictures when I get there. stay tune....!
 
what's a thread with no pictures.???

Wow this is an amazing project I am looking forward to seeing your truck up and running. Keep posting pictures and good luck buddy.

I figured everybody loves pictures and detail explanation on how to do certain things so I'll do my best to give as much info on my swap. I'll skip the obvious like how to install a tranny....
 
Last edited:
new clutch installed...

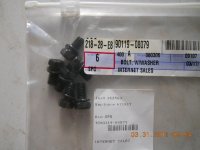
Here is a picture of the clutch cover bolts (6EA). The part number is: 90119-08079. They're relatively cheap, $0.47. The size is M8x1.25 and the length is about 14mm without the locking washer. Yes, it does take a locking washer. You can either buy them from the dealer or buy the kit from marlincrawler which are stronger. I'm giving you the specs on the bolt just in case you decide to get your own from a different source.
 

Attachments

  • DSCN1017.jpg
    DSCN1017.jpg
    121.5 KB · Views: 2,160
  • DSCN1025.jpg
    DSCN1025.jpg
    140.5 KB · Views: 2,170
Thats pretty cool stuff youre doing man. I would love to do this to mine. But I have the 6cyl, and apparently its significantly more difficult. By the way, what kind of gas mileage does your 4 get?
 
Thats pretty cool stuff youre doing man. I would love to do this to mine. But I have the 6cyl, and apparently its significantly more difficult. By the way, what kind of gas mileage does your 4 get?

well sense you swapped out your F100-PW-220/220E back to the original 5vze 3.4 v6, can i have your old F100-PW-220/220E out of the F-16... i think i can make it fit in my runner if i do a body lift :zoom::lookout::boink:
 
W59 transmission

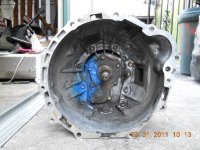
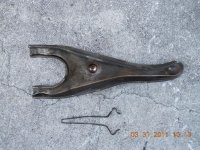
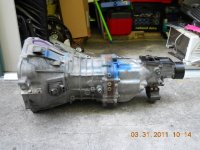
Here is a few pictures of the W59 tranny and the clutch release fork and spring that holds it in place. I purchased the tranny in a package. It included the tranny, the driveshaft, shifter, clutch release bearing fork, shifter boot and the shifter knob which is all beat up and I'm not going to use. Everything shipped for $775.00. I had the guy ship it to where my brother in law works since they have a forklift to lower the pallet, otherwise I would had paid about $120.00 more. You can see the shifter on the far left side of the 1st picture. The tranny mount came with the transmission which is the same as the automatic. I ended up using the automatic transmision mount since the other one, the center shaft was bent.
 

Attachments

  • DSCN1018.jpg
    DSCN1018.jpg
    136.8 KB · Views: 1,704
  • DSCN1019.jpg
    DSCN1019.jpg
    130.8 KB · Views: 1,833
  • DSCN1020.jpg
    DSCN1020.jpg
    135.8 KB · Views: 1,752
Last edited:
transmission mounting hardware....

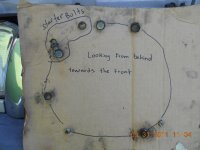
When I removed the auto tranny, I made a template out of cardboard and installed all the bolts on it so it would be easier to put them back in their original location. The only bolts that I did not put on the cardboard were the ones that hold the support bracket for the exhaust pipe that comes down after the exhaust manifold which are located about 4 o'clock position. All the bolts that that attach the auto tranny to the engine fit the manual tranny. The lower cover plate from the automatic transmission fits perfect, too.!
 

Attachments

  • DSCN1028.jpg
    DSCN1028.jpg
    126.5 KB · Views: 1,580
  • DSCN1031.jpg
    DSCN1031.jpg
    131.5 KB · Views: 3,635
Last edited:
# 3 crossmember bracket...

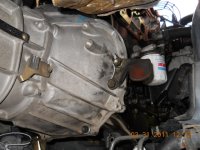
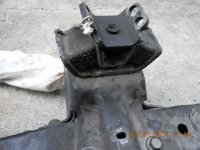
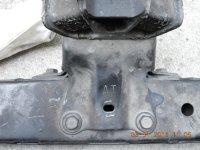
So, the manual transmission is installed. The center bracket where you bolt the transmission mount is different from the manual tranny. With the auto transmission center bracket the manual tranny sits too far forward and cannot align the holes to install the bolts for the tranny mount. The bracket from the auto tranny has the letters "AT" stamped on the bracket. I ordered the bracket from the same guy I bought the tranny, it should arrive tomorrow. The hardware is the same for the tranny mount and the bracket. The crossmember is the same according to the p/n's from Toyota. I will confirm this once I get the center bracket.
 

Attachments

  • DSCN1029.jpg
    DSCN1029.jpg
    129.9 KB · Views: 1,695
  • DSCN1030.jpg
    DSCN1030.jpg
    129.5 KB · Views: 1,631
  • DSCN1032.jpg
    DSCN1032.jpg
    128.4 KB · Views: 1,716
Another issue that needs to be adressed...

As you can see in the picture, I need to trim the center tunner so that I can install the shifter. It shouldn't be a problem... I also need to fabricate an adapter for the dust boot retainer if I want to use the original mounting holes... that should be fun.!!!
 

Attachments

  • DSCN1033.jpg
    DSCN1033.jpg
    137.4 KB · Views: 1,591

Members online

Forum statistics

Threads
278,316
Messages
3,554,120
Members
248,016
Latest member
Advally Service

Trending content

Back
Top