2000 4runner 4cyl. auto to manual transmision swap

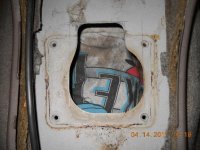
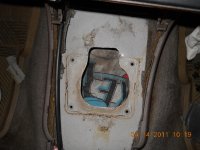
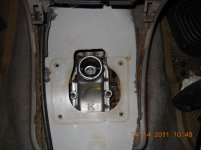
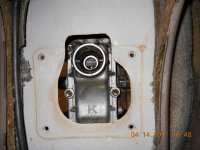
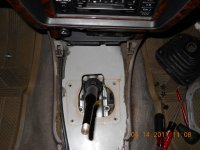
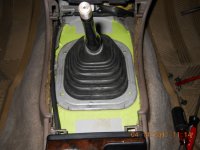
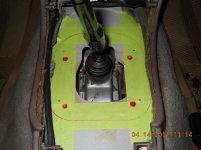
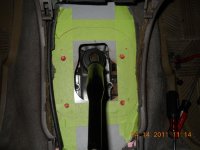
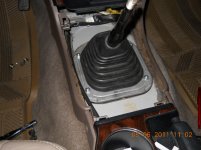
As you can see in the picture, I need to trim the center tunner so that I can install the shifter. It shouldn't be a problem... I also need to fabricate an adapter for the dust boot retainer if I want to use the original mounting holes... that should be fun.!!!

Fantastic!! I love how detailed this is. The more details, the better!

I think that I will gather all of the parts you recommend and then try to crank this out within a few days. Gotta find out what I need if I want to try this with a 2TR R series trans, but thank you!!
 
Thats pretty cool stuff youre doing man. I would love to do this to mine. But I have the 6cyl, and apparently its significantly more difficult. By the way, what kind of gas mileage does your 4 get?

It's more work but I don't think is more difficult. You would have to get an R150 transmission which is a 2wd tranny unless you want to go 4x4 and then you would get the R150f. My milaeage is pretty bad, around 18,19 to the gallon and that was with the automatic transmission. I think it's because of the wheels. I have 16" aluminum wheels, and the vin sticker says that it's suppose to have 15"s. There is quite some difference between both. The tire rotates slower and makes my speedo read innacurate. I bought smaller tires but I still need to compare it with my spare which is the right rim and size tire for my 4runner.
 
I would only do this in an 01-04 taco dc. I feel like theres only like 10 people or so who I have heard of attempting the swap

If I had about $15,000 dollars I would definetely do it. About $12,000 to buy the double cap and the rest to buy the parts for the conversion.
 
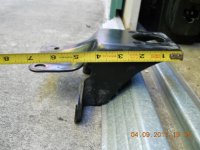
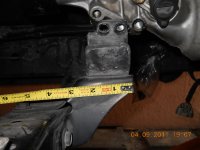
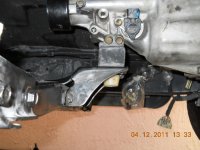
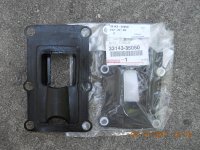
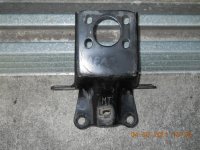
transmission mount bracket....

Ok, here we have a few pictures of the manual tranny mount bracket. As you can see, the bracket is longer than the auto. I believe the p/n is: 51431-35200 (for the manual) and Toyota calls it: "Bracket, engine rear mounting" Double check this p/n with your dealer, like I mentioned before, I ordered if from the junk yard I bought the tranny. The guy charged me $40.00 bucks shipped to my house. The crossmember is the same for the manual, so you can reuse your crossmember. Keep in mind that this is for a 4x2 4 cylinder conversion. If you're doing a V6 you're going to do your own research. You can use all the mounting hardware from your auto.
 

Attachments

  • DSCN1034.jpg
    DSCN1034.jpg
    137.4 KB · Views: 1,620
  • DSCN1035.jpg
    DSCN1035.jpg
    127.6 KB · Views: 1,613
  • DSCN1039.jpg
    DSCN1039.jpg
    125.5 KB · Views: 1,870
  • DSCN1040.jpg
    DSCN1040.jpg
    126.5 KB · Views: 1,747
well sense you swapped out your F100-PW-220/220E back to the original 5vze 3.4 v6, can i have your old F100-PW-220/220E out of the F-16... i think i can make it fit in my runner if i do a body lift :zoom::lookout::boink:

No way man. Sorry. I really like the 23,000 ft/lbs torque for towing. I can tow a a small house.
 
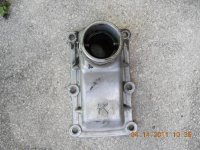
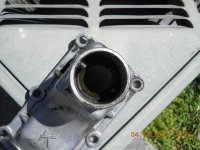
shifter tower...

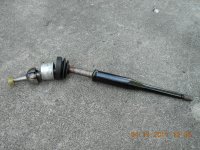
Ok... for the shifter tower, I replaced the seal that seats between the tranny and the shifter tower, toyota calls it: "plate, extension housing oil baffle" and the p/n is: 33143-35050. I paid $30.65. Becareful when you replace it, it has 6ea spacers that look like washers that may fall inside the tranny. These keep the installer from overtorquing the baffle. The shifter seat was in good condition so I left it alone. Here is the p/n if you need to buy it from your Toyota dealer: 33548-31010, Toyota calls it: "seat sub-assy shift lever" and the price is: $9.50 from where I purchase my parts. For this price you might be better off buying it from marlincrawler.com since they make one that last the life of the vehicle and maybe more... Price from marlin: $10.00
 

Attachments

  • DSCN1064.jpg
    DSCN1064.jpg
    140.5 KB · Views: 2,147
  • DSCN1065.jpg
    DSCN1065.jpg
    138 KB · Views: 1,895
  • DSCN1066.jpg
    DSCN1066.jpg
    126 KB · Views: 1,801
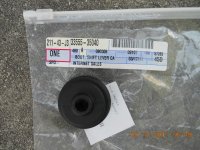
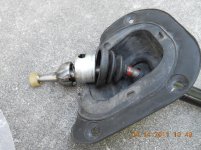
shifter boot...

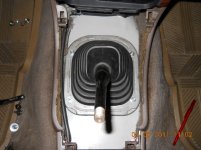
The shifter boot was kind of old and you could see cracks around the boot so I bought one from the dealer: P/N :33555-35040 $5.77 Toyota calls it: "boot, shift lever". The hole is kind of small but with a bit of vaseline it goes right in. Here is a couple of pictures... before and after.... The p/n for the white bushing at the end of the shifter is: 33548-31010, name: "bush, shift lever" price: $4.04 (remember... price may vary from your local dealer) I did not replace mine since it was good.
 

Attachments

  • DSCN1069.jpg
    DSCN1069.jpg
    138.5 KB · Views: 2,123
  • DSCN1070.jpg
    DSCN1070.jpg
    138.6 KB · Views: 2,149
  • DSCN1071.jpg
    DSCN1071.jpg
    131 KB · Views: 2,217
Looking great.

Details on these posts are beautiful to see. Bravo, sir.

When I see that dumb thread with every detail on earth on how to change out a clock, I wanna shoot someone. A tranny swap, that's worthy of details.

Many rep points for you!
 
thanks

Looking great.


Details on these posts are beautiful to see. Bravo, sir.

When I see that dumb thread with every detail on earth on how to change out a clock, I wanna shoot someone. A tranny swap, that's worthy of details.

Many rep points for you!

Thanks for those rep points.! I can understand a lot of people that do their conversion and not post details and pictures. It's time consuming. You have to stop as you're working to take a picture and then gather all the information that you want to post like p/n's, prices etc... I have one and half jobs so my time is very limited and this is the main reason why it's been taking me forever to finish but I enjoy posting all this info as much as doing the conversion.
 
Trimming the tunnel...

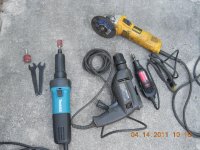
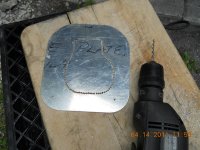
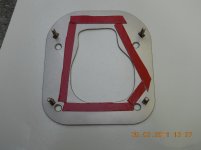
Here are some the tools I used to cut or trim the hole for the shifter. I marked with a pencil what I needed to cut. After trimming the hole I placed the shifter boot retainer and marked where I want the retainer to be. I'm making an adapter plate out of an 0.100" aluminum sheet. These will hold 4ea. studs to accomodate the new shifter boot retainer. The big 4 red dots are the original mounting holes for the auto shifter. I'm planning on using them to hold the adapter plate. The smaller dots align with the holes on the shifter boot retainer. Nuts and washers will be used to secure the retainer onto the studs.
 

Attachments

  • DSCN1060.jpg
    DSCN1060.jpg
    136.7 KB · Views: 1,626
  • DSCN1061.jpg
    DSCN1061.jpg
    137 KB · Views: 1,636
  • DSCN1063.jpg
    DSCN1063.jpg
    136.3 KB · Views: 1,657
  • DSCN1068.jpg
    DSCN1068.jpg
    133.6 KB · Views: 1,660
  • DSCN1067.jpg
    DSCN1067.jpg
    135.5 KB · Views: 1,698
  • DSCN1073.jpg
    DSCN1073.jpg
    133.1 KB · Views: 1,611
  • DSCN1075.jpg
    DSCN1075.jpg
    123.6 KB · Views: 1,662
  • DSCN1076.jpg
    DSCN1076.jpg
    133.1 KB · Views: 1,772
enough pictures.???

Only 8 pictures allowed at a time.. Here is some more.
 

Attachments

  • DSCN1077.jpg
    DSCN1077.jpg
    130 KB · Views: 1,618
  • DSCN1079.jpg
    DSCN1079.jpg
    135.7 KB · Views: 1,591
Awesome thread man, I gotta agree with CoB on this one about how detailed people make the most "trivial" things, and projects like yours are few and far between. I don't know if this had been covered already, but what was the reasoning behind swapping to a manual ?
 
Awesome thread man, I gotta agree with CoB on this one about how detailed people make the most "trivial" things, and projects like yours are few and far between. I don't know if this had been covered already, but what was the reasoning behind swapping to a manual ?

Yes, it has... Most of the swaps I've seen on line have been V6's and 4x4. I happen to have a 4 cylinder 2wd (my wife's actually) but the main reason for the swap is that I love manual, hate auto. I live in Florida so, I don't need the 4x4. Factory 4runners are really hard to find around here and I already know what I have and what maintenance has been done on the vehicle so the swap is the way to go for me even though is not that cheap. I'll post the total price when I finish with it.
 
shifter boot adapter plate continue....

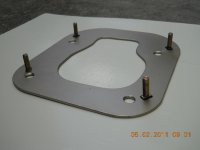
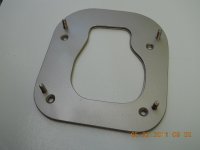
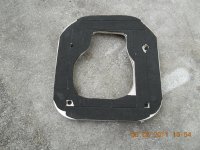
Finally back from having some time off and having some issues with my camera and loosing all the pictures that I had taken to post them here.:crybaby: Therefore, you're not going to see the whole process of doing some things on this project. I left off on the adapter plate for the shifter boot. I don't think a lot of you will get into this since it's a lot of work for something that is cosmetic, but I wanted to do this as good as I possibly could. So here is the rest of the info on the adapter plate project: There is two plates, a bottom plate and a top plate. The bottom plate will hold 4ea studs that I made out of M6-1.0 x 20mm bolts. You can get them from your local Autozone. I trimmed the bolt heads into rectangular shapes, I also trimmed the bottom plate holes so the bolts will fit into the bottom plate and would not allow the bolts to turn. I used a dremmel moto tool and a hand file to trim the holes for the studs. Yes, it did take me a while to do this.!!!
 

Attachments

  • 4runnerpictures 010.jpg
    4runnerpictures 010.jpg
    124.4 KB · Views: 1,732
Last edited:
shifter boot adapter plate continue....

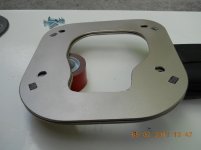
The top plate has the same holes as the bottom plate and it will sit on top of the bottom plate. Its job is to keep the studs from pulling thru the plate. I used 3M double side tape to keep both plates together, this will keep dust & water from getting in between both plates.
 

Attachments

  • 4runnerpictures 012.jpg
    4runnerpictures 012.jpg
    143 KB · Views: 1,593
  • 4runnerpictures 014.jpg
    4runnerpictures 014.jpg
    126.6 KB · Views: 1,587
  • 4runnerpictures 015.jpg
    4runnerpictures 015.jpg
    123.3 KB · Views: 1,607
shifter boot adapter plate continue....

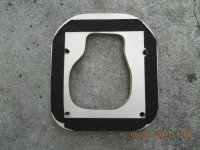
I put foam tape at the bottom side of the bottom plate to keep dirt out of the cab, you can get this at your local home depot.
 

Attachments

  • 4runnerpictures 016.jpg
    4runnerpictures 016.jpg
    137.4 KB · Views: 1,583
  • 4runnerpictures 017.jpg
    4runnerpictures 017.jpg
    134.7 KB · Views: 1,589
Awesome stuff man. Its gonna be cool to see the finished product. You must have experience with sheet metal huh? Based on that chain drilling
 
shifter boot adapter plate continue....

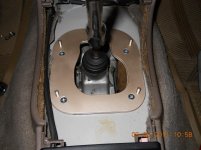
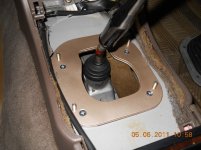
Here is the shifter adapter plate installed on the vehicle. I used 4ea countersunk M6-1.0 x 20mm screws from my local home depot. I found these in the hardware section. You have to countersink the holes on the top plate so the countersink screws will sit flush when you tighten the screws. I used a countersink bit from a friend that works in aviation. You may find the washers and nuts for the shifter retainer at your local autozone. The shifter, the shifter boot and retainer was part of the package deal when I bought the transmission.
 

Attachments

  • 4runnerpictures 018.jpg
    4runnerpictures 018.jpg
    135.1 KB · Views: 2,503
  • 4runnerpictures 020.jpg
    4runnerpictures 020.jpg
    135.2 KB · Views: 1,844
  • 4runnerpictures 021.jpg
    4runnerpictures 021.jpg
    130.5 KB · Views: 1,658
  • 4runnerpictures 022.jpg
    4runnerpictures 022.jpg
    130.1 KB · Views: 1,790
shifter boot adapter plate continue....

I know... the paint does not match, but that was the closest thing I could find. I used some primer first.!
 

Members online

No members online now.

Forum statistics

Threads
278,316
Messages
3,554,120
Members
248,016
Latest member
Advally Service

Trending content

Back
Top