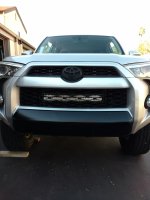
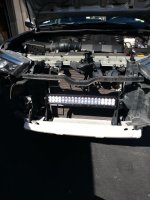
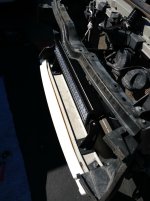
2014-2016 behind grill light bar mounts.

how did you do yours? did you tap the bar and screw into that? or use a nut?

Ya, I drilled and tapped the bumper support thingy. If you didn't want to tap it you could take off the front bumper completely, remove the foam from inside the aluminum bumper support and put a nut in there. Seems like a lot of work though.

Honestly, it was my first time tapping into anything and it was easier than I expected. Just try to keep your tap as straight as possible while trying to start it. After its started, its easy. Just turn it back half a turn for every turn you do and it works out well.
 
Ya, I drilled and tapped the bumper support thingy. If you didn't want to tap it you could take off the front bumper completely, remove the foam from inside the aluminum bumper support and put a nut in there. Seems like a lot of work though.

Honestly, it was my first time tapping into anything and it was easier than I expected. Just try to keep your tap as straight as possible while trying to start it. After its started, its easy. Just turn it back half a turn for every turn you do and it works out well.

Ah.. didn't know there was foam in there.. makes sense though... If I ever need to redo mine, maybe I'll tap it...
 
[MENTION=102465]meanbaby[/MENTION] Mounts arrived today. They will no be installed till next week. I am around if you want to meet and see if they work for you.

doh' been so busy past few weeks, after this weekend i have some free time, what day is good for you?

-pete
 
I screwed up and drilled 1/4 hole into bumper thinking I could bolt threw the bumper. This does not appear to be the case. Bumper is a square pice, thought there was an opening from a prior post who bolted threw, i don't know of an easy way to get a bolt inside. Damn. Any suggestions?
 
I screwed up and drilled 1/4 hole into bumper thinking I could bolt threw the bumper. This does not appear to be the case. Bumper is a square pice, thought there was an opening from a prior post who bolted threw, i don't know of an easy way to get a bolt inside. Damn. Any suggestions?

one thing you could do is go the next size up in screw size:

A (5/16-18) tap takes a (17/64) drill bit

I haven't checked the clearances on the actual bracket but im sure it could fit. But im also not sure of the thickness of the crossmember. You want to make sure you have adequate thread engagement. It case it works, you just have to drill the 1/4" hole you made 1/64" bigger and drill a bigger thru hole in the bracket. Im not sure what else you could do unless you have a really long 1/4" bolt.
 
I screwed up and drilled 1/4 hole into bumper thinking I could bolt threw the bumper. This does not appear to be the case. Bumper is a square pice, thought there was an opening from a prior post who bolted threw, i don't know of an easy way to get a bolt inside. Damn. Any suggestions?

one thing you could do is go the next size up in screw size:

A (5/16-18) tap takes a (17/64) drill bit

I haven't checked the clearances on the actual bracket but im sure it could fit. But im also not sure of the thickness of the crossmember. You want to make sure you have adequate thread engagement. It case it works, you just have to drill the 1/4" hole you made 1/64" bigger and drill a bigger thru hole in the bracket. Im not sure what else you could do unless you have a really long 1/4" bolt.


Some on this sight have drilled all the way thru the bumper and used long bolts from homersdespot and places of like kind...
You may need an aircraft bit (longer) to go straight thru keeping your angle correct thru the bumper. It's no big deal, just run to the store and grab what you need if you can't tap the bumper.
OH, suggestion....use fine threads if you tap the bumper. (more thread engagement)
 
I screwed up and drilled 1/4 hole into bumper thinking I could bolt threw the bumper. This does not appear to be the case. Bumper is a square pice, thought there was an opening from a prior post who bolted threw, i don't know of an easy way to get a bolt inside. Damn. Any suggestions?

Just step up to 5/16 tap, no big deal really.

Also, I would not use fine threads on something like this. You have a higher chance of pulling the threads out by accidental over tightening.

That's my opinion.
 
I just had an idea.... was actually researching rivnuts for another truck install, and just thought about that for this install... a rivnut would be secure, and give you a bunch of treads for strength....
 
I just had an idea.... was actually researching rivnuts for another truck install, and just thought about that for this install... a rivnut would be secure, and give you a bunch of treads for strength....

Thats a great idea!! Idk why I didn't think of using a rivnut.

If I did it again, I'd most likely use a rivnut.
 
Installed my light bar today. Need to wire it up tomorrow. Installation went pretty smooth, but there were a few bumps along the road. All in all im pretty happy with the result. Thanks Brad for making these mounts available.

What i used:

(4x) 1/4 x 28 fine thread grade 8 bolts
(4x) toothed washers
Blue Loctite
Light bar was a $60 one from amazon

Some of the things I did to the mounts:

-I drilled the thru holes to 5/16" to give me some slop when bolting down the mounts.
-Painted the mounts matte black

Overall the install went pretty well. The grill wasnt to hard to remove, but was a little harder to re-install. What I did that seemed to work well was to:

-take out the front grill
-mock up the light with the brackets marking the drill spots
-drill tap the holes
-mount the whole light bar assembly
-tighten and loctite the mounting bolts to their final torque on the cross member
-Then.....remove the light bar only leaving the brackets in place
-reinstall the lower grill
-install the light bar back to the brackets through the top of the engine bay.

Taking out the light bar before putting the grill back seemed to make it easier.

Im a little concerned that the cross member looked to be only 1/8" thick at the mounting surface. I didnt tighten the bolts with too much torque to the cross member for this reason. It does seem pretty sturdy though as it is now.

And finally pics:
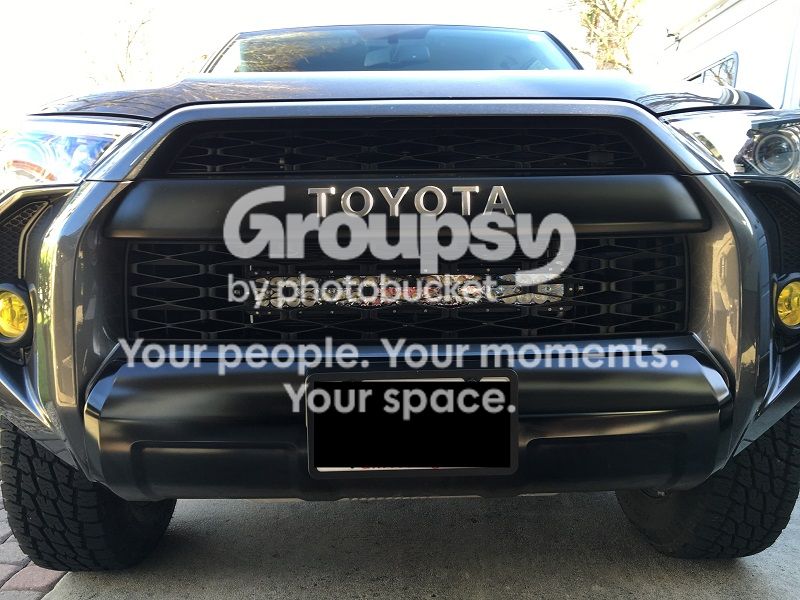

Hooked the lights up to 12v power supply to make sure all the LEDs worked:
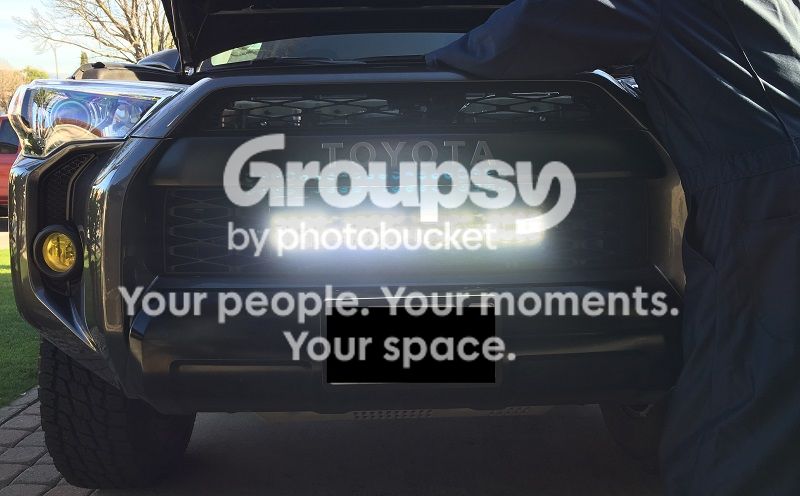
 
Installed my light bar today. Need to wire it up tomorrow. Installation went pretty smooth, but there were a few bumps along the road. All in all im pretty happy with the result. Thanks Brad for making these mounts available.

What i used:

(4x) 1/4 x 28 fine thread grade 8 bolts
(4x) toothed washers
Blue Loctite
Light bar was a $60 one from amazon

Some of the things I did to the mounts:

-I drilled the thru holes to 5/16" to give me some slop when bolting down the mounts.
-Painted the mounts matte black

Overall the install went pretty well. The grill wasnt to hard to remove, but was a little harder to re-install. What I did that seemed to work well was to:

-take out the front grill
-mock up the light with the brackets marking the drill spots
-drill tap the holes
-mount the whole light bar assembly
-tighten and loctite the mounting bolts to their final torque on the cross member
-Then.....remove the light bar only leaving the brackets in place
-reinstall the lower grill
-install the light bar back to the brackets through the top of the engine bay.

Taking out the light bar before putting the grill back seemed to make it easier.

Im a little concerned that the cross member looked to be only 1/8" thick at the mounting surface. I didnt tighten the bolts with too much torque to the cross member for this reason. It does seem pretty sturdy though as it is now.

And finally pics:


Hooked the lights up to 12v power supply to make sure all the LEDs worked:


This is a great write up. I have been reading all of these post in preparation for my installation. I have settled on the Rough Country 20" LED bar. $215 with free shipping on Amazon.

I was afraid that the aluminum bar was thin. When I changed my oil last weekend I stared at the bar for a few minutes while I was under the truck, thinking of mounting alternatives. I thought about drilling through.

If the aluminum bar is only 1/8" thick, that is not good. You need 1.5X bolt diameter for thread engagement.

I am even considering roughing up the contact surfaces and using JB Weld as a glue. That stuff is very durable and strong. We use Belzona, an industrial JBWeld, on machinery at work with great success. JB in combination with the bolts. Also I would use fine threads, more threads per engagement thickness.

I am wiring my lights directly into the high beams. No switch in the dash, will use the HBs to trigger the relay. I don't want to dig into the dash.
 
Scroll up and see the idea of using a rivnut....

Brad, maybe you should edit the first post and place that idea there.... when I have time, I'm gonna redo mine and go that route..
 
Scroll up and see the idea of using a rivnut....

Brad, maybe you should edit the first post and place that idea there.... when I have time, I'm gonna redo mine and go that route..

What exactly is the bar for? Are there any components, wires or critical components inside of it?

I looked at the Rivinuts, I have seen them before. I also thought about drilling size on hole on top, hole on the bottom large enough to get a socket in and using a standard bolt and nut set up.

Not sure if all of these holes will weaken this member, depending on what function it serves.

77
 
What exactly is the bar for? Are there any components, wires or critical components inside of it?

I looked at the Rivinuts, I have seen them before. I also thought about drilling size on hole on top, hole on the bottom large enough to get a socket in and using a standard bolt and nut set up.

Not sure if all of these holes will weaken this member, depending on what function it serves.

77

Don't quote me, but the function is to absorb some impact upon impact. As someone said earlier, there is foam inside the hollowed out bar. Similar to the foam filled barriers, or even the water filled barriers on the highways, it is intended to absorb energy from impact and lessen the energy transfered to the rest of the cab.
 
Got my mounts the other day, hoping our Canadian dollar improves so I can get the light bar without taking out a second mortgage.
 
Got my $40 light in. Just waiting for night to test it. Here's some picks.
 

Attachments

  • IMG_20160207_150530.jpg
    IMG_20160207_150530.jpg
    113.1 KB · Views: 2,864
  • IMG_20160207_125302.jpg
    IMG_20160207_125302.jpg
    131.1 KB · Views: 1,376
  • IMG_20160207_125308.jpg
    IMG_20160207_125308.jpg
    127.5 KB · Views: 1,402

Members online

Forum statistics

Threads
278,316
Messages
3,554,107
Members
248,016
Latest member
Advally Service

Trending content

Back
Top