2015 Dual Battery Installation

Any chance of making me a set for stock battery tray, and shockeorks tray and I'll pay you for your time?

Sorry but no. Unfortunately life doesn't afford me that extra time right now.

You should be able to get similar standoffs at a good hardware store. I have seen something very similar at my local Ace Hardware.
 
My Dual Battery set up

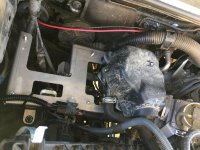
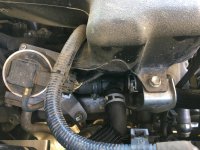
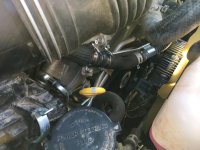
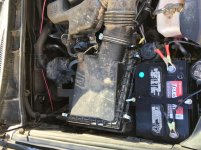
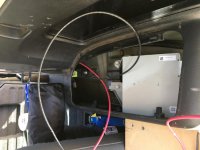
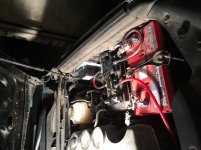
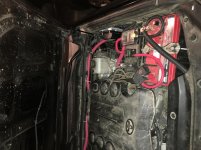
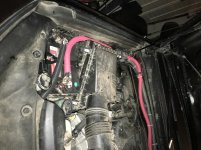
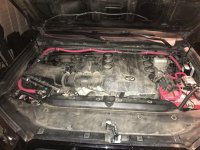
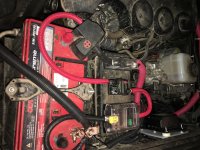
So I thought I would post my dual battery installation. Please any comments, suggestions or WTF did you do comments are welcome, I was in a bit of a rush and appreciate any advice to make sure my set up is solid. I spent quite a bit of time researching and going back and forth on what to do but ultimately I went with a hybrid of the original poster set up with an Antman system twist. First off many many thanks to everyone for posting their pictures and information it was absolutely invaluable to getting this done. I really liked Antman's set up and originally started with the plan of doing that, and bought the same very large dual purpose battery, was a bit tough to fit in the factory spot and had to move some wires/connectors but got it done. Really for most of what I would do that would probably be enough, with some thing like 210 Amp hours or so and really only running a fridge, some lights and a radio I doubt I would ever have trouble starting if a I paid attention, but after a few months I began working on fabing up a second battery tray behind the air box, passenger side. But I suck and metal work and found out about the Shrockworks battery tray kit that moves the smog pump to the back and I liked that much more. A bit pricey but it is pretty damn solid and it provides a great mounting place for an ARB compressor should I go that way later and I like having the second battery up front. I didn't have to move any of the wire underneath like the original poster mentioned, I think they have fixed that issue in newer kits, it was all pretty straight forward but a bit scary tearing up all of the OEM Toyota plastic, but the battery tray was no where big enough to hold my extra large battery so the stock Toyota battery went back in there. So now I have basically an Antman set up, with the large dual purpose battery with tons of Amp hours wired up to start my car and run the Toyota accessories and also added a fuse block for all of the aftermarket accessories. The second battery, the original stock Toyota battery on the passenger side has nothing wired to it at all and is only there as a back up to start the car should the main battery fail or get discharged. For all of the wiring, fuses, fuse block etc. I basically used all of the same equipment as the original poster, just that like Antman I have everything wired to main battery and then a back battery in reserve. Unlike Antman I went a bit more expensive and used some of the nice Blue Sea equipment and heavy-duty wire and fuses and such like the original poster. I basically did this simultaneous with running a full time power wire to the cargo area to install a brand new National Luna fridge/Freezer. Again many thanks to Antman and others to show how to run the wires to the cargo area and access the power plug, I was able to contort my arm and actually removed the top panel without breaking any of the plastic. So far everything is working great, when I start the car after a delay the switch inside shows that it automatically connects the batteries and after shutting off, after a short delay it isolates the battery, and can be switched manually if needed. Plus the National Luna fridge has a battery monitor (though not terribly accurate as a measure of the actual voltage of the main battery) but it has an alarm as well so that will act as an alarm to let me know that my main battery is getting low, but after a two night camping trip this week, with the freezer keeping popsicles cold I never came close to draining the main battery. So far it is working perfectly, and I even tried to make it look nice an pretty like you guys instal (usually my electrical work look like hell).
 

Attachments

  • IMG_7402.jpg
    IMG_7402.jpg
    130.9 KB · Views: 1,679
  • IMG_7406.jpg
    IMG_7406.jpg
    137 KB · Views: 1,822
  • IMG_7407.jpg
    IMG_7407.jpg
    135.9 KB · Views: 1,691
  • IMG_7408.jpg
    IMG_7408.jpg
    125.2 KB · Views: 1,702
  • IMG_7410.jpg
    IMG_7410.jpg
    137.4 KB · Views: 1,794
And the battery set up

I attached a bunch of stuff to the top of the OEM fuse box, seems to have plenty of clearance from the fuses underneath but not sure if this is kosher.
 

Attachments

  • IMG_7411.jpg
    IMG_7411.jpg
    138.2 KB · Views: 1,691
  • IMG_7412.jpg
    IMG_7412.jpg
    139.4 KB · Views: 1,672
  • IMG_7413.jpg
    IMG_7413.jpg
    113.6 KB · Views: 1,693
  • IMG_7414.jpg
    IMG_7414.jpg
    128.4 KB · Views: 1,687
  • IMG_7417.jpg
    IMG_7417.jpg
    136.5 KB · Views: 1,706
All buttoned up,

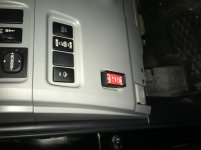
What did you guys do to get the switch to fit in the lower location, it didn't fit so I took a file and chisel to the Toyota plastic but it's still not a great fit so I used a hot glue gun, good enough for now but not 100% pleased with it yet, also have to mount the passenger side 300AMP fuse, I didn't have the right size nut to go in the factory hole... anyone know what size bolt goes in there?
 

Attachments

  • IMG_7577.jpg
    IMG_7577.jpg
    136.9 KB · Views: 1,735
  • IMG_7578.jpg
    IMG_7578.jpg
    136.8 KB · Views: 1,737
  • IMG_7579.jpg
    IMG_7579.jpg
    137.4 KB · Views: 1,734
  • IMG_7580.jpg
    IMG_7580.jpg
    140.4 KB · Views: 1,764
  • IMG_7581.jpg
    IMG_7581.jpg
    126.3 KB · Views: 1,736
Finished! Here is what it looks like all buttoned up.
1mKq3Hf.jpg


I got the LED readout done too. Top display is Start battery and bottom display is the AUX battery. Getting a label made up for the overhead.... It looks better in person that in that picture, the flash makes it look a little messy.

Tied into the stock ground (Pin1) and aux (Pin8) to power up the meters, then tied into the stock battery (Pin 9) for the Start Battery and then ran a wire up to the Aux battery for its voltage reference.

TWN0hNK.jpg

jekujoa.jpg

era5zQ1.jpg

rw4QcCh.jpg


Hope this helps someone along the way....
Cheers

very nice writeup! I have one question, how did you remove the upper center column? is it held up by screws?
 
Did your Odyssey PC1500 fit within the Shrockworks tray?

Hey Keith, did your Aux. Odyssey PC1500 fit inside the Shrockworks battery tray? It measures 10.85"L x 6.76"W x 7.82"H but the Shrockworks published max battery size dimensions for the tray are: 10.1”L x 6.8”W x 6.9”H.

I'd love to pack a PC1500 in if I can to save on height. I was planning on installing the Odyssey 25-PC1400 since its dimensions are a safe 9.47" L x 6.85" W x 8.75" H. This one packs it in vertically while the PC1500 takes it added length.
 
I haven't seen many dual battery installations on 5th Generation 4runners with the air pump so I will go ahead and start a build thread on this. It will take me several days to complete the build as I am working on things as time permits and parts arrive.

Parts:
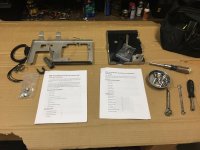
  1. Shrockworks dual battery tray and air pump relocation kit with optional washer bottle mounting bracket to utilize stock washer bottle.
  2. Odyssey PC1500 Battery
  3. Blue Sea 7620 ML-ACR with interior Contura Switch
  4. Blue Sea ANL Fuse Holders (300A variant with 300A ANL Fuses)
  5. Blue Sea ST Fuse Block with 12 circuits
  6. Phoenix Gold 100A circuit breaker for feed to Blue Sea ST Fuse Block
  7. 2x Drok mini .28" Digital Voltmeters custom fabricated into spare switch slot in TEP overhead console to monitor voltage on both batteries.
  8. 1/0 Welding Cable for Battery>ML-ACR>Battery connections. 4awg for Blue Sea ST fuse block feed. Everything is done with copper connectors and covered in Techflex protective sheathing.
From a circuit and build of materials perspective I copied a local Land Cruiser build from IH8MUD, linked Here >Hhttp://forum.ih8mud.com/threads/dual-battery-install-complete.807973/

My design considerations and usage were:
  1. Support a fridge
  2. Support having all non-factory accessory loads connection to an auxiliary battery and not the starting battery.
  3. In the event that I install the hidden winch I have the ability to connect the two batteries for increased current capabilities, thus the requirement for large 1/0 wire.
  4. Ability to jump start myself off of the AUX battery.
  5. The design needs to be modular mounted in a way that I am not drilling holes into the car and am using space that cannot be used for much else, leaving the larger volume free locations available for other items to be added later.
  6. Minimize blocking access to factory equipment

I used the stock battery studs and made up some nylon spacers and T6 aluminum stand-offs. The spacers are just that. The stand-offs thread onto the factory battery studs and then provide a tapped hole for the plate. The spacers were an afterthought after I mis-measured the required length (Ooops, damn super cold bear on a 97 degree day). The extra wires you see are for my LED light bar and will be relocated to the AUX battery fuse block.
tuABYAh.jpg


I used some 1/2" ABS Plastic from our local TAP Plastics to fabricate the mounting plate to attach the main fuse off of the starting battery and the Blue Sea ML-ACR.
kIJfd9A.jpg

I'm currently installing the blue sea 7622 in my runner. I'm wondering if I need to fuse the starter battery to the ACR. Like yours, it's about 6" away from my starter battery- my question for you is: Why fuse the starter battery ->acr when the cable length is so short?
 
Hey Keith, did your Aux. Odyssey PC1500 fit inside the Shrockworks battery tray? It measures 10.85"L x 6.76"W x 7.82"H but the Shrockworks published max battery size dimensions for the tray are: 10.1”L x 6.8”W x 6.9”H.


I'd love to pack a PC1500 in if I can to save on height. I was planning on installing the Odyssey 25-PC1400 since its dimensions are a safe 9.47" L x 6.85" W x 8.75" H. This one packs it in vertically while the PC1500 takes it added length.


Did you ever confirm this? Just starting my dual battery plan. Thanks
 
Keith never replied but after seeing my PC1400 installed, I'm pretty confident the 1500 won't fit at all or won't fit well (i.e.: tie down hooks won't have enough clearance from the hole to the battery side wall.

Did you ever confirm this? Just starting my dual battery plan. Thanks
 
Keith never replied but after seeing my PC1400 installed, I'm pretty confident the 1500 won't fit at all or won't fit well (i.e.: tie down hooks won't have enough clearance from the hole to the battery side wall.

Good to know, thanks. it sounds like replacing with longer J hooks may make it work huh?
 
Odyssey PC1400 vs. PC1500

The length of the tie-down hooks is irrelevant. You can get longer tie-downs and cut them down if needed to accommodate a taller battery (as I did). It's the actual hook end of the tie-down that goes through the hole on the bottom of the tray. As the hook pokes through the hole, the end of that hook requires clearance between the battery tray wall and the battery side. I believe the PC1500 battery will not afford the needed clearance with the Shrockworks tray.

Good to know, thanks. it sounds like replacing with longer J hooks may make it work huh?
 
Does the shockwork tray allow you to use the stock tie down spot? For my tray I used the stop tie down spot because i didn't like how tight the battery rested against the tie down on the tray.

I'm using a different tray and a 31m battery though so i'm not sure if it is still applicable
 
Just received my Off-Grid Engineering battery setup. Will post install pics over the weekend. Seriously, worth EVERY penny and the fact that Matt can terminate the cables for your specific needs is a godsend. Quality parts and quality craftsmanship. Seriously. Check them out, and before you go on about the price, take into account how much the individual, quality pieces would cost and then tack on what you believe your own time is worth for the labor estimate. You'll see it's a damn good deal.

Sent from my Nexus 6P using Tapatalk
 
Thanks to this thread and Kieth for starting it, I got my dual battery setup going.

Running the fridge, rear aux 12v and winch off the optima.

Beautiful set up. I know this is old, but a few questions for you.

Is the manual switch on the radiator a winch cut off? Do you have it fused?

Where is the ANL fuse coming from the yellow top mounted?

Finally, I've read about people having issues with the 5th gens not producing a high enough voltage for some batteries such as the odyssey to properly charge to 100%. Have you experienced any issues? Do you supplement with solar or a AC/DC charger?

Thanks!
 
Last edited:
I haven't had any issues. All my fuses are mounted to the kit at their respected locations. I followed/still following his other projects "snow leopard" on the fj boards.

FJ Dual Battery Cable Set

This also has a PDF of the cable lengths. His build thread on the board has some good pics and I followed the same. The cable kit on the website is what I used.
 
I haven't had any issues. All my fuses are mounted to the kit at their respected locations. I followed/still following his other projects "snow leopard" on the fj boards.

FJ Dual Battery Cable Set

This also has a PDF of the cable lengths. His build thread on the board has some good pics and I followed the same. The cable kit on the website is what I used.


O'man this is fantastic! Will save me a ton of time and energy. Unfortunately Snow Leopard's thread is of limited value due to photobucket's shenanigans. However, I have all the same shrockworks brackets you have, I'll pick up the cable kit too. Looks like it even has larger cables for my winch, that's nice.

I'm still not clear where your accessory batterie's fuse is mounted. I can't see it in any photos. I'd love to know where you put it.

Thanks!
 
Oh. I was reading it wrong. The acc fuse is just a homemade bracket mounted to the air pump relocation bracket near the passenger firewall.

Good luck!
 
Working hard to follow in you guy's footsteps.

All my parts are ordered and just installed the Shrockworks dual battery tray, pump relocation bracket, winch switch and driver side ACR/Fuse battery tray. Very nice parts, everything was explained well in the instructions. I took my time and it took about 4 hours going really slow.

a4OkWc8.jpg


koCs6dv.jpg


YUb6j4Z.jpg
 

Members online

No members online now.

Forum statistics

Threads
278,310
Messages
3,554,080
Members
248,016
Latest member
Advally Service

Trending content

Back
Top