I wanted to put a detailed write up regarding the Fender Liner Mod because in all my searches for some detail before doing this mod, to see exactly what I was getting myself into, I really didn’t find much. And what I did find wasn’t really specific to the 2014 or newer body. I am not at all familiar with the body of the pre-2014, so perhaps everything is the same. However, in the event that there are some differences, this should help.
I want to say that I’ve learned a lot on this forum and have greatly appreciated the collective knowledge of all the members.
To be honest, I’m not sure I would have gone with tire sizes this big had I known I was going to have to undertake this mod. I say this, not because I’m not willing to go through the modification process, but because I value my time and didn’t really want to spend it on something like this.
I guess I see this as a form of penance for me, though, since I obviously didn’t do as thorough of research as I should have, prior to putting 285 70 17 KO2’s on my 2016 4Runner Trail.
After talking to a few people, reading some posts, I felt pretty confident that 285’s would fit without any issue. But after looking back and all the additional research I have done, it seems that my desire to make them work forced a certain level of “selective” consideration in what I read. For my vehicle, at least, 285’s are clearly too large to run without some minor modifications to the truck.
I’ll abbreviate the entire story so you have context. I’ve found that context helps me greatly when I’m doing my own research, so hopefully it’ll help someone else.
I ordered 285 70 17 KO2’s after my research and an insistence from my “tire guy” that they would fit “all day long”.
I had them shipped to me and installed by my local shop that does the work on all my vehicles.
3 hours after I dropped off the truck, I got this text: "Call me asap, tires rub like crazy."
Dang.
I go up there and sure enough, they rub the back of the front fender liner (or the mud flap, rather) and the front of the fenders, especially catching on the bottom of the front bumper cover.
NOTE on the photos: all photos are taken with the wheels turned at full lock.
One more note: in case it's relevant to you, I also had Spidertrax 1.25" spacers installed with the tires.
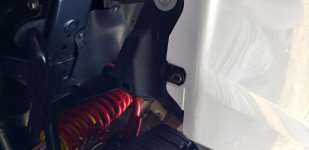
In front of tire.
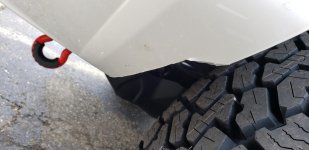
At the rear of tire.
So at this point, I had two options: mod the liner or put smaller tires on. The latter option was going to take too long to get the new tires in, the former was going to take too long to get it drive ready - time to pick my poison.
As I was considering my options, I had a thought: if I could raise the front end up (read: leveling kit), then maybe this would solve my problem. I called ToyTecLifts to ask if they have a leveling kit to use with my OME suspension (884 front springs) that would raise the front up a little. I assumed the used kit I bought from another member here did not have any sort of leveling kit with it since it was not adjustable and only came with coils and shocks.
And this is where I learned a little more about some of this stuff: the rep at ToyTec asked me if when I bought the kit used, it had the 1” aluminum piece to be installed at the top of the coil, to which I said no. He told me the standard leveling kit for these isn’t intended to be used with modified suspension, but I should have that aforementioned aluminum piece, and it should help the situation, leveling the truck.
He shipped it to me overnight (at my expense) and I had it installed.
So, that brings us to the fender liner mod.
That piece, indeed, helped a lot, as you can see we barely rub now.
In front of tire.
At the rear of tire.
The first part of the fender liner mod was to move the front part of the fender forward. I unscrewed the two screws on the bottom that were connected to the fender liner and was easily able to push the fender liner forward, as other posters had mentioned, 1-1.5 inches.
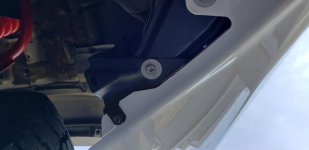
The tricky part was putting the back-most screw back in. I found what made it easier was drilling a pilot hole the same size as the original, into the fender liner plastic. Once I did that, getting the screw to line up with the seat it screws into was much easier.
As you can see in this shot, I have the fender liner pushed forward the advertised 1-1.5”.
You can see in this shot, the screw wasn’t quite lining up. This was because the bottom of the seat had a nipple that was intended to fit into the original hole to keep it in place. When I made the pilot hole larger, it lined up perfectly.
For the front screw, I drilled a much smaller pilot hole.
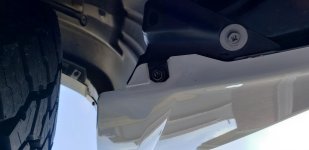
Now that the fender liner is moved forward, the next step was to trim the bottom inside corner of the bumper cover.
I taped my line that I wanted to cut, intentionally being conservative, knowing I can always trim more, but I can’t put any back!
It took a few passes with a fresh utility knife, but the cutting was fairly easy.
I wasn’t really happy with the clearance and decided to take some additional bumper off.
Once I got that pesky corner cut, I grabbed some 150 grit sand paper and sanded it all down nice and smooth. I smoothed out all the jagged edges, rounded off any corners and got it looking as close to a “factory finish” as I was able to.
As you can see in the before and after pictures, I earned about 3/4” of clearance through the mod on the front of the fender and bottom of the bumper cover. I can definitely take off more, and will have to watch it to see if I need to.
I’ve been driving it for a few days now and haven’t noticed any rubbing, but I haven’t really flexed the suspension at all, so we’ll see!
This is a shot of the finished product (on the front of the fender liner) on the driver’s side.
This is a shot of the finished product on the passenger side.
The next step (much quicker) was to make some adjustments to the mud flaps so the plastic didn’t protrude out as much.
As you can see in the above shot, I was riding pretty close back there. I grabbed a heat gun from Lowes, heated up the plastic, and used the handle of a screwdriver to push the plastic back. If they continue to give me issues, I’ll just remove them like other members have suggested. I did want to keep them if possible, so I was willing to try this first.
You can see in this shot, I cleared up some space back there and haven’t had any rubbing as of yet!
I’ve learned a lot on the forum, here, and my hope is that this post will be of use to other members trying to figure out how to do this mod, should they need to.