3wbdriver's 2014 TE build thread.

There is enough room to get the ball of an adult's foot on them, but they are so close to the door level already they aren't really practical as a step. My 5' 6" wife definitely preferred the Nfabs as pure steps. Check your PMs.

I figured the n-fabs would be a better step, and honestly I don't plan to do the kind of off roading where I would need the protection, I was just trying to put more purpose behind the money since the need for a easy step is temporary.
 
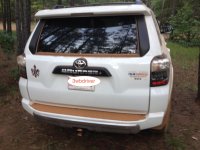
Got my "Name your ride" plate in. I sure wish they could do apostrophes. I can't find the thread that started this so I can post it there.......

 
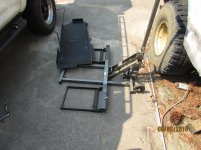
I had reason to use the tray today. It was much easier getting at my GoPro box which is stowed on the left front of the tray. I just slid it out and stood by the left taillight to get at the box. I have a cabin tent, cot, Kelty tarp in a bag, hanging and bagged clothes, and various storage boxes stowed on the folded down 2nd row seat right now It all stays put when I slide the tray out. And the tray has been rattle free for 1200 miles so far. The heaviest item you see on there is the tool box on the right front. I prefer to keep the heavier items forward on the tray to reduce strain on the forward tie down straps.


So I've been reading a few of these build threads, and I have seen a common theme amongst several of them, including yours. I see a lot of 5th gen 4Runner owners are either using a small to medium sized aftermarket bumper or are staying with the stock bumper.

Do you have any feedback on your particular bumper and why you chose it over the 'traditional' full-sized Shrockworks and ARB bumpers?

Also, what kind of skid plates are you running?

Awesome looking 4Runnner by the way!
 
Last edited:
So I've been reading a few of these build threads, and I have seen a common theme amongst several of them, including yours. I see a lot of 5th gen 4Runner owners are either using a small to medium sized aftermarket bumper or are staying with the stock bumper.

Do you have any feedback on your particular bumper and why you chose it over the 'traditional' full-sized Shrockworks and ARB bumpers?

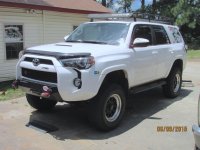
The nose is what sold me on the 2014 TE. I wanted to get a winch bumper but I didn't want to give up the look of the nose. I like the looks and functionality of the Shrockworks bumper, but I just didn't want to go that radical a change in appearance. Kevin at Southern Style Speed was willing to work from a description I made and a sketch another member made to create this bumper, which fit my desires to the letter. It has worked like a champ the 4 times I have had cause to use the winch so far.

Also, what kind of skid plates are you running?

Awesome looking 4Runnner by the way!

Thanks for the compliment. I am currently still running the factory skids. But I did pickup a full set of used BudBuilt skids on my recent trip. I haven't had a chance to install them yet, but the factory skids have worked fine so far for the few weekend play days I have run. The fuel tank one has taken a couple minor hits but is holding up fine. It's really a matter of carefully choosing your line over the obstacles.
 
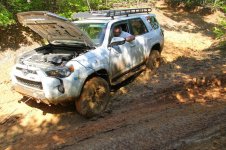
It's amazing what driving 1.5 miles of dirt road that rig traffic has ground down to 3" deep silt will do to coat a clean vehicle.

at least its not Carolina Red Clay. i have to got through that crap everyday haha:crybaby: sweet rig by the way. i got a trd pro and that hidden winch system you have is giving me some ideas:tongue:
 
at least its not Carolina Red Clay. i have to got through that crap everyday haha:crybaby:

True. I get that at Barnwell Mountain in Texas. :becky:
 

Attachments

  • IMG_2817.jpg
    IMG_2817.jpg
    127.6 KB · Views: 1,384
  • IMG_5461.jpg
    IMG_5461.jpg
    94.4 KB · Views: 1,395
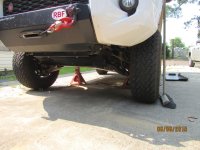
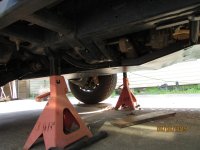
Almost exactly 1 month to the day after my trip I finally got around to installing the Budbuilt skid set [MENTION=102206]IAmTodd[/MENTION] so kindly sold me. The front 3 plates and crossmember were fairly straight forward. The front filler plate won't fit with the SSS bumper, but the gap is so small I'm not worried about it. Please note the "custom" stenciling on the jack stands. A left over from my roundy round racing days.....
 

Attachments

  • IMG_3857.jpg
    IMG_3857.jpg
    136.2 KB · Views: 1,390
  • IMG_3859.jpg
    IMG_3859.jpg
    130.3 KB · Views: 1,401
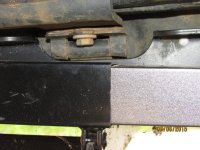
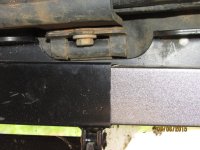
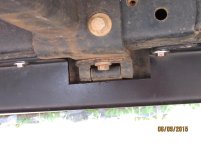
But when it came time to install the gas tank skid I ran into a problem. I did find a good use for the lawn mower jack we bought last year. But when I got it lifted and started on the bolts I found out it wouldn't clear the front gas tank strap bracket because of the previously installed Shrockworks sliders. I'm going to make some calls on Monday and see if I can find a business with a plasma cutter in my small town. If not, I'll have to get some cutting discs and do it the old fashioned way. I'm just going to deepen the notch another 3/4"
 

Attachments

  • IMG_3860.jpg
    IMG_3860.jpg
    137.5 KB · Views: 1,348
  • IMG_3862.jpg
    IMG_3862.jpg
    136 KB · Views: 1,372
Glad to see you got them mounted and and that they're going to get some use! i recall there was a spacer that was to be used if the Shrockworks sliders were installed. Since I never installed them I'm not sure how it fits together.
 
Glad to see you got them mounted and and that they're going to get some use! i recall there was a spacer that was to be used if the Shrockworks sliders were installed. Since I never installed them I'm not sure how it fits together.

That may explain the 2 flat brackets in the part box. I'll look into that also. There were also supposed to be 2 spacer plates where the allen bolts go in the cross member that I didn't get and Budbuilt didn't include with my order. So I need to talk to them again anyway. But thanks for chiming in. :cool:
 
Yup. The 2 flat brackets are spacers for the gas tank. But I think I'm still going to cut some. Even having those I think I'm still lacking 1/4" from getting it flush.
 
Got the gas tank skid in today. I had to trim another 1/2" or so out of the notch around the forward tank strap. Otherwise it was just time consuming as a one man job. The right trailing arm mount on the frame had some minor dings in it. I guess that will be next to armor.
 

Attachments

  • IMG_3862.jpg
    IMG_3862.jpg
    136 KB · Views: 1,537
  • IMG_3863.jpg
    IMG_3863.jpg
    129.4 KB · Views: 1,495
  • IMG_3864 copy.jpg
    IMG_3864 copy.jpg
    124.3 KB · Views: 1,539
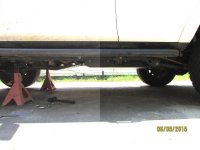
I love this stance. It's a shame it will go away after I take the jack stands out of there........
 

Attachments

  • IMG_3865 copy.jpg
    IMG_3865 copy.jpg
    130.4 KB · Views: 1,527
Your rig has come a long way since I saw it! I like it! I will have to start visiting more parks so that I can fill up my drivers rear window with trophy stickers too.
 
They are flush cut on the back and there is a possibility of clearance issues with the front brake calipers. I had driven mine 500 miles to work before I found an ever so tiny little drag line on one wheel from a high spot on one caliper. I am currently running a pair of 1/4" spacers on the front. But I have consulted a tech and he says it will do no harm to file down the casting marks on the calipers to get that 1/16th" I need. I just wanted you to have full knowledge of this possible issue. Otherwise I am perfectly happy with them.

CJ, do you have any pictures of the drag line you found, or of the offending casting mark? Was the casting mark something like a part number, or just a high spot or seam? After looking at what seems like hundreds of wheels, I found this thread today and I really love how yours look!

-John
 
CJ, do you have any pictures of the drag line you found, or of the offending casting mark? Was the casting mark something like a part number, or just a high spot or seam? After looking at what seems like hundreds of wheels, I found this thread today and I really love how yours look!

-John

Sorry John, no pictures. If you look at your calipers you'll see they have very squared edges on them from the casting. I never identified where the actual contact was happening. One of those edges had to have been just barely dragging on the back of the wheel. It wasn't even enough to measure, and it was only on one wheel. Just a line you could kind of catch your fingernail on if you ran it across it. I was going to just run a file over the squared edges to basically take the sharp corner off. Since I put the spacers on I just haven't worried about it, but it really was such a small amount I never worried about damage to either component. I just wanted potential buyers to be aware of the tight clearance.
 

Members online

Forum statistics

Threads
278,309
Messages
3,554,071
Members
248,016
Latest member
Advally Service

Trending content

Back
Top