4ever4running's 2002 4Runner Build

Looks awesome dude!

I vote white wheels :p

seriously though, that would be so cool.

Thanks man! I haven't even thought about white wheels...it might actually look pretty sweet.

The rig is looking great! The front bumper really sets it off, and once you get rid of the chrome on the rear bumper it will look even better. Are your Hella's HID? I always wanted a set but they are $$$!

I'm with Ripcord, I bet white wheels would look great on your 4Runner! But, I think they would have to be the right style. Something like the SCS F-5 in white would look awesome!

I love the "Panda" nickname, but all I can think of is "Sexual Harassment Panda" on South Park, lol! :D

Thanks dude! I'm super happy with the Shrockworks and I'm really glad it was worth the wait. Unfortunately the Hella's aren't HID, just standard halogen. The HIDs are awesome and I would have loved to have them, but at 4X the price it just didn't make sense to me. I figure if I really want to go HID in the future I can just buy an HID kit for between $100-$150, bringing the total cost to $300-$400, instead of $800-$1,000.

Hahaha that is hilarious :lmao:. I think I have a new name for my build. Do you think the mods would let me change the name of my build to "4ever4running's Sexual Harassment Panda Build" :pound:
 
A couple months ago I sold my Yakima Loadwarrior and Thule load bar setup because it sat too tall on the roof for me to use them regularly so they just sat in storage most of the time. My plan was to sell everything and upgrade to a Whitson Metalworks full length rack because it is stronger and has a much lower profile. I was able to get $500 for my setup so I was well on my way to getting the Whitson, but I just never pulled the trigger. After some more thought I decided that the Whitson just doesn't really make sense right now because my truck is a DD and most of the parking garages in DC are pretty low clearance that I already don't fit in so it doesn't really make sense to further limit my options by adding the additional height. So I decided to use the cash for some maintenance and other mods.

After spending more than half on my timing belt kit, I still had some $$ left over....So, I decided to upgrade my stereo head unit and just ordered this bad boy from Amazon: Amazon.com: Pioneer AVH-X3500BHS 2-DIN Multimedia DVD Receiver with 6.1 WVGA: Car Electronics. It has pretty much every feature I could possibly want/use and I have always wanted a double din unit so I'm pretty pumped!

I ordered up a rear view camera to go with it: Amazon.com: Night Vision Parking Car Rear View Wide Angle LED Reversing CMOS Camera: Car Electronics

And finally, a parking brake override Bypass switch (This allows you to operate the DVD player and watch other videos without having the parking brake engaged): Amazon.com: Night Vision Parking Car Rear View Wide Angle LED Reversing CMOS Camera: Car Electronics
 
Last edited:
Those ae some nice upgradess man, make sure to post some photos after you get the the stereo installed. I want a DD setup and am searching reviews and such now.

Cool ass tag by the way.
 
I've wanted a double din radio for quite some time, preferably a Pioneer. Just never pulled the trigger on it. Was too busy buying overly expensive bs :rolleyes:

Looking forward to seeing it. Aside from the longhorns emblem, your truck looks awesome lol.
 
Those ae some nice upgradess man, make sure to post some photos after you get the the stereo installed. I want a DD setup and am searching reviews and such now.

Cool ass tag by the way.

Thanks Nathan! I'll definitely post some pics once I get everything installed. I did a fair amount of research and ended up going with the Pioneer AVH-X3500BHS because the price was right and it got really good reviews on Amazon, Crutchfield, and Besy Buy.

I've wanted a double din radio for quite some time, preferably a Pioneer. Just never pulled the trigger on it. Was too busy buying overly expensive bs :rolleyes:

Looking forward to seeing it. Aside from the longhorns emblem, your truck looks awesome lol.

Haha yeah I was in the same position. I've wanted one for a while, but there was just always something else to spend money on.

Thanks dude, but the Longhorn emblem is one of the best "mods" so far! Hook'em! \m/ :bluejump:
 
Is that the OME 10mm spacer? Happen to have any before and after measurements?

BTW, those 33s look real beefy, love it! Not sure if it's because they are MT/Rs or the 3rd gen body lines, but it really fills the wheel wells nicely. I should venture into this sub forum more often :)
 
Is that the OME 10mm spacer? Happen to have any before and after measurements?

BTW, those 33s look real beefy, love it! Not sure if it's because they are MT/Rs or the 3rd gen body lines, but it really fills the wheel wells nicely. I should venture into this sub forum more often :)

Exactly right. I don't remember the measurements off the top of my head, but I do remember that it brought that side up about 1/2". I will take some measurements when I get home from work today.

Thanks man! I'm really happy with how the look and function so it's a win-win in my book. I've been thinking about stepping up to 35's, but I doubt that will be anytime soon so I'm just enjoying the setup I have now.
 
I haven't posted in here for awhile, but I've been following along through the weather techs, switches, fuse box, winch, new front suspension, the Shrock front, the lights, the updated rear end (chrome bumper delete), etc...

Your rig has had a great year so far, and I've gotta say that the Shrockworks front bumper really brought it all together and made it POP! That thing looks great on your 4Runner, and I like the bits of red.

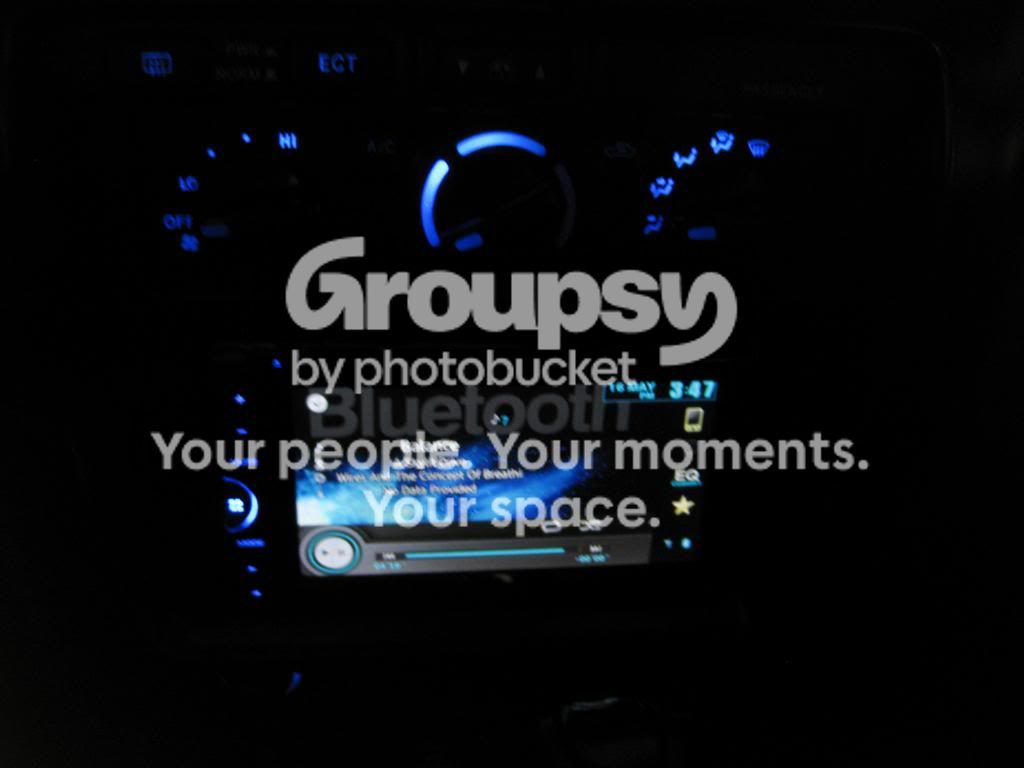
Anyway, I checked out your last post and wanted to say great work, and nice rig! I'll be watching for your post on the DD deck and blue dash lighting. I've been thinking of going to blue dash lighting for a long time, so it will be interesting to see how it turns out.

EDIT: I also noticed you finally installed that grille emblem! Looks good.
 
Last edited:
I haven't posted in here for awhile, but I've been following along through the weather techs, switches, fuse box, winch, new front suspension, the Shrock front, the lights, the updated rear end (chrome bumper delete), etc...

Your rig has had a great year so far, and I've gotta say that the Shrockworks front bumper really brought it all together and made it POP! That thing looks great on your 4Runner, and I like the bits of red.

Anyway, I checked out your last post and wanted to say great work, and nice rig! I'll be watching for your post on the DD deck and blue dash lighting. I've been thinking of going to blue dash lighting for a long time, so it will be interesting to see how it turns out.

EDIT: I also noticed you finally installed that grille emblem! Looks good.

Thanks Nick! Yeah she has had a pretty good year. I am really happy with the SW and although 6 months is a long time, it was definitely worth the wait. The only thing left to do is take her out for a shakedown run, which I am hoping to be able to do sometime soon...

I actually did the blue LED swap a while back, shortly after I bought the truck (http://www.toyota-4runner.org/3rd-gen-t4rs/114425-4ever4runnings-2002-4runner-build.html#post1056536) so the teaser pic was for the new double din Pioneer head unit.

Thanks a lot for hooking me up with the emblem, I think it looks great and I'm really happy with how it came out! Just needed a few coats of paint and it was good to go.

Thanks for checking in.
 
Pioneer AVH-X3500BHS Install

For the past couple years I have been using a Sony CDX-GT620IP head unit. While the Sony was great, I have always wanted a double din unit. After a substantial amount of research I ended up deciding on the Pioneer AVH-X3500BHS. It has all the features I want (Bluetooth, Ipod control, HD radio, etc.), got great reviews, and the price was just right ($300 shipped from Amazon). As an added bonus, you don't need a pocket install kit like all of the single din units require.

Here is a list of the major parts I used for the install (I ordered everything from Amazon):
Pioneer AVH-X3500BHS
Metra 70-1761 Radio Wiring Harness For Toyota 87-Up Power 4 Speaker (I already had this since I have an aftermarket head unit)
Night Vision Parking Car Rear View Wide Angle LED Reversing CMOS Camera (optional)
Parking Brake Override Bypass for Fully Automatic Video in Motion (optional)
Scosche Mda-B Micro/Delco Antenna Adapter Tip (optional)
Metra Ltd 40-UV43 Motorola Antenna Y-adapter (optional)

After removing the old Sony unit, I cut off the Sony wiring harness from the Metra wiring harness. I was careful not to cut too much of each since I would be reusing the Metra harness and selling the Sony harness with the head unit. After cutting off the old harness, I soldered and heat shrunk the Pioneer harness to the Metra harness.

Note: There were only 2 wires that are not used: 1) The orange wire with a black stripe on the Metra harness and 2) The yellow and black wire ("mute" wire) on the Pioneer harness. The white and purple wire on the Pioneer harness will only be used when connecting a rear view camera.
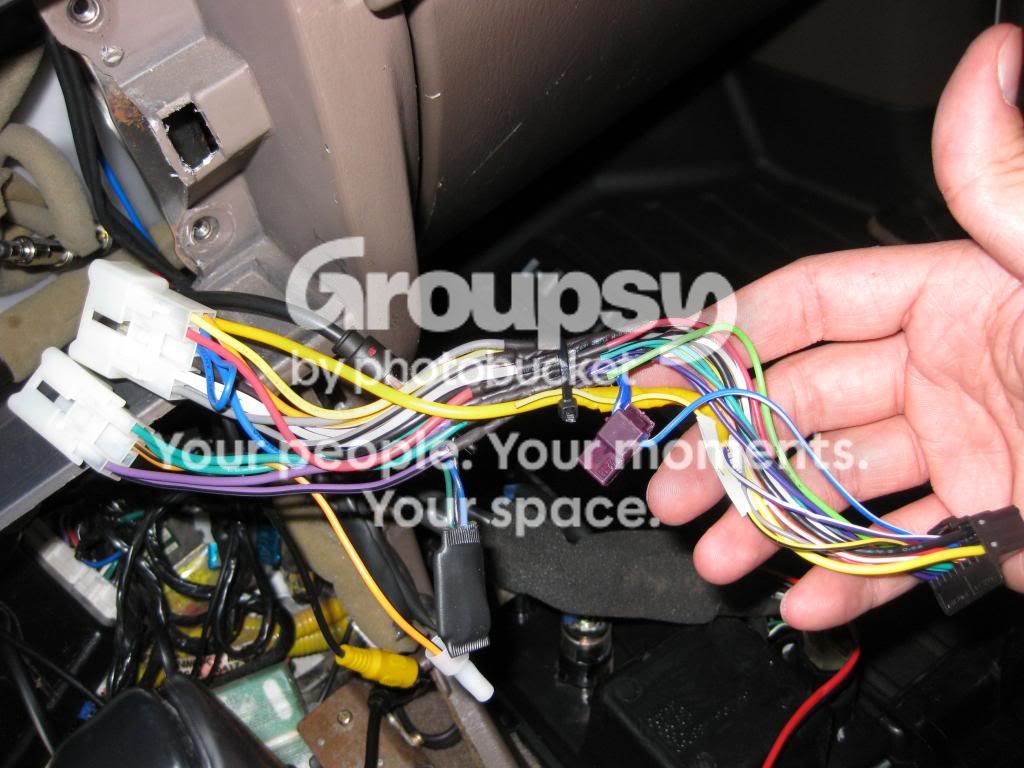

When soldering the two harnesses together, I was sure to include the Parking brake override relay wires. The override relay has 3 wires that match up to the wiring harness as so:
1) Black wire - This is a ground wire that is soldered in line with the other 2 black ground wires.
2) Green wire - This wire is attached to the light green parking brake wire on the Pioneer harness.
3) Blue wire - This wire is attached to the amp/antenna power wire. In my case this wire was soldered inline with the blue and white wire from the Pioneer harness and the blue wire from the Metra harness.

Here you can see the parking brake override relay (small black rectangle)
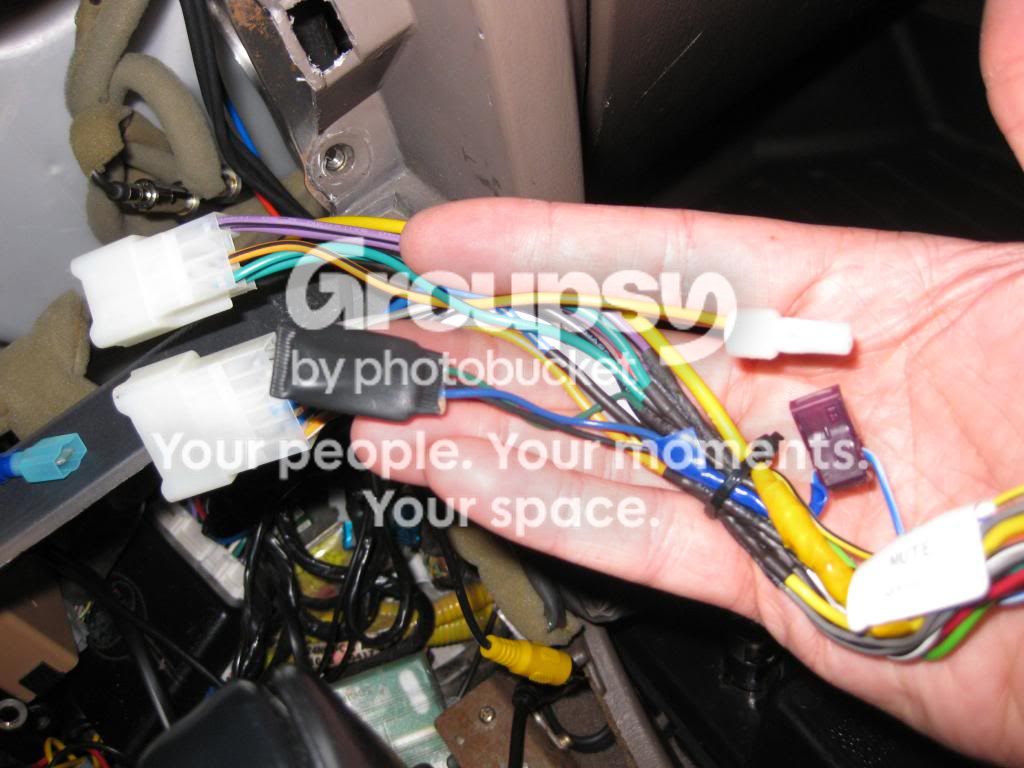

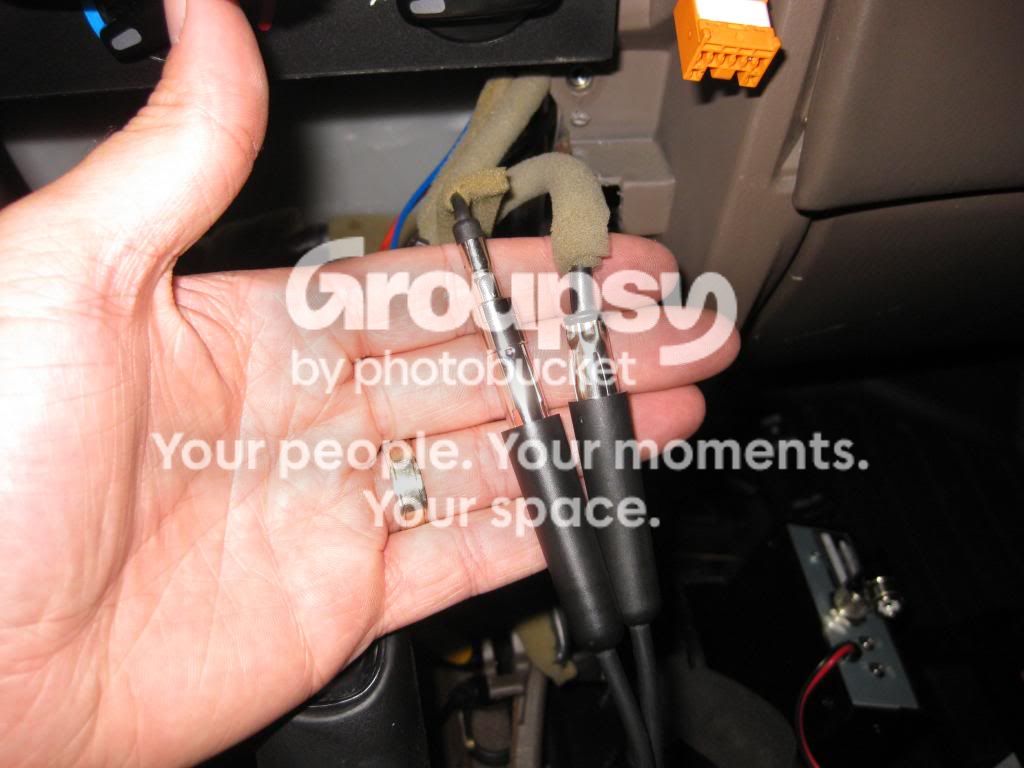
When you remove your factory head unit you will notice that you actually have 2 antenna wires. A large plug for the main front antenna and a smaller plug for the rear antenna.
Larger on right, smaller on left
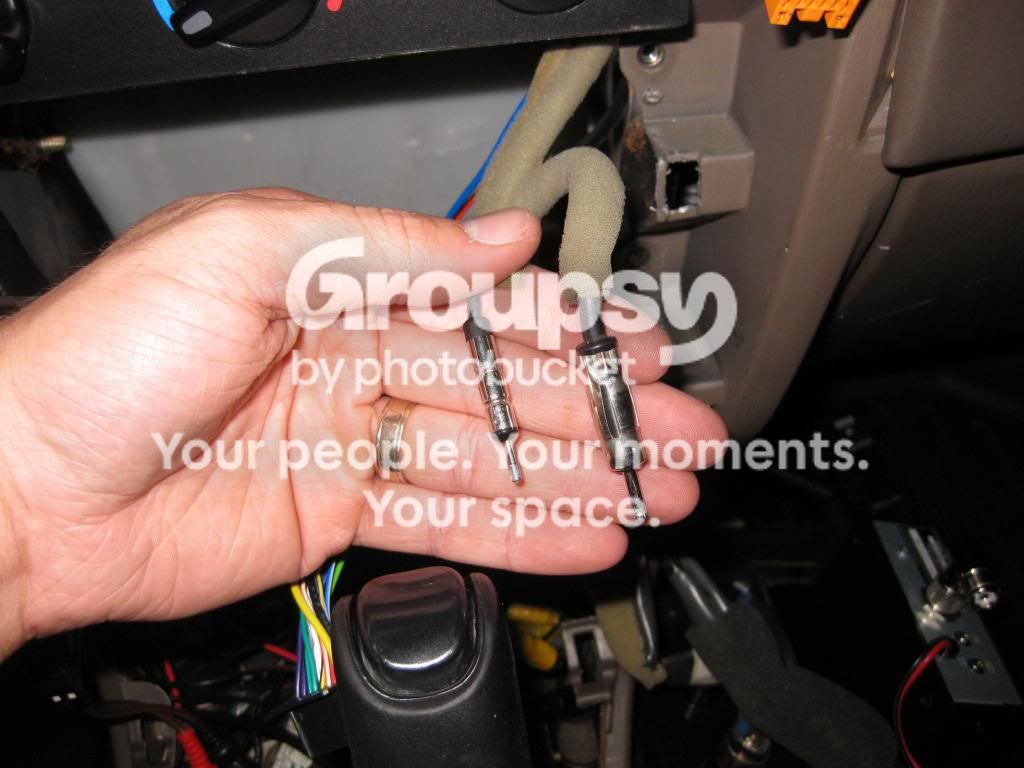

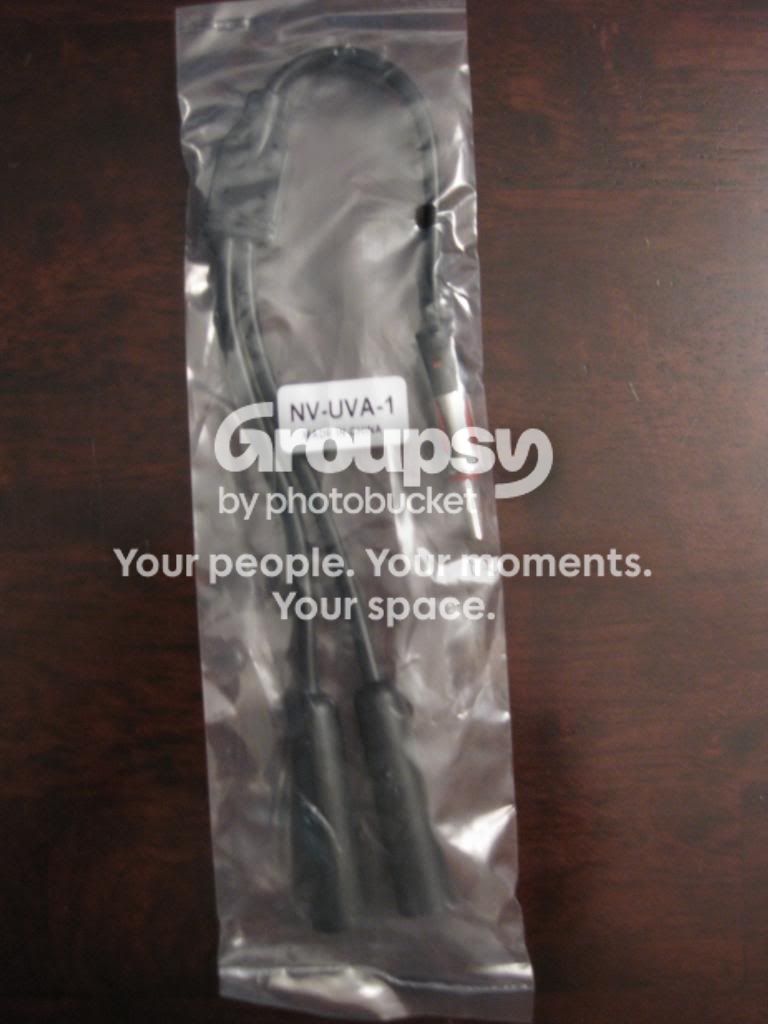
Since I bought an HD radio I wanted to make sure that I had the best reception possible so I bought a Scosche Mda-B Micro/Delco Antenna Adapter Tip and a Metra Ltd 40-UV43 Motorola Antenna Y-adapter.
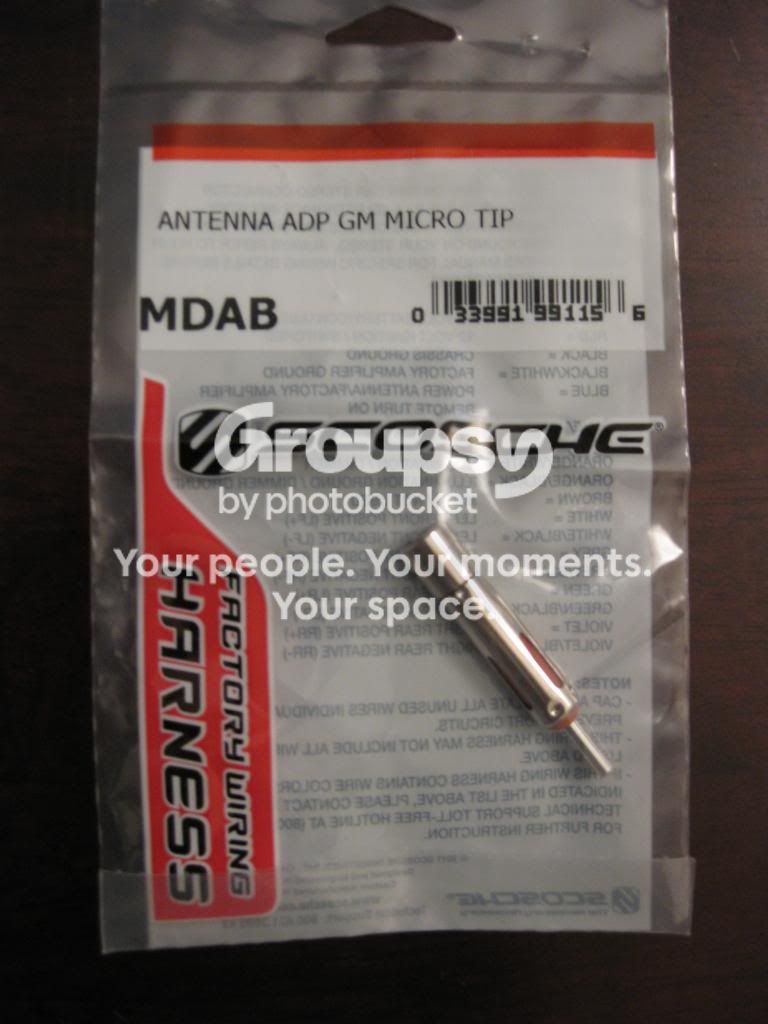

The adapter tip converts the smaller rear antenna plug to the same size as the larger main antenna plug.
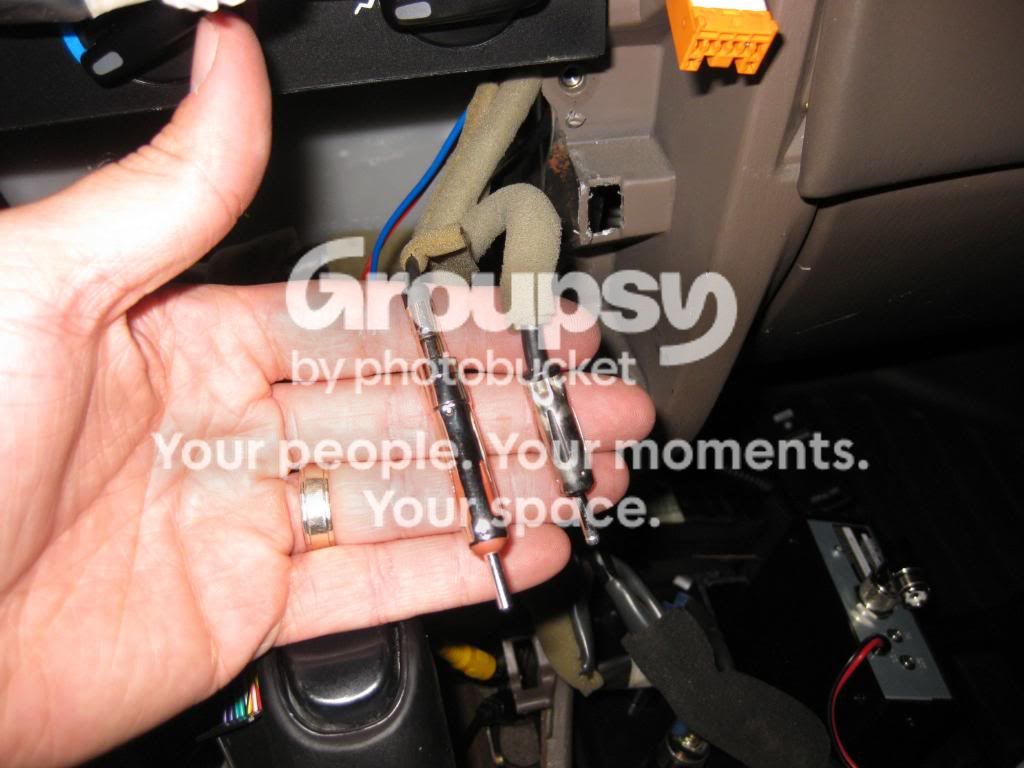

And the Y adapter allows you to connect both the front and rear antenna to the single antenna plug on the Pioneer unit.

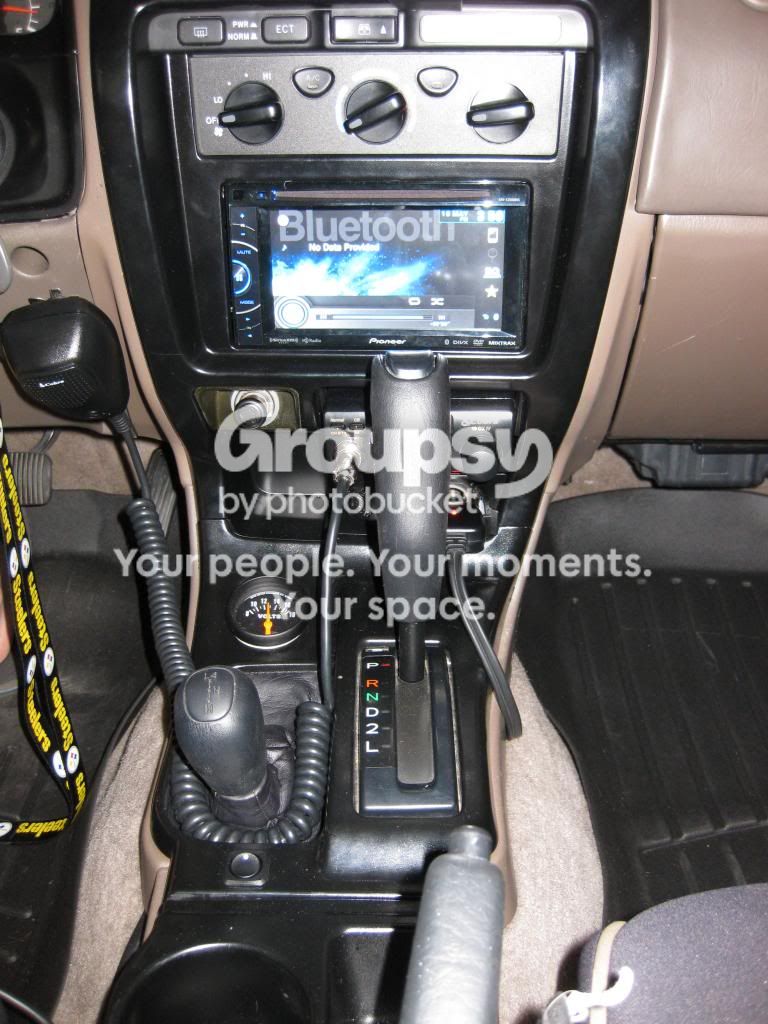
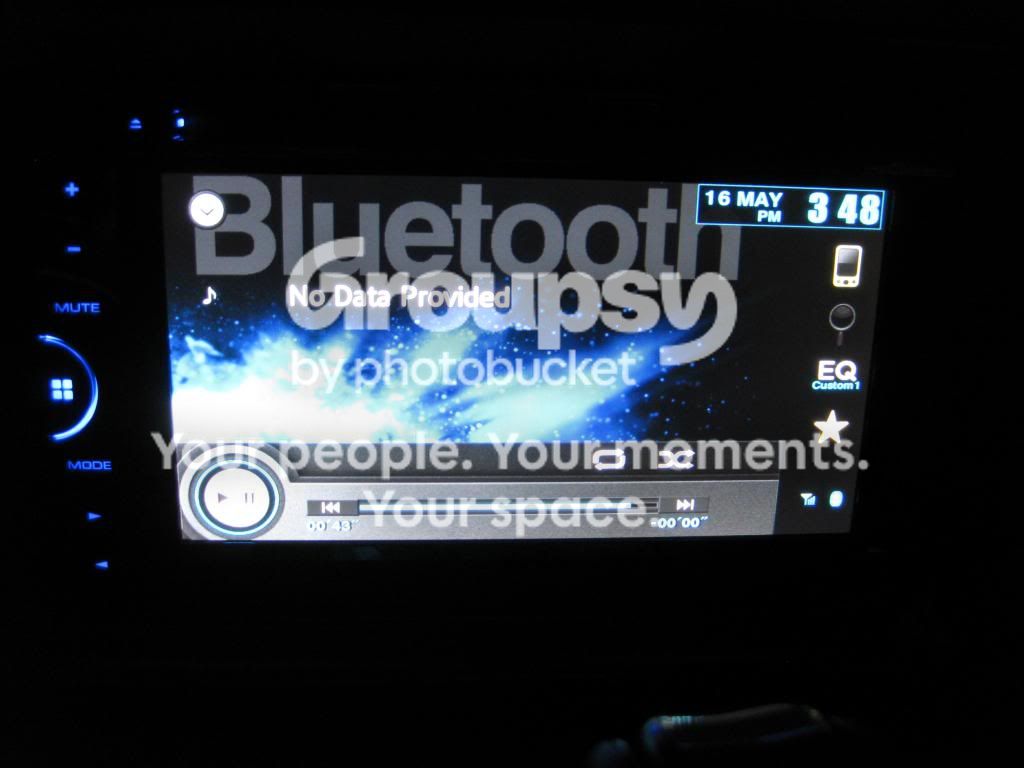
And after putting everything back together here's how it looks.


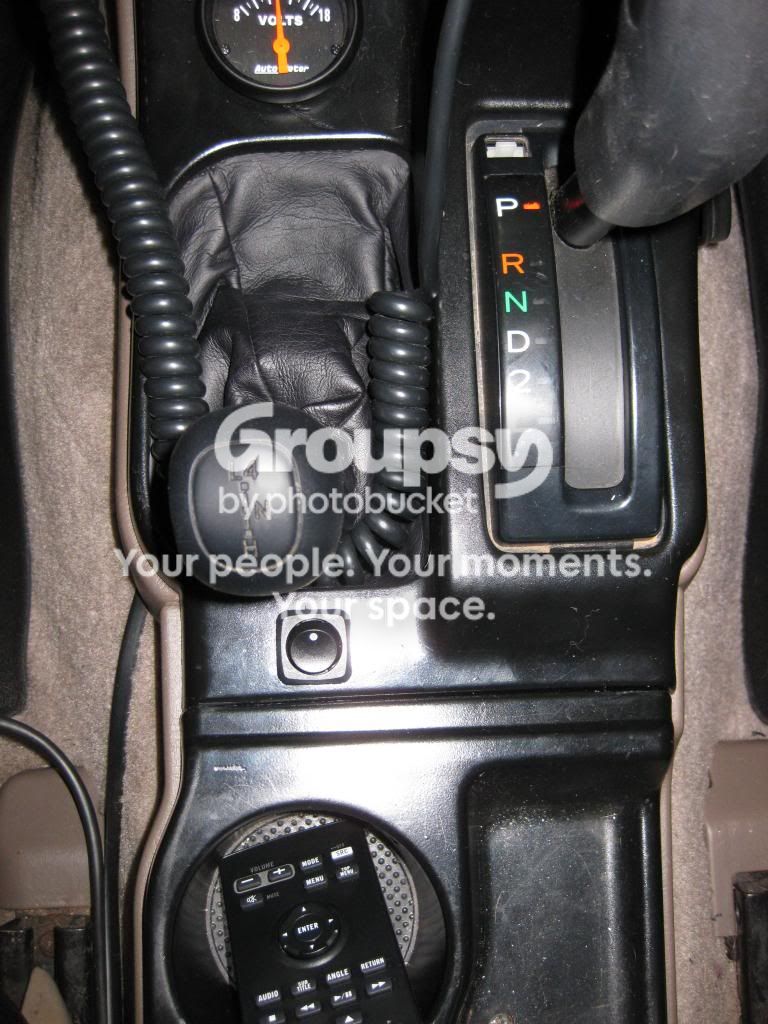
Finally, I noticed that with the new Pioneer unit, my antenna is up and stays up whenever the stereo is on, regardless of whether or not I am listening to the radio. While this isn't a huge deal, I don't like the idea of having the antenna up when I wanted to listen to music via iPod/iPhone while wheeling. So, I went to my local radio shack and I picked up a simple on-off switch. I cut the blue (antenna power) wire on the Metra harness and soldered a length of wire to each end and ran those to the switch. Now, I can raise and lower my antenna with the simple flip of a switch. Not difficult at all, but super useful!
Here is where I mounted the switch.

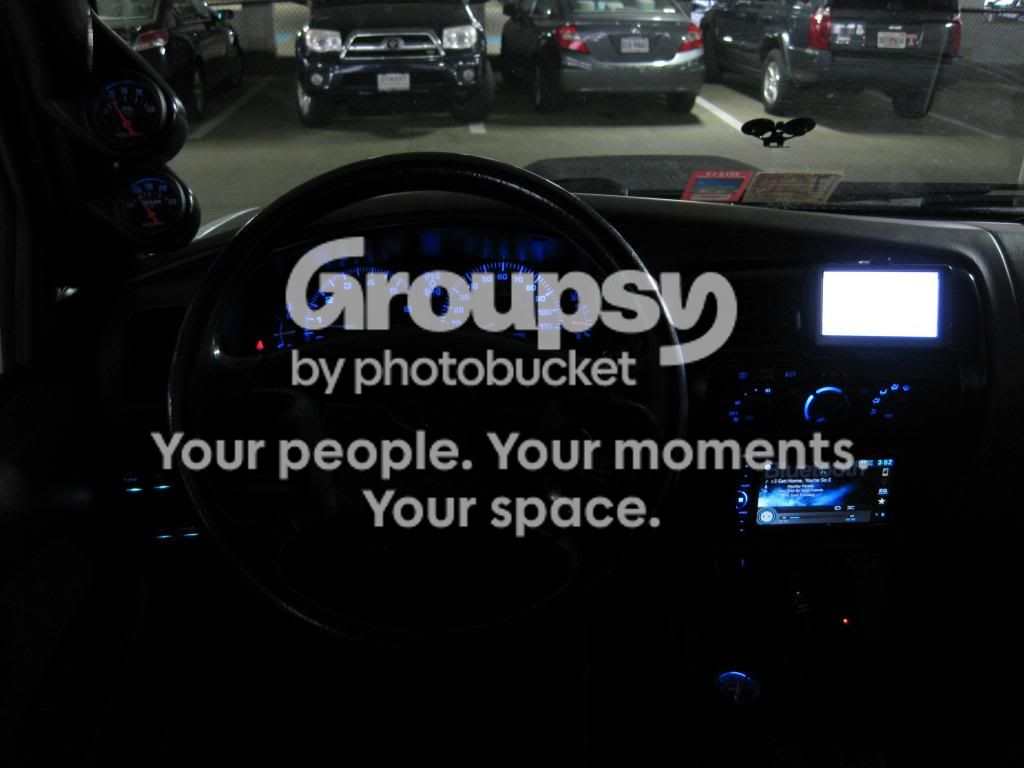
And an overall night shot

I'm still working on wiring up the rear view camera so more to come...

 
That looks awesome, great matching colors. Where's the rear view camera install??

You're giving me an itch to visit Amazon.... Bad bad bad
 
That looks awesome, great matching colors. Where's the rear view camera install??

You're giving me an itch to visit Amazon.... Bad bad bad

Thanks man! I actually got the rear view camera installed this weekend, I just haven't gotten a chance to upload the pics yet...
 
im curious as to how you mount that camera. I have yet to install mine. I love my headunit but that screen does get a tad annoying sometimes. good pick though!
 
[MENTION=94804]funnymeatball[/MENTION]

Thanks! So far I have no complaints and I'm really happy with it!

I was on vacation for the past week so I'll try to get the rear view camera install info/pics posted soon.
 
Overdue Update...

1) As promised, here are some install pics of my rear view camera. I wanted to keep it low profile so I mounted it to the underside of my stock bumper. It was a PITA to get a drill in the right spot to drill the 2 mounting holes, but other than that it wasn't too bad.


One downside with this location is that it is a little too low, so the scale for the green/yellow/red zones built into the camera aren't to scale at all. It will take a little getting used to, but I have no desire to mount it anywhere else.
(pic to come)

For the wiring, I ran them from the camera through the hole for the spare tire winch, into the trunk, and along the trim panels in the trunk. I tapped the power and ground wires into the passenger side reverse light so the camera powers on whenever the truck is in reverse.


The yellow video cable runs from the radio along the passenger side trim panels to the trunk.

There is one thing I still can't figure out.... I don't know where to connect the automatic sensing wire from the Pioneer. This wire from the Pioneer is supposed to be hooked into a "reverse sensing wire" that automatically switches over to the camera when the truck is in reverse. Anyone know which wire I need to tap into? Right now I just have the yellow video cable plugged into the "Aux Video" input on the Pioneer so I have to switch over to it manually, not a huge deal, but I would like to be able to have it done automatically.

2) I received my license plate mount from Shrockworks. I ordered it in bare steel so I hit it with some Duplicolor Metalcast to match the other red accents.


3) Finally got my timing belt job done and it honestly wasn't as bad as I thought it was going to be. I have to give a big shout out to my buddy [MENTION=89991]RdRunNNeR[/MENTION] for helping me out. Everything went pretty smoothly and we were able to save some time by removing the old tensioner and installing the new one without having to mess with the power steering pump at all. The only parts I have left over are the 2 camshaft seals and the crankshaft seal. Mine weren't leaking, so I didn't bother messing with them. I don't have any pics of the actual install, but here is everything that came in the kit.


For anyone doing this job by themselves, this writeup is a great resource and definitely comes in handy: http://www.nwtoys.com/forum/tech-article-submissions/1261-5vz-fe-timing-belt.html.
 
I see what you did there. those pictures are like a 4runner strip tease. lol. i like the placement of the camera. on another note, does that gap between the bumper and hitch ever bother you? thinking about doing the 2" body lift but not looking forward to gaps... gaps everywhere
 
I see what you did there. those pictures are like a 4runner strip tease. lol. i like the placement of the camera. on another note, does that gap between the bumper and hitch ever bother you? thinking about doing the 2" body lift but not looking forward to gaps... gaps everywhere

Haha thanks man!

As far as the gap between the bumper and hitch, it does bother me a little bit, but it really isn't too bad. My biggest problem with it is that it hurts the overall clearance in the rear because I have scraped it and bumped it numerous times. While it saves my bumper from being destroyed, it would be nice to have it be flush with the bumper so I have the extra clearance. Eventually I am going to get an aftermarket rear bumper with a built in hitch so I can just put up with it until then.
 
i feel ya. Mines one step up from a mall crawler since its 2wd and I live in the flat land called florida. lol. as far as clearance, theres nothing getting up that high, and the hitch has saved my bumper once from a rear end collision. I did see a guy that remounted his, but i think he welded it. Other than that, id love to do a bumper too, but schools got me on a budget that doesn't leave me with much... that and the now 15 mpgs that i get vs 19 before lift+ tires.
 

Members online

Forum statistics

Threads
278,310
Messages
3,554,080
Members
248,016
Latest member
Advally Service

Trending content

Back
Top