afiremensrunner4
New member
4th Gen 4Runner snorkel and my install
 [/IMG]
Intro:
I have been looking everywhere on the inter-webs and can't find anything for a write up so i thought i would make one for everyone on how I installed mine.
Part Options:
After researching and talking to people through T4R, Facebok, and internet. I have found that these work for the 4th Gen. (NOTE: Almost all Need some creativity/fabing/rerouting)
Tools/Parts used in my installation
My Installation:
****I AM NOT RESPONSIBLE FOR ANY DAMAGE TO YOUR MOTOR VEHICLE. I AM NOT A LICENSED OR CERTIFIED MECHANIC/FABRICATOR AND SHOULD NOT BE CONSIDERED ONE. THIS IS JUST A RECOLLECTION OF WHAT I DID FOR MY 4RUNNER AND SNORKEL INSTALLATION****
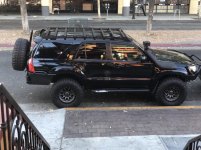
I personally did the Land Cruiser 80 series for my 4.7L V8 T4R but this is almost the exact install as most from what I have found. **NOTE I don't have all pictures but I do have some and will add some more of the finished product when I can.**
Steps that I took:
 [/URL][/IMG]
 [/URL][/IMG]
Closing
I hope that this helped with getting and installing a snorkel for the 4th Gen 4Runner. Feel Free to Post up questions or pictures of your rig with snorkel attached and don't be afraid to ask question to me or other forum members
about what they did for their install.
***NOTE: JUST BECAUSE YOU INSTALLED A SNORKEL DOES NOT MEAN THAT CAR IS WATER PROOF. TO FIND OUT WHAT ELSE NEEDS TO BE DONE DO SOME RESEARCH*** [/B]
****AS NOTED ABOVE IN THE BEGINNING I AM NOT RESPONSIBLE FOR ANY DAMAGE TO YOUR MOTOR VEHICLE. I AM NOT A LICENSED OR CERTIFIED MECHANIC/FABRICATOR AND SHOULD NOT BE CONSIDERED ONE. THIS IS JUST A RECOLLECTION OF WHAT I DID FOR MY 4RUNNER AND SNORKEL INSTALLATION****
Intro:
I have been looking everywhere on the inter-webs and can't find anything for a write up so i thought i would make one for everyone on how I installed mine.
Part Options:
After researching and talking to people through T4R, Facebok, and internet. I have found that these work for the 4th Gen. (NOTE: Almost all Need some creativity/fabing/rerouting)
- Land Cruiser 80 series (I installed this one)
- Land Cruiser 100 series
- ARB Safari SS170HF
Tools/Parts used in my installation
- Snorkel of choice w/ all mounting & hardware included
- PVC pipe & PVC glue (elbows/straight size dependent on snorkel)
- Bore saw/Hole saw
- Power Drill/Impact Drill
- Flat head screw driver
- Pry bar
- Socket set
- OEM fender clips
- Silicone
- Drill Bits (assorted sizes)
- Heat gun
- Rivett gun
- Painters tape
- Flash light(s)
- Jack and stands
- Grinder
- Wizz wheel or some sort of metal cutting saw
- Sharpie/marker
- A Rattle Can of Rust Proof Paint
My Installation:
****I AM NOT RESPONSIBLE FOR ANY DAMAGE TO YOUR MOTOR VEHICLE. I AM NOT A LICENSED OR CERTIFIED MECHANIC/FABRICATOR AND SHOULD NOT BE CONSIDERED ONE. THIS IS JUST A RECOLLECTION OF WHAT I DID FOR MY 4RUNNER AND SNORKEL INSTALLATION****
I personally did the Land Cruiser 80 series for my 4.7L V8 T4R but this is almost the exact install as most from what I have found. **NOTE I don't have all pictures but I do have some and will add some more of the finished product when I can.**
Steps that I took:
- Jack up front of the vehicle and place on jack stands
- Remove passenger front tire and set aside for the time being
- Remove inner wheel well lining and mud flaps if they are on yours. There are clips that hold it in place and some bolts that can be removed by using a socket wrench. Don't be affraid of having to break some of the clips because otherwise they are a pain to get out if you try to preserve them for later use.
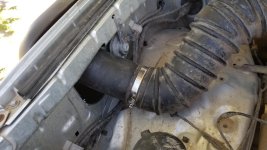
- Remove air box and piping to expose side of the engine bay and hole to inner fender. **NOTE I have a OEM intake and remove everything for better access may not be needed for aftermarket air box**
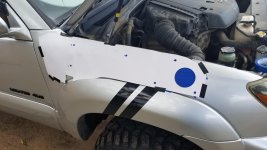
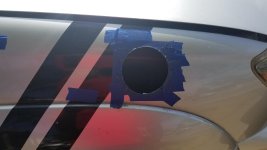
- Use the painters tape to tape the outside of the fender and side panel do not worry about tape overlapping. Just need to have the paint convered as much as possible.
- Map out where to drill the large and bore the hole. Some of the kits come with a template but they may or may not work with the 4th Gen 4Runner. Mine came with one and I used it as a good judge of how big the holes were. I achieved proper placement by finding where i wanted to have it sit then traced the piece of piping that come off of the snorkel it self.
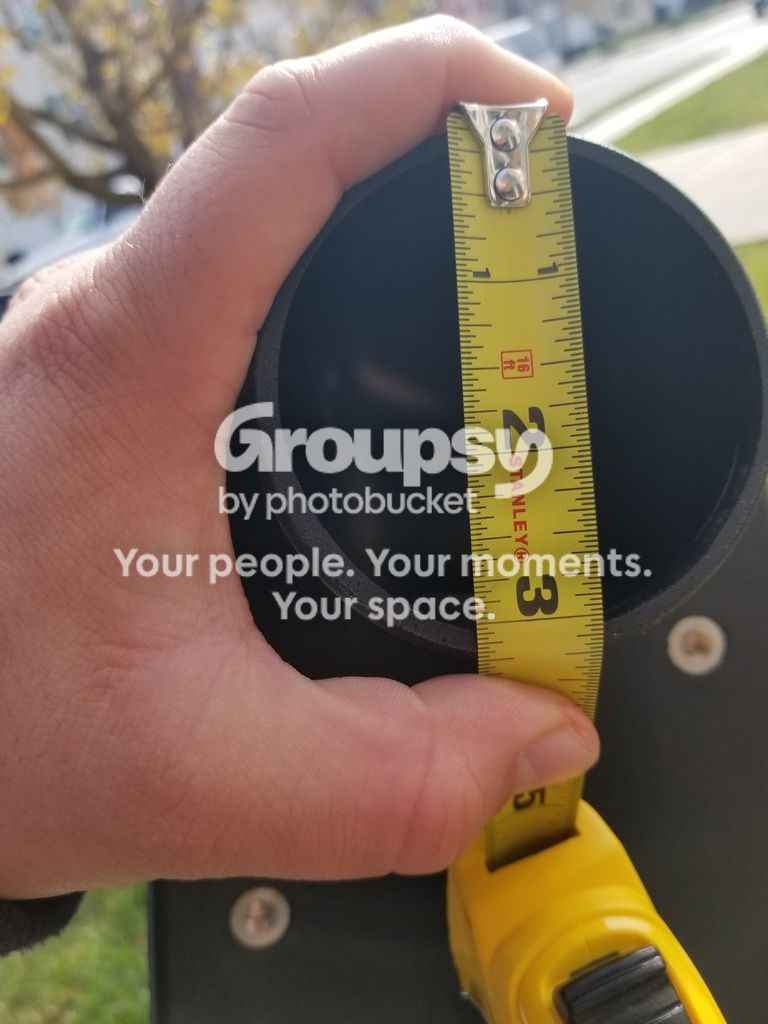
- Grab your bore/hole saw cut the largest hole for the pipe to go into. I measured out how large the hole needed to be by measuring the inner diamater of the pipe and then calculated that the piece that was going to be going over it was about an inch wide so I used a 4in diameter bore.
- Once the hole is cut clean the area by using a grinder to smooth out the surface of the metal.
- Apply pain to the fresh cut area to avoid rusting of the body panel.
- The next step is a little dependent on whether you used a template or not. I did not so what I did was I inserted the stud into the snorkel its self and then put a little pit of paint on the ends of the studs to make a stamp effect. I then lined it up how i wanted it then pressed firmly on the snorkel to make sure that the paint set on the tape.
- Using variable size drill bits bore holes for the studs to go through and then be secured. **NOTE do not over do the size of the whole otherwise the stud will not be able to be secured properly.**
- Grind all "Stud holes" and add paint to prevent rusting.
- Next step is dependent on what your creativity is. The up ward part (for write up purposes we are going to call it the "Arm") of the snorkel that hugs the "A post" secure using what came in the kit. My kit came with a plate that attaches to the "arm" of the snorkel and "A post" via rivets. I had to do use some creativity to adjust the plate to the angle of the "A post" but once I did I outlined the plate and marked the holes where the rivets were to go. I then mounted the plate using a rivet gun.
- Once all holes have been drilled, grinned, and painted. Remove the tape.
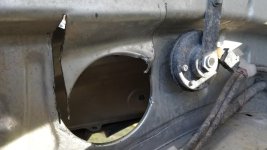
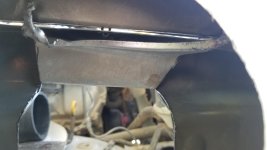
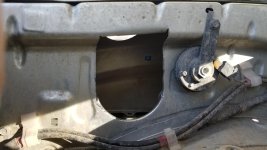
- This step is also dependent on whether you need to do routing in the inner fender well. I was lucky enough that i was able to go almost straight on to the factory made intake hole and the piping that came with it was going to fit right up to the air box with some creativity. (I removed the section at the end and figured out that I can insert the rubber tubing into the hole in the air box.) I did though have to cut the body a little where the intake hole is. due to the angle of the pipe coming off of the snorkel. I achieved this by using a wiz wheel. I then grinned down the fresh cuts and painted them.
- If you did not already secured the snorkel to the body and "A post" then do so now. Also make sure that all piping is secured inside the fender well.
- Go over all piping section with silicone for water tight seal and let it settle. (I used a fast drying silicone so I would not have to wait while it was drying and could continue the job as soon as possible.)
- Now that the snorkel is installed to the body. Reattach the airbox if you have not done so while routing the piping. **NOTE not all air boxes especially OEM is not water proof there are multiple holes in it and fill the holes with silicone so it will be water tight.**
- Finish reinstalling the rest of the intake if you removed it all.
- Using OEM clips and bolts secure the inner wheel well liner and mud flap if vehicle has one.
- Put passenger tire back onto the vehicle and tighten all lug nuts to torque spec.
- Remove jack stands/jack
- Clean up the area of body and snorkel.
- Attach RAM AIR intake with mounting hardware supplied.
- Finally once everything is back to the way it should be under the hood and the snorkel is properly installed. Start the vehicle up and test that there is air being pulled into the snorkel. Listen for weird or bizarre sounds coming from the engine and the snorkel to make sure that there is no leak anywhere.
Closing
I hope that this helped with getting and installing a snorkel for the 4th Gen 4Runner. Feel Free to Post up questions or pictures of your rig with snorkel attached and don't be afraid to ask question to me or other forum members
about what they did for their install.
***NOTE: JUST BECAUSE YOU INSTALLED A SNORKEL DOES NOT MEAN THAT CAR IS WATER PROOF. TO FIND OUT WHAT ELSE NEEDS TO BE DONE DO SOME RESEARCH*** [/B]
****AS NOTED ABOVE IN THE BEGINNING I AM NOT RESPONSIBLE FOR ANY DAMAGE TO YOUR MOTOR VEHICLE. I AM NOT A LICENSED OR CERTIFIED MECHANIC/FABRICATOR AND SHOULD NOT BE CONSIDERED ONE. THIS IS JUST A RECOLLECTION OF WHAT I DID FOR MY 4RUNNER AND SNORKEL INSTALLATION****