5vz-fe Removal

I am a dummy, I am thinking of getting to the bell housing bolts from behind the truck not in front. Fail.

And I got a 4x2 so i think the majority of that is going to be a breeze. Getting the hoist today. Might start pulling it tomorrow.

I try and avoid universal joints because going back and torquing to spec. But if thats the onlyyy way..... :(
 
I am a dummy, I am thinking of getting to the bell housing bolts from behind the truck not in front. Fail.

And I got a 4x2 so i think the majority of that is going to be a breeze. Getting the hoist today. Might start pulling it tomorrow.

I try and avoid universal joints because going back and torquing to spec. But if thats the onlyyy way..... :(
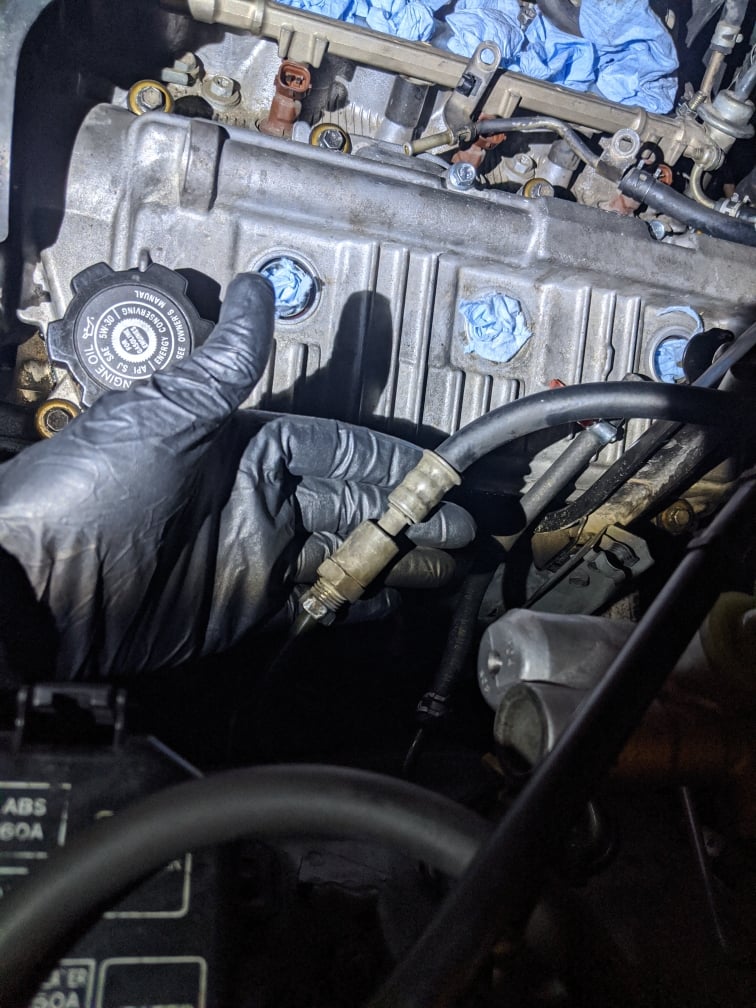
You get to the bolts from the back side of the trans, like this:

8479ORr.jpg

(looking forward over the front gas tank crossmember, that's a 2WD driveshaft that the hand is resting on)

It really isn't that bad. A swivel socket won't change torque applied to the fastener significantly unless it is at a large angle. I don't think we even used a swivel though...

-Charlie
 
My 97 SR5 Build and Repair thread goes into pretty much detail on engine removal etc. including a picture of what’s needed to get the bellhousing bolts out.

A 1/2” breaker bar and a pipe and a pack of long 1/2” extensions from harbor freight and your good to go. If you tighten the bolts as tight as you can with the breaker bar you won’t need a torque wrench.


Sent from my iPhone using Tapatalk
 
I would pull the transmission out of the way before pulling the engine out.

If you on on a cement floor with Jack stands. You can use an hydraulic table from harbor freight to pull the transfer (if 4wd) and then the transmission out.

That is how Got my transmission 5 speed and transfer to the floor by myself.

Worked really slick and made it so much safer as a used a rachet strap to hold it in place as a safety.

2wd wouldn't have that transfer hanging out there. I removed it because I didn't want the transmission to spin plus it lighted the transmission so i could move it myself with it off. :-)

Less weight the better for safety is what I say..:-D Its not worth getting hurt on.
 
Pulling the engine is actually super easy, but can turn into a real ordeal if you don't know what you're doing.

The process is slightly different depending on engine/tranny/drive train, but overall similar.

I'll do a quick step by step for the easiest engine pull:

1. Disconnect and remove battery
2. Remove aorbox and intake
3. Remove glove box and upper cover
4. Unplug engine harness from ecu/dash harness
5. Unbolt engine harness grommet from firewall, drape harness over motor
6. Drain and remove radiator, use the shroud's removable piece to get it by the fan. Plug auto trans lines if applicable
7. Remove fan clutch/fan together, reinstall nuts to keep pulley on
8. Unbolt transmission lines from pass. side of motor (2 places) only on autos.
9. Disconnect fuel lines at inner fender junction near brake Master cylinder.
10. Remove fuse box from inner fender and separate the case, unplug the 4 wire harness on the bottom and unbolt and remove the alternator charge wire from the fuse inside. Unbolt body ground from inner fender (this takes care of all the wiring for the secondary charge/start harness) drape over motor
11. Remove heater core lines at firewall. If it's a 3RZ, uninstall the coolant temp sensor on the back of the head, it will break off if you don't. Also consider unbolting heater valve bracket and tying up
12. Unbolt motor mounts, either take the 2 bolts that hold the plates together off on both sides, or take the plate off one side and the single nut off the stud that holds the mount to bracket.
13. Remove throttle/kick down/cruise control cables, move out of way
14. Get the vacuum lines, evap, booster, power steering etc.
15. Unbolt the A/C Compressor from the motor, leave all lines attached. Don't tie it up, it will be less likely to hang up on the motor if left loosely hanging. Also unbolt the power steering pump from its bracket, there is enough slack to tie it up near the battery tray, well out of the way.
16. Bellhousing bolts and starter bolts. (about 4 ft of extensions and a long handled ratchet work awesome to remove them) and flex plate bolts on automatics (honestly a giant pita especially on 4x4s.) Once you've got the engine partially out, I like to ziptie the starter back to one of its holes.
17. Disconnect exhaust. 3.4's will disconnect at the crossover, 3rzs you can either unbolt the downpipe or pull the manifold off the head.
18. Double check, get the scragglers, some wires in the engine harness go to things bolted to the body, so get those, also make sure all the plugs on the transmission are undone and the harness is routed upwards to the top of the engine. There are a lot of little plugs hiding on top of the auto Trannys.

That's it. You don't have to tear really anything off of the engine itself. The V6 automatic combo takes the longest to prep, but is by far the easiest to pull and reinstall. When I'm doing a 3RZ manual I typically pull the transfer case off the transmission and pull the motor/transmission together, it fits but barely and is not for the faint of heart.

On reinstall it usually helps to unbolt the transmission crossmember so you can control the angle, and a ratchet strap from framerail to framerail can help prop the bellhousing up where it needs to be.

I could be missing some small tidbits, I'm sitting on the couch writing this up.

Sent from my JSN-L23 using Tapatalk
 
Pulling the engine is actually super easy, but can turn into a real ordeal if you don't know what you're doing.

The process is slightly different depending on engine/tranny/drive train, but overall similar.

Sent from my JSN-L23 using Tapatalk

This right here. Thanks for a quick run down I appreciate it. [MENTION=139000]phattyduck[/MENTION] and [MENTION=164664]brillo_76[/MENTION] thank you as well. I got some more extensions and will support the transmission. I gotta replace that transmission mount. It's shot.

Hopefully I got enough extensions. Might have to go from 3/8s to 1/2 and back but I should be able to manage.

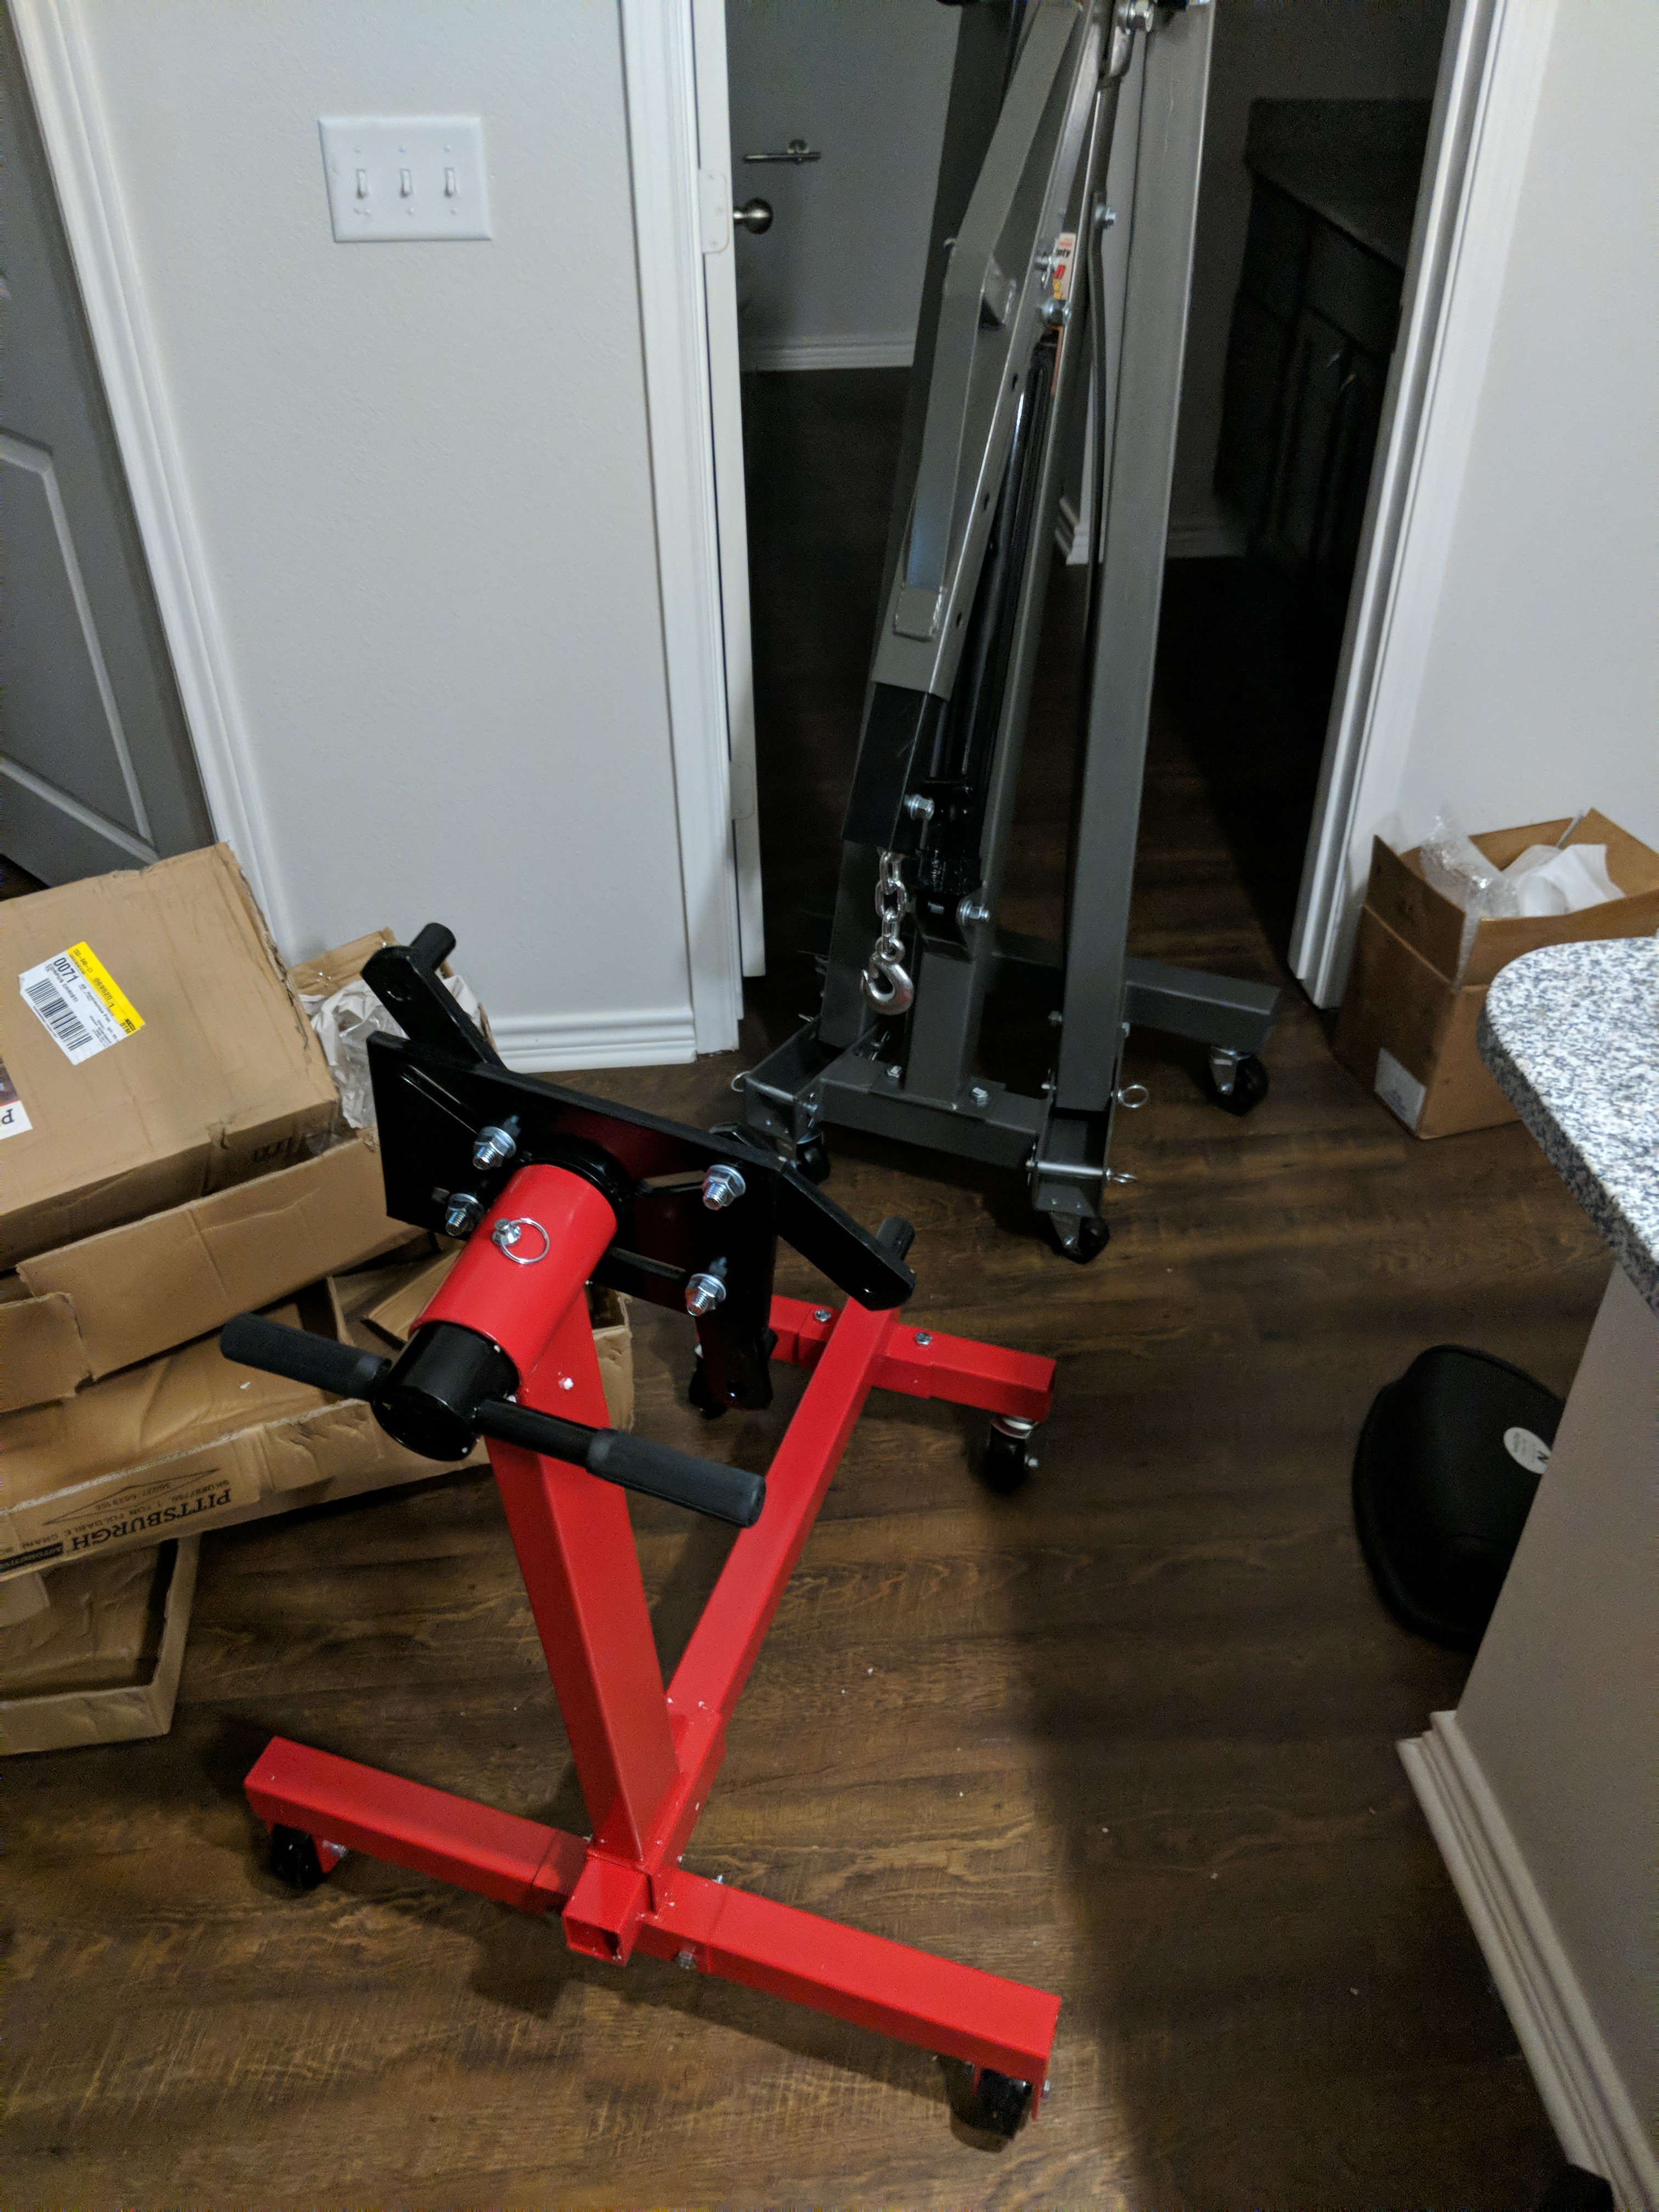
My tools of destruction are assembled and ready for battle.

Saw some questionable welds on the hoist (welds had pours in them)

Fingers crossed no damage to heads and it's just an old gasket.

If it's toast I am gunna get another 5VZ or a 1UZ lol

Gotta lot of work to do on this engine bay and cleaning up the engine bay while it's out. Had a bad valve cover leak for a while by the looks of it.

I got a laundry list of stuff to hit! This afternoon I'll start breaking it apart.

Probably Monday or Tuesday the engine will be pulled. I need M12x1.25 x 90 bolts for the pedestals I think...
04b394d4a692e0b31bd6153212a35ca7.jpg


Sent from my Pixel 2 XL using Tapatalk
 
Back to the top!

I'm almost chain ready. I got the bell housing bolts, 1 nut in the collector pipe and fuel inlet hose

My only concern is fuel inlet line. Idk why but every time I losen it it gets tight then loose. Now it's full bore tight

Any ideas? Anyone else have problems with this.

Also, I had to leave the fan clutch on, the POS stripped the bolts holding the fan on and it's not worth my time screwing around with it.

If I mash up the condenser I don't care I already don't have AC so I can't lose anything I never had lol

Did y'all disconnect your fuel filter to rid excess pressure? That is only thing I feel like I could do to loosen it up bbut I don't wanna screw with that pesky filter lol

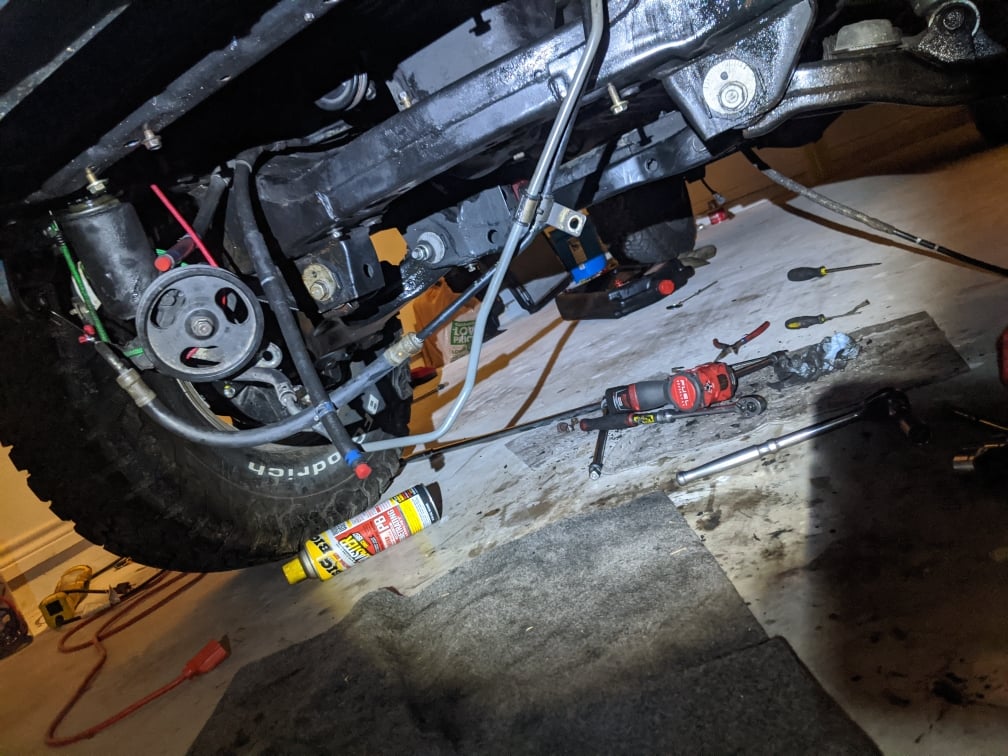
Attached some other pictures of the madness. It's funny to anyone else this looks like a nightmare. But to me it's controlled chaos. This thing is so easy to pull apart. Everything has a home so going back together will be easy as well.
e1ed1823b46afddaa7976f6b1d18d67d.jpg

02a4039aeea03548f8184a6d7ec2156a.jpg


Sent from my Pixel 2 XL using Tapatalk
 
Back to the top!

I'm almost chain ready. I got the bell housing bolts, 1 nut in the collector pipe and fuel inlet hose

My only concern is fuel inlet line. Idk why but every time I losen it it gets tight then loose. Now it's full bore tight

Any ideas? Anyone else have problems with this.

Also, I had to leave the fan clutch on, the POS stripped the bolts holding the fan on and it's not worth my time screwing around with it.

If I mash up the condenser I don't care I already don't have AC so I can't lose anything I never had lol

Did y'all disconnect your fuel filter to rid excess pressure? That is only thing I feel like I could do to loosen it up bbut I don't wanna screw with that pesky filter lol

Sent from my Pixel 2 XL using Tapatalk

The high pressure send line on every 3rd gen I have ever disconnected from the fuel rail has always been sticky like that. Some resistance, even brand new ones from Toyota were like that.

Just be super careful with those heater core connections up on the firewall. If you don’t take the fan clutch off I’m not sure you will have enough room to get the engine out.

You will want to bring the engine slightly forward to clear those heater core pipes. You can also spin it a bit once it’s free. Just don’t mess up those heater core lines. Did I mention I’m really worried about those heater core pipes.
 
Back to the top!

I'm almost chain ready. I got the bell housing bolts, 1 nut in the collector pipe and fuel inlet hose

My only concern is fuel inlet line. Idk why but every time I losen it it gets tight then loose. Now it's full bore tight

Any ideas? Anyone else have problems with this.

Also, I had to leave the fan clutch on, the POS stripped the bolts holding the fan on and it's not worth my time screwing around with it.

If I mash up the condenser I don't care I already don't have AC so I can't lose anything I never had lol

Did y'all disconnect your fuel filter to rid excess pressure? That is only thing I feel like I could do to loosen it up bbut I don't wanna screw with that pesky filter lol

Attached some other pictures of the madness. It's funny to anyone else this looks like a nightmare. But to me it's controlled chaos. This thing is so easy to pull apart. Everything has a home so going back together will be easy as well.
e1ed1823b46afddaa7976f6b1d18d67d.jpg

02a4039aeea03548f8184a6d7ec2156a.jpg


Sent from my Pixel 2 XL using Tapatalk
It's been half and half on that fuel line fitting for me, some wind right out and some go on and off super hard. Line wrenches are a must when they are being difficult.

Ya kind of messed up by taking the intake manifold off. The 3.4 is way easier to lift with it on, more stable because you can use both factory lift points, one of which is the black bracket that bolts to the driver's side of the intake.

Leaving the fan on is doable, it only makes the V6 about as long as the I4 from front to back, a tighter fit for sure, but not too bad. You'll have decent clearance, just watch the heater core bits and brake reservoir on the way up and out.

Sent from my JSN-L23 using Tapatalk
 
My only concern is fuel inlet line. Idk why but every time I losen it it gets tight then loose. Now it's full bore tight

Any ideas? Anyone else have problems with this.

Also, I had to leave the fan clutch on, the POS stripped the bolts holding the fan on and it's not worth my time screwing around with it.

If I mash up the condenser I don't care I already don't have AC so I can't lose anything I never had lol

Did y'all disconnect your fuel filter to rid excess pressure? That is only thing I feel like I could do to loosen it up bbut I don't wanna screw with that pesky filter lol

I too had the same problem with those dang tight fuel lines. I was afraid the threads were going to strip out. So I just screwed the fitting back ( I couldn't leave my rig down for a day) on. And orded the whole dang fuel line all the way back to the tank, and replaced it all from the fuel filter back when I did my fuel pump.
Just removing the gas cap released the tank pressure for me. Still, about 4oz of gas dropped when I cracked the fuel line.
A taped on cardboard will protect the condenser fins from getting damaged.
 
I'm glad I'm not alone in the fuel line! Lol my goodness that thing is tight. I'll just keep going ham on it. I guess if it cracks it cracks. I got a big ass wrench on one side and the flare side has a flat nut wrench but I'll keep going it has to be close.

I'll run to harbor Freight this afternoon and just hacksaw that damn thing off.

I just wanna be able to reuse that pulley for the new engine.

Anyone got any tricks for hitting the outside bolt on the collector pipe? I can't get a socket fulley seated. I was gunna go remove it from the hanger in the back and try and maneuver it but I think that would put the bolt in a bind

So as a back up in gunna go buy a universal joint.

I don't have my lovely stubby air impact 850 ftlb break away torque wrench [emoji24] it would decimate all stubborn bolts in it's path

I only got a 3/8 Milwaukee impact but I don't think it has enough balls to get it.


I pulled the intake manifold to get the harness out of the way. I am leaving the harness attached to my truck and the engine I'm getting is from a 99 so it should be plug and play.

Gunna rebuild the harness as well. Rol all the greasy crap off and wrap it with tesa tape. Need some electrical connection cleaner too ... everything is covered in grime. Me no likey lol

And just for others who are curious for time commitment.....I am about 5 hours into this. And about 1 hour includes time where I hit road blocks and said above. about 95% done with removing Everything. Single handed.

With another person, and an experienced guy leading, you could cut it in half. One can work on harness the other hits the bolts.

This thing is a breeze to work on. I wish I had more space than a single freaking car port at the apartment

Sent from my Pixel 2 XL using Tapatalk
 
Last edited:
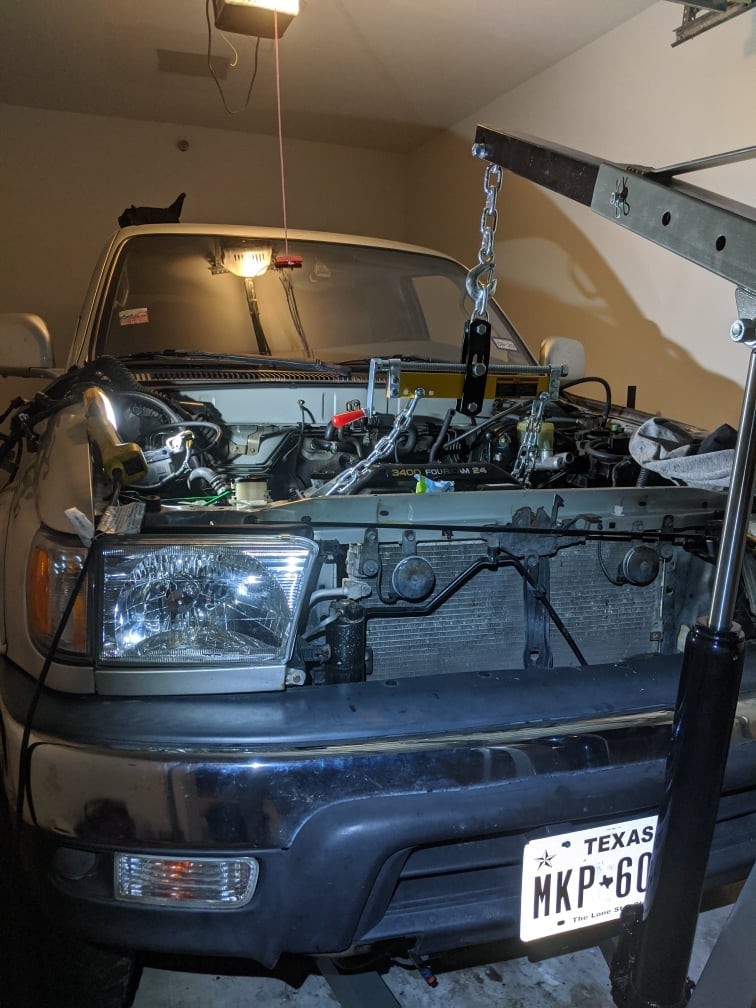
Engine is hook ready.

I got the fuel line loose. You guys were right just kept wrenching on it and it came off.

I got the nut off on the outside of the cross pipe with a 3/8 socket and it was a 14mm IIRC. You want to use a 3/8 because the 1/2inch is gunna make it harder for the socket to sit flush. What I had to do was put the socket on the nut first. Then grab 2ft it 3/8 extension and hammer the extension on to the socket. I would not recommend doing that any other way otherwise you run the risk of shearing the nut.

You can apply this method to the upper bell housing bolts. I used 56inch (4ft) extension for the upper ones. Put the socket on by hand first. Verify its flush. Then pound the extension into the socket.

I would recommend a big 1/2ratchet with some leverage or you can try a breaker bar. Don't like using those because they limit your ability to swing it freely when your in a cramp space and need to make adjustments.


The amount of extensions you have to goes up the higher you work up on the bell housing. This exlcuds the bolts for the starter

I had to use a deep socket and a half inch ratchet only to get the upper starter bolts off. I would definitely recommend getting a ratchet with alot of teeth to get the right engagement.

After you get some engagement with the ratchet take a hammer and hit the ratchet handle to break the bolt lose, you night have to do this several times. The power steering line is gunna be obstructing you. So it's hard to get enough power behind the ratchet with only 1/2inch gap which is why the hammer worked better.

A wobble would be probably be a good alternative. Not sure how much different the 4x4 setup but the above tricks worked for me in digging into the 2WD drive, 5VZ-FE removal.

Just if your in a bind and you don't have limited tools you can get it with the above method. It will worth Everytime. Mine Sledge solves everything.

She is hook ready. Gotta find where this m12x90 bolt is supposed to go on the passenger side....I could not find it. And I'm hoping I actually have a m12x90 bolt and not another size

And just FYI if your picking this out of a lifted 4runner get the biggest hoist you can find with alot of reach. I'm probably gunna have to jack up the rear end to get the hook in proper position. Maybe air out the front tires too but it's a home stretch now.

7818077dff052d971ed959f84d439328.jpg


Sent from my Pixel 2 XL using Tapatalk
 
Last edited:
And just FYI if your picking this out of a lifted 4runner get the biggest hoist you can find with alot of reach. I'm probably gunna have to jack up the rear end to get the hook in proper position. Maybe air out the front tires too but it's a home stretch now.
Shorten up the top chain by connecting to one of the lower links instead of the end link, that will gain you a few inches.

-Charlie
 
On all three 4wd rigs I forgot to remove a wireharness anchor bolt on the drivers side engine mount where the harness goes towards the trans.


Sent from my iPhone using Tapatalk
 
On all three 4wd rigs I forgot to remove a wireharness anchor bolt on the drivers side engine mount where the harness goes towards the trans.
The 4WD donor I got had a pulled/ripped ADD position switch plug - that's another one in that area that is hard to see.

-Charlie
 
Pulling an engine is 3x as simple as putting one back in. I've pulled 5 5VZ-FE's but only put one back in.

A few tips:

1. You can re-use the bellhousing bolts in the Harbor Freight engine stand. They are the perfect size and thread.
2. I wish I knew about the fuel line before. My line wrench head is now permanently melded to the nut. I got lucky and it didn't strip, it just dug itself into the nut. Still is there today after my engine swap lol!
3. Air down your tires as much as you can and like someone else said, bring the chain as high up as you can safely. It takes a LOT of clearance for that Harbor Freight hoist to get the oil pan over the front radiator support and you'll max out the lift how you have it now and not clear it. The hoist arm needs to be almost completely horizontal to clear.
 
Last edited:
The 4WD donor I got had a pulled/ripped ADD position switch plug - that's another one in that area that is hard to see.


-Charlie


I pulled the pins out of that plug all three times. Darn it. You really can’t see it until the engine is in the air.


Sent from my iPhone using Tapatalk
 
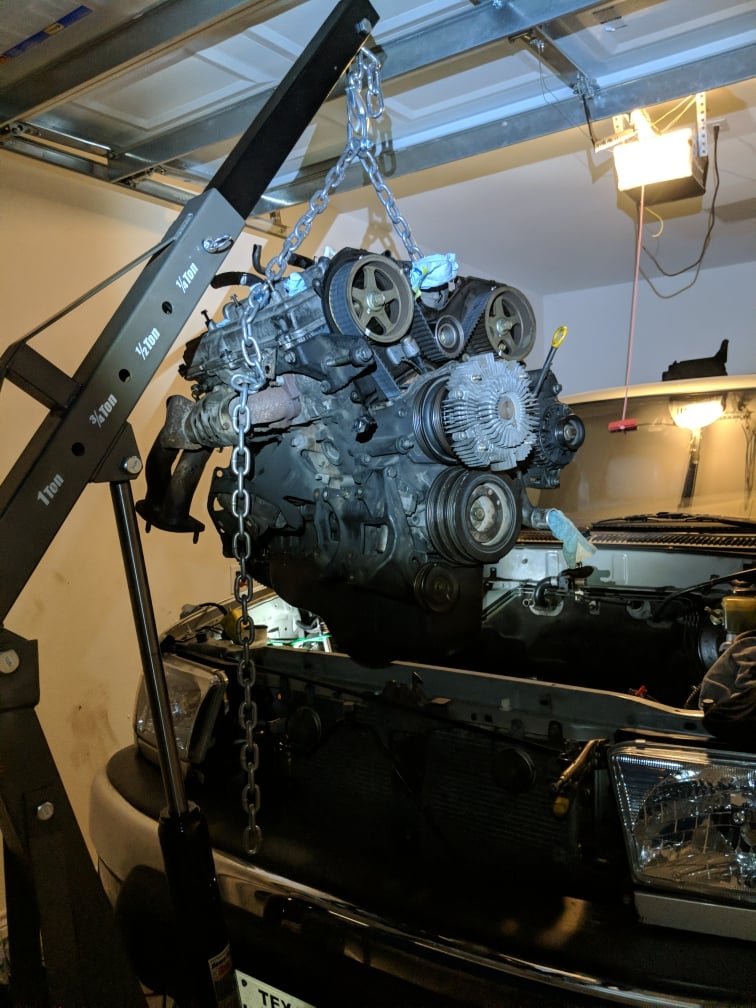
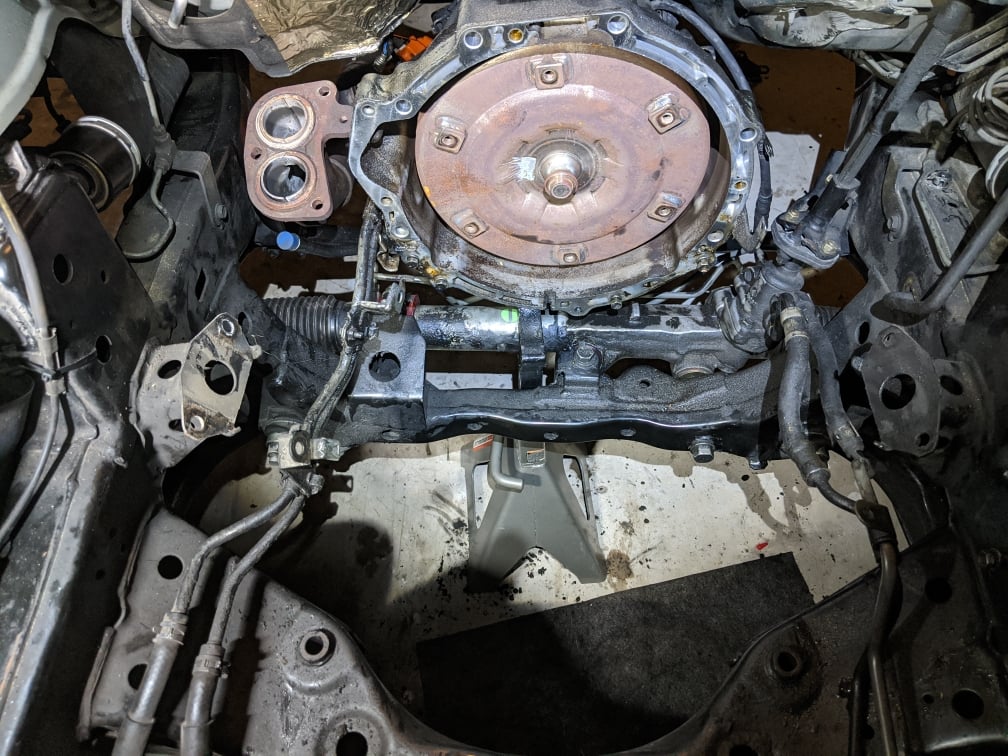
The engine came out with zero fuss. Like a freaking glove!!!

Broke the engine mount nuts and had it out in five minutes.

I took Charlie's advice and move the main hook up a few links.

Propped a jack under the bell housing to catch the transmission and shook the engine just a hair and the hoist just floated the engine. I didn't even realize it slid off the bell housing it was so smooth.

But I did g up the links to not pick up on it evenly and I let the slight torsion in the chain help me move it. After that it was slowly coming up albeit the passenger side head rotated forward at the end of it. But that's okay because all you gotta do is maneuver the hoist to counter twise and it will come out straight.

That was a hell of alot easier than I expected.

Thanks everyone for the help! Get the donor engine Saturday. Gunna do alot of TLC and restore this thing engine bay to it's oil free glory now
fb0acfe019dce16308ceb56d5edbae1c.jpg
8b676562abe829a751b0b2c8762e938b.jpg


Sent from my Pixel 2 XL using Tapatalk
 
Engine bay porn from those southern trucks. . Man is that rust free..lol. Glad it came out easy. :)

Sent from my SM-J337V using Tapatalk
 

Members online

Forum statistics

Threads
278,310
Messages
3,554,080
Members
248,016
Latest member
Advally Service

Trending content

Back
Top