A few pictures of my Runner

How do u like the ride of the performance products coils?? I just got a used set

I havent had pp coils for years now. Im running stock coils with bilstein 5100s up front now. The pp coils were way too stiff for me. Honestly they felt terrible on rough roads.

Yes, I would like to know as well. Also, I googled and can't seem to find a seller of those springs. I am sure they have a website.

Performance Products stopped selling suspension for 3rd gens years ago. You wont find them anymore. But they were terrible anyway. There are many far better options available now. Stock coils with spacers are a better option than pp coils
 
Thanks for the reply! Out of production...ok. I am just looking at all possibilities out there. Love the way your Runner looks so I had to ask.:bravo:
 
Thanks for the reply! Out of production...ok. I am just looking at all possibilities out there. Love the way your Runner looks so I had to ask.:bravo:

Thanks. My honest opinion after running several different lifts is that a new set of oem springs and a 1.5 day star spacer lift is the best way to go unless you will be carrying a lot of weight, or doing difficult off road trails. I have nothing more than stock suspension and a .5" spacer right now, and I drive the trails in my local mountains all the time. I have never had a problem clearing anything. Even with stock suspension I can do far more than most stock vehicles. I've been able to make it up most of the trails my brother and I explored on his side by side.

I don't have any added weight and don't plan on adding anything. I found that all the lifts I tried were way too stiff for stock weight. For daily driving my truck felt like a wooden roller coaster. You could save a lot of money by just getting stock suspension and adding a spacer.
 
you can get those front mudflaps from toyota for $60 i think. Do a search and check it out.
43.gif
6.gif

4.gif
 
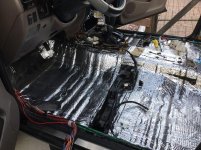
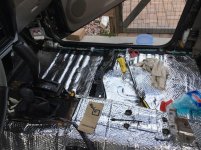
Did a bit of sound deadening yesterday. Now I have the majority of sheet metal on the floor, hatch and doors covered. In a few weeks I plan to add closed cell foam over the sound deadener, and on the roof. I used rattle trap in the past, but went with Noico 8mm sheets this time, as it is nearly half the price and had good reviews. No decibel measurements, but as anyone who has done sound deadening knows, there is certainly a subjective difference in road noise and vibrations. Always a good investment.


IMG_0381.jpg

IMG_0382.jpg
 

Attachments

  • IMG_0381.jpg
    IMG_0381.jpg
    123.5 KB · Views: 1,130
  • IMG_0382.jpg
    IMG_0382.jpg
    124.1 KB · Views: 1,118
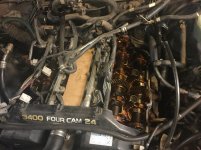
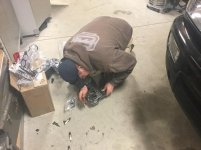
Tackled the valve cover gaskets last weekend. I had never done them before so I took my time with the help of my bro. Learned quite a bit in the process, including the fact that you have to re tighten the stupid bolts like ten times. Im guessing this is because the gaskets shrink down as they heat up. Having to take the intake manifold off to access those last three bolts is a pain. Anyways, a few pictures.


Everything off.

IMG_0534.jpg

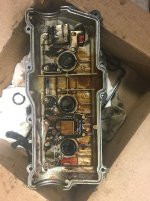
Valve covers didnt look to bad. Some carbon build up is expected at at 245k.

IMG_0536.jpg

My bro helping clean the valve covers. We used Purple Power which works quite well.

IMG_0538.jpg

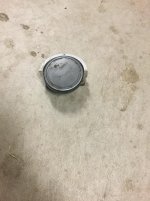
So I learned that this guy was the source of my leak, not actually the valve cover gasket. I know that the cam shaft plug has been brought up before, but I don't think people are aware that this is probably the most common cause of valve cover leaks on our trucks, rather than the gaskets. So we took it off and filled it with high heat rtv.

IMG_0539.jpg

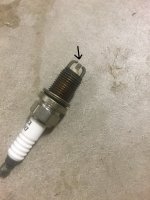
I didnt really need to change the spark plugs as these only had 20k miles on them, but they came with the OEM kit I got on ebay. Not bad. A little worn on one side.

IMG_0533.JPG
 

Attachments

  • IMG_0534.jpg
    IMG_0534.jpg
    85.2 KB · Views: 935
  • IMG_0536.jpg
    IMG_0536.jpg
    86.3 KB · Views: 915
  • IMG_0538.jpg
    IMG_0538.jpg
    61.5 KB · Views: 907
  • IMG_0539.jpg
    IMG_0539.jpg
    70.9 KB · Views: 929
  • IMG_0533.JPG
    IMG_0533.JPG
    135.5 KB · Views: 928
Question

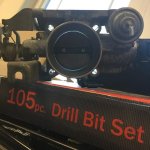
So Ive read a few threads about high idle issues being caused by the throttle body. My idle seems fine after changing the valve cover gaskets and cleaning the throttle body and iac, so I cant say Im having any issues. But when I was cleaning it I noticed that there is a gap on top and bottom of the butterfly valve. I read in a few other threads that this was the cause of high idle issues which were cured by eliminating the gap. On mine the butterfly is being stopped by the adjustment screw on the back side of the throttle body. I know the screw hasnt moved because it still has the original yellow paint marking the correct location. So I could get the butterfly to close fully ish by adjusting that screw.

My question is simply, should that gap be there at idle? You can see the light coming through on top and bottom.

IMG_0542.jpg
 

Attachments

  • IMG_0542.jpg
    IMG_0542.jpg
    48.7 KB · Views: 949
So Ive read a few threads about high idle issues being caused by the throttle body. My idle seems fine after changing the valve cover gaskets and cleaning the throttle body and iac, so I cant say Im having any issues. But when I was cleaning it I noticed that there is a gap on top and bottom of the butterfly valve. I read in a few other threads that this was the cause of high idle issues which were cured by eliminating the gap. On mine the butterfly is being stopped by the adjustment screw on the back side of the throttle body. I know the screw hasnt moved because it still has the original yellow paint marking the correct location. So I could get the butterfly to close fully ish by adjusting that screw.

My question is simply, should that gap be there at idle? You can see the light coming through on top and bottom.

View attachment 238603

Anyone know the answer to this question? I'm planning on taking everything off in a few hours to tighten the valve cover bolts beneath the plenum. So now would be the time for me to adjust the butterfly if I need to
 
Consider this the thread for my truck. Call it my "build" thread, "mod" thread, "maintenance" thread, whatever. It's going to be a record for myself of what Ive done so I can keep track of maintenance and such. So here we go . . .

"Jitters"
1998 Black SR5, 4x4, 3.4L, Auto
Purchased in Ft. Collins, Colorado on 8/3/10 for $6000 with 161000 miles, 100% stock


My objective with my truck is to make it as nice as possible (exterior, interior, mechanics, functionality), not necessarily "build" it. It's my daily driver, and probably will be for a while. My primary driving is highway for work, so building a rig designed to perform off road would be great, but simply wouldn't be practical for my needs. What I want is a truck that is extreamly healthy and well maintained, performs well on any road conditions or terrain, does everything I need including tow small loads and take me on my many adventures, can be trusted to drive cross country and back, and has a look that appeals to me.

Here's what I've done thus far.

As of today: Updated 10/18/16
242000 miles
Last oil change: 243500

Mods and Add-on's

Exterior

- Clear corner and bumper lenses
- LED tail lights
- Pre-fatlip bumper painted OEM black (purchased from blcktpgsr)
- Rear bumper ends painted OEM black (purchased from BanditRunner) thanks BanditRunner!
- Front grill painted OEM black
- Sotashi mod with custom made "-T-O-Y-O-T-A-" emblem, painted platinum metallic
- Liscense bezel painted OEM black
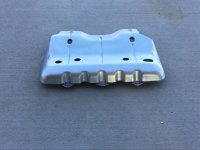
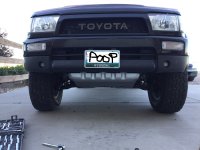
- Skid plate painted aluminum metalic
- Westin in channel vent visors
- Update to wide sport flares (started)
- Rear 5th gen 4runner badge and Tundra 2nd gen Toyota emblem on hatch

Interior

- Interior dash trim painted Rust Oleum semi-gloss black
- Husky floor liners, front, back and cargo (one of the best purchases I've ever made)
- Kenwood KDC-BT955HD Head unit
- Infiniti Reference speakers
- Alpine Amp
- CNC cut stainless steel "4RUNNER" door sills
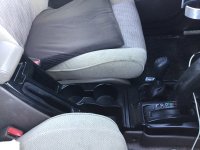
- Custom made cup holder! Best mod ever
- Rattle Trap and Noico sound deadened
- Closed cell foam decoupler
- Limited leather door panel swap (purchased from DeathCougar)
- Faux leather center console cover
- 99 center console swap

Suspension/Drive Train

- (Rear) 99 Coils, stock shocks
- (Front) 99 coils with Tacoma Bilstein 5100's on lowest setting
- Safari LTD Steering Rack
- Sway Away poly front and rear sway bar bushings
- @MStud front adjustable front links
- Sway Away poly steering rack bushings
- Rear diff breather mod
- EBC performance brake rotors and pads
- Level 8 zx wheels in matte black
- 265/70r17 Cooper Discover AT tires @ 230k
- Sway away lca poly bushings

Engine/Performance

- "Hole in the air box" (deck plate) mod
- ISR mod

Lighting

- 99+ glass Headlights from Certifit
- Hella Micro DE custom mounted fog lights
- Interior LEDs
- LED aftermarket tail lights
- Clear corners and bumper lenses
- Phillips super white headlights

Maintence/OEM parts

- New rear cone bump stops @ 165k (taken off when lc coils installed)
- Moble 1 high mileage synthetic and OEM oil filters every 4 - 5k
- OEM air filters every 10k
- OEM Injector #3 @ 165k
- OEM spark plugs @ 165k
- Amsoil synthetic rear diff oil @ 166k
- Tranny oil full flush and refill @ 175k
- OEM fuel filter @ 173k
- OEM inner tie rods @ 170k
- OEM tie rod ends @ 168k
- OEM upper and lower ball joints @ 170k
- OEM remanufactured steering rack @ 173k
- Seafoam in oil and pcv valve @ 186k and 190k
- New Denso Radiator and Toyota Red coolant @ 187600
- OEM remanufactured drive/pass cv's @ 189300
- OEM steering column shaft sleeve bushing @ 189300
- Replaced steering intermediate unit with lower mile (107k) unit @191000
- OEM reman cv's (again) @ 203000
- Reman alternator @ 212000 11/1/14
- New Safari LTD Steering rack @ 220000
- Energy suspension rack bushings @ 220000
- New Beck/Arnley upper ball joints @ 220000
- New OEM inner tie rods and rod ends @ 220000
- Lower mileage steering shaft intermediate unit (to rack) @ 205000
- Amsoil front diff oil @ 215000
- New OEM front wheel bearings @ 220000
- Greased all drive shaft fittings @ 22000
- OEM spark plugs @ 225000
- EBC brake rotors and pads @ 237500
- Eastern Cat converter @ 237500
- Duralast rear u joint @ 237000
- Sway Away lower control arm bushing @ 243000
- OEM rear shocks @ 243500
- OEM valve cover gasket @ 244500
- OEM spark plugs @ 244500
- OEM intake manifold gaskets @ 244500
- OEM passenger lower ball joint @ 245000
- OEM used cv axles @ 245000
- OEM inner tie rods @ 245000
The Dream List

- Low mileage engine swap
- Turbocharger
- JAOS spoiler
- Wide flares color matched black
- Projector retrofit
- Full length roof rack
- Keyless entry and alarm
- Remote start
- Tundra brake upgrade
- Re-gear with 4.3
- King coilovers
- Watts linkage in the rear
- Leather seats/covers
- Full undercarriage restoration
- Upgrade rear door speakers
- TRD headers

8/5/10


Here it is the week I bought it. Running boards still on.


View attachment 34104

View attachment 34111

Running boards off. Amazing how just removing running boards gives it an instant lift.

View attachment 34103

View attachment 34107

View attachment 34108

About a month ago I installed KYB gas shocks. Tires are brand new Goodyear Wrangler RT/S 265 70 16. Ive learned that tires for this vehicle are significantly more expensive than for my old Ford Taurus!

View attachment 34106

I bought the Husky liners to protect the carpet. They're a great investment here in Wisconsin, or any mid-west state where they use salt during the winter. These liners are awesome! Also have them in the back. And plan on getting the cargo liner eventually.

View attachment 34109

Last week I brought it in to a Toyota service center and got new rear coils and cones via the factory recall on the original springs. Nice freebie.

View attachment 34110

More to come

That's a beautiful truck

Sent from my SM-G955U using Tapatalk
 
FYI on the Noico sound insulation, per the instructions you are supposed to roll it on until the ridge pattern disappears completely. I bough a $5 roller on Amazon works great.
 
Few updates to the truck.


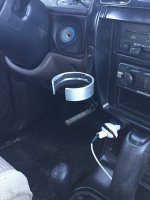
I did the 99+ cup holder mod. Painted with rust oleum semi gloss black to match the rest. I paid a whopping $20 for the parts.

IMG_0633.JPG


But dont worry, I still use my custom home brewed cup holder that has now worked flawlessly for 5 years. Its perfect for smaller cups.

IMG_0634.JPG


And re painted my skid plate with rust oleum metallic silver. Put in a lot of work prepping it to get rid of the Wisconsin rust, and let it cure for 5 days before installing, so it should last a long time.

IMG_0632.JPG

IMG_0636.JPG


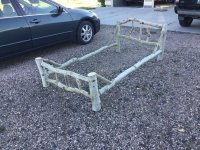
And built this. Maybe not 4runner specific, but I used my 4runner to drive to the local mountains and get the aspen, so. Aspen, where the beer flows like wine.

IMG_0635.jpg


I also installed a brand new set of 2016 SR5 wheels a while back, but havent gotten around to taking any good pictures yet. Will post them soon
 

Attachments

  • IMG_0633.JPG
    IMG_0633.JPG
    129.9 KB · Views: 718
  • IMG_0634.JPG
    IMG_0634.JPG
    118.8 KB · Views: 747
  • IMG_0632.JPG
    IMG_0632.JPG
    124.3 KB · Views: 731
  • IMG_0636.JPG
    IMG_0636.JPG
    103.8 KB · Views: 738
  • IMG_0635.jpg
    IMG_0635.jpg
    100.9 KB · Views: 736
Alright, can someone tell me what Im doing wrong posting my pictures? When people reply I want the pictures to be there instead the image link. I know Ive been doing it this way for the past 6 years but Id like to correct it.
 
One of my favorite on this site. Thanks for all the detailed write-ups and pictures. Will be using this as a reference on my upcoming build (when I can find a Black 2002 Sport)!
 

Members online

Forum statistics

Threads
278,316
Messages
3,554,121
Members
248,016
Latest member
Advally Service

Trending content

Back
Top