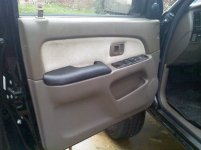
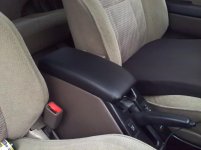
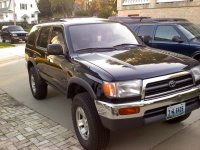
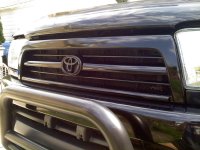
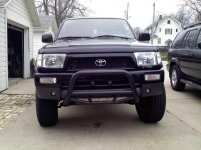
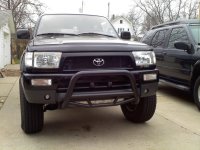
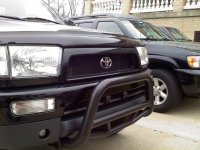
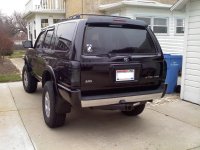
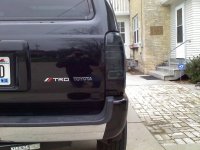
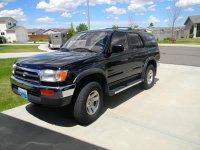
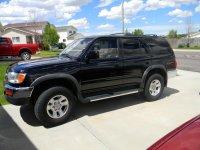
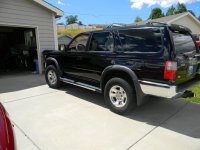
A few pictures of my Runner

My "Taylor" Made Cup Holder

So I did'nt want to spend the money on the 99+ cup holder. Plus you loose a bit of cargo room with it. I wanted something custom that would work perfectly, be located in the best possible spot, and accomidate a large range of cups. So I went to the drawing board and designed my own cup holder.

I strayed from the original design. The final product is a bit more simple, but better than the mock up.
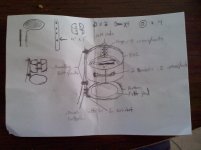

0917021119b.jpg


Here's what I used. A sturdy strip of aluminum, foam tape used for sealing doors, some stretchy cord, a 3" diameter section of PVC, and not pictured is an assortment of machine screws with nuts and washers, a small hinge, primer and trim paint, and a small washer I made from a scrap peice of plastic. This is basically all you need. I got everything from ACE Hardware for about $15.
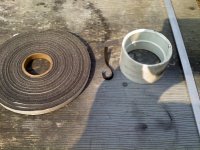

0917021102b.jpg


The pictures are fairly self explainatory, so Ill only give a few details.

I cut off a section of PVC at a width that I thought would work well for a variety of cup sizes, and then cut it in half vertically. I then drilled and fit the hinge in place, formed the stip of aluminum to accomidate the screws seat at 90 degrees, and then drilled the holes and put it together. Then I disassembled it to prime and paint. I let it dry over night and then put it back together and added the foam.

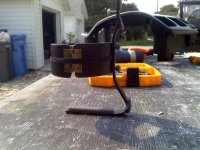
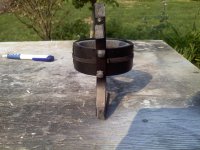
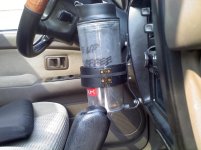
Here's the finished product uninstalled.
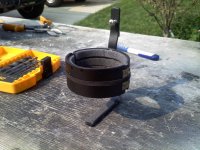

0917021022ab.jpg

0917021022abc.jpg

0917021022ac.jpg


And now to mount it.

I Lined it up on the dash bezel, drilled my holes, and screwed it into place.
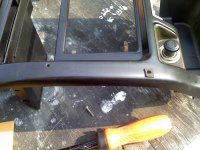

0917021022b.jpg


A nut on each screw to hold it securely.
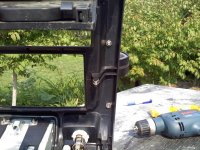

0917021039b.jpg


>>> continued on next post >>>
 

Attachments

  • 0917021119b.jpg
    0917021119b.jpg
    72.8 KB · Views: 1,985
  • 0917021102b.jpg
    0917021102b.jpg
    137.8 KB · Views: 2,099
  • 0917021022ab.jpg
    0917021022ab.jpg
    138.5 KB · Views: 1,991
  • 0917021022abc.jpg
    0917021022abc.jpg
    136.6 KB · Views: 2,016
  • 0917021022ac.jpg
    0917021022ac.jpg
    136.8 KB · Views: 1,981
  • 0917021022b.jpg
    0917021022b.jpg
    136.7 KB · Views: 1,994
  • 0917021039b.jpg
    0917021039b.jpg
    140.8 KB · Views: 1,987
>>> continued from previous post >>>
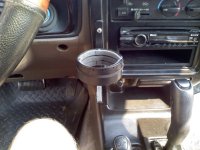
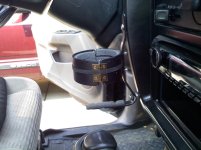
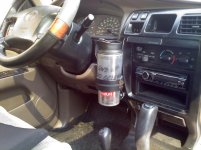
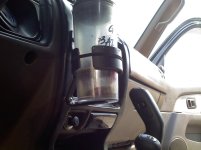
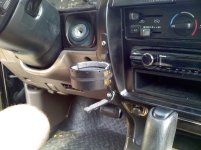
Here's what it lookes like with eveything back into place.


0917021049b.jpg

0917021049ab.jpg

0917021050b.jpg


And with a large cup in place.


0917021052ab.jpg

0917021052b.jpg

0917021051b.jpg


MY CONCLUSIONS:

This little cup holder is sweet! It works perfectly and holds any size cup you throw in it. The mounting is rigid and strong, while the foam allows some cushion. I think it looks pretty cool empty. Its not too big or gaudy. The tension from the cord is perfect. It holds just tight enough, but not so tightly that its a pain pulling the cup out and putting it back into place. No more dealing with the cup sliding all over every time I hit a bump. And the location is perfect. No more blocking the ac/heater and clock. It does'nt interfere with the steering wheel or wiper lever at all, and is at a perfect distance for my short arm to reach. For all of you 96 to 98 guys out there, I think you would really enjoy this little mod. For 3 to 4 hours of work, and $15, it's well worth it!
 

Attachments

  • 0917021049b.jpg
    0917021049b.jpg
    120 KB · Views: 3,121
  • 0917021049ab.jpg
    0917021049ab.jpg
    92.2 KB · Views: 2,526
  • 0917021050b.jpg
    0917021050b.jpg
    99.6 KB · Views: 2,182
  • 0917021052ab.jpg
    0917021052ab.jpg
    112.2 KB · Views: 2,046
  • 0917021052b.jpg
    0917021052b.jpg
    97.7 KB · Views: 2,513
  • 0917021051b.jpg
    0917021051b.jpg
    75.7 KB · Views: 2,019
tumblr_m963foQwDc1qiue7go2_1280.jpg


That thing is SWEET. Nice work on that man, I could use one of those...I wonder if my knee would get in the way being 6.5'. Regardless, awesome design!
 

Attachments

  • tumblr_m963foQwDc1qiue7go2_1280.jpg
    tumblr_m963foQwDc1qiue7go2_1280.jpg
    25.2 KB · Views: 1,949
Thanks man. Its possible that your knee would be close to it. Im 5'4" so the location of mine isnt an issue. But all you would need to do is mount it a little higher. Then Im positive it wouldnt be an issue for you.
 
Cat converters?

So I am almost 100% certain that my cat converter is going bad. Ive had the rotten egg smell of hydrogen sulfide for almost 2 years now, and its been getting worse.

I looked on toyotapartseast.com, and it looks like they no longer sell the the "exhaust gas recirculation system". Im sure it would be more than I could afford anyways. My first choice would be to get a full aftermarket exhaust, but I cant afford that right now either. So Im looking at cats. Ive seen several aftermarket, but honestly I dont know much about them. Do any of you guys have experience with cat converters, and can you make me a good recommendation? Should I go aftermarket, or try to find one used somewhere?
 
If you don't have to worry about emissions, just go with aftermarket. I was talking to the exhaust guy as he was welding my muffler on yesterday, and he told me they're all pretty much the same. Magnaflow cats aren't any better than generic aftermarkets according to him.

I have an aftermarket on mine (original was stolen right before I bought it) and I haven't had any problems with it.
 
Curious... did you use locktite on those nuts? Not much thread to work out on a rough trail. I'd have used a nylon locknut. Just an observation.

Very nice writeup and great looking cup holder. :nerd:
 
If you don't have to worry about emissions, just go with aftermarket. I was talking to the exhaust guy as he was welding my muffler on yesterday, and he told me they're all pretty much the same. Magnaflow cats aren't any better than generic aftermarkets according to him.

I have an aftermarket on mine (original was stolen right before I bought it) and I haven't had any problems with it.

Thanks for the info. Did your cat go bad?

That is one awesome cupholder.
Question... is it a one handed or two handed operation to insert/remove?


Thanks man. I love the thing. I use every day on my 45 minute drive to work, and I can put anything in it. I just use one hand. Its kinda hard to explain, but if the bottom of the cup is larger than the opening, you just put it in using one edge first, and kinda pry it open. I have never used two hands. And on most tapered cups the bottom is narrow enough to just push right into the cup holder.


Curious... did you use locktite on those nuts? Not much thread to work out on a rough trail. I'd have used a nylon locknut. Just an observation.

Very nice writeup and great looking cup holder. :nerd:


Im not sure what youre referring to here?
 
Thanks for the info. Did your cat go bad?


Im not sure what youre referring to here?

Nope, I was having a new muffler installed. The PO had the cat stolen, and head it replaced with an aftermarket...haven't had any problems with it in the year I've owned it.


And I think he's referring to the nuts you used on the back side of the trim to secure your cup holder...maybe those can work themselves loose...a cheap solution would be nylon nuts...but it doesn't look like you've had any problems with them yet.
 
Nope, I was having a new muffler installed. The PO had the cat stolen, and head it replaced with an aftermarket...haven't had any problems with it in the year I've owned it.


And I think he's referring to the nuts you used on the back side of the trim to secure your cup holder...maybe those can work themselves loose...a cheap solution would be nylon nuts...but it doesn't look like you've had any problems with them yet.

Oh. Ya that would be a good idea. But I dont think there will be any problems the way it is. The bottom one is fully threaded, it just doesnt look like it in that picuture. And since the nut is secured against the bezel, the plastic is crimped and keeps pressure on that nut.
 
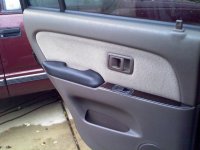
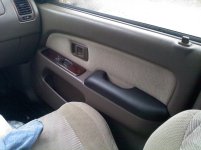
Added some black interior vinyl to the door handles and console lid. I like the look and feel . . . its like leather. Its really durable, waterproof, stain proof, etc . . . Plus its covering the fabric so I can take it off any time to go back to original.


1025021633a2.jpg

1025021633b2.jpg

1025021633c2.jpg

1025021640b.jpg
 

Attachments

  • 1025021633a2.jpg
    1025021633a2.jpg
    133.7 KB · Views: 2,416
  • 1025021633b2.jpg
    1025021633b2.jpg
    133 KB · Views: 2,392
  • 1025021633c2.jpg
    1025021633c2.jpg
    131.1 KB · Views: 2,383
  • 1025021640b.jpg
    1025021640b.jpg
    82.4 KB · Views: 2,385
Last edited:
My Sotoshi Mod

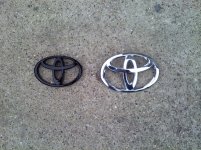
I did my rendition of the sotoshi mod over the past few days. I replaced my original 4runner emblem from a new Tundra one as its much larger. I also used trim around the back edge to make it look sharp. This was my first experience with Bondo, and I had to apply and sand it twice to get a good finish. Also, I used flat black vinyl on the inside edges rather than paint as its too cold to paint and I dont have access to a heated garage. It looks sharp, though I will probably end up painting the whole thing in the spring.

What my grill looked like factory

4.jpg


What it looked like a few days ago before the sotoshi mod (honestly I think this grill looked very sharp fully color matched)

0814021459a.jpg


Size difference between the emblems

1130021447aa.jpg


And what it looks like now after the sotoshi mod

1130021527aa.jpg

1130021456bb.jpg


Here you can see the black trim on the inside edge

1130021456aa.jpg


Maybe one day I will invest in a digital camera so my pictures dont look so dull.
 

Attachments

  • 1130021527aa.jpg
    1130021527aa.jpg
    134.3 KB · Views: 2,415
  • 0814021459a.jpg
    0814021459a.jpg
    130.5 KB · Views: 2,367
  • 1130021456bb.jpg
    1130021456bb.jpg
    132.4 KB · Views: 2,433
  • 4.jpg
    4.jpg
    104.8 KB · Views: 2,366
  • 1130021456aa.jpg
    1130021456aa.jpg
    132.8 KB · Views: 2,376
  • 1130021447aa.jpg
    1130021447aa.jpg
    138.2 KB · Views: 2,361
I also tinted my tail lights. I really cant decide if Im sold on it.

1130021523bb.jpg


1130021528.jpg
 

Attachments

  • 1130021523bb.jpg
    1130021523bb.jpg
    135.1 KB · Views: 2,402
  • 1130021528.jpg
    1130021528.jpg
    134.2 KB · Views: 2,369
So Im back in Wyoming on vacation for Christmas, and I was looking through my parents pictures and found a few shots of my 4runner taken right after I got it back in august of 2010. Running boards still one!


384b.jpg

385b.jpg

386b.jpg
 

Attachments

  • 384b.jpg
    384b.jpg
    129.9 KB · Views: 2,313
  • 385b.jpg
    385b.jpg
    129.8 KB · Views: 2,289
  • 386b.jpg
    386b.jpg
    127.9 KB · Views: 2,331
Just read the whole build up. Love it! My 4Runner is almost identical to yours and I have a set of the Tacoma wheels that I am considering mounting. The lift info was also very helpful. This gave me great perspective. Thanks!
 
Just read the whole build up. Love it! My 4Runner is almost identical to yours and I have a set of the Tacoma wheels that I am considering mounting. The lift info was also very helpful. This gave me great perspective. Thanks!

Hey thanks man! Im glad I could provide some useful info. This forum is an ocean of knowledge. Ive learned everthing Ive ever needed to know about my 3rd gen from the helpful guys here
 

Members online

Forum statistics

Threads
278,316
Messages
3,554,120
Members
248,016
Latest member
Advally Service

Trending content

Back
Top