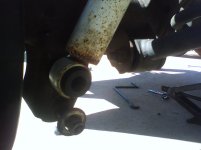
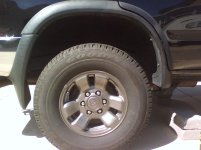
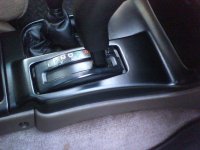
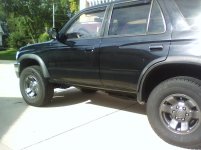
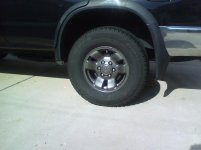
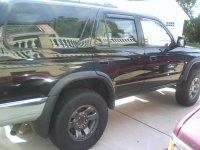
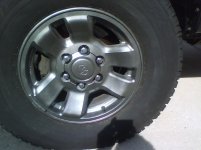
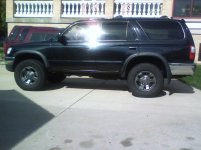
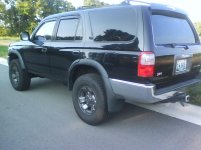
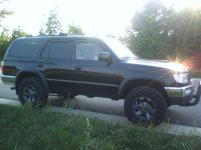
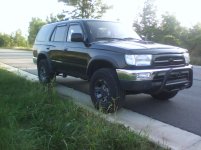
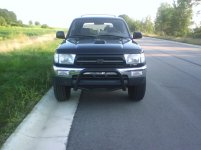
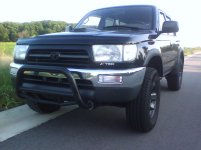
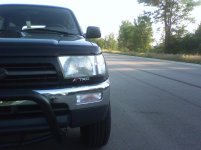
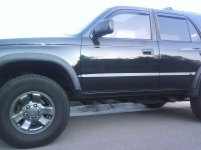
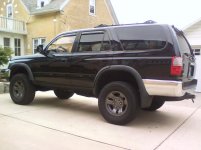
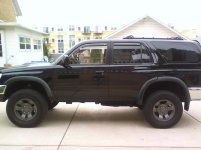
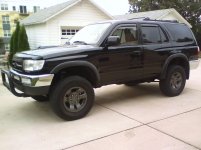
A few pictures of my Runner

So this morning I went ahead and purchased prep supplies and Dupli Color Graphite wheel paint. Ive been working on it throughout the day. 3 wheels down, one to go. Look for pictures tomorrow!

Also removed the fake wood grain trim on the dash on console and painted black with Rust-Oleum Bumper and Trim paint. The stuff looks awesome! Looks better than the plain black plastic did.

0904011907.jpg
 

Attachments

  • 0904011907.jpg
    0904011907.jpg
    137.4 KB · Views: 5,201
Last edited:
Dupli color graphite wheels

Alright bros, here they are. Im not fully convinced that I love it yet. It may grow on me. I think the graphite looks better on white runners. Not so sure against the black. But, I will say that I did a quality job painting them. Spent a lot of time, mainly doing the prep work. So the wheels dio look really nice. Just not sure if Im set on the look on a black runner. Sorry about the quality of pictures. My 1.2 pix camera phone is all I have right now. Tell me what you think. Oh, and if anyone out there really likes these and thinks they would look better on your runner, I may be interested in some sort of trade for the right set of wheels.

0827010924.jpg

0827010924a.jpg

0827010924b.jpg

0827010925.jpg

0827010936.jpg
 

Attachments

  • 0827010924.jpg
    0827010924.jpg
    120.6 KB · Views: 4,882
  • 0827010924a.jpg
    0827010924a.jpg
    79.5 KB · Views: 4,789
  • 0827010924b.jpg
    0827010924b.jpg
    127 KB · Views: 4,785
  • 0827010925.jpg
    0827010925.jpg
    112.6 KB · Views: 4,930
  • 0827010936.jpg
    0827010936.jpg
    114.7 KB · Views: 5,526
I think they came out good but i would prefer a silverish duplicolor like i did on my 4R. Especially on a black runner like that. It would really break it up alot.
 
I think they came out good but i would prefer a silverish duplicolor like i did on my 4R. Especially on a black runner like that. It would really break it up alot.

My thoughts exactly. I thought the graphite color was much lighter. With black I need the aluminum or steel look. But at least Im fully preped to repaint at this point. All I need to do is scuff them.
 
And a few more pictures with the new rims. Still not decided if I want to keep them this way or not.

0831011804b.jpg

0831011805.jpg

0831011805a.jpg

0831011805b.jpg

0831011806.jpg

0831011806a.jpg

0831011806c.jpg
 

Attachments

  • 0831011804b.jpg
    0831011804b.jpg
    124.3 KB · Views: 4,746
  • 0831011805.jpg
    0831011805.jpg
    119 KB · Views: 4,787
  • 0831011805a.jpg
    0831011805a.jpg
    131.3 KB · Views: 4,789
  • 0831011805b.jpg
    0831011805b.jpg
    120.7 KB · Views: 4,721
  • 0831011806.jpg
    0831011806.jpg
    109.3 KB · Views: 4,732
  • 0831011806a.jpg
    0831011806a.jpg
    118.3 KB · Views: 4,705
  • 0831011806c.jpg
    0831011806c.jpg
    95.3 KB · Views: 4,777
I have to ask; are the window visors actually on the windows themselves? Do they roll down with the windows or do they somehow clip into the channel above?
 
I have to ask; are the window visors actually on the windows themselves? Do they roll down with the windows or do they somehow clip into the channel above?


Theyre just in channel visors. They stick in the channel the window rolls up in. They are suppose to block more wind than the tape-on visors. And of course you dont have to put any tape on your paint
 
Nice paint work on those wheels, but I'd have to agree that Graphite would look a lot better on almost any other color other than black. Duplicate that paint work with some silver or whatever & you'll be set.
 
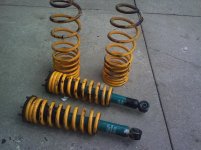
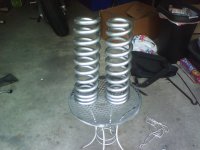
Well, I already showed these off on another thread, but since this is like my build thread, Ill go through the install here. Got these from member AF808fighter for a really good price. He's in Milwaukee about an hour from me. Performance Products progressive coils with around 30k miles, with Tokico Trekmaster shocks with around 15K on them. Im gonna match the coils up with my KYB gas shocks, so the Trekmasters are gonna go up for sale here in the classifieds. The KYBs are really stiff shocks, so Im hoping these coils suite them well.

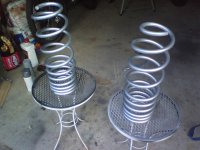
Heres what they looked like when I got them on Monday.
0905011351.jpg

I then preped, primed and painted the rears with Rustoleum Steel Metalic paint, which is awesome stuff. Of all the aerosol paints Iv used, thier metalics come out the best. Its easy to get a smooth surface, and the finish is very strong. I think they look awesome!
0905011700.jpg

Havent done the fronts yet. I still need to pull the shocks off of them first. Probably wont have time to do this till next week. But the rear coils are going on today. Right after I finish this post! So look for the update later today
 

Attachments

  • 0905011351.jpg
    0905011351.jpg
    135.5 KB · Views: 3,904
  • 0905011700.jpg
    0905011700.jpg
    129.8 KB · Views: 3,925
Well it took me just over 2 hours to change the rear coils, taking my time and doing everything carefully. Went really smooth overall. I didnt think it would be such a straight forward job.

After jacking it and removing the tires I then removed the sway bar connection and bottom bolt of the shocks while supporting the rear axel.
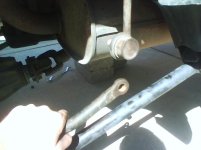
0908011026.jpg
0908011026a.jpg

I had to take this bracket off as well because it was gonna put too much stress on the line.
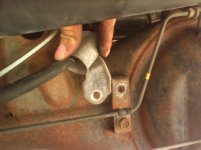
0908011050.jpg

Then I took the jack from beneath the axel, and pulled out the rear springs. They came out relatively easily. Just had to push the axel down a bit.

Heres a shot of the stock Toyota vs. Performance Products coils. The difference in height was only like an inch, so I was worried I would only get like a half inch lift with them being progressive and softer at the one end.
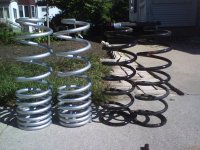
0908011029.jpg
By the way my stock coils in excellent condition, and will be going up for sale in the classified section pretty soone here.

When I went to install the new coils, I couldnt get the driver side down far enough to get the spring in. So I just got creative with the jack.
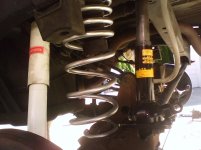
0908011037.jpg
You can see I put one end against the axel, and the other end against the frame. This made it really easy.

And there they are installed with the sway bar and shocks reconnected.
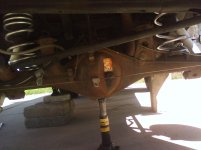
0908011057.jpg

Heres the before and after. The difference is pretty obvious. It gave me right around 2 inches on both sides, which is perfect in my opinion.
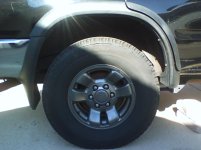
0908010908.jpg
0908011124.jpg

My measurements from the ground to tip of fender flare:

Stock --------------------- Driver side = 35 3/8 in. Passenger side = 34 7/8
Performance Products coils - Driver side = 37 1/2. Passenger side = 36 7/8

So I am sitting a little high on the drivers side. Since Im sitting about an inch higher in the back I have a slight stance, which is exactly what I wanted! I think it looks awesome. And its perfect for the light weight towing I'll be doing.

I also installed the front coils and shocks as seen in the picture above (temporarily) to see how much lift I would get, and what it would drive like with the Tokico Trekmasters. AF808fighter (who sold me the suspension) told me that they were a little to soft for these coils, and that it made the ride a little rough. But when I drove it around after the install, its not a bad ride at all. Just a little bouncy up front as would expect with not enough shock to offset the coils. But like I said, this is temporary. I am still going to put my super stiff KYBs up front. The back feels fantastic with the PP coils and KYB shocks. Seems like a win so far. Overall the ride is great. It doesnt necessarily feel softer then my stock ride, just less harsh.

So I know that everyone wants to see the full body pictures. Look for those tomorrow!

 

Attachments

  • 0908011026.jpg
    0908011026.jpg
    87.6 KB · Views: 3,851
  • 0908011026a.jpg
    0908011026a.jpg
    76.3 KB · Views: 3,866
  • 0908011050.jpg
    0908011050.jpg
    122.1 KB · Views: 3,865
  • 0908011029.jpg
    0908011029.jpg
    139.4 KB · Views: 4,067
  • 0908011037.jpg
    0908011037.jpg
    111.3 KB · Views: 3,891
  • 0908011057.jpg
    0908011057.jpg
    92.5 KB · Views: 3,847
  • 0908010908.jpg
    0908010908.jpg
    105.3 KB · Views: 3,855
  • 0908011124.jpg
    0908011124.jpg
    108.8 KB · Views: 3,850
Been doing some other stuff as well.

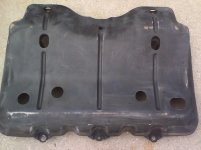
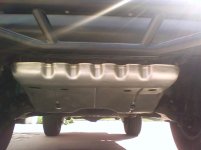
Heres the stock skid plate with its dull black coating.
0909011359.jpg

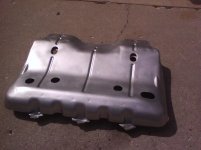
When I sanded it down I got to the metal in a few spots. You can kinda see it in the picture. I think it would look really good sanded down to the bare metal and then polished. I actually thought about doing that, but it would rust like crazy.

So here it is with rustoleum steel metalic coating.
0909011417.jpg

Also have been doing some color matched painting. This guy used to be graphite.
0908011139.jpg
 

Attachments

  • 0909011359.jpg
    0909011359.jpg
    104.3 KB · Views: 3,846
  • 0909011417.jpg
    0909011417.jpg
    124.3 KB · Views: 3,823
  • 0908011139.jpg
    0908011139.jpg
    134 KB · Views: 3,801
Looks great. Spring removal, rear at least, is pretty easy IMHO. When I first did it, I was amazed just how much the axle had to articulate to get the spring out.

Not to sound like an old fart, but once ya get a job with that degree, and you plan to keep the 4runner, buy some 6ton jack stands and a decent floor jack for more safety.
 
Theres the plate mounted. Looks awesome! Though you really dont see it form the front because my bull bar is in front of it.
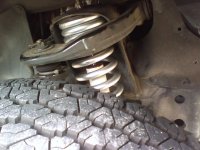
0909011513.jpg
 

Attachments

  • 0909011513.jpg
    0909011513.jpg
    78 KB · Views: 3,831
Looks great. Spring removal, rear at least, is pretty easy IMHO. When I first did it, I was amazed just how much the axle had to articulate to get the spring out.

Not to sound like an old fart, but once ya get a job with that degree, and you plan to keep the 4runner, buy some 6ton jack stands and a decent floor jack for more safety.

Definately agreed. Throwing around 40lb concrete blocks as no fun. Money is short for the time being though.
 
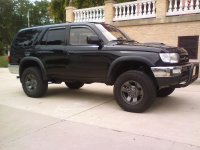
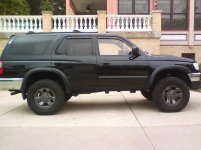
And heres the finished product. Just took the front assemblys apart yesterday, preped and painted them to match the rears, and installed with my KYB's. Overall I got about 1 1/2 in the front, and just over 2 in the back. Its hard to tell because my driveway is dipped down where the back tires are sitting, but it has a slight rake which I really like. Supprisingly the ride is almost identical to what it was with the stock coils. These KYBs are just too stiff! And I think the graphite rims are growing on me a bit. Heres a few pics -

0913011810.jpg

0914011137.jpg

0914011136.jpg

0914011137a.jpg

0914011137b.jpg

0914011138.jpg

0914011138a.jpg
 

Attachments

  • 0913011810.jpg
    0913011810.jpg
    131.4 KB · Views: 3,814
  • 0914011137.jpg
    0914011137.jpg
    130.3 KB · Views: 3,806
  • 0914011136.jpg
    0914011136.jpg
    127.2 KB · Views: 3,868
  • 0914011137a.jpg
    0914011137a.jpg
    123.3 KB · Views: 3,826
  • 0914011137b.jpg
    0914011137b.jpg
    113.8 KB · Views: 3,823
  • 0914011138.jpg
    0914011138.jpg
    105 KB · Views: 3,847
  • 0914011138a.jpg
    0914011138a.jpg
    124.1 KB · Views: 4,676
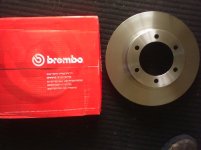
Also got these today and installed them. Ive had a shimmy under braking at anything over 40mph for quite a while now (like 6 months). So I ordered the Brembos. Drove it today and braking vibration is completly gone.

0914011340.jpg
 

Attachments

  • 0914011340.jpg
    0914011340.jpg
    90 KB · Views: 3,753

Members online

Forum statistics

Threads
278,316
Messages
3,554,124
Members
248,016
Latest member
Advally Service

Trending content

Back
Top