Ace's 1998 4Runner Build Thread

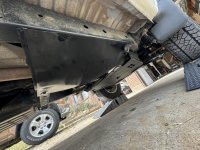
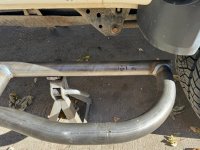
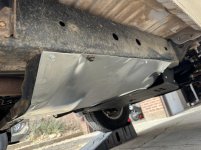
I rolled the side edges to give it a bit of rigidity and secured it to two existing & unused threaded holes after cutting a notch for it to slide under the Talons Garage skidplate. I secured it to the back crossmember with a bolt, fender washers and a lock nut. Then I used a few self tapping screws to hold it tight to the frame-
 

Attachments

  • IMG_8993.jpg
    IMG_8993.jpg
    100.1 KB · Views: 593
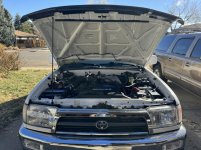
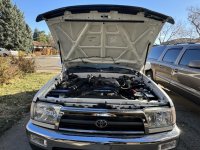
Installed a Spiker ULTIMATE Lift Hood Strut Kit today :thumb3:

Easy install if you have the tools.

Opening & closing is how it should be- easy, effortless and predictable.

Before & after pics.
 

Attachments

  • IMG_8998.jpg
    IMG_8998.jpg
    135.4 KB · Views: 629
  • IMG_8999 2.jpg
    IMG_8999 2.jpg
    139.6 KB · Views: 4,639
Last edited:
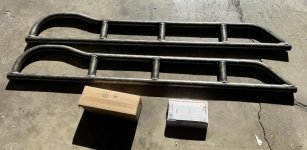
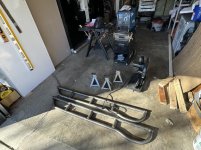
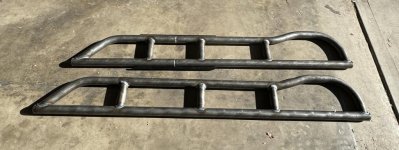
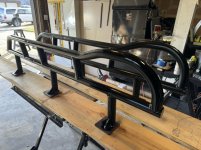
After I unpacked them I put them up next to 4Runner to see how much I'd have to shorten them. I knew ahead of time that I would need to do this in order to have them fit between the front and rear mud flaps after discussing this with Adam at 4X.

It looks like between 5 & 6 inches will have to be removed -

408315d1700252661-best-rock-sliders-budget-img_9005-jpg
 

Attachments

  • IMG_9007.jpg
    IMG_9007.jpg
    111.1 KB · Views: 589
Last edited:
To know for sure I plan on removing the rear flap and measuring the slider against a forward edge mark for the flap. I'll remove a section in the middle and then weld them back together.

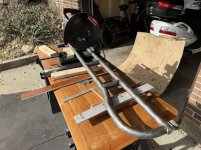
I got a fresh bottle of gas this morning for the Miller Millermatic 211 and broke out the steel chop saw, should be a fun project -
 

Attachments

  • IMG_9010.jpg
    IMG_9010.jpg
    126.5 KB · Views: 609
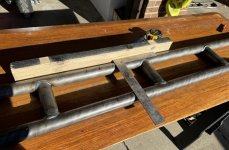
Yesterday I got most of the work done on the 4XInnovations rock sliders.

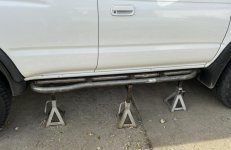
I had to remove 4.25 inches from the length to have them fit between the OEM flares/flaps.
 

Attachments

  • IMG_9012.jpg
    IMG_9012.jpg
    104.4 KB · Views: 563
  • IMG_9017.jpg
    IMG_9017.jpg
    137.3 KB · Views: 569
I used a pair of free (remember back when Harbor Freight always had free items?) magnetic tool bars to keep the rails aligned while I tacked them.

I probably should have sleeved the joints but didn't have the material.
 

Attachments

  • IMG_9013.jpg
    IMG_9013.jpg
    73 KB · Views: 570
Last edited:
After I cleaned up the welds I checked for fit between the mud flaps-
 

Attachments

  • IMG_9015.jpg
    IMG_9015.jpg
    74.4 KB · Views: 1,667
Last edited:
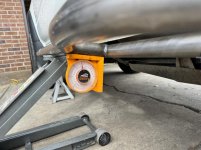
I decided on a 10 degree tilt -
 

Attachments

  • IMG_9016.jpg
    IMG_9016.jpg
    97.7 KB · Views: 564
  • IMG_9019.jpg
    IMG_9019.jpg
    96.9 KB · Views: 575
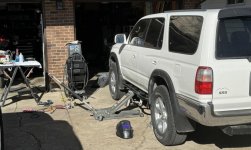
Today I have to finish cleaning up the welds and paint the sliders. I'll prime and paint them with satin Rustoleum, easy to apply and touch up.
 
Gotta give you credit for putting in the work to make those fit how you want. I would no longer have mud flaps, but I'm a lot lazier than you are!
 
I like the integrated (and hard to find) mud flaps that go with the flares. They will be in danger in serious off roading situations but I'm not planning on doing too much of that.

This morning I cleaned up a few welds and did a few touch ups, then cleaned the sliders with brake cleaner and painted.

1 coat of rusty metal primer and then 2 coats of satin black Rustoleum.

In the garage right now curing, I'll probably leave them alone for a few days before welding them to the frame -
 

Attachments

  • IMG_9021.jpg
    IMG_9021.jpg
    120.4 KB · Views: 554
Yesterday I armed the Viper alarm with my dog inside and within a few minutes she set it off...I suspect that her dog tags clinking set off the Directed 506T audio/glass breakage detector.

I looked at the manual and can't find a way to turn the sensor off so I'll be installing a toggle switch to manually disable the sensor.
 
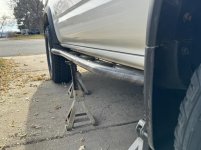
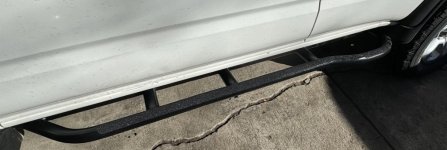
Finished installing the 4XInnovations DOM Rock Sliders today.

Slider in place, about to weld it to the frame -
 

Attachments

  • IMG_9029.jpg
    IMG_9029.jpg
    94.5 KB · Views: 1,605
After I welded it in place I painted the bare metal and then applied 2 in wide grip tape to the top of the slider. I'll see how well it works- right now I will scuff my calf getting out if I'm not paying attention.

If it becomes an issue Ill remove the sections by the front door but will keep the tape on the kickout for sure -
 

Attachments

  • IMG_9033.jpg
    IMG_9033.jpg
    50.4 KB · Views: 344
Last edited:
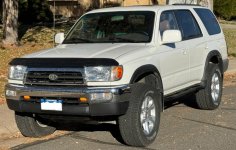
That was the biggest mod to the T4R so far. Next will be installing a Sherpa Antero Rack. They are located just north of me so I'll go by to pick it up when it's ready, hopefully by the end of the week.

Slick roof & sliders for now -
 

Attachments

  • IMG_9035.jpg
    IMG_9035.jpg
    101.1 KB · Views: 1,463
Last edited:
That was the biggest mod to the T4R so far. Next will be installing a Sherpa Antero Rack. They are located just north of me so I'll go by to pick it up when it's ready, hopefully by the end of the week.

Slick roof & sliders for now -

Nice. You'll notice the sliders being there for sure. Mine are very tucked in and I'm still getting dirt on me trousers. If you get Matterhorn envy after installing the Antero, Sherpa will sell you the longer side pieces and hardware. Also, the 'blem' cross-members are a good deal especially if you don't need shipping.
 
I ordered the Antero last week on the phone and was told they might get it out this week but with Thanksgiving being tomorrow I'm not counting on it. Good to know that upgrading to a Matterhorn is easy though I doubt I'll go that route.

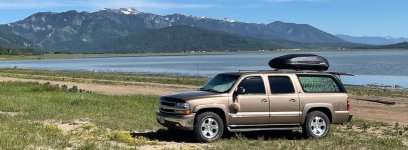
Because the OEM rack crossmembers were gone when I got it I just want a rack about the same size that I can mount my big SportRack Vista XL Rear Opening Cargo Box to. Here it is on my Suburban -
 

Attachments

  • FAD190CB-C5D9-4C53-93AB-BD0C3BDC9784.jpg
    FAD190CB-C5D9-4C53-93AB-BD0C3BDC9784.jpg
    75.7 KB · Views: 356
When I go to pick up the rack I'll be looking at light bar mounts for the front of the rack. It would be nice to have a 32 in or larger light bar with combo fog/spot lights.
 

Members online

Forum statistics

Threads
278,309
Messages
3,554,066
Members
248,016
Latest member
Advally Service

Trending content

Back
Top