aemravan's build thread - project TacoRunner

So looks like my $180 of A1 o2 sensors and sparkplugs/coils narrowed down my P0430 issue down to the actual catalytic converter itself.. I was super happy when the code didn't show up for the first 5 days, but now its back with a vengeance lol. Still throwing the bank 2 below threshold code... so after doing some digging I think my next cheap try will be to go get some non foulers at lunch and drill them out for the rear 02 sensors.. hopefully that takes care of the issue.

I don't mind spending the money on new cats.. but can't stand the idea of having to take off the headers to replace.. if I go through the trouble of doing that you better be damn certain i'm going with a long tube header instead lol. But now it looks like URD doesn't offer the 02 simulator anymore so I figured instead of dropping $1000+ on an upgrade i'll try the $15 route first and see what happens lol.


Also, for some reason I am seeing a P0705 code showing up for the (something related to gear position sensor switch) .. which is weird. I have all my gear indicator lights coming on as needed, no issues with the car shifting at all (that I've noticed anyway). My initial thought was that it has something to do with my disconnecting the 4WD ecu with my FJ Transfer case swap. I have a permanent VSC trac off light (and the system is registering an error) but after doing more reading I don't believe that is the case of the P0705 code.. very strange. Gotta love constantly breaking stuff on this thing :)


***EDIT*** on my drive over to pick up the defoulers I had a bit of a revelation... I think my P0705 code may be lingering from the previous off road OOPSIE I had when I blew a fuse and lost the gear position indication on the dashboard where nothing was lit up for a while and I couldn't get out of 4Lo..I would think that should certainly fall in the realm of possible errors for the P0705 code. Planning on drilling out the defoulers later today and getting the bank 2 rear sensor spaced out, clearing codes, and driving it for the weekend to see what happens..
now just to confirm that the bank 2 sensor is the passenger side.... lol.

ps: attaching an identification file for the banks that I just found for reference later if anyone needs.
 

Attachments

Last edited:
So a few things …

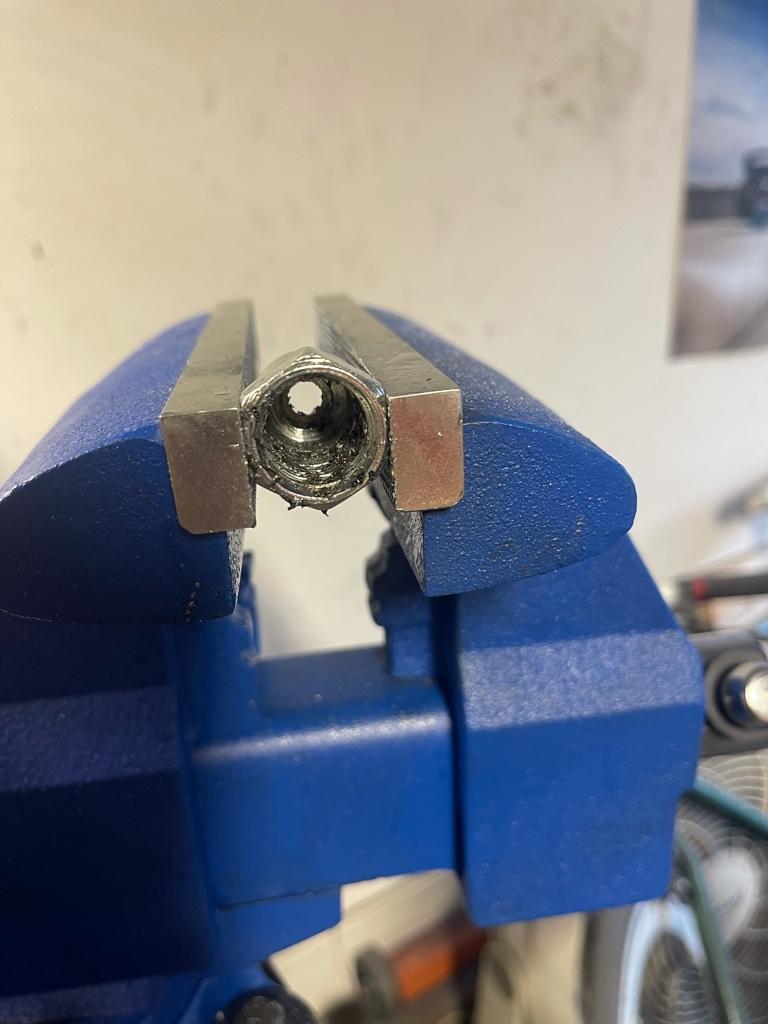
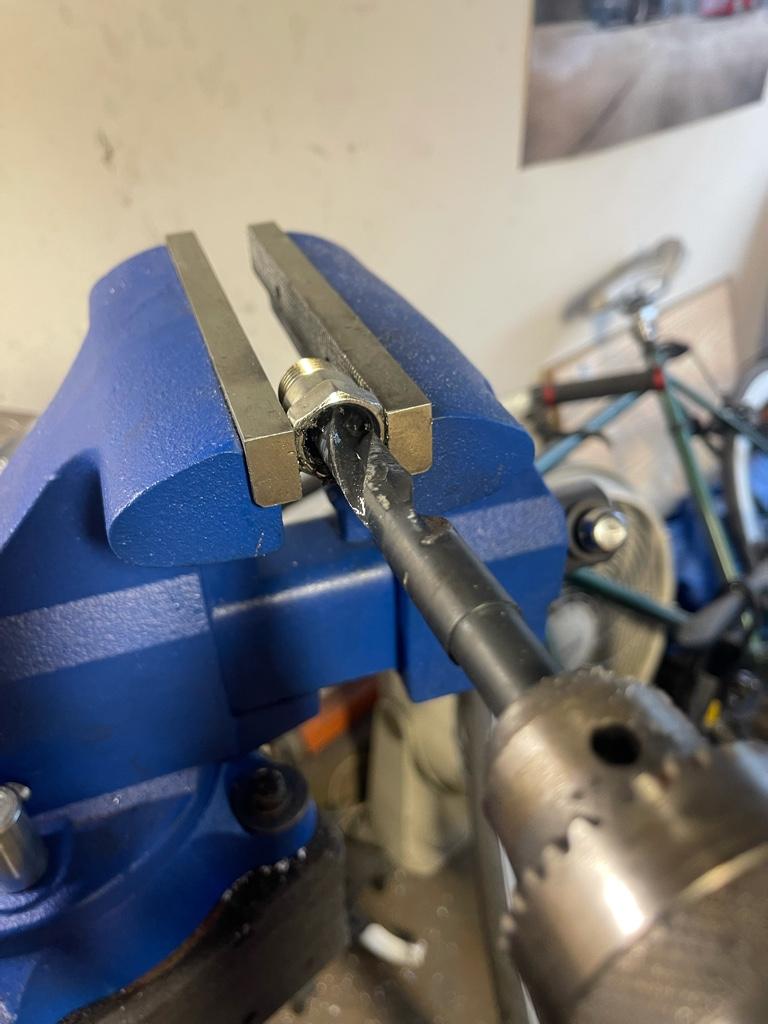
1. Drilling out the plug defoulers absolutely sucks without a drillpress absolutely sucks.
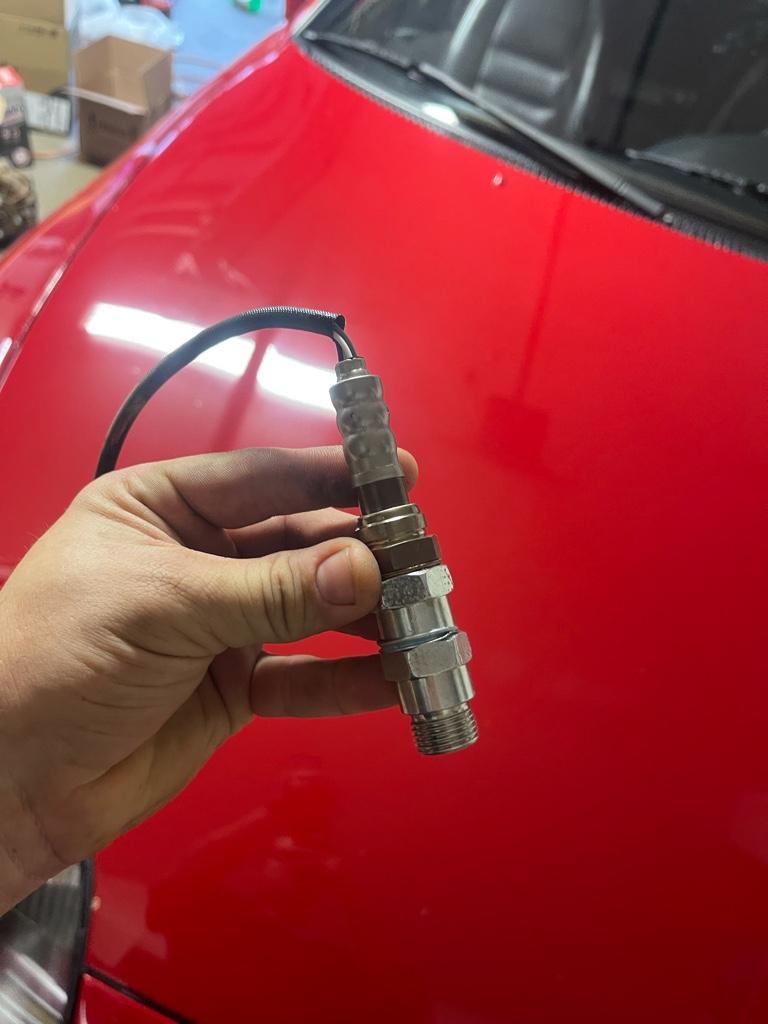
2. The stacked defouler method appears to work, but I may need to open the hole up a bit. At idle it’s reading 0v on that o2 sensor and I’m not sure if that’ll be a problem for the system to initialize, time will tell. It picks up voltage as soon as I start accelerating so the concept definitely works.
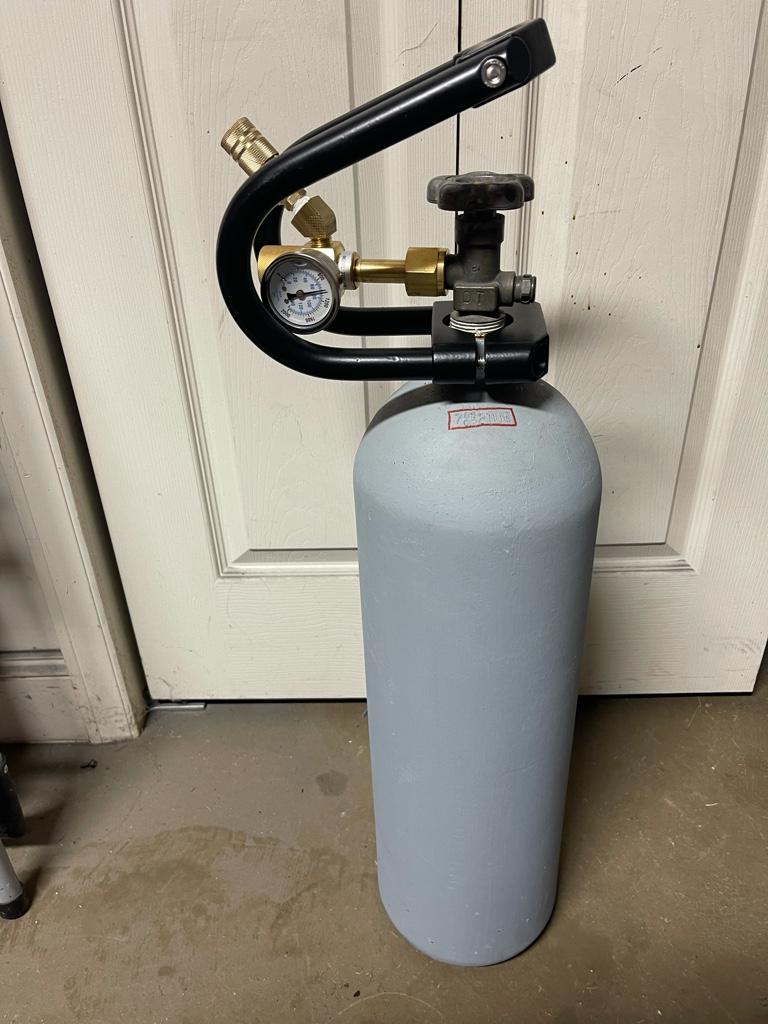
3. My CO2 fill is pretty much complete. Tank was supposed to ship empty, I’m not complaining or anything … but there’s 1600psi worth of CO2 in there.. so that bad boy is full lol. Can’t wait to do a test tomorrow.
dc306b3e5b185d24cd3795a9fcf5e380.jpg

1879908c32d159ade127b086906857a6.jpg

5989227a3ce07e886ece13377f6f7185.jpg

769dd13fc7976e8245258416a7333050.jpg


Sent from my iPhone using Tapatalk
 
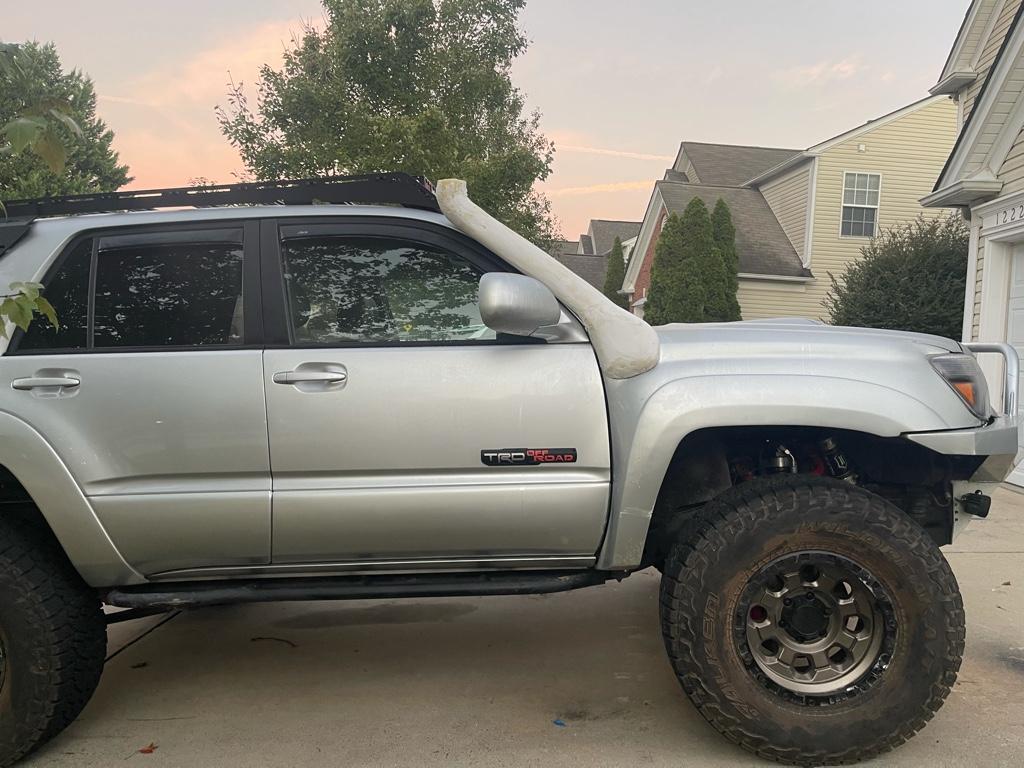
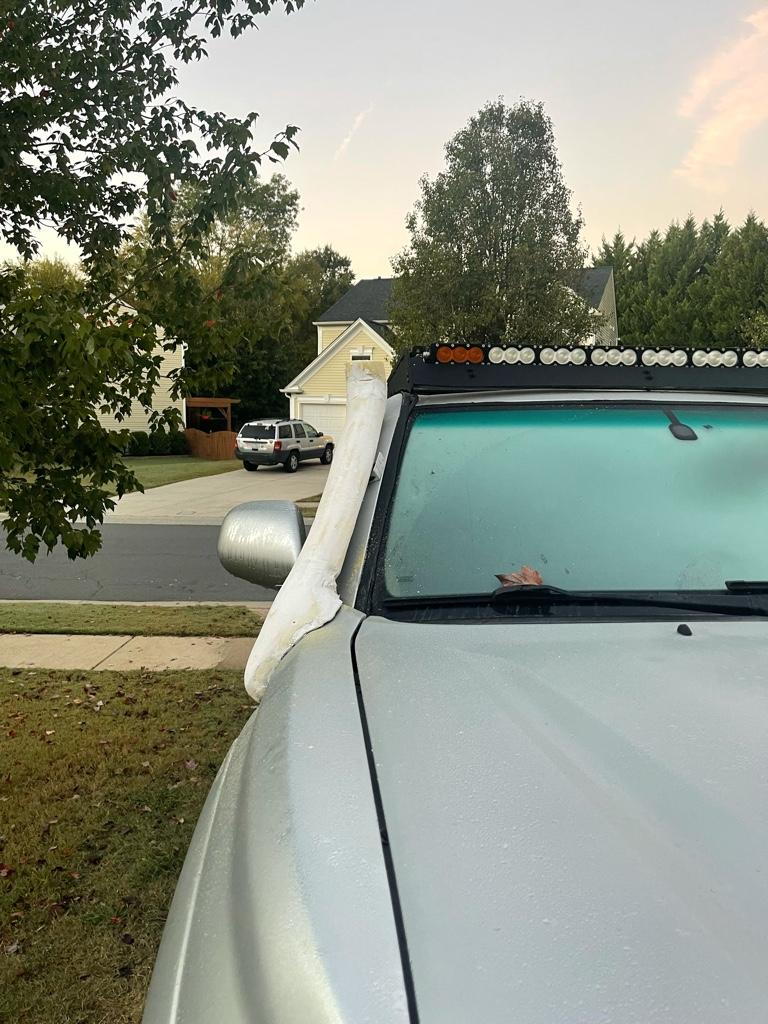
No going back now. Spent a better part of the day tackling my custom carbon fiber snorkel. Made good progress but still have a ways to go…

While the fiberglass was drying I tried out my CO2 tank. 15 psi to 31 psi in about 40 seconds. Not too shabby !

1023b6edbdeb93f2b9d5637e196041a1.jpg

0a62931c213fd305eb5a5e5bedb3e2c9.jpg

4c5331bd9960be7fa11424a3b38b57d7.jpg

5ca9980109a859963e167bfcb57298b5.jpg

e377577f76affa3625cd8a2ff30b2335.jpg

db0fbdfdb740cadc26befa55007d55f8.jpg

378593b60ab5144082e592ccb0e76a11.jpg

c56b7c43f46ca9de89df1ed0283e4f9a.jpg

f164c0796dc3a8682bc3a31f7ce82571.jpg


Sent from my iPhone using Tapatalk
 
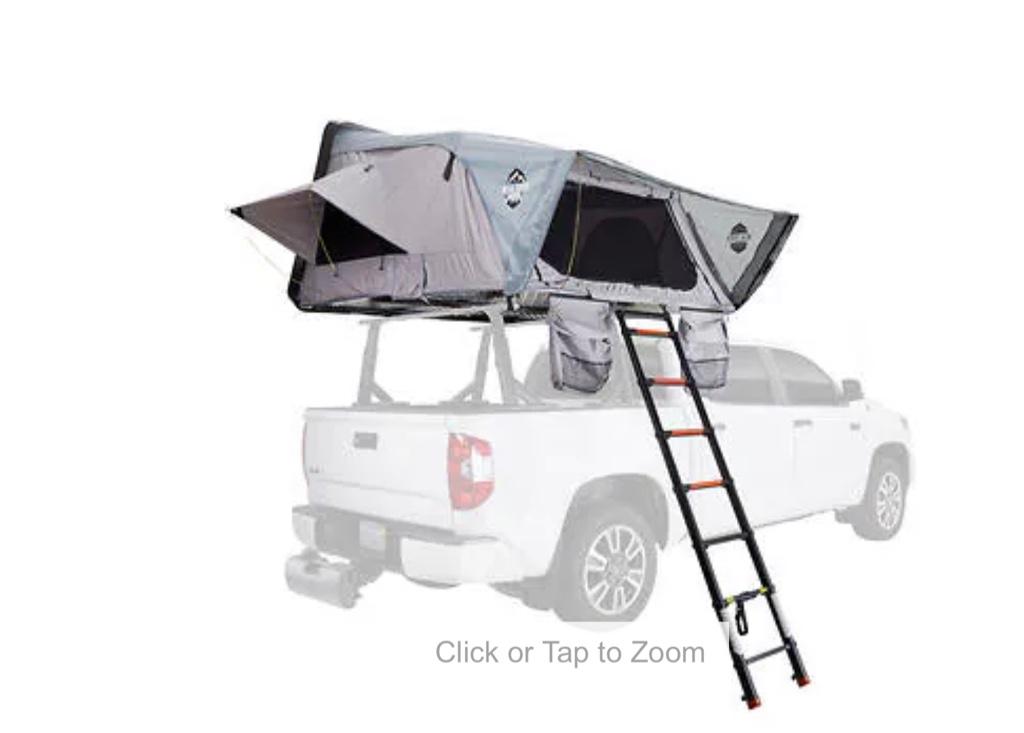
Did a thing today while on lunch .. working from home sucks… lol. My smittybuilt gen 1 tent is now for sale … couldn’t swing the ikamper price tag and with the amount of times I actually camp figured it would be worth a try to go with the Costco mia overlander hard shell … 2-3 weeks, can’t wait !

The idea is to be able to keep it on the car more permanently since it’s a bit more lower profile and doesn’t have a vinyl cover on it.
e9c91cf861670bf1ca55bb5c2374d330.jpg


Sent from my iPhone using Tapatalk
 
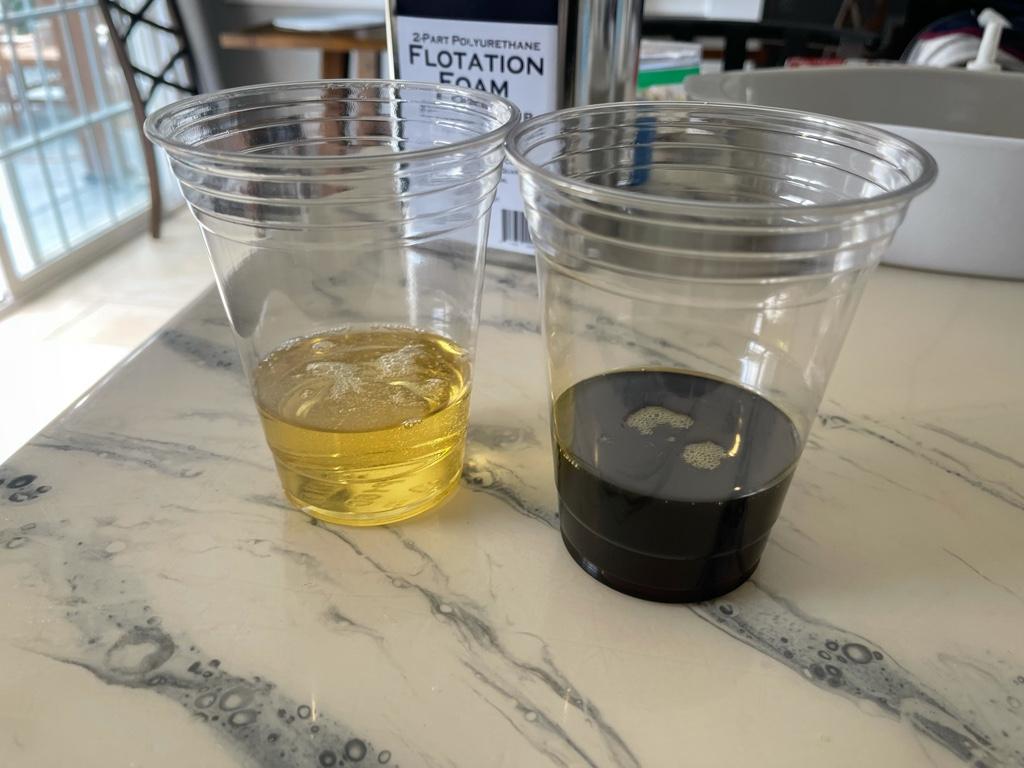
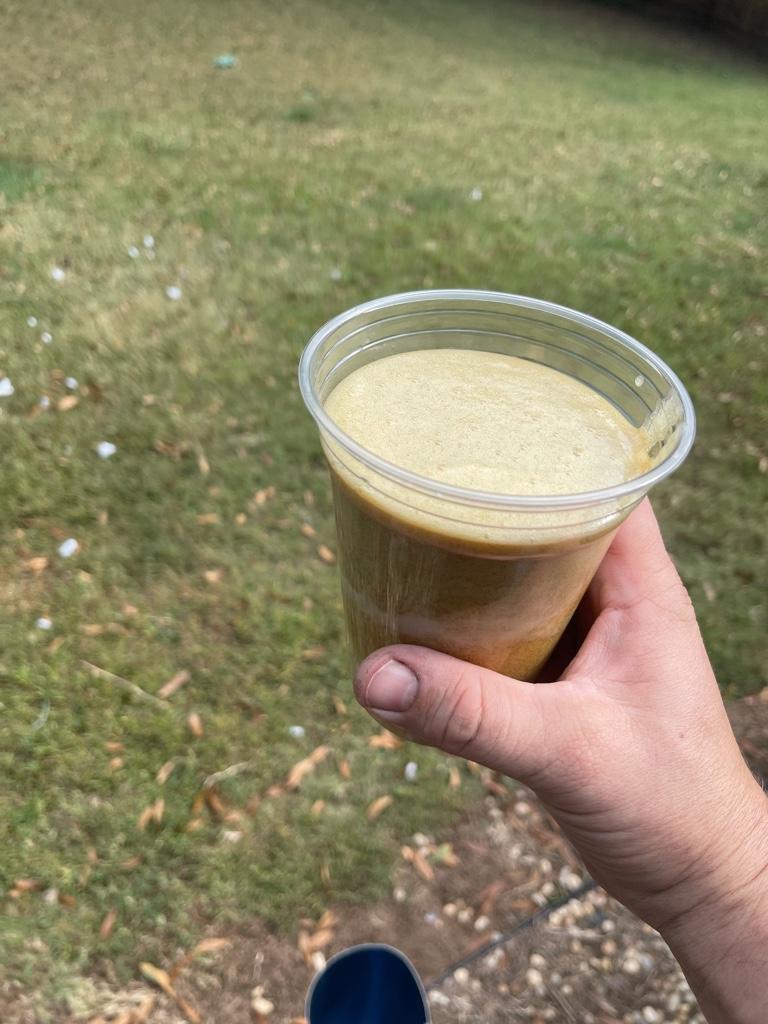
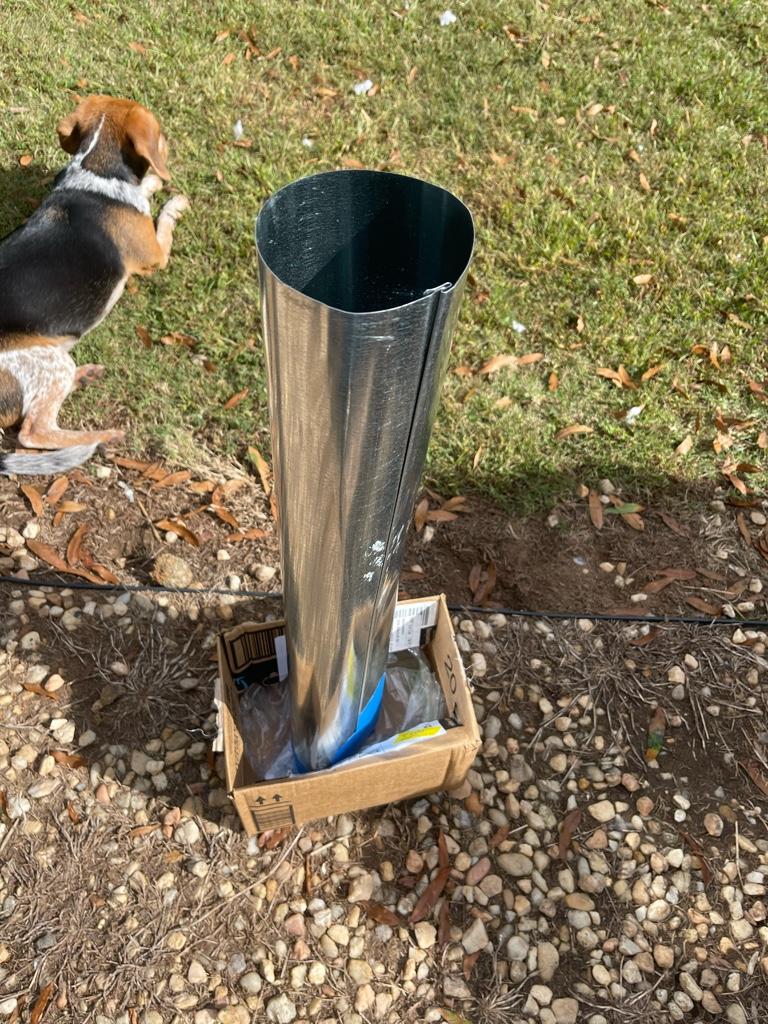
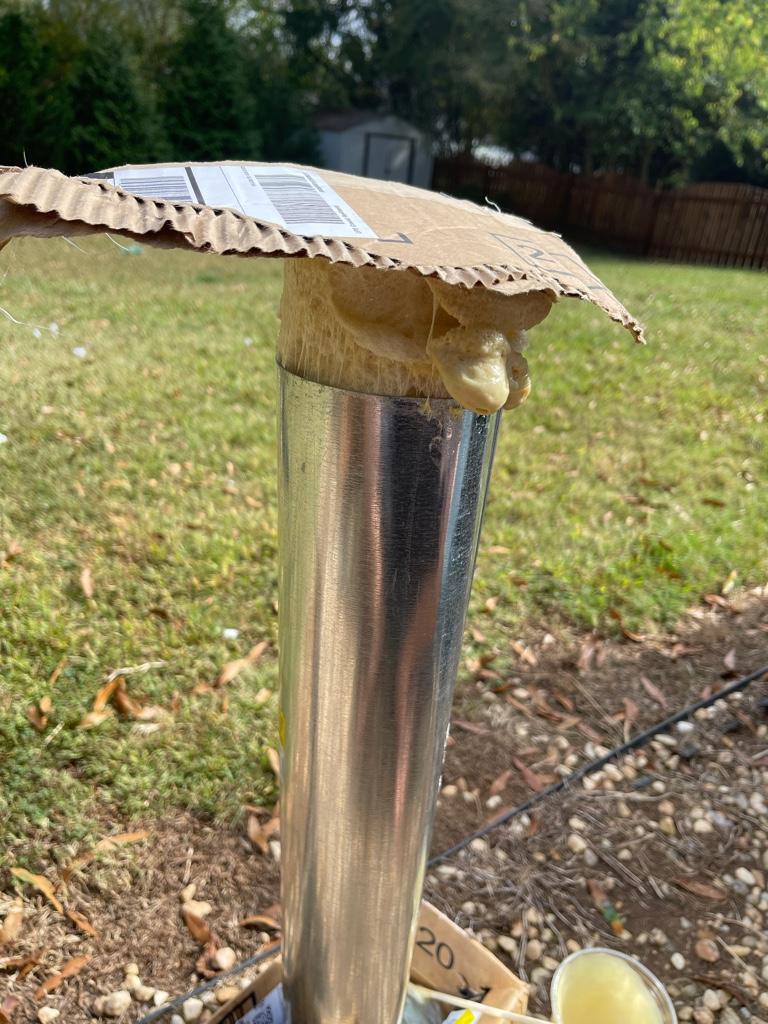
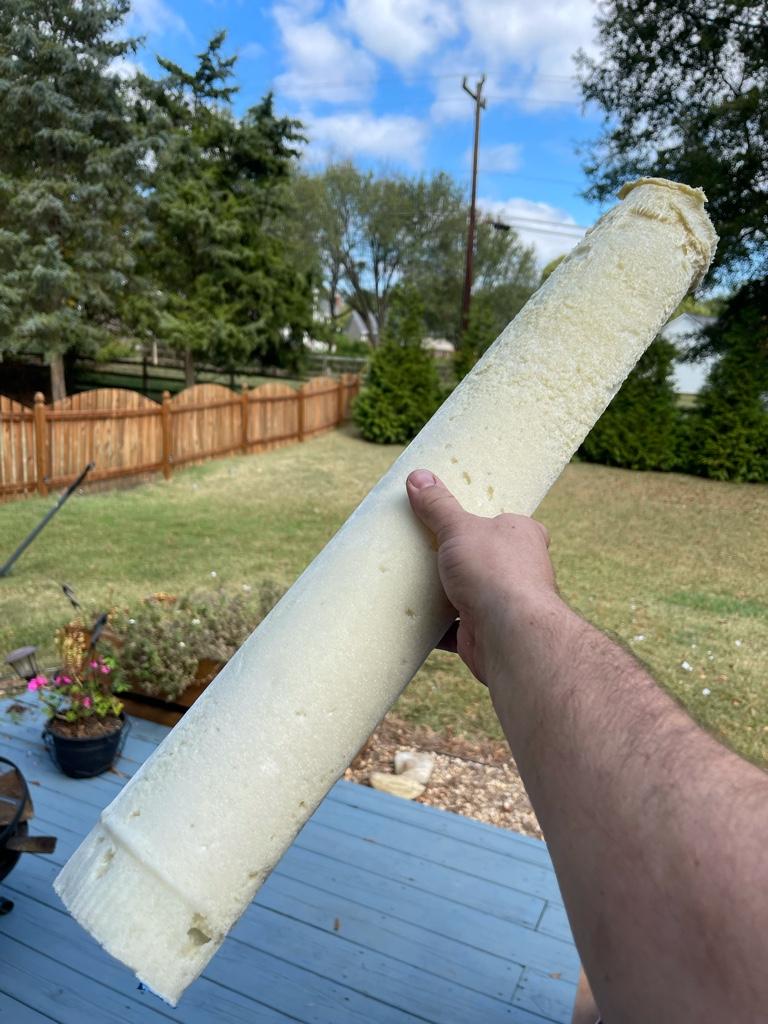
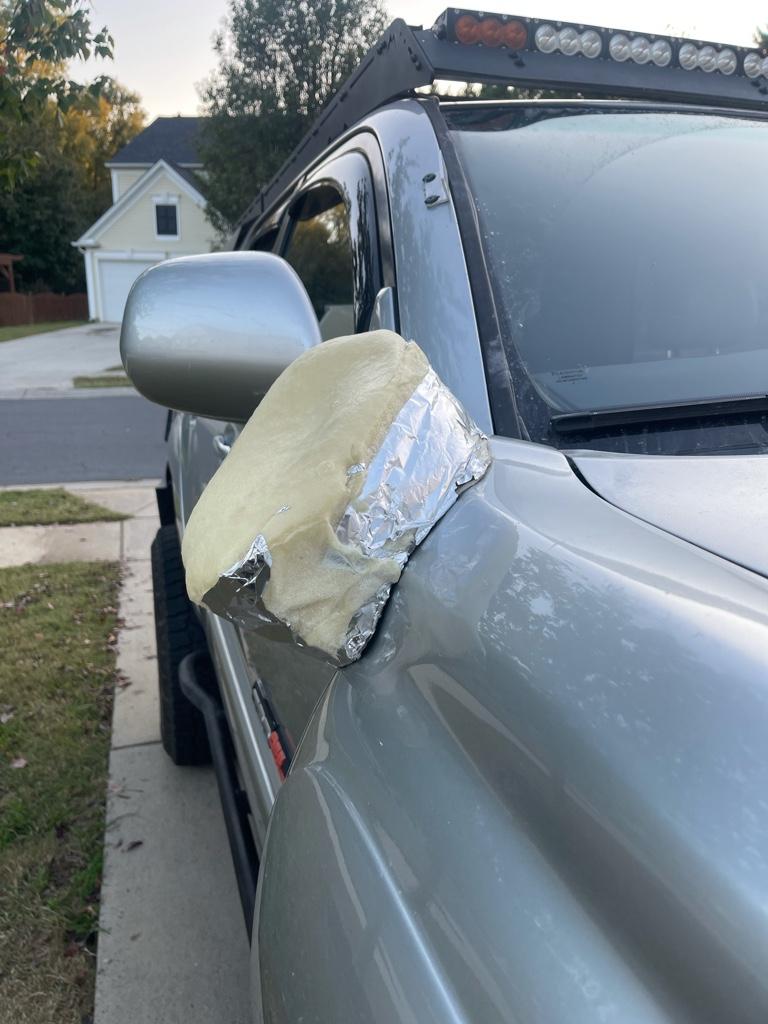
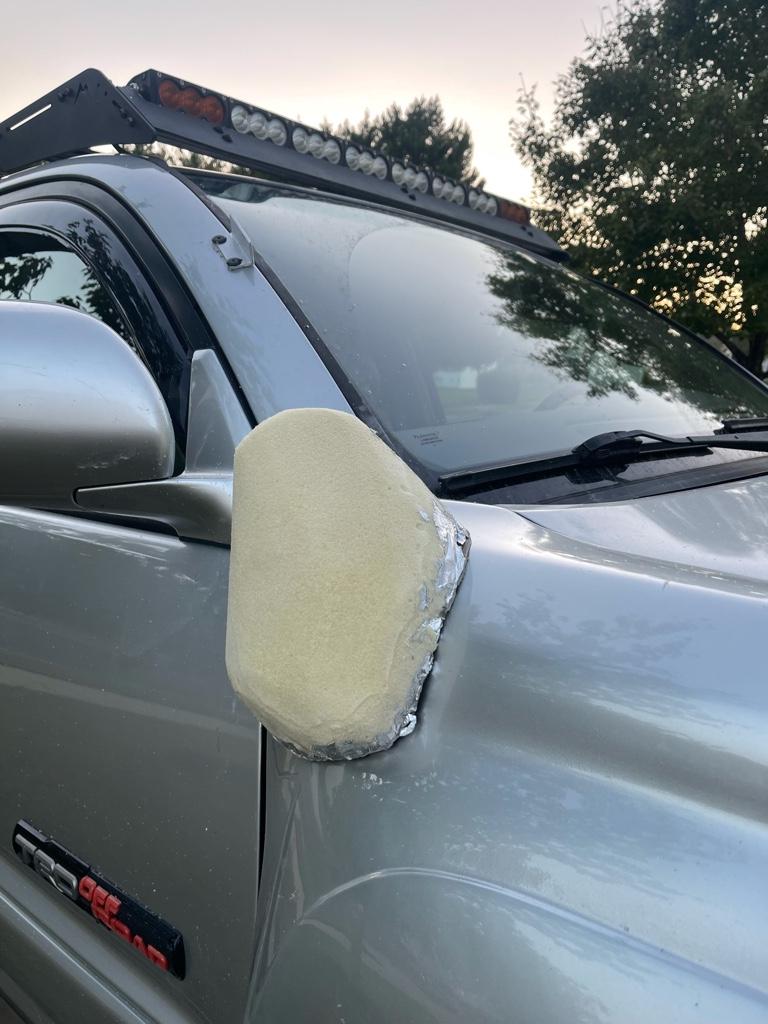
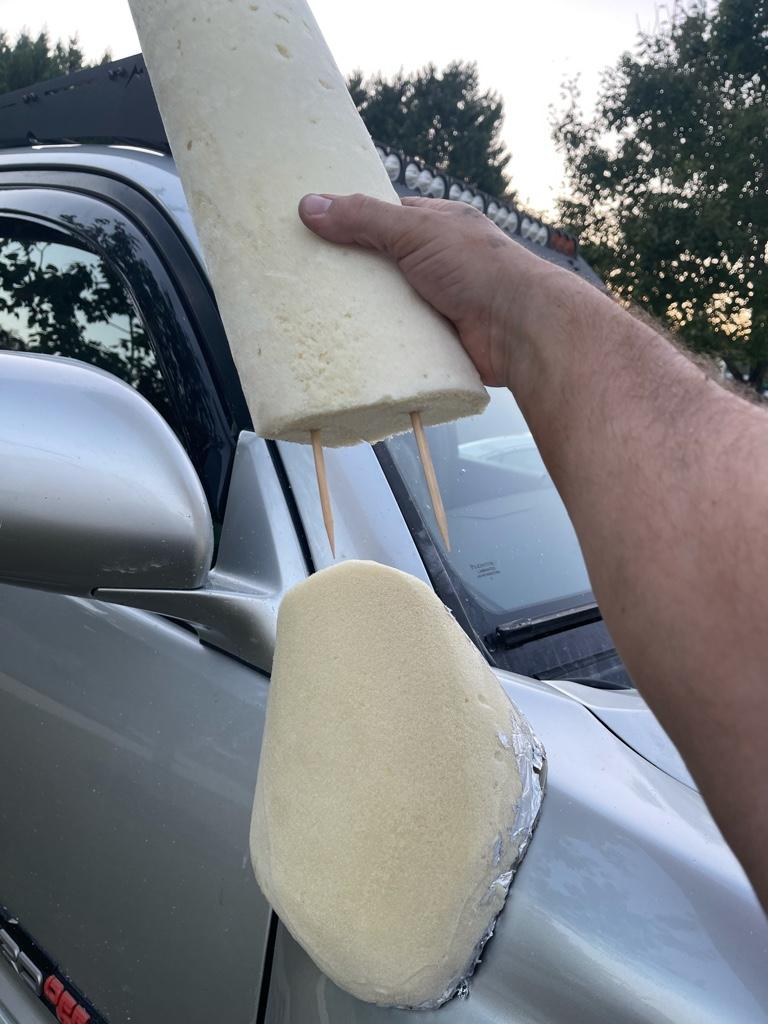
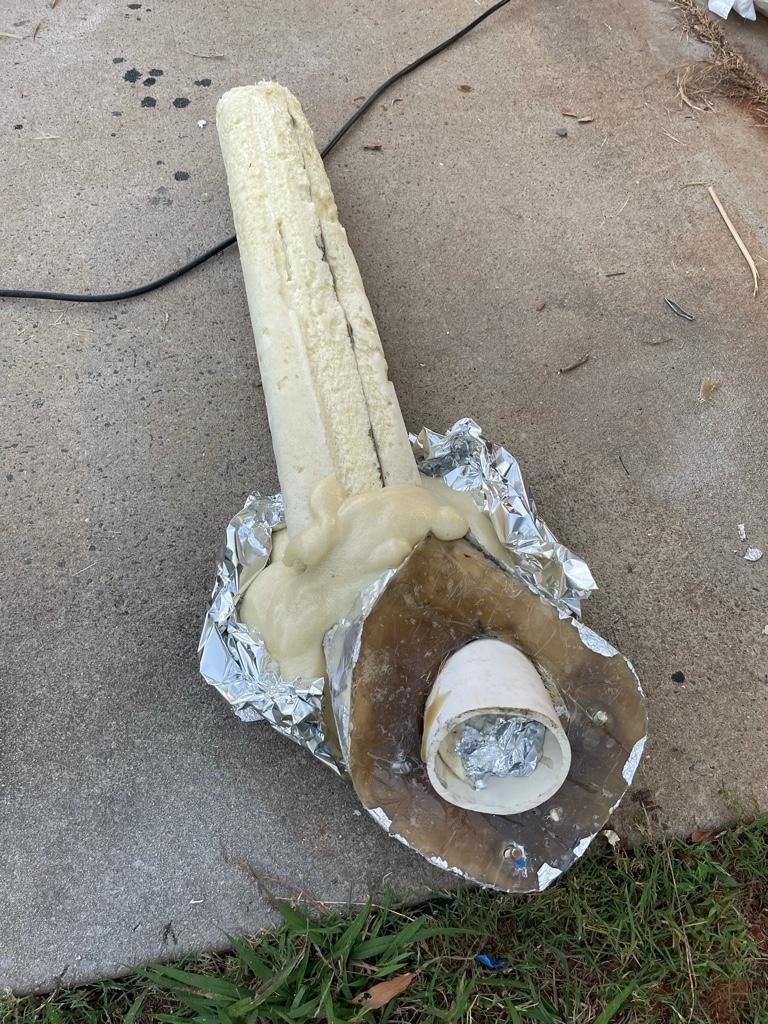
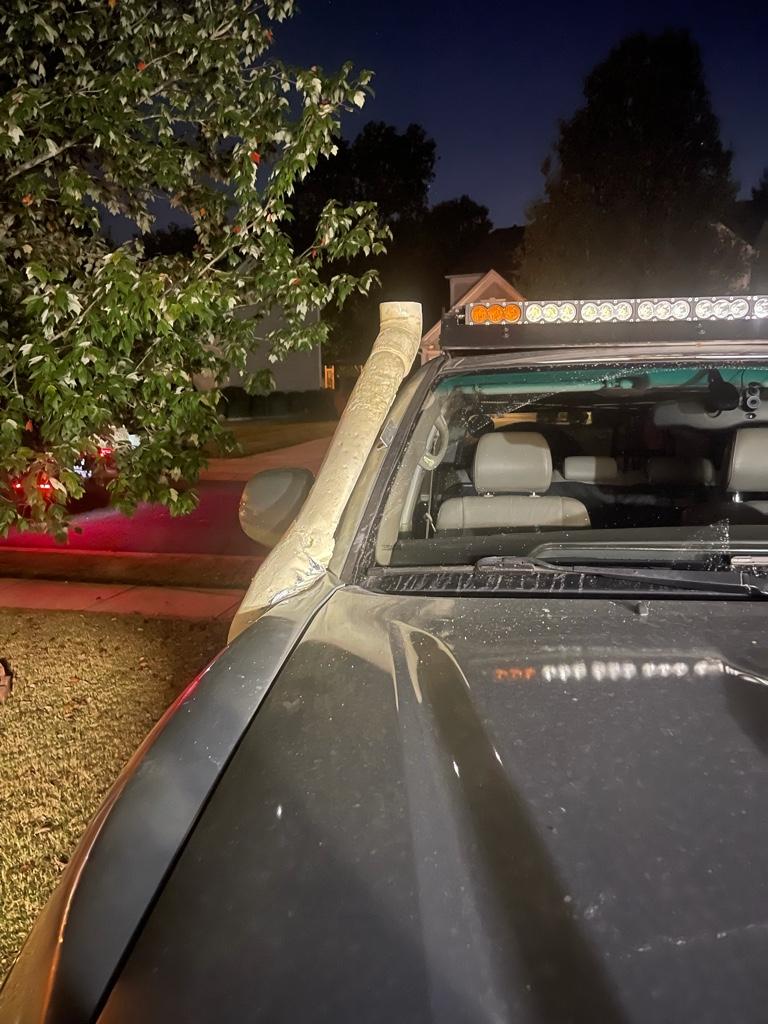
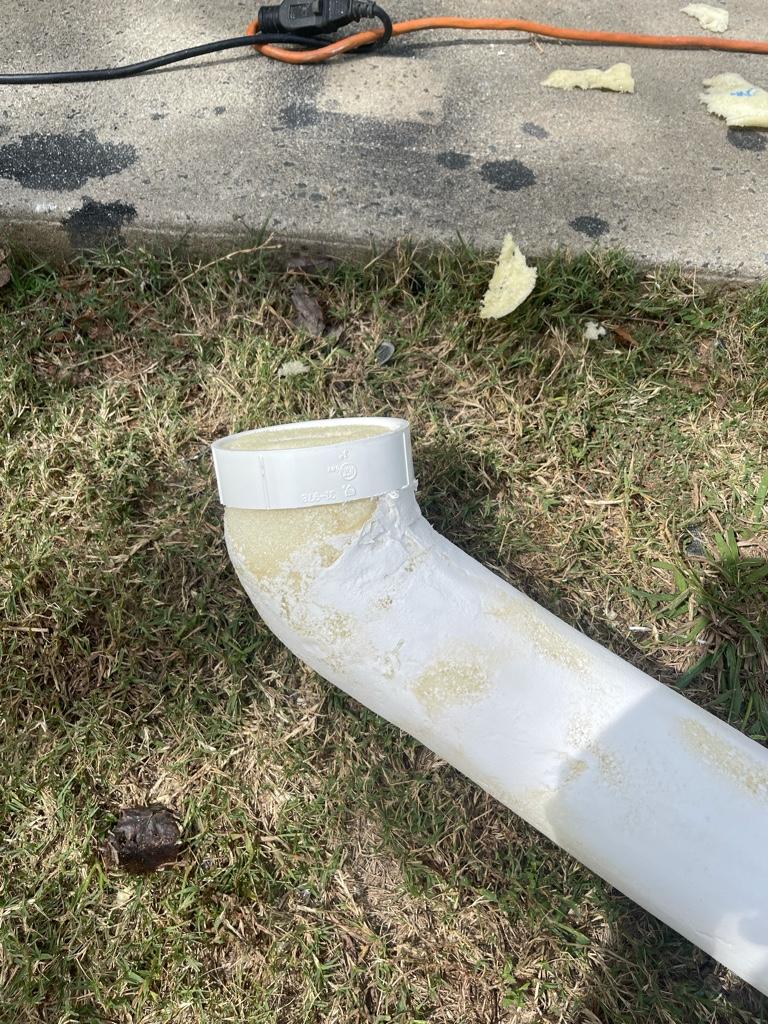
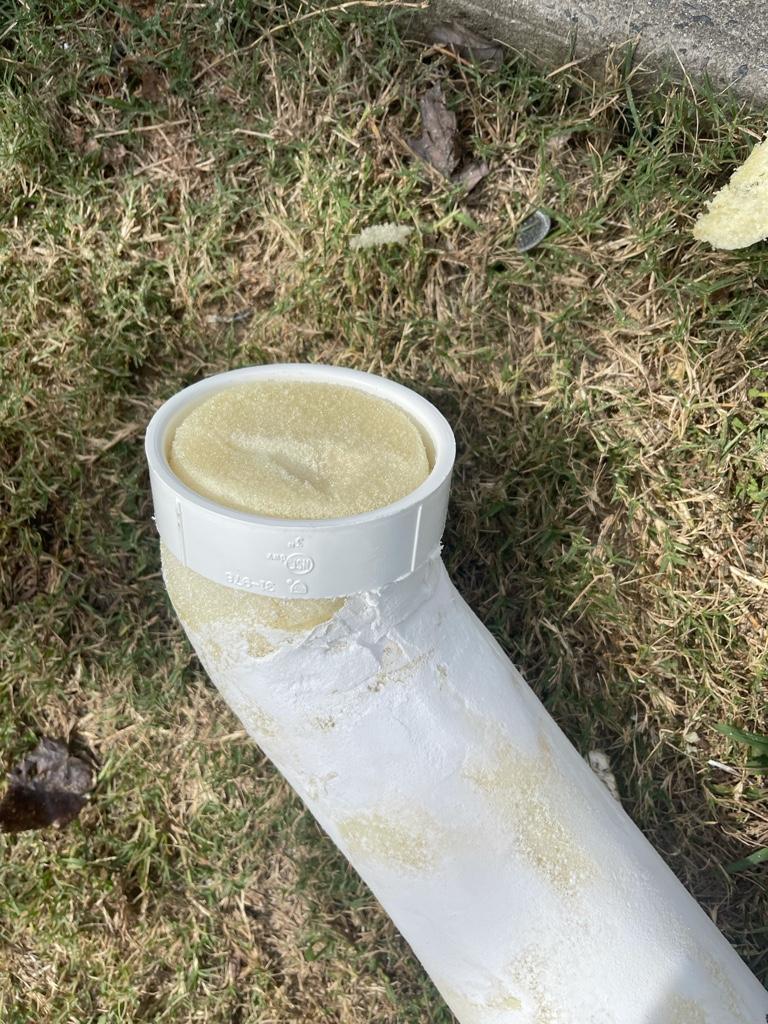
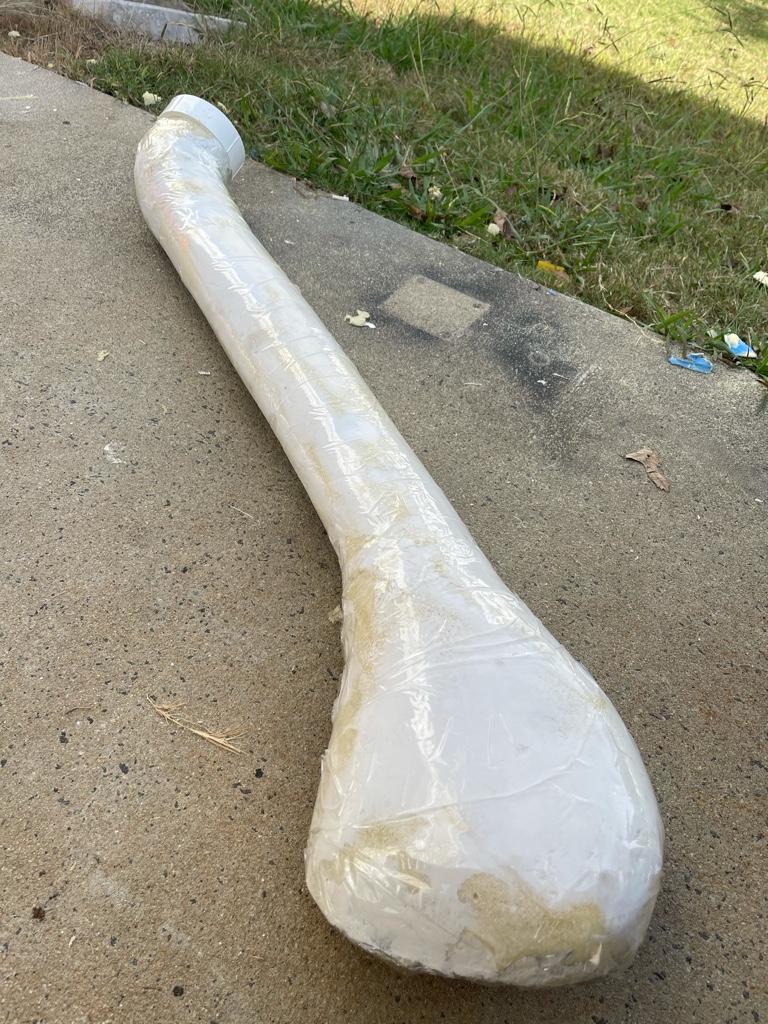
So I scrapped the idea of using pvc or duct material for the upper runner. Instead I decided to try the 2 part expanding foam to create the snorkel first before making a mold to made the carbon final piece. This stuff is pretty crazy lol.

9c8222e46b91d7238bd7b7a84f973758.jpg

fda4549fbc70eb76872e51d14bbbd0b4.jpg

34f4a39e1adf3ec679654b8e373f11a8.jpg

272664d636e80d1c42fe0d088e4ecb07.jpg

b8ebe5a2ee8556f397f7fbcea232a014.jpg


Sent from my iPhone using Tapatalk
 
Last edited:
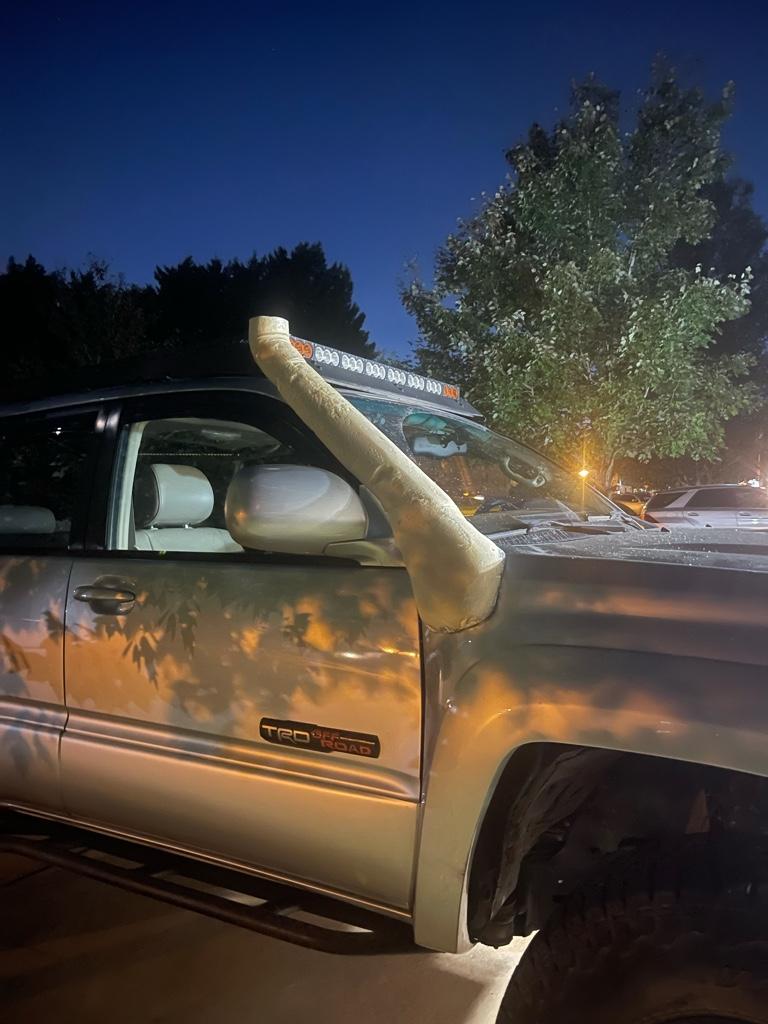
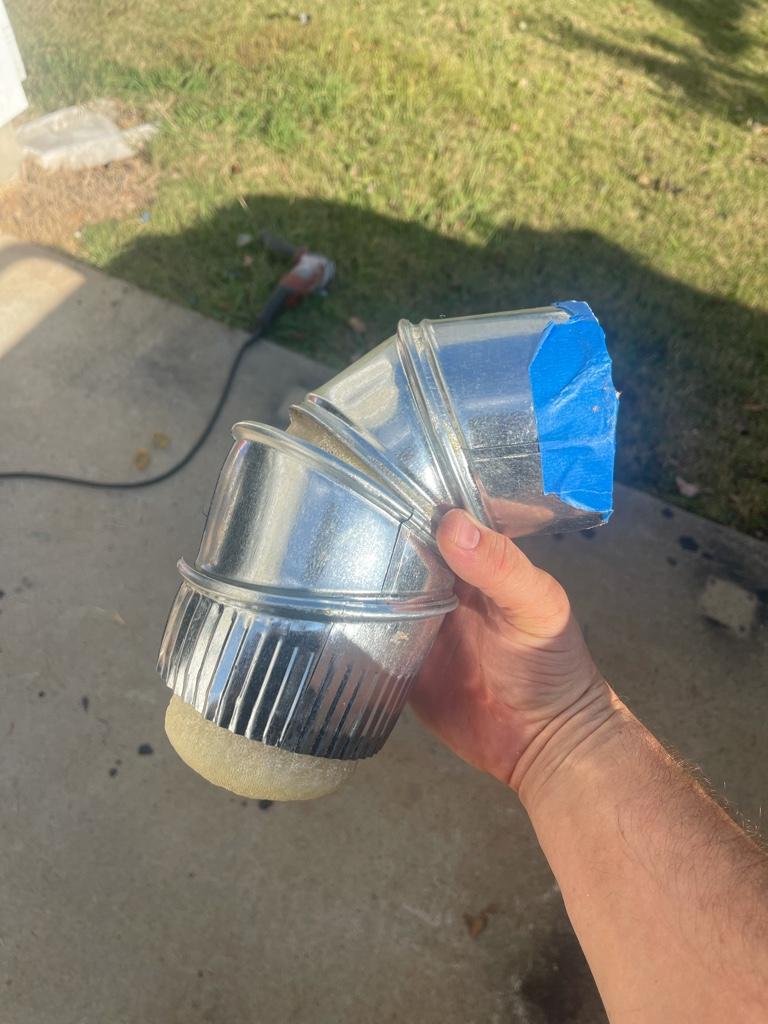
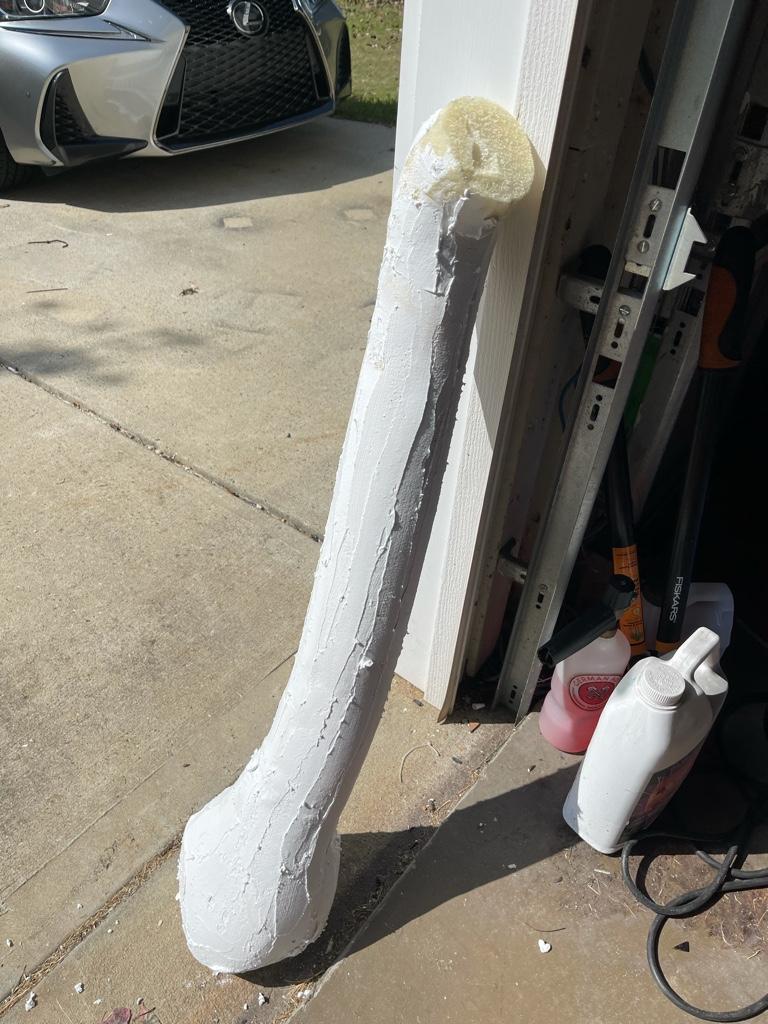
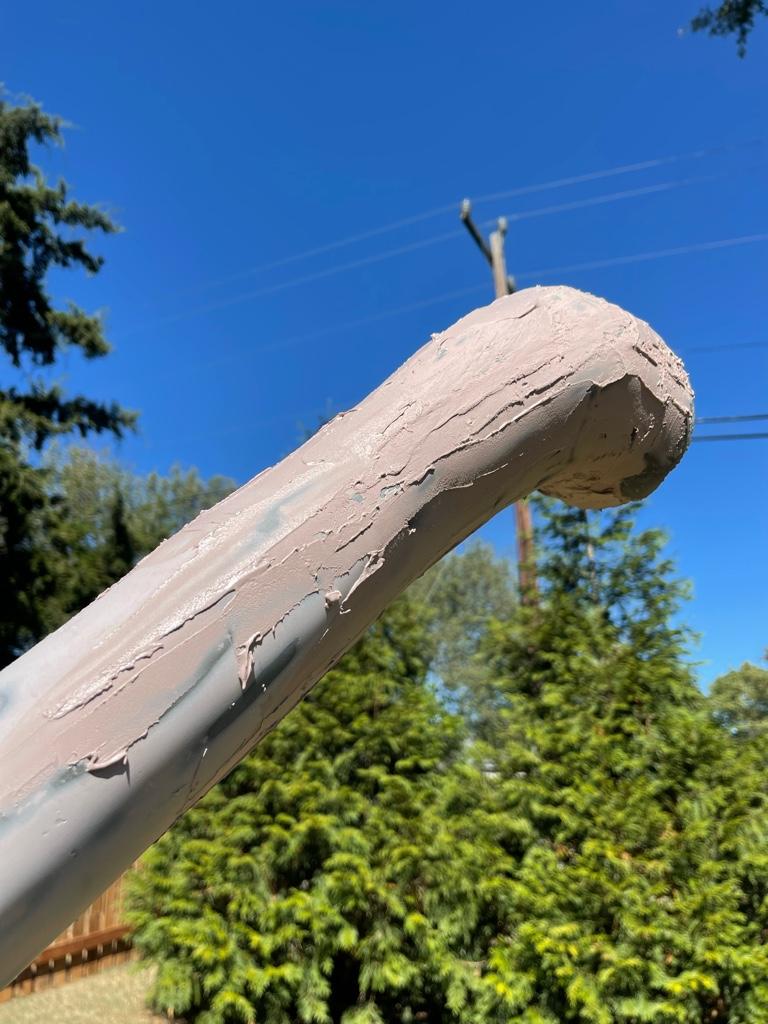
Did a little bit kore sanding on my lunch break and also fused the 45 degree elbow piece on. Was fairly happy with the overall shape so decided I would cover it in spackel and let it dry so I can start sanding in the actual finished surface in preparation for doing the first layer in fiber glass followed by the carbon fiber final layer.
56b106563275eb9f4e9391c4f45e2d9f.jpg


Sent from my iPhone using Tapatalk
 
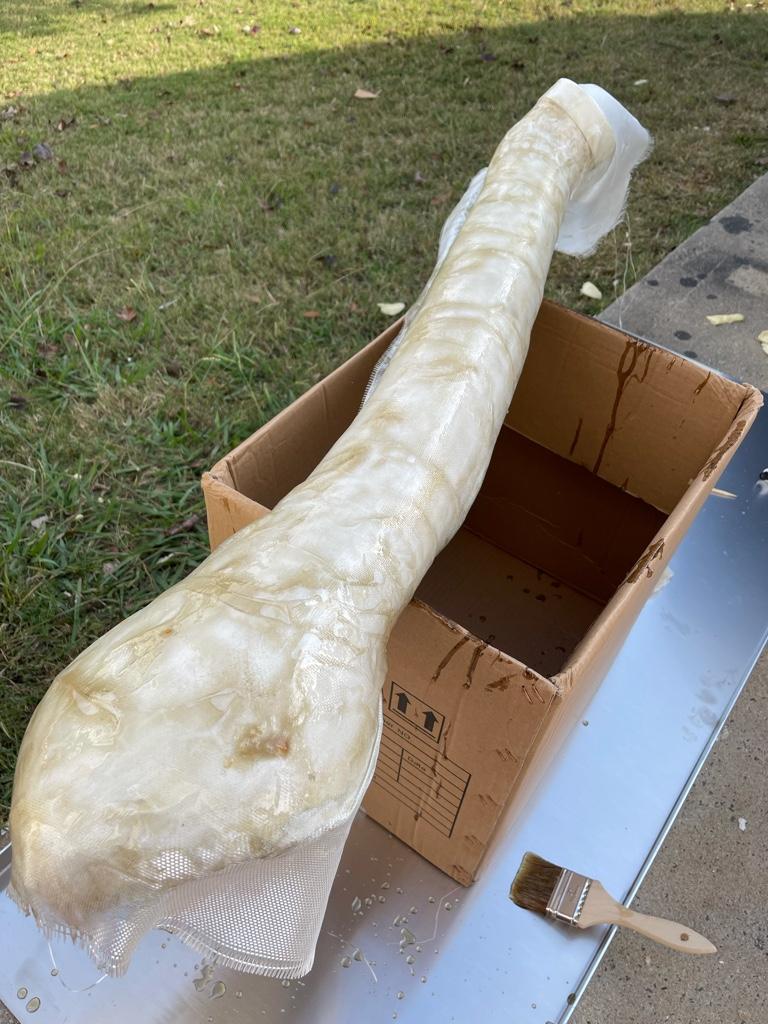
Sparkling took forever to dry, I hate sitting and waiting lol. Finally dried enough to start doing a bit of sanding before work this morning and man am I getting excited. I decided not to worry about the imperfections in the foam and just take it to the next step which will be fiberglass the hole thing.

I’m going to do my best to do a clean smooth layer but worst case it’ll take some more sanding and filling with body filler to get it right before doing a final layer in carbon fiber. I figured 2 layers is plenty strong to support the pre filter. If I mess up the pattern a bit then I can go to a 3rd layer I guess. Still need to figure out exactly how to have the mounting bracket done and fused to the carbon but shouldn’t be too hard.

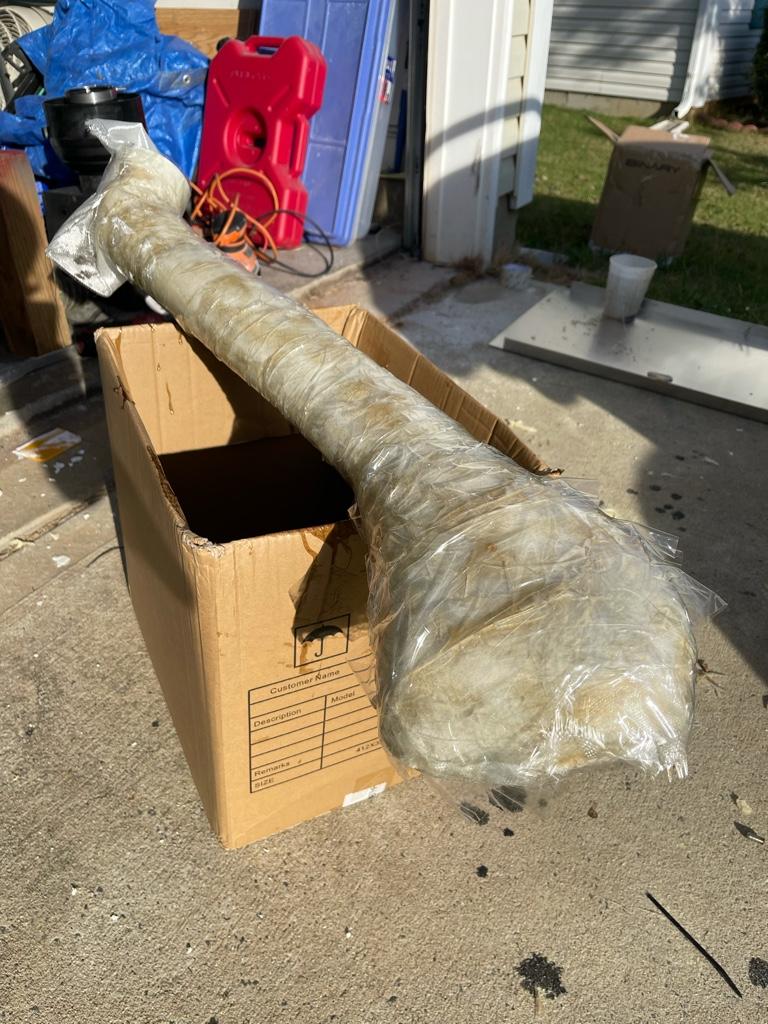
My current plan is to wrap the entire thing in fiberglass and then cut one side of it down into the foam so I can spread it a bit and take it off without having to fuse 2 completely separate pieces together but I don’t know if it will flex open enough to take it off from the foam.. we shall see. One things for sure.. this is going to be one sweet looking snorkel :)
d3a085fee5ca4a637b269cb152c7a3d6.jpg

d4e1658c817a381bda802692047d1cda.jpg

865144dbe04aa66136ed1d0cb69a1457.jpg

bb42afdef0f756be4cdf4d62375999ca.jpg


Sent from my iPhone using Tapatalk
 
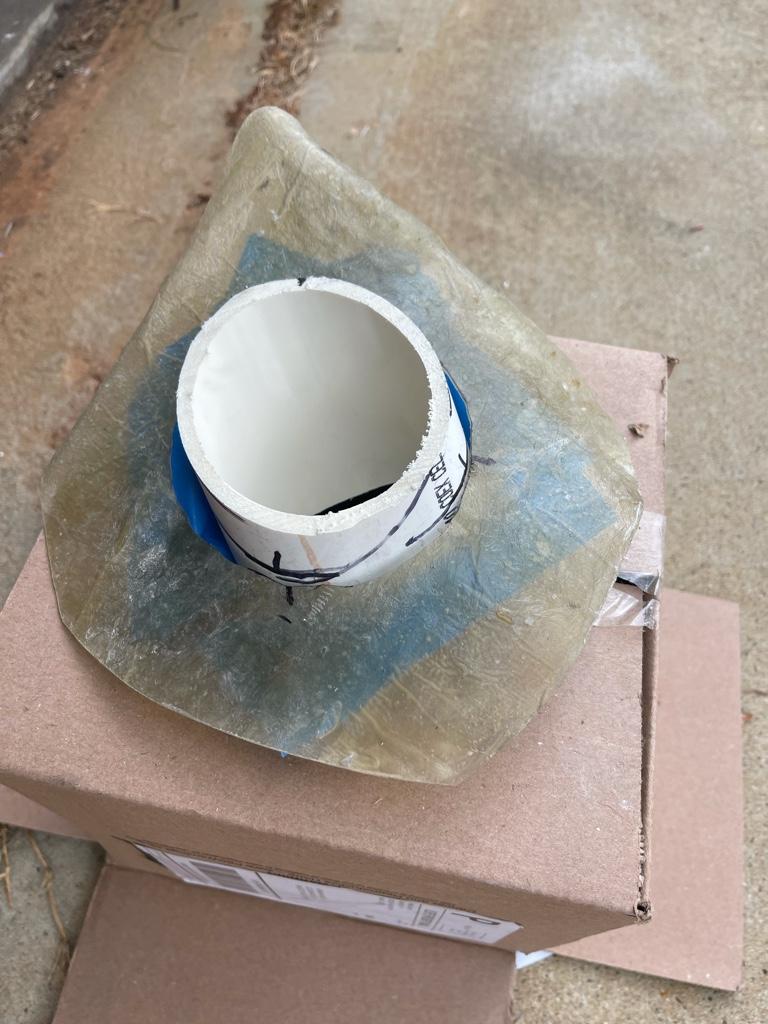
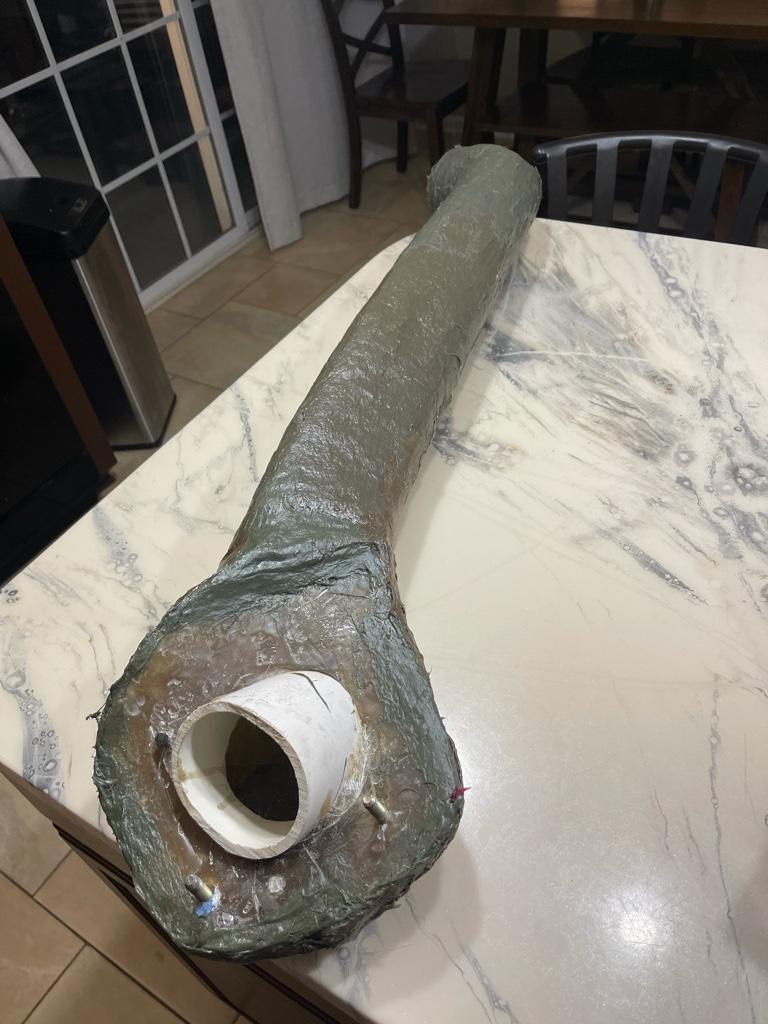
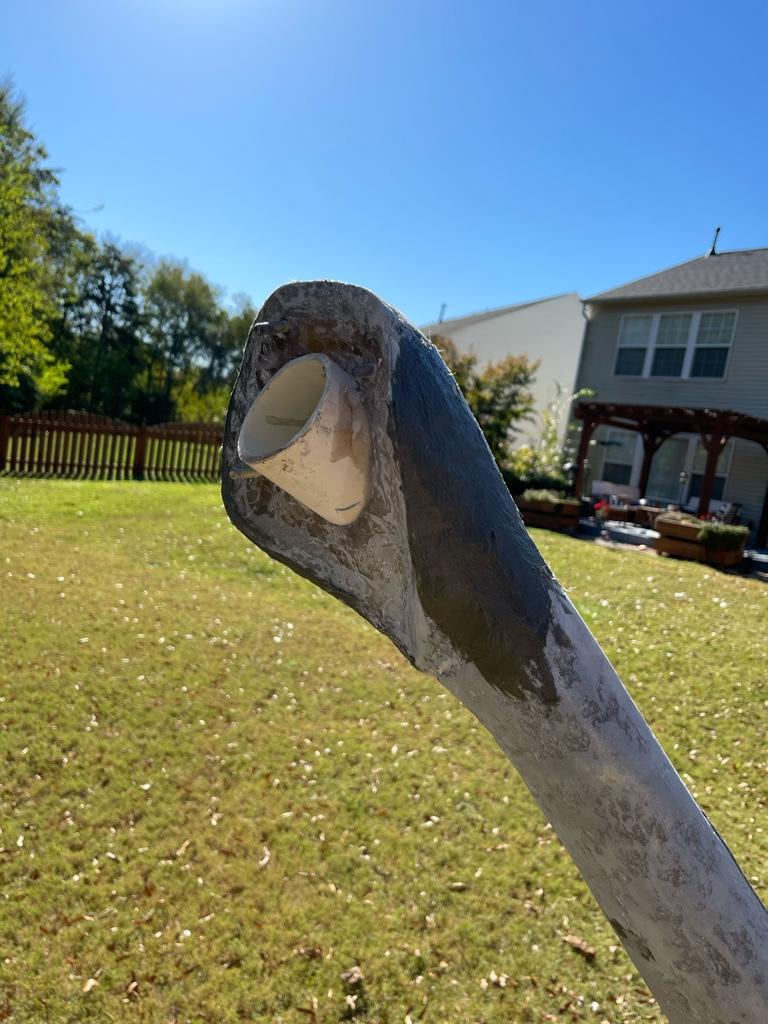
Did a little more sanding at lunch. I started fabricating the mourning bracket to the snorkel portion itself and will need to give it some thought on how I will fuse it to the carbon piece reliably. Potion and and all is great, just need to make sure it stay that way after it cures. I also decided to add a pvc reinforcement ring up top where the pre-filter will tighten using the clamp that way I don’t have to worry about crushing the carbon fiber if I go too tight.
bb47286a44237fbf1c7c73f8d69487cd.jpg

da1673e456861636a1c79443dae04435.jpg


Sent from my iPhone using Tapatalk
 
Is there anyway you could pour a solvent down there that dissolved the foam, but didn't hurt the fiberglass? Then you wouldn't need to seppuku the snork open to get the foam out.
 
Is there anyway you could pour a solvent down there that dissolved the foam, but didn't hurt the fiberglass? Then you wouldn't need to seppuku the snork open to get the foam out.


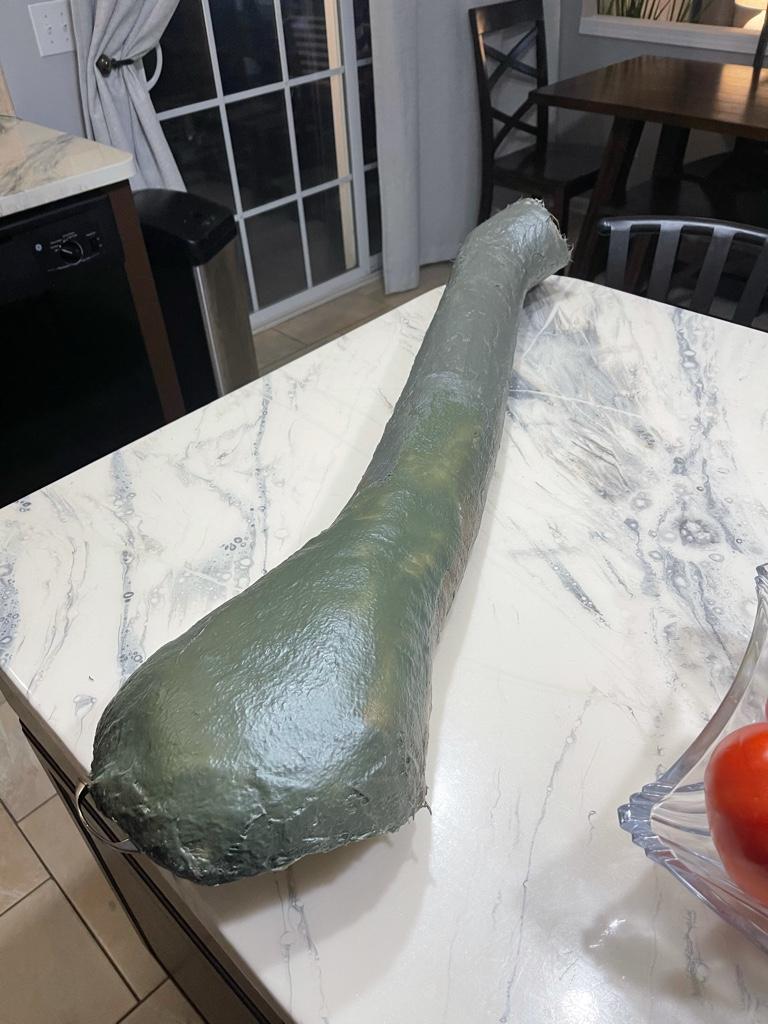
I looked into that as my first option but everything I read is that once it cures it’s basically a mechanical removal .. acetone does good to remove it before it cures but not so much once it cures. I may give it a try before I cut it but I’m not too concerned with cutting it open, there’s a lot of sanding that will have to be done anyhow… first layer of fiberglass is curing now so here goes nothing …
995cd3d2d433e3d777f9bbc2e869fa29.jpg

b45f5b80e15fd5be0af9fb90915ad95c.jpg

108c376b370117438c92047fde924ef5.jpg


Sent from my iPhone using Tapatalk
 
I looked into that as my first option but everything I read is that once it cures it’s basically a mechanical removal .. acetone does good to remove it before it cures but not so much once it cures. I may give it a try before I cut it but I’m not too concerned with cutting it open, there’s a lot of sanding that will have to be done anyhow… first layer of fiberglass is curing now so here goes nothing …
995cd3d2d433e3d777f9bbc2e869fa29.jpg

b45f5b80e15fd5be0af9fb90915ad95c.jpg

108c376b370117438c92047fde924ef5.jpg


Sent from my iPhone using Tapatalk

True, once it's cut, putting an extra fiberglass layer on is just rinse and repeat of the previous layers
 
True, once it's cut, putting an extra fiberglass layer on is just rinse and repeat of the previous layers


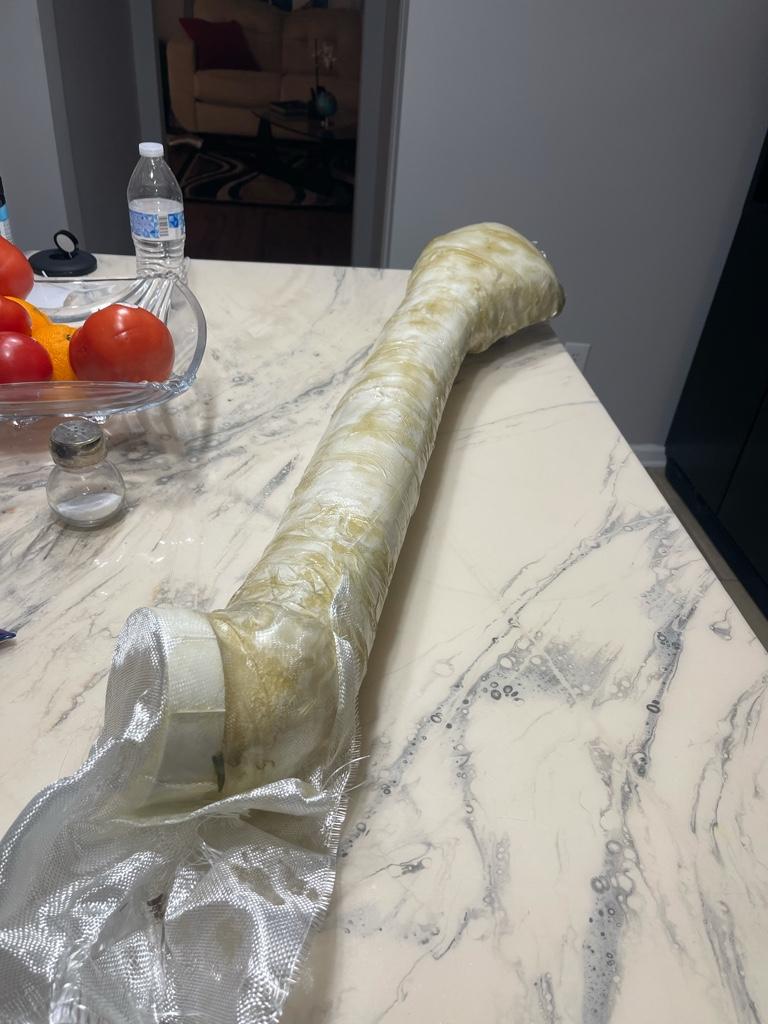
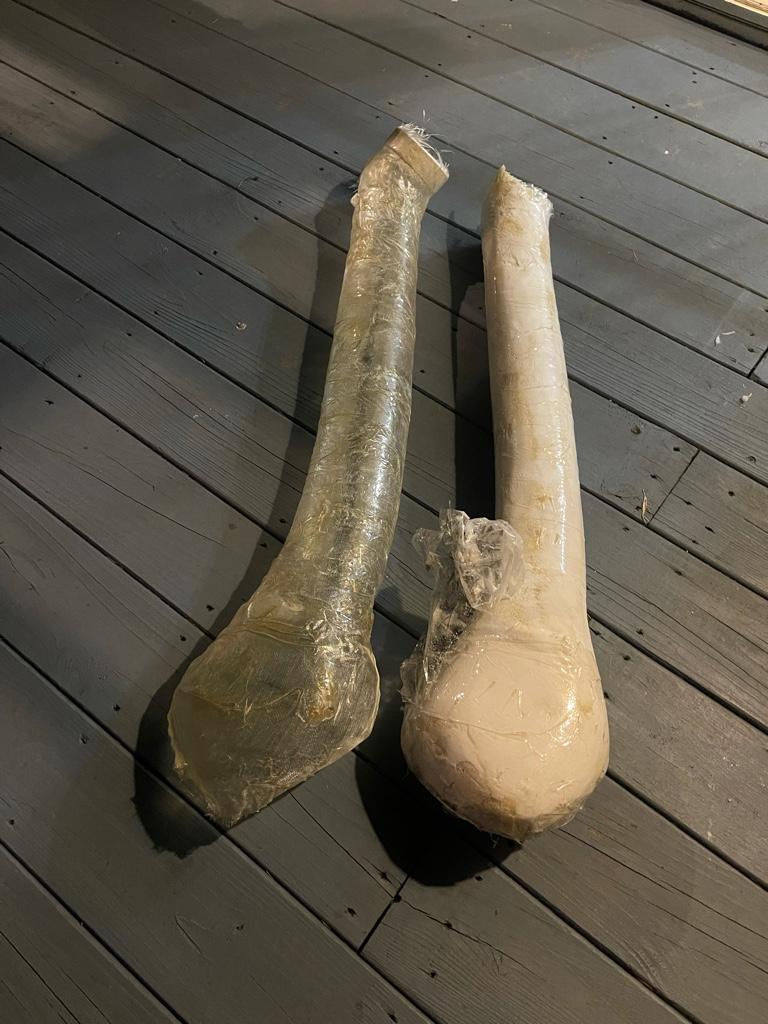
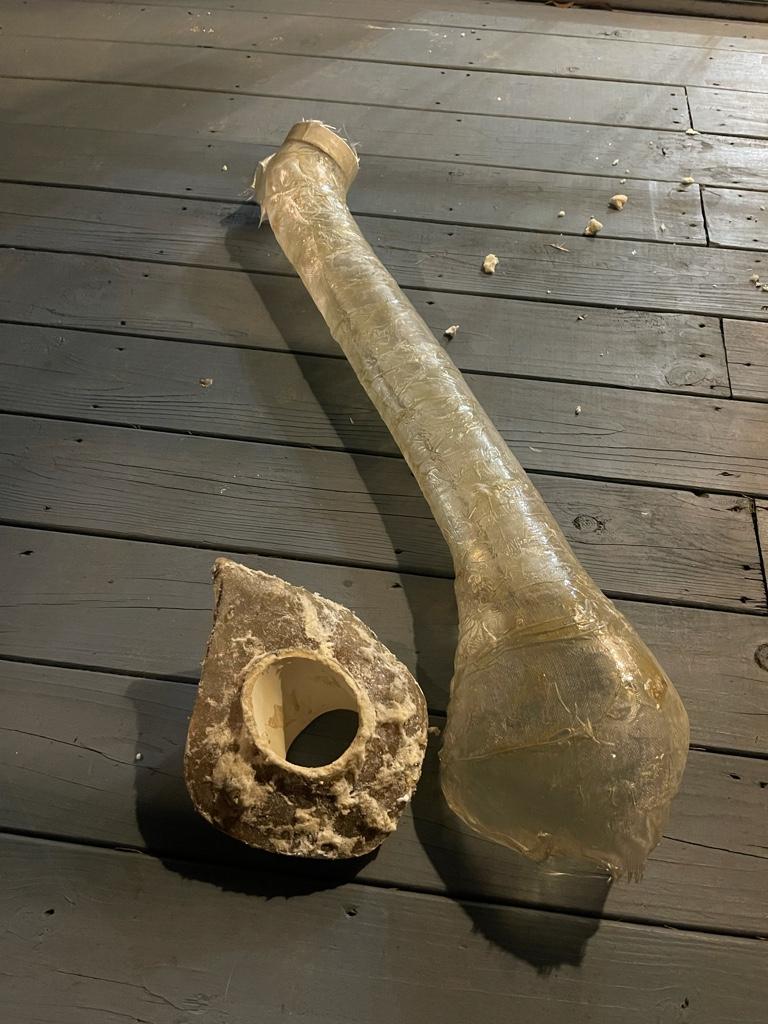
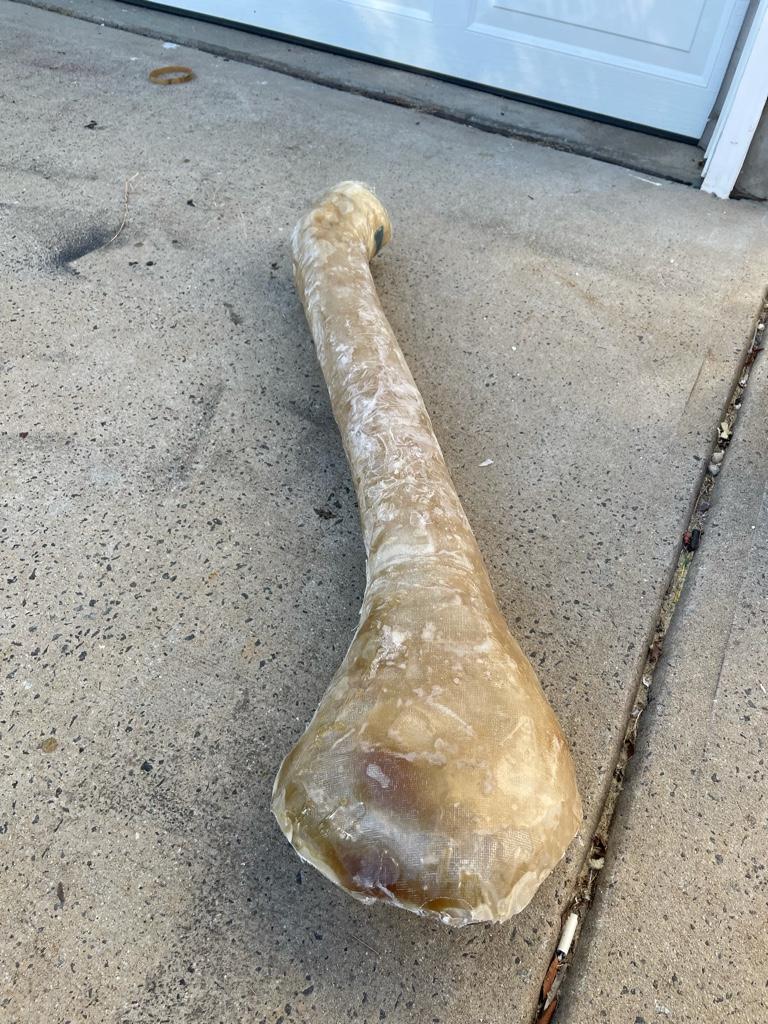
Well, it’s gonna take a bit more work but the foam is out . And by a bit more work I mean a lot… lol
3264db54e923958bba931f3836b6d3f8.jpg

a8bf86820dc359ebfe3197ded6ca69f1.jpg

2072c0ad97a29c3cf026438cc39f2d24.jpg

6a7f7b1b5146b00470af2da474cd5829.jpg


Sent from my iPhone using Tapatalk
 
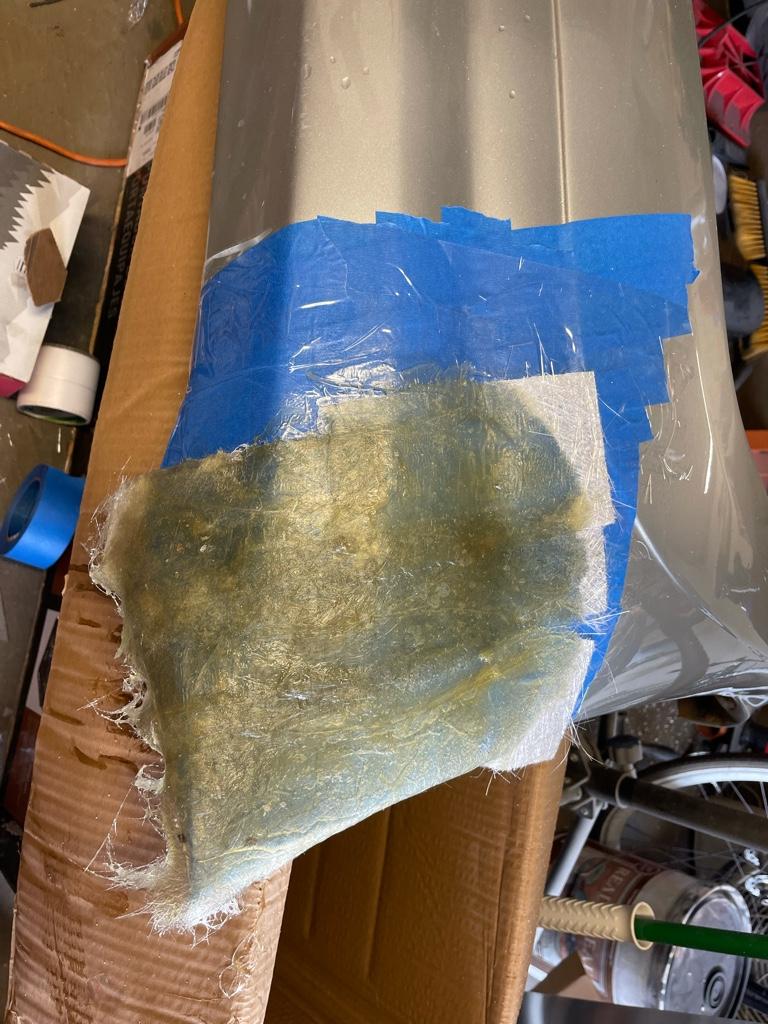
Here is the incision made to remove the foam, currently being patched up in sections before I continue with another solid layer of fiberglass to see if need to do 2 or 3 total layers.
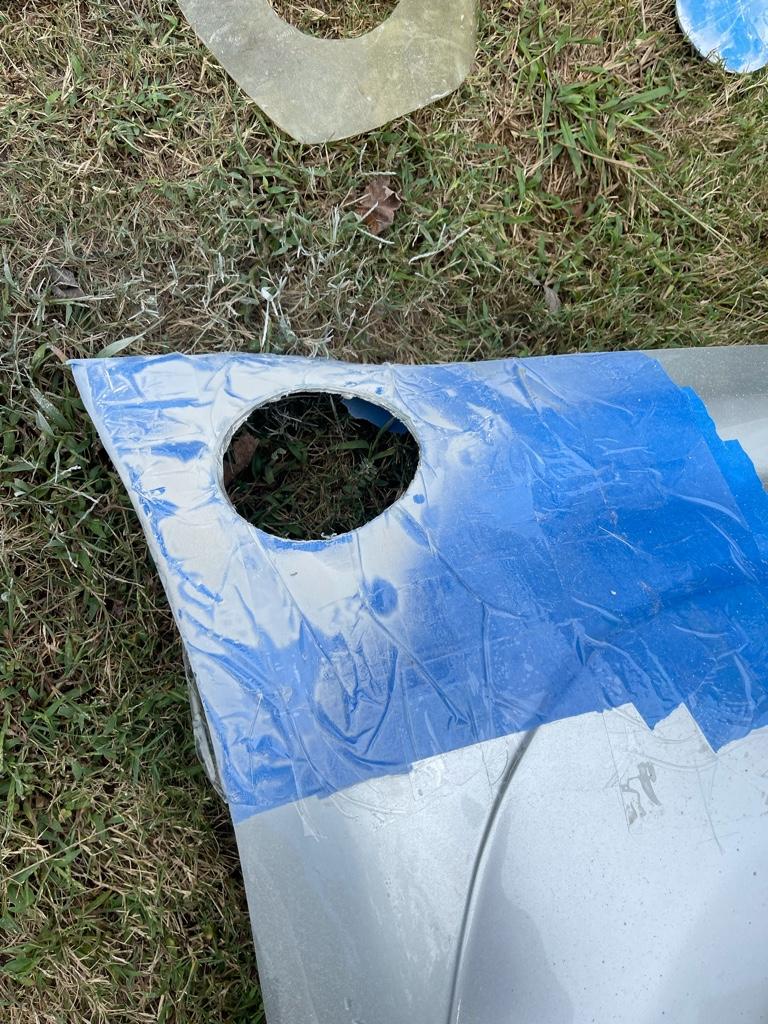
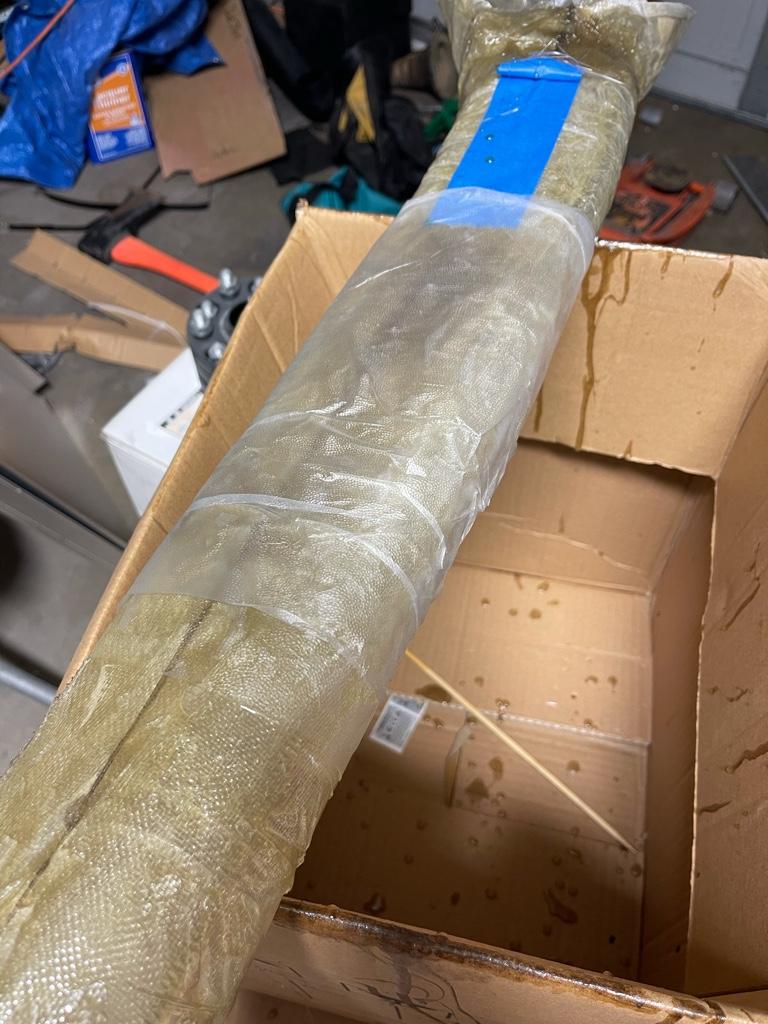
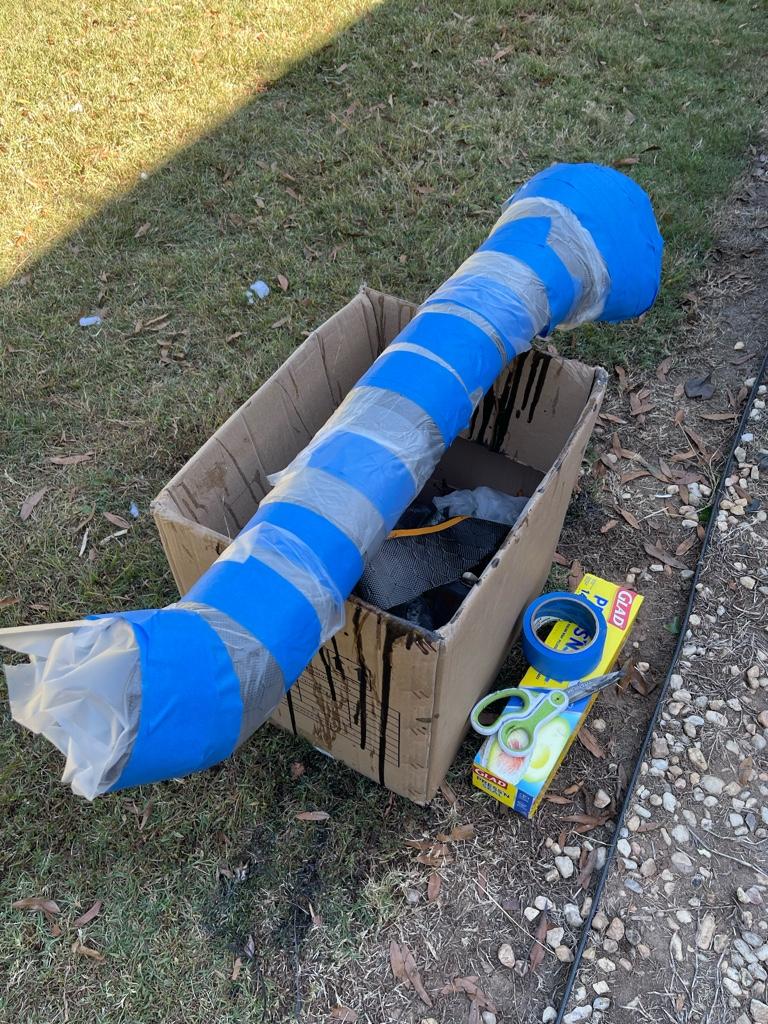
I found out that packing tape is a great quick way to create separation between parts you don’t want the resin to stick to.. pretty awesome. Also, the same tape or cling wrap can be used on the outside once the layers are down with resin to keep everything from rising up while curing and peels right off after the resin sets. I am thinking I will use this method on the final carbon fiber layup so that it lays down and cures as flat as possibly with minimal sanding left to do.


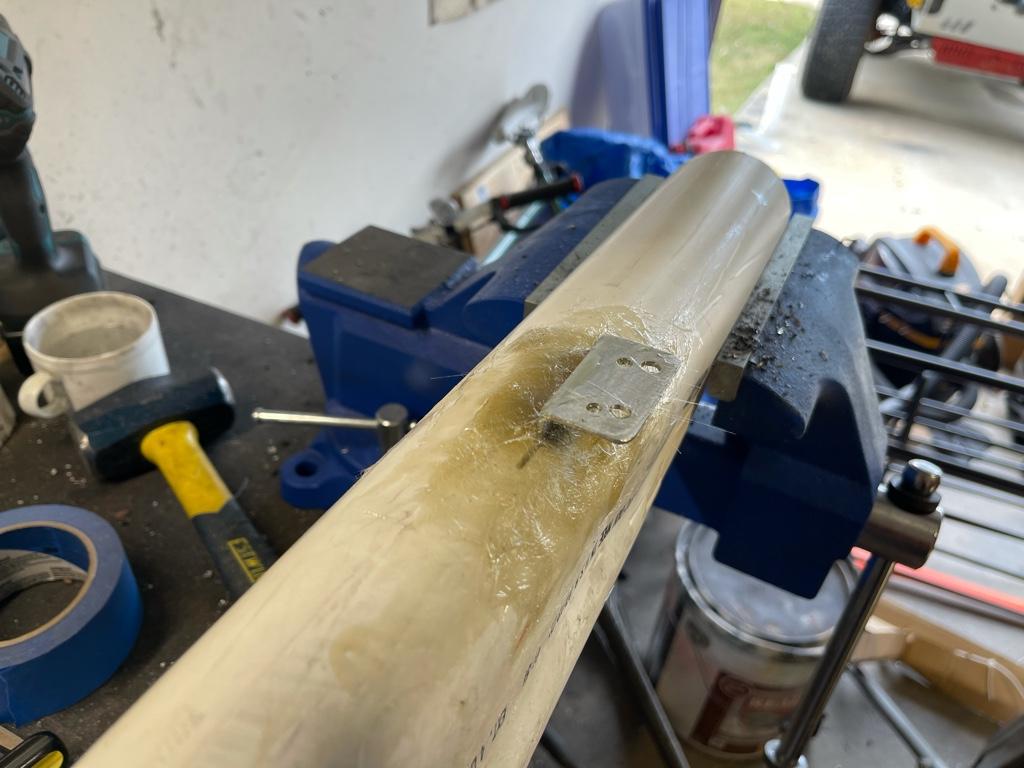
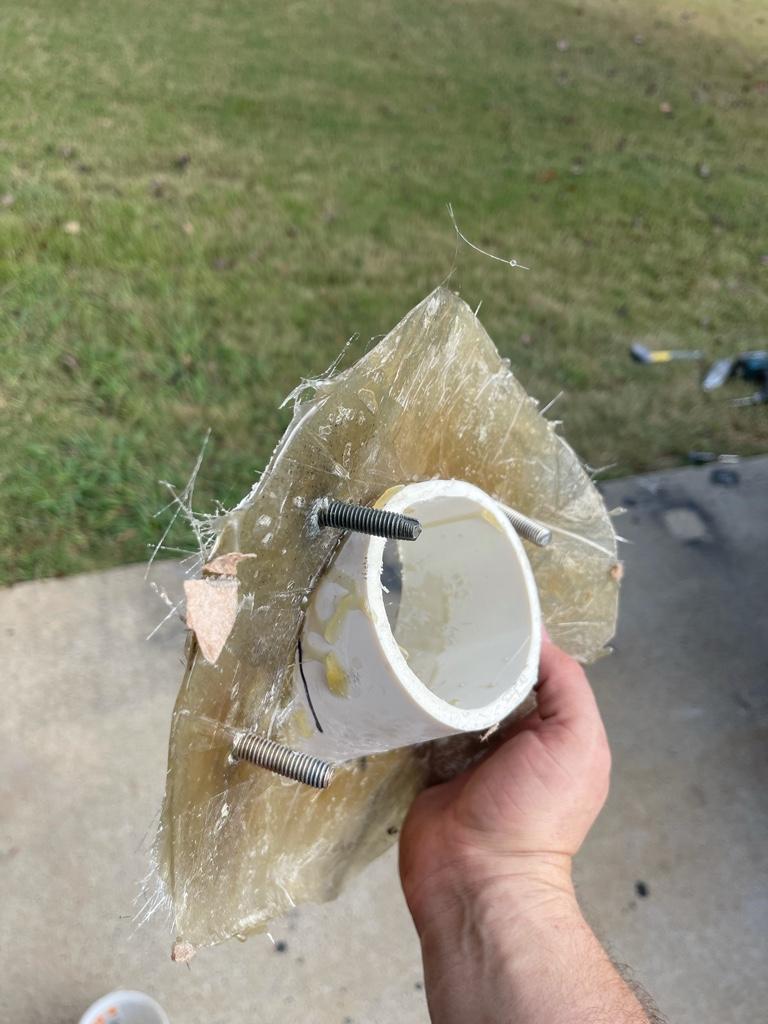
Oh yea, also, I came up with a much simpler ideal of creating a fastener point on the snorkel tube itself.. instead of fusing in an aluminum angle or making other brackets I plan to just drill 2 holes and install 2 screws from the inside of the tube with a nut and washer on the outside to secure them in place. This would them mount through the existing bracket on the A pillar and fasten with some acorn nuts for a nice finish. This will also give me the ability to fine tune the distance between the tube and bracket via more or less nuts/washers in between. What I haven’t decided is whether I want to do this before or after the final layer of carbon fiber.. not having the bolts there would make wrapping the carbon significantly easier.. decisions decisions..

07e12cd9ef3c0bb4e6467c3a2f62e473.jpg

1d7a733bd8980a3ca484a0bcf8b8522a.jpg

84191acc588531d09a0326dccd4c407f.jpg
 
Last edited:
6b0f1f36ae2674b3d0b8fb4b1b0140ea.jpg

de1b0643c15e7a479a25c6aa5987e103.jpg

8196f44af175c7f68eb76b71c465b9d8.jpg


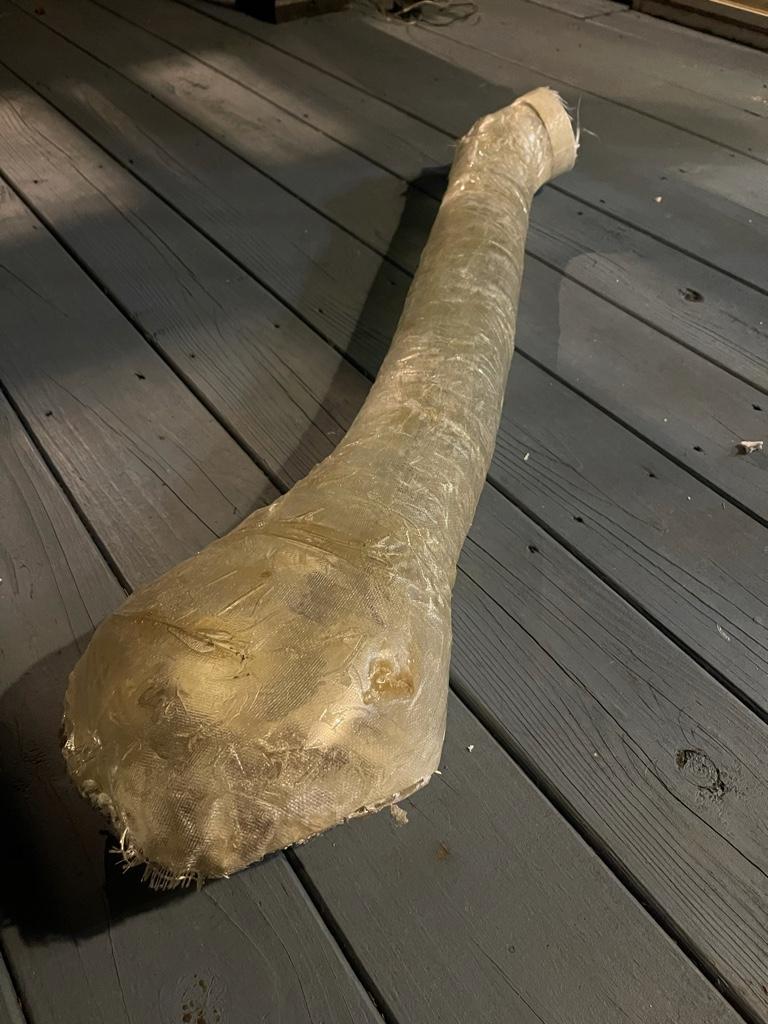
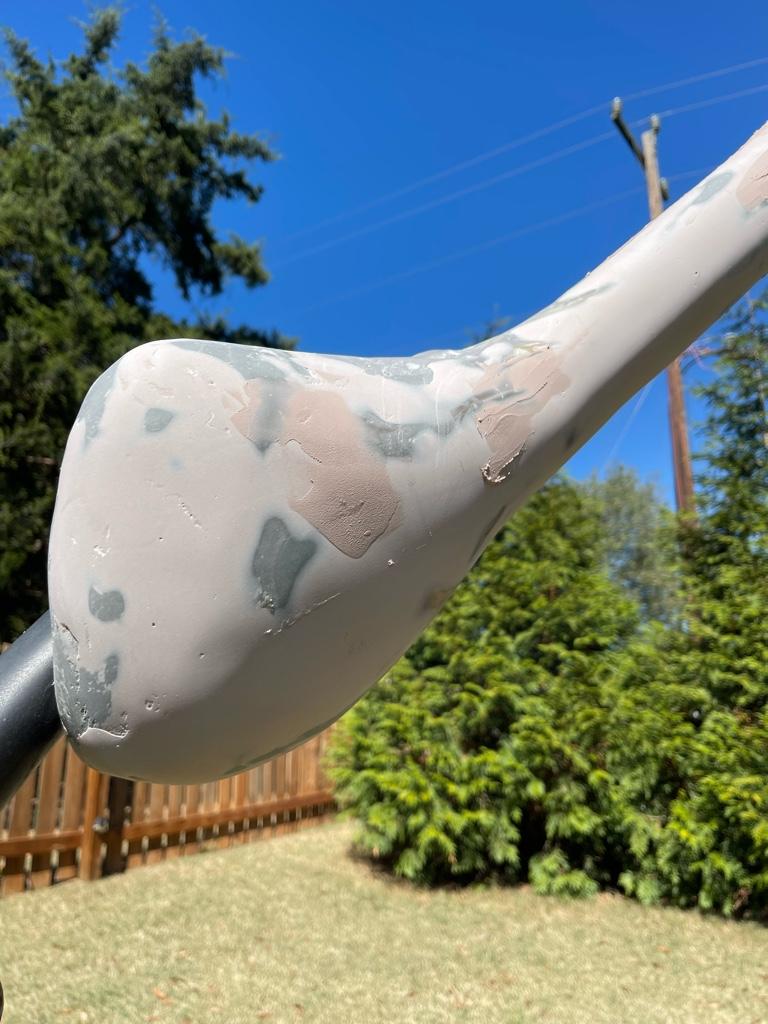
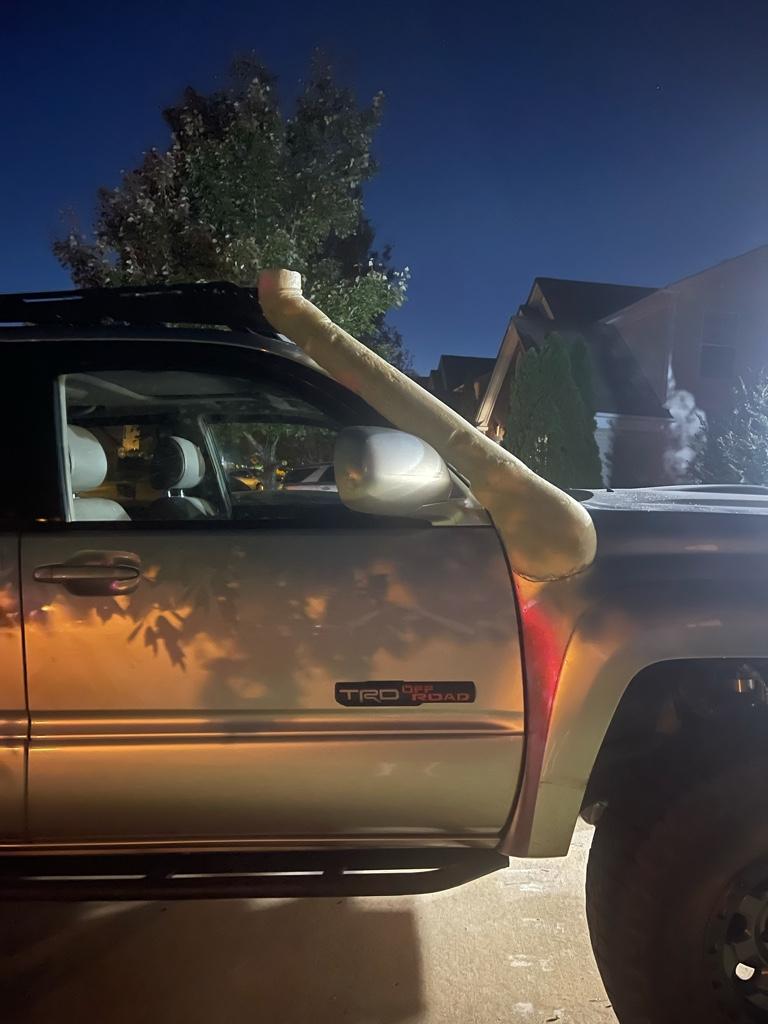
Still got some sanding to do, and then some more and more and more, but it’s now one piece. The plan for today is to add some bondoglass reinforced body filler and do some more roughy shaping before moving into regular body filler to give it the final smooth finish before laying on the carbon layer. Also need to drill and insert the 2 mounting bolts.. we’ll see how that plan goes


Sent from my iPhone using Tapatalk
 
Made some progress with the bonzo glass reinforced filler today. Waiting for some 80 grit pads to show up tomorrow to shape this down before I hit it with body filler. This stuff is super strong, but did add a little bit of weight.

e7d797e8606bb9527aa8d706e9784552.jpg

cdd8d44fe43454e74351386306361537.jpg


Sent from my iPhone using Tapatalk
 
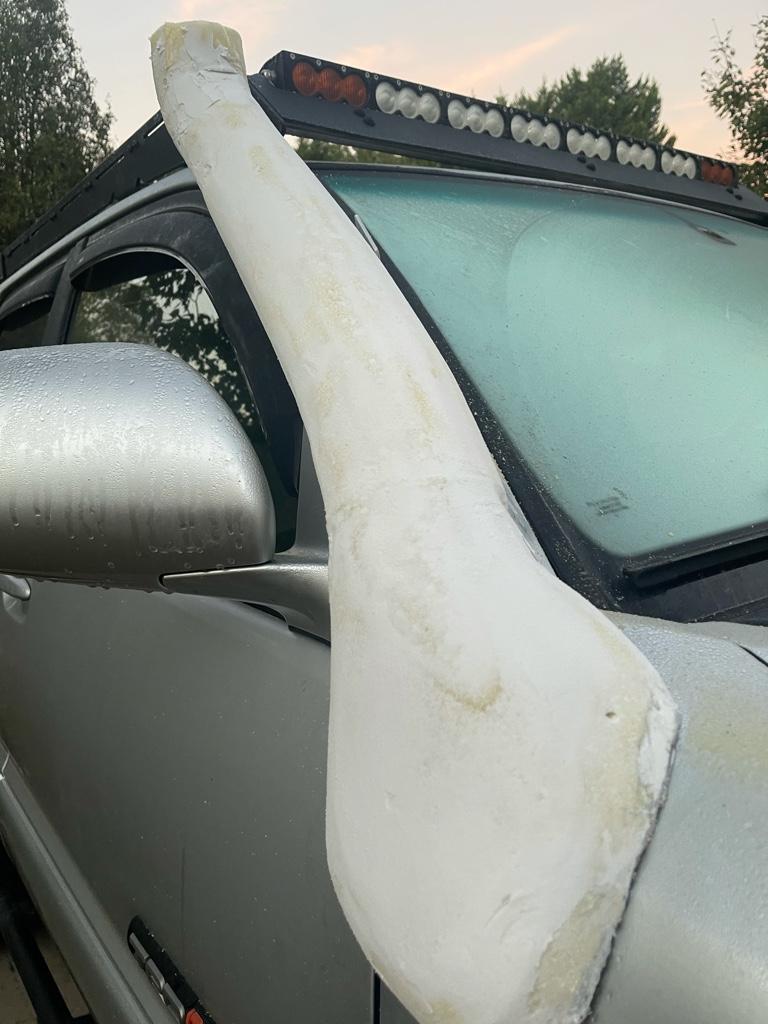
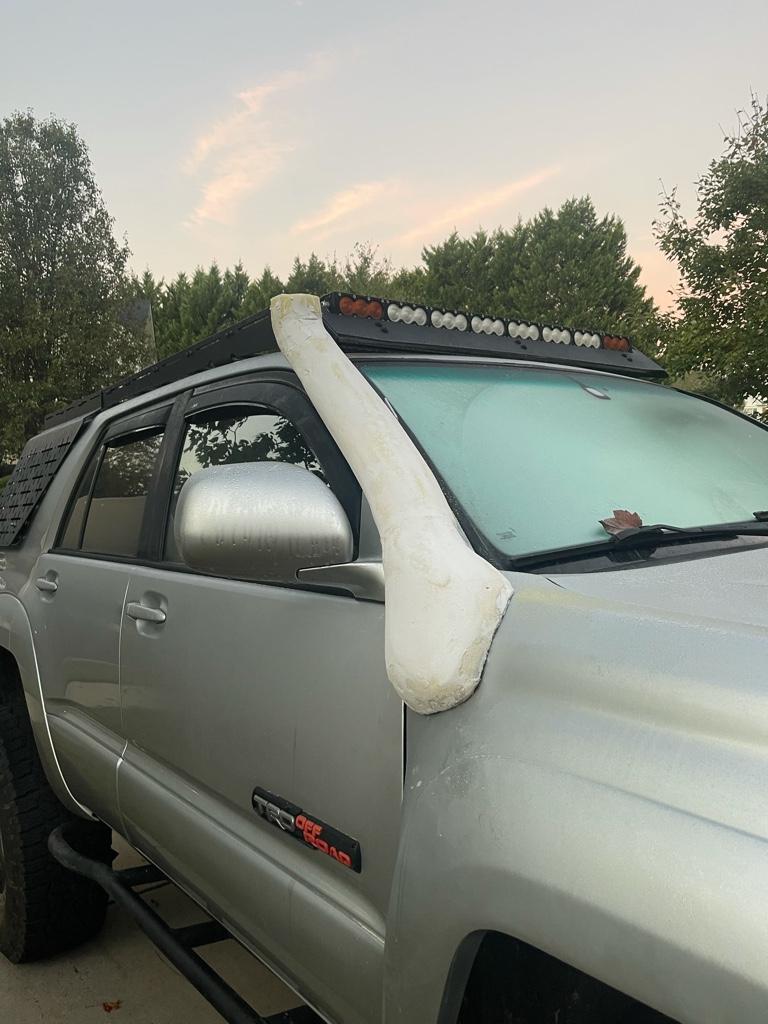
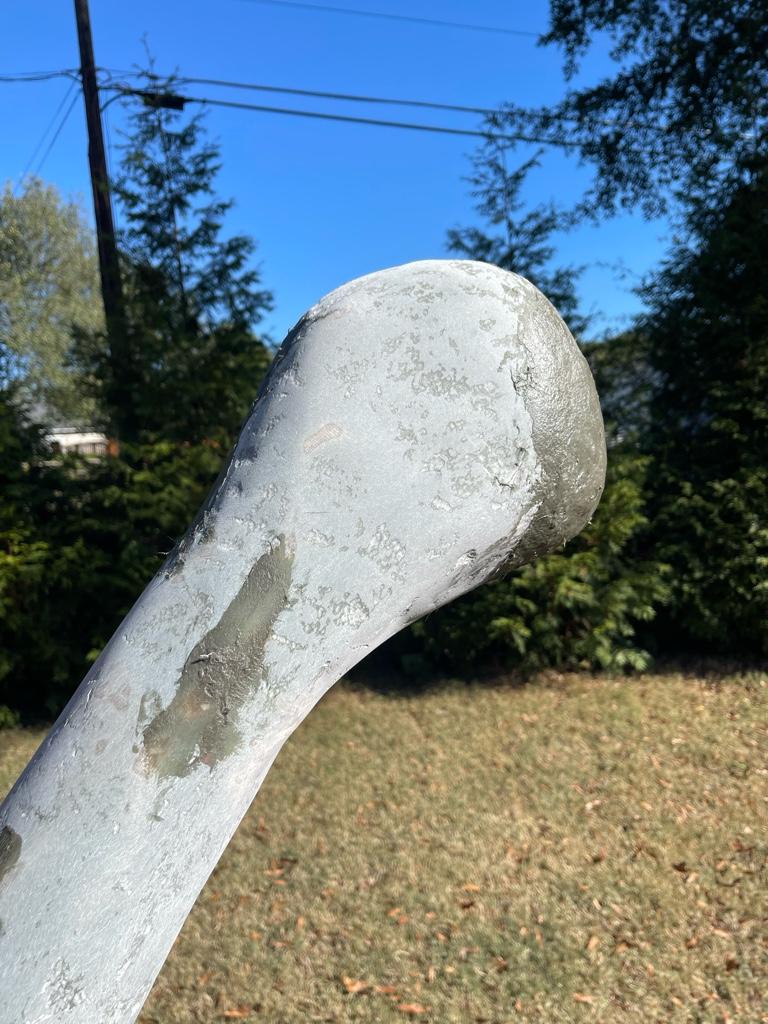
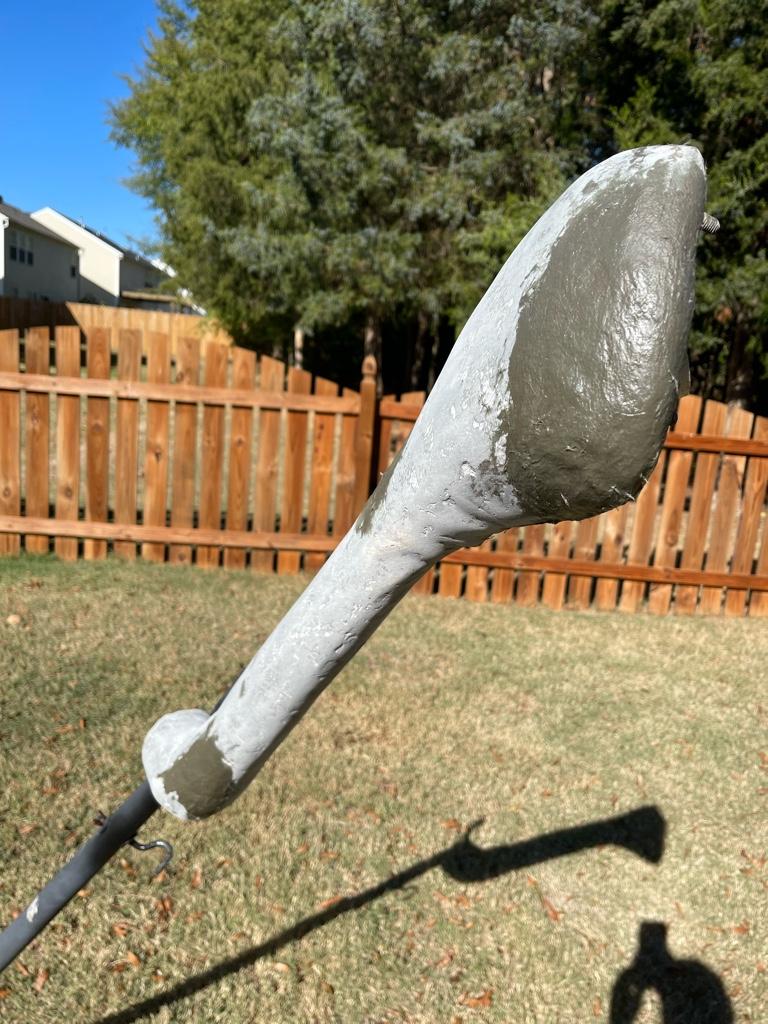
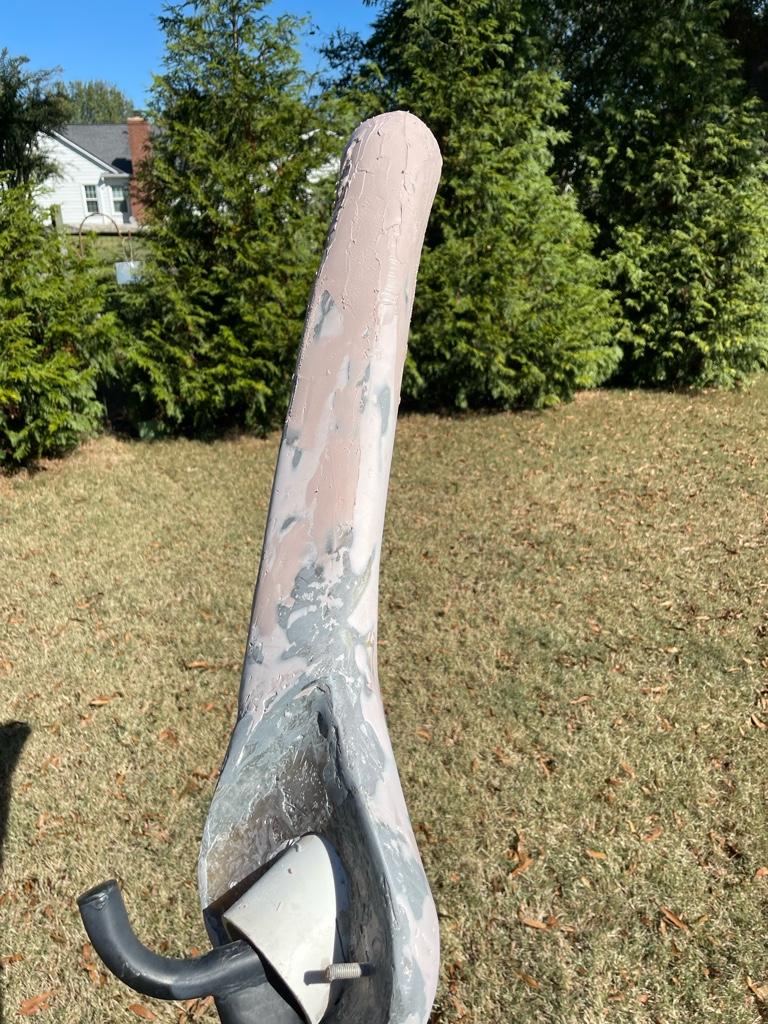
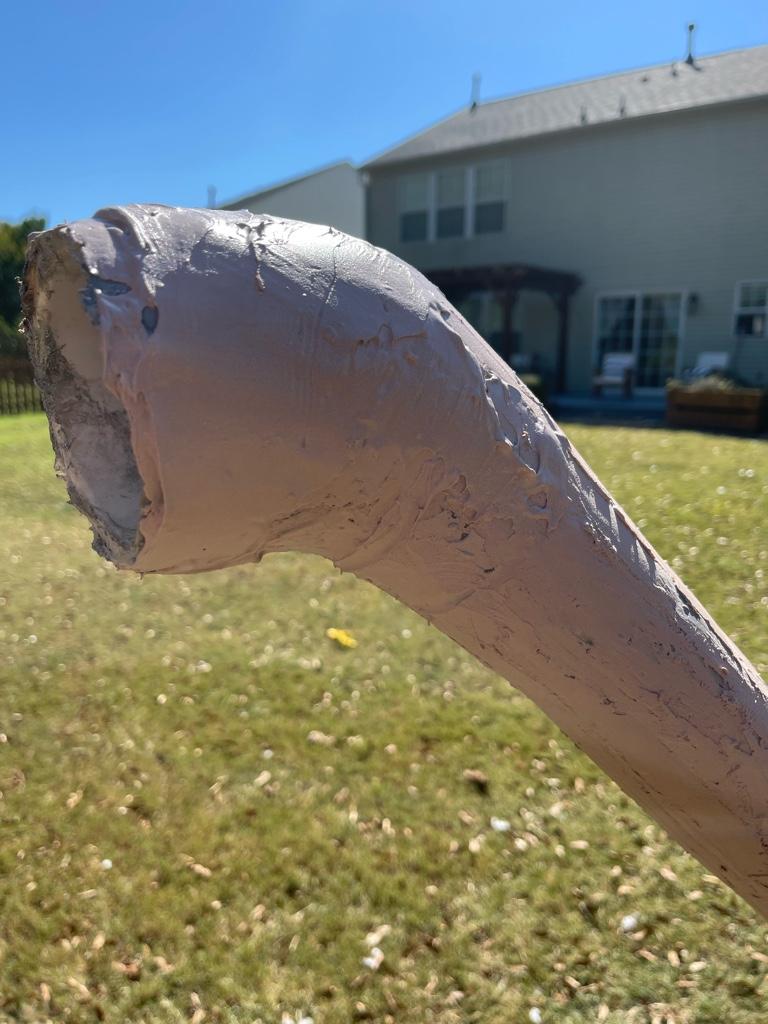
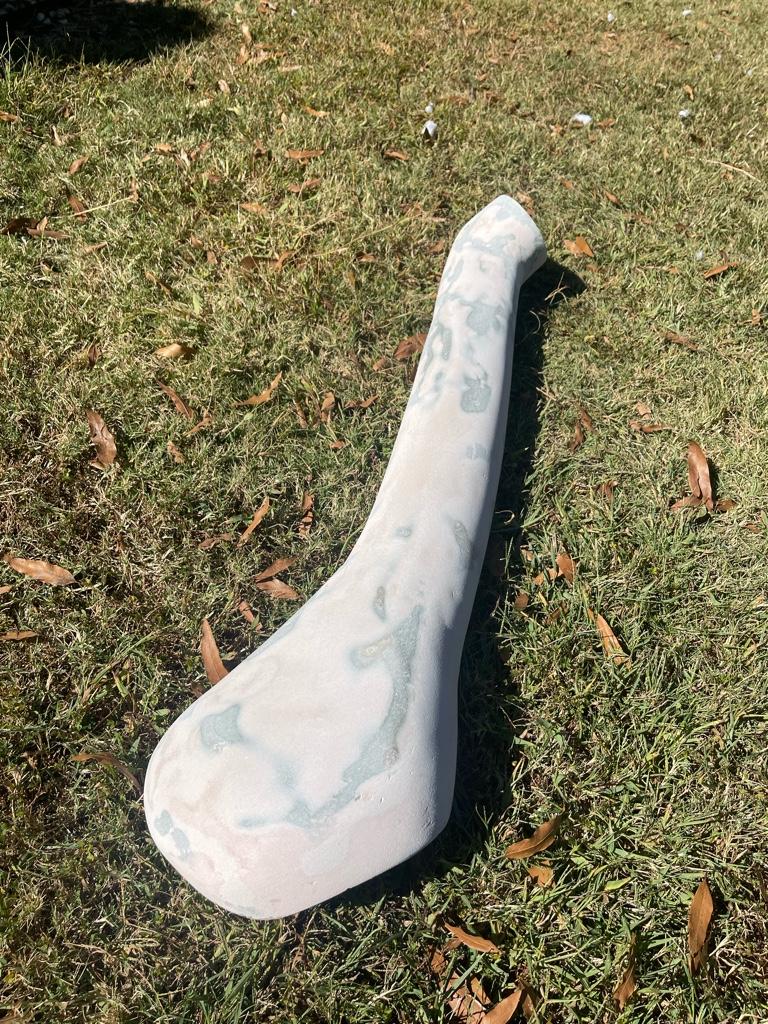
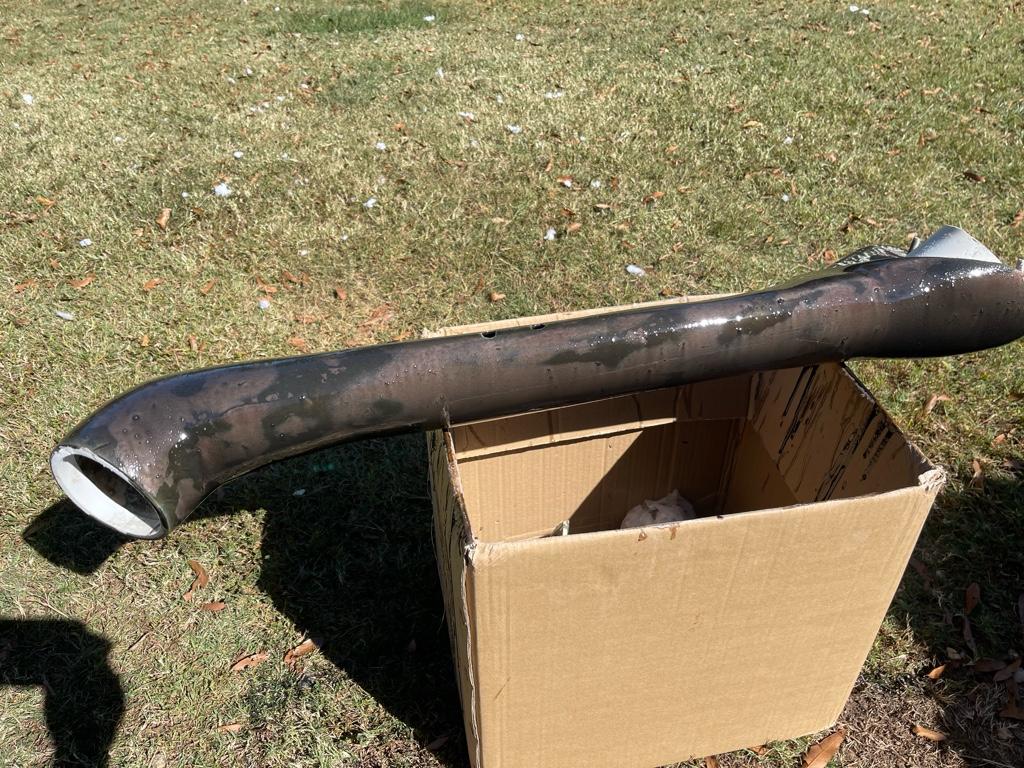
Hats off to the body work guys .. you make this stuff looks easy, it is far from it lol. This is after round 4 of sanding and filling. Finally onto the body filler , hoping to only need a couple more spots to fill after the next sanding session and then I should hopefully be done.

Then I’ll need to Mark and drill the holes for the mount bolts and hope like hell I can get them in from the inside lol.

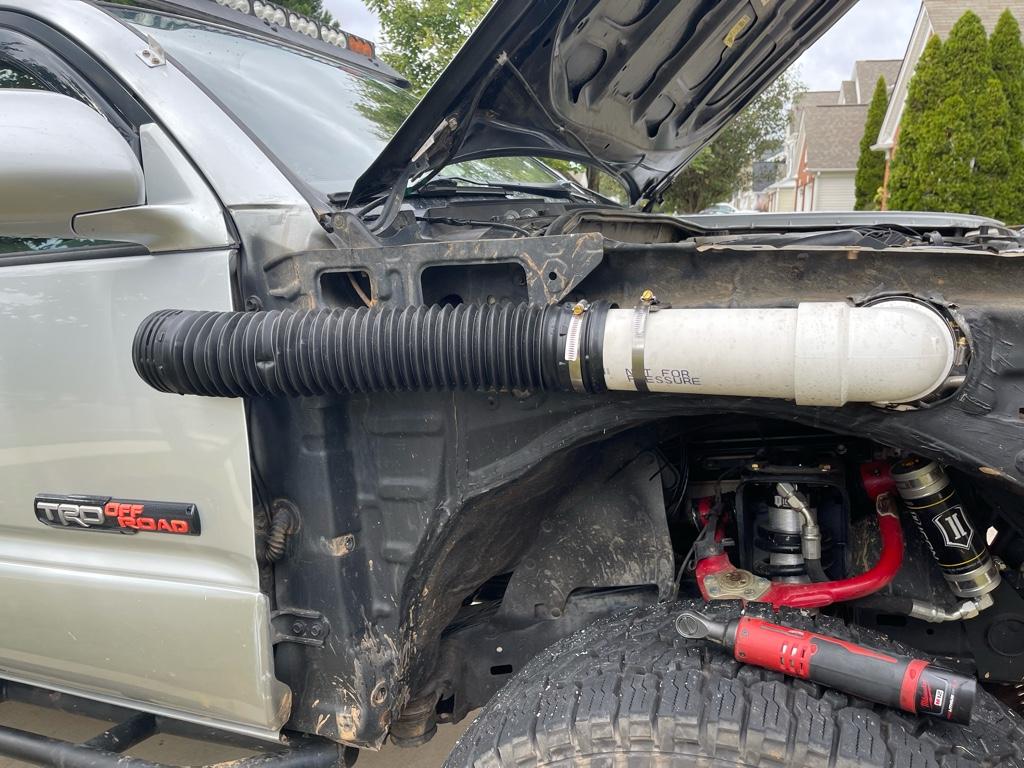
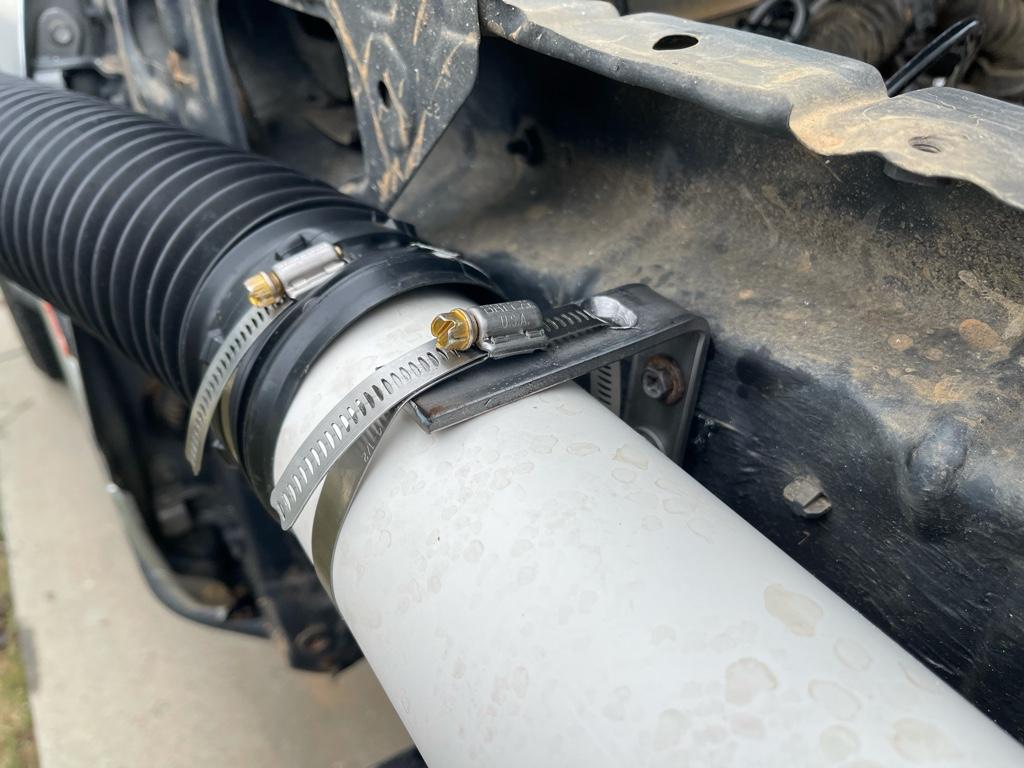
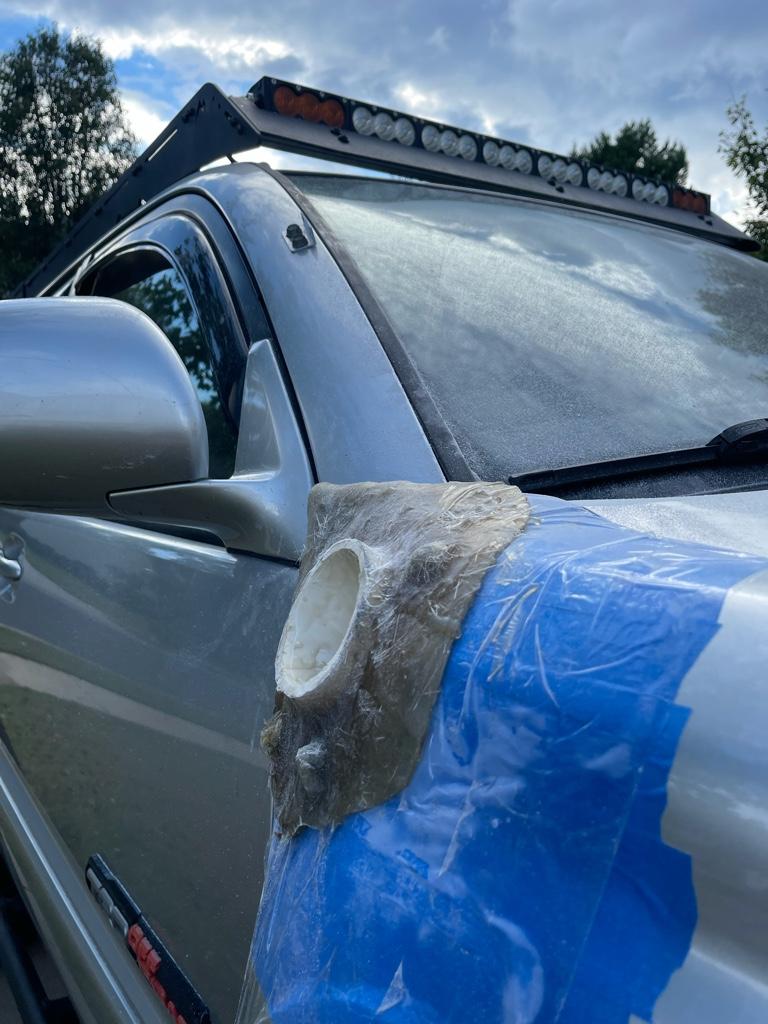
The fitment on fender is no longer 100 %perfect because the upper tube looks like it moved just a little either while I was doing the first round of fiberglass (since I elected not to mold it right on the car) or possibly after I cut it open and fused it back. Nonetheless it’s not terrible and I’ll planning on installing some sort of gasket on the bottom between the fender and backside of the snorkel so it should be ok. The challenge will be to figure out the last part of the piping run that will attach to the removable snorkel, not quite sure yet if my metal flex conduit is going to be the best route or if I’ll have to custom make another foam insert and make a short fiberglass extension tube that will run out to the rubber couple under the fender.

Either way I am hoping that another 3-4 days I should already have a finished carbon exterior piece and see what this thing will look like. Can’t wait. Lots of work but hopefully the end result will be worth it.
32b143a55aaf9ed76f3dd68d2437a567.jpg

aed7558ba1b38fe2ec762c8dcd5c44a8.jpg

973bb961b3044d0ce1d58921654987ed.jpg

91eba7543d10d8d1d83cb7279c9f4e54.jpg

d890d3793204dcb0bd42ee4d87fc00d9.jpg

6ab268e767499fd43d84be63174373ef.jpg

1c8f8095986cf3d193ef8288267e74c8.jpg


Sent from my iPhone using Tapatalk
 
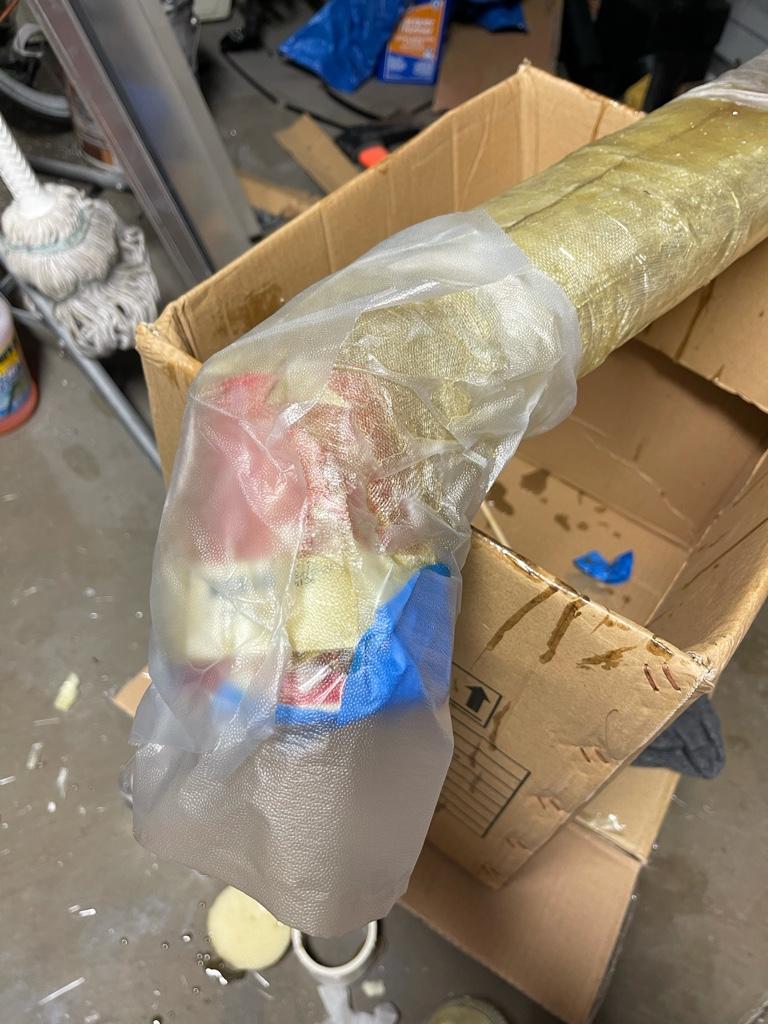
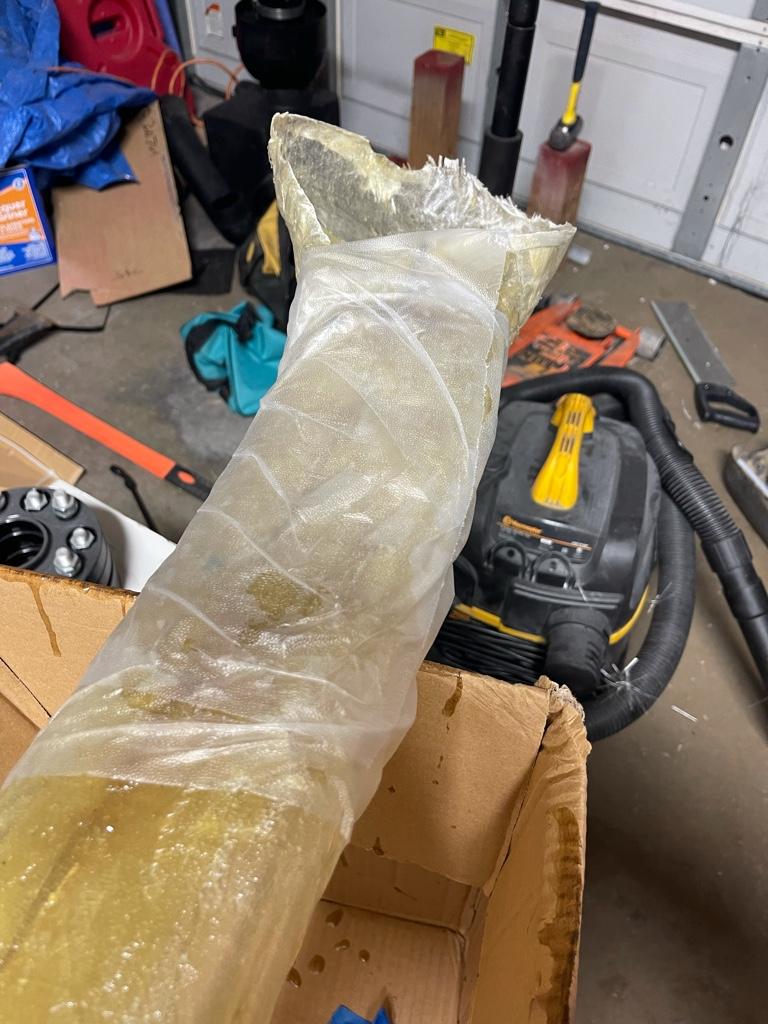
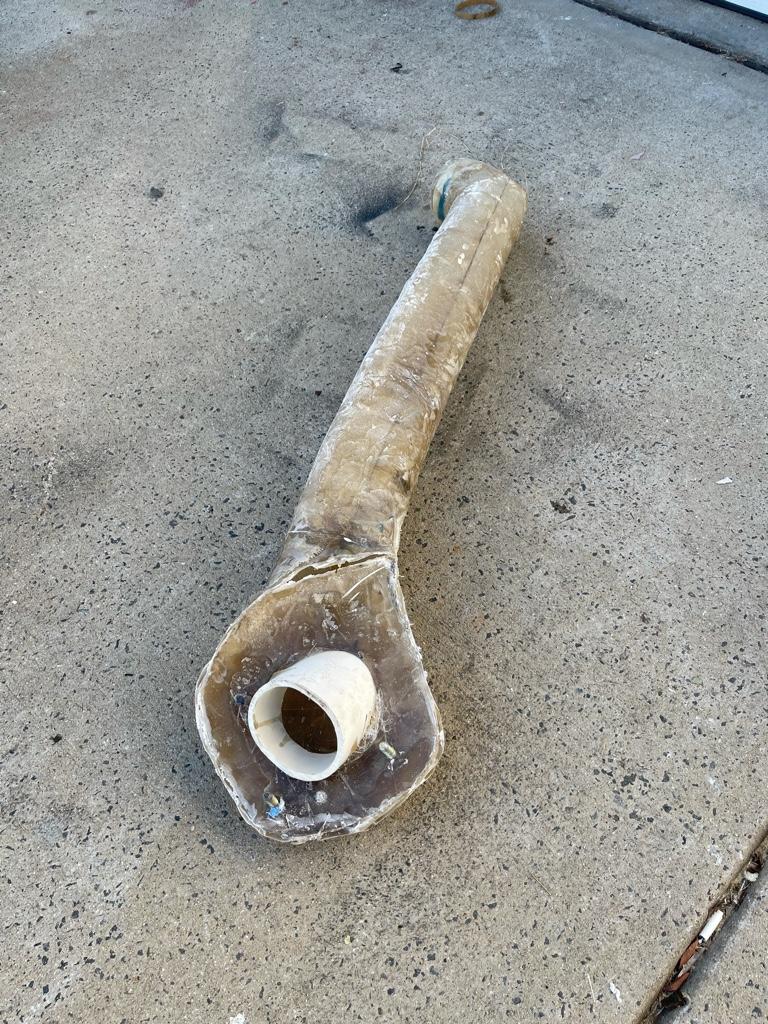
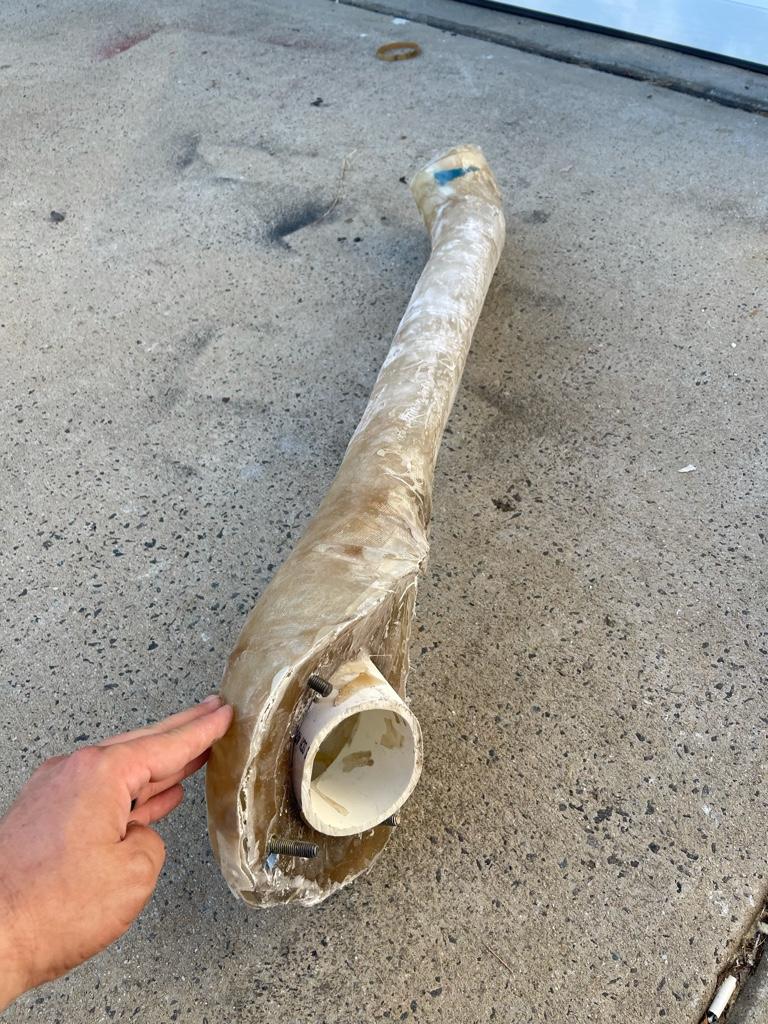
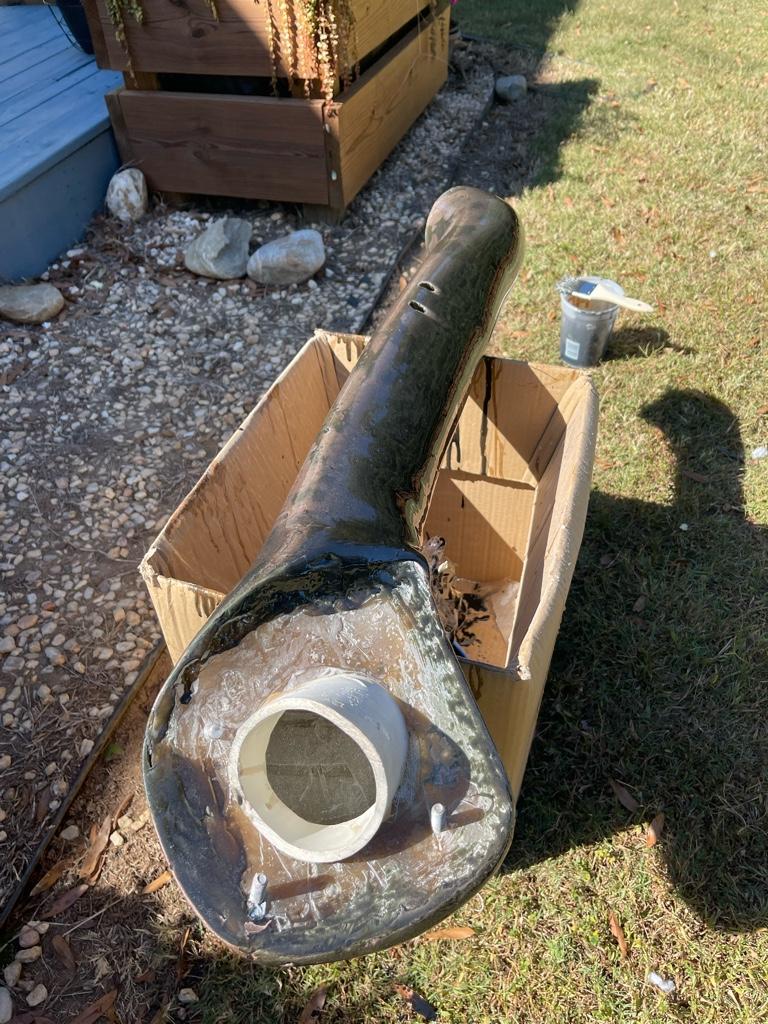
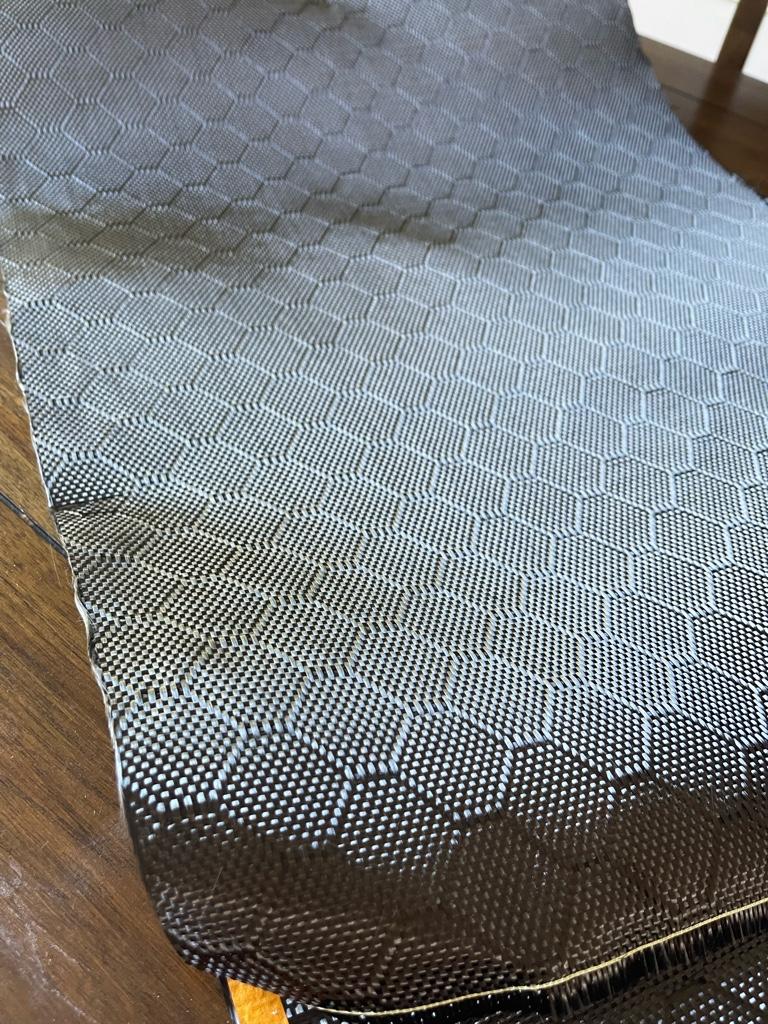
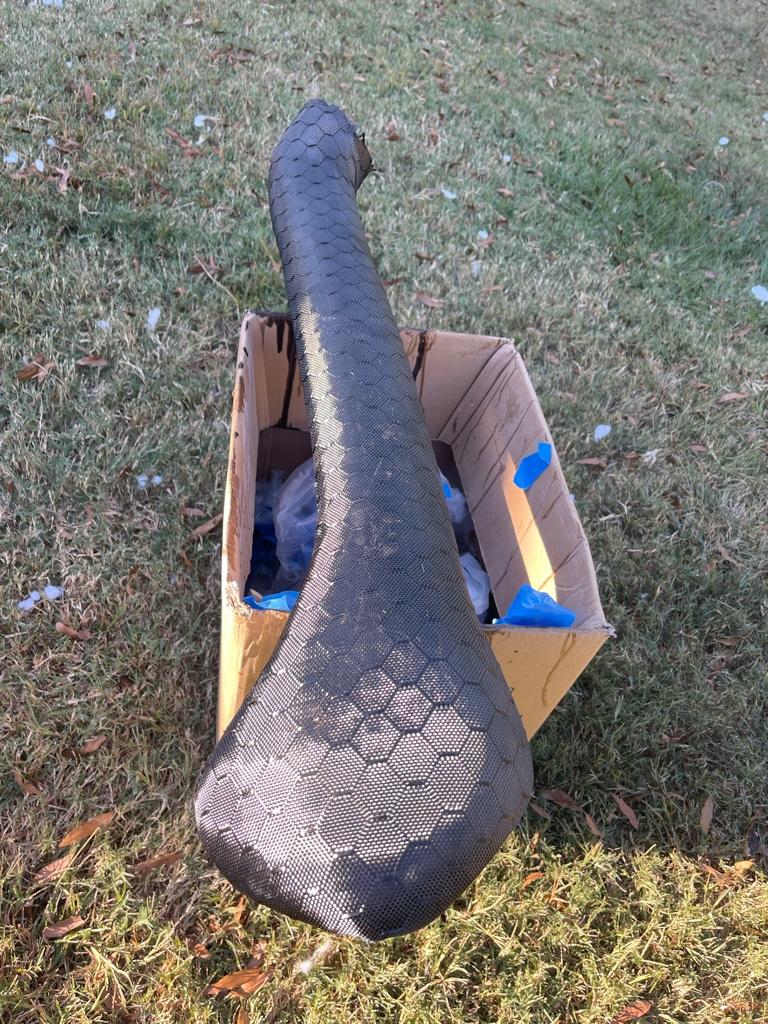
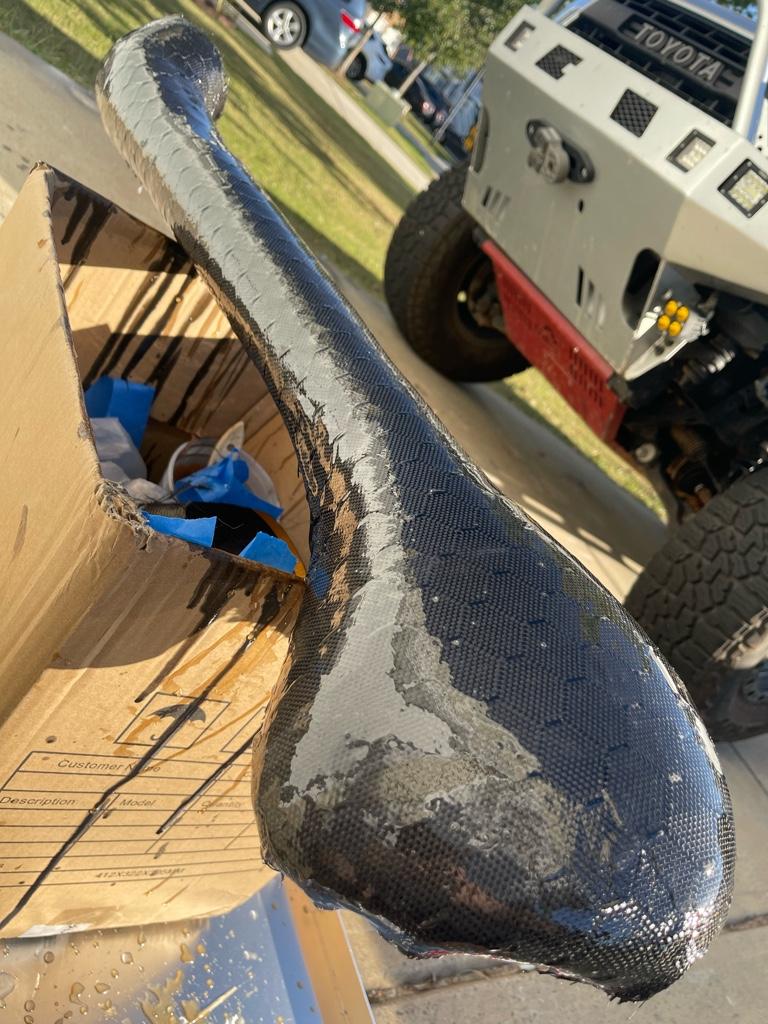
Well… wish me luck. The black -dyed resin coat is on and currently waiting for it to get to a tack stage so that I can drape the honey comb carbon over it. This is the most time intensive and nerve racking part because the tack time is like 2 hours and if you screw up laying down the cloth you’re pretty SOL and have to start over or call it quits on carbon appearance and paint it black lol.

After this it even more time intensive with 14 hour cure times in between next coats with lots of sanding in between. I am hoping I can lay this on nicely , at least on the visible surface and have this finishing out by the weekend so I can figure out the final piping connection.
c948ef569ebd1c79038a4f98b882943c.jpg

4915c41f43fc5d68d646d11dc4bfd4b3.jpg

2bdbe3bfa7b2386e5154b944d696ba8e.jpg

fbda1996ac5c7f54bd18d93a0c97ff09.jpg


Sent from my iPhone using Tapatalk
 

Members online

Forum statistics

Threads
278,312
Messages
3,554,085
Members
248,016
Latest member
Advally Service

Trending content

Back
Top