
You are using an out of date browser. It may not display this or other websites correctly.
You should upgrade or use an alternative browser.
You should upgrade or use an alternative browser.
aemravan's build thread - project TacoRunner
- Thread starter aemravan
- Start date
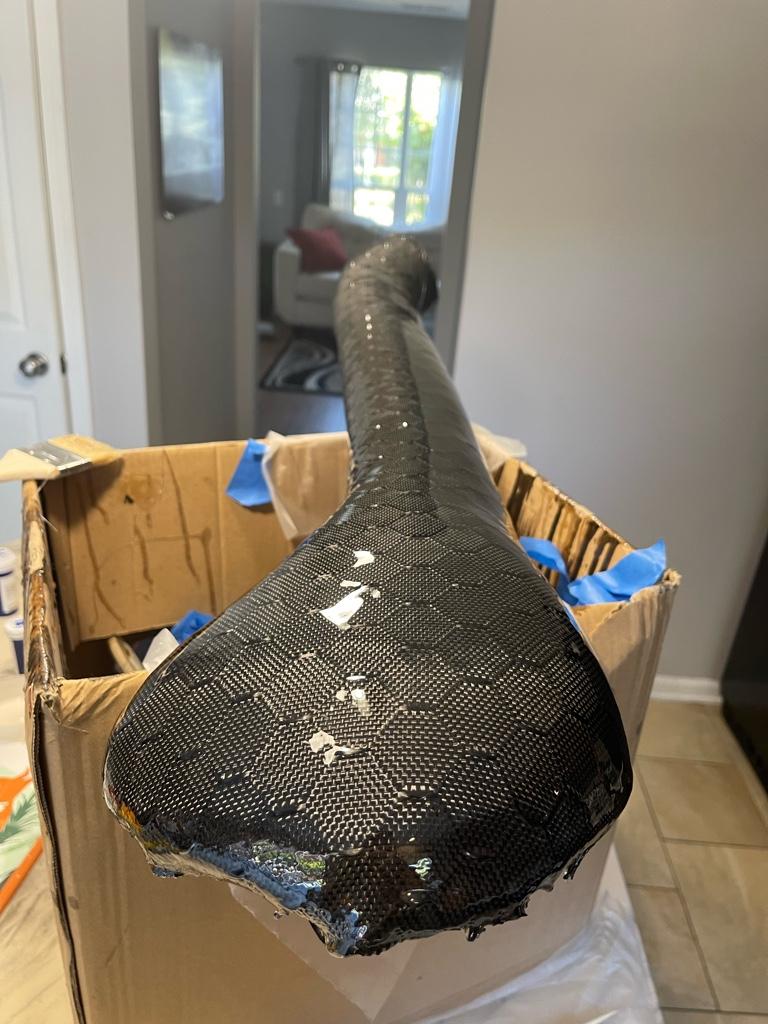
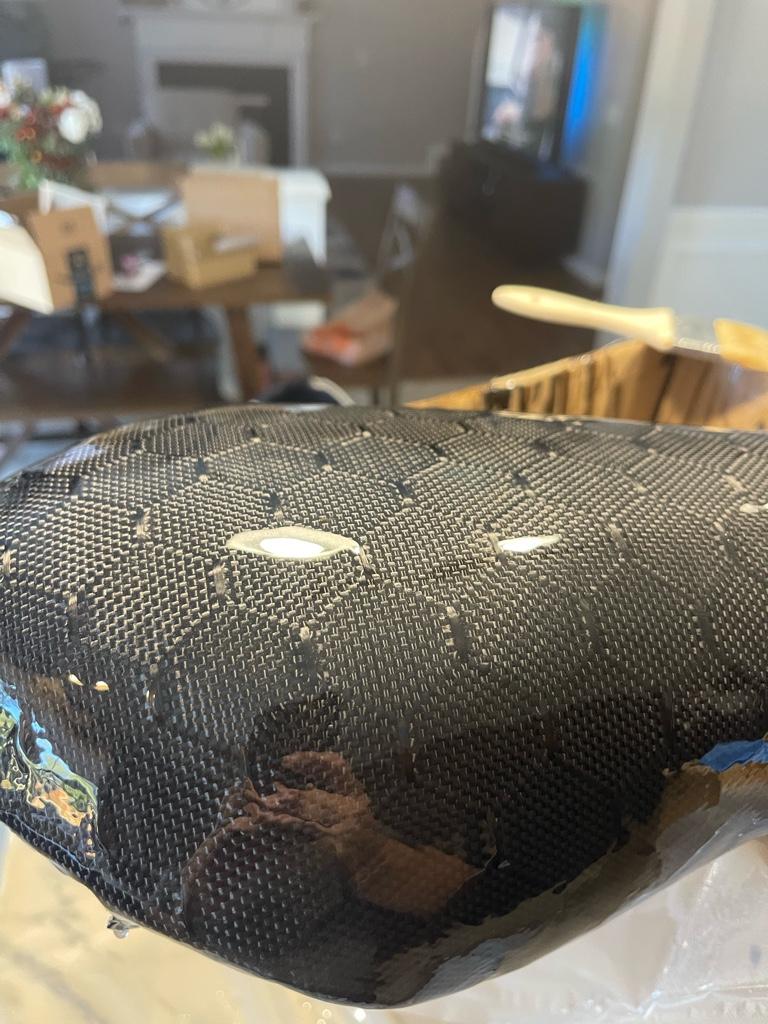
Since I can’t do anything but sit and watch it dry I’ll just resort to flooding my build page with frequent updates as I go out to look at it lol.
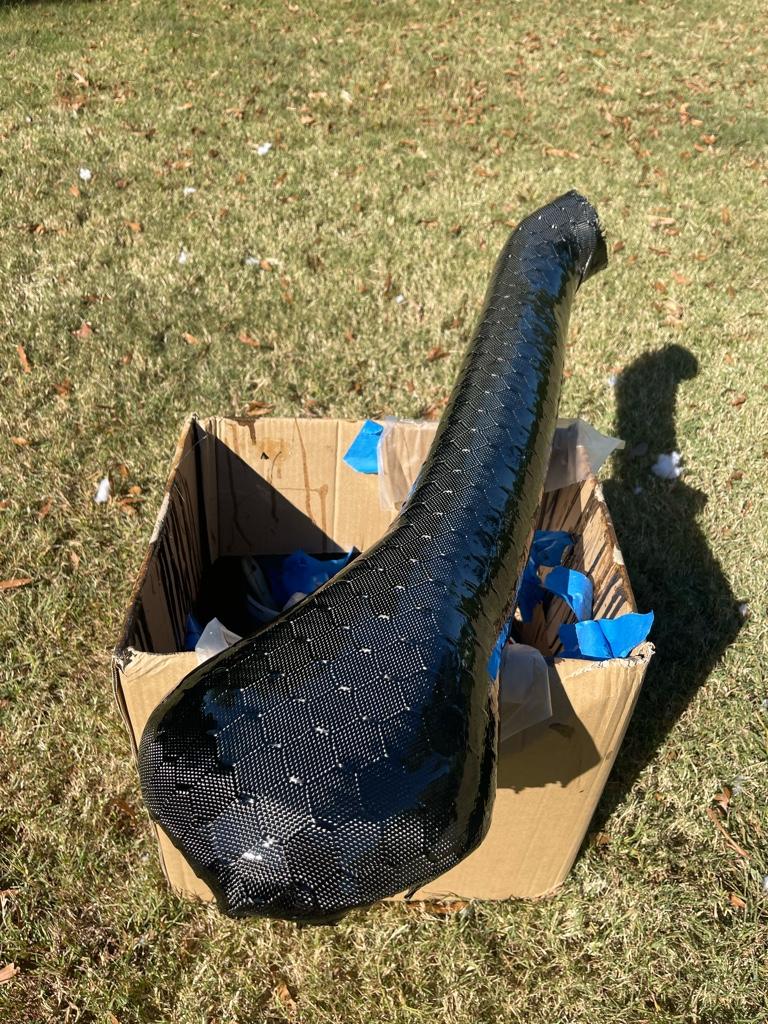
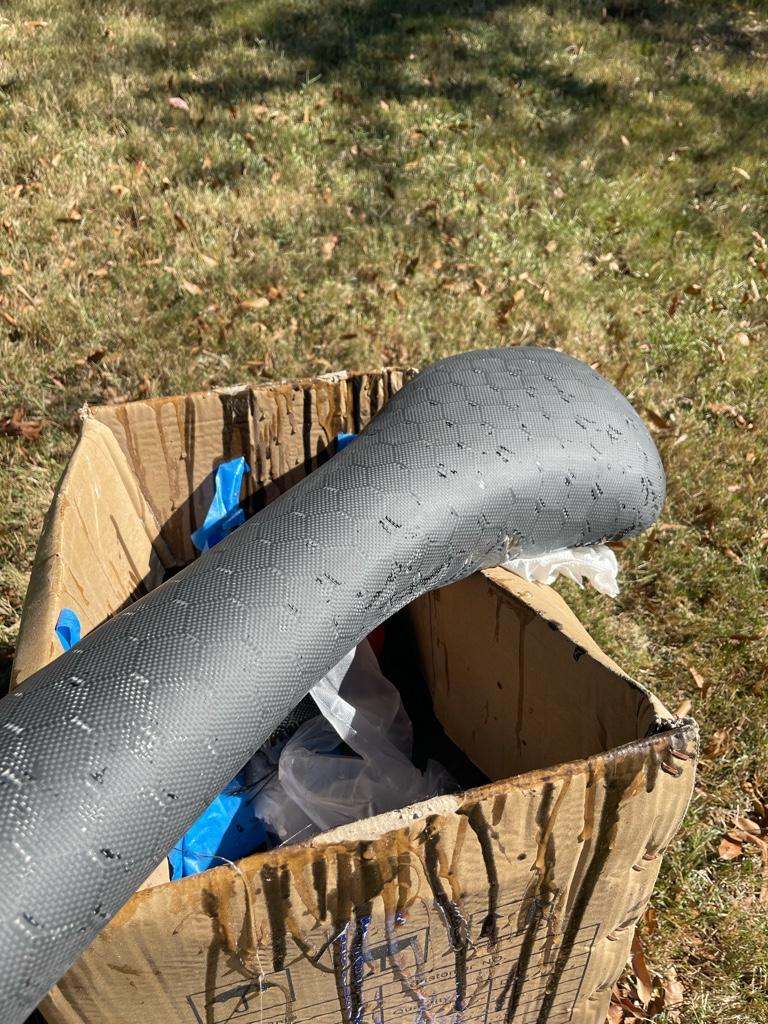
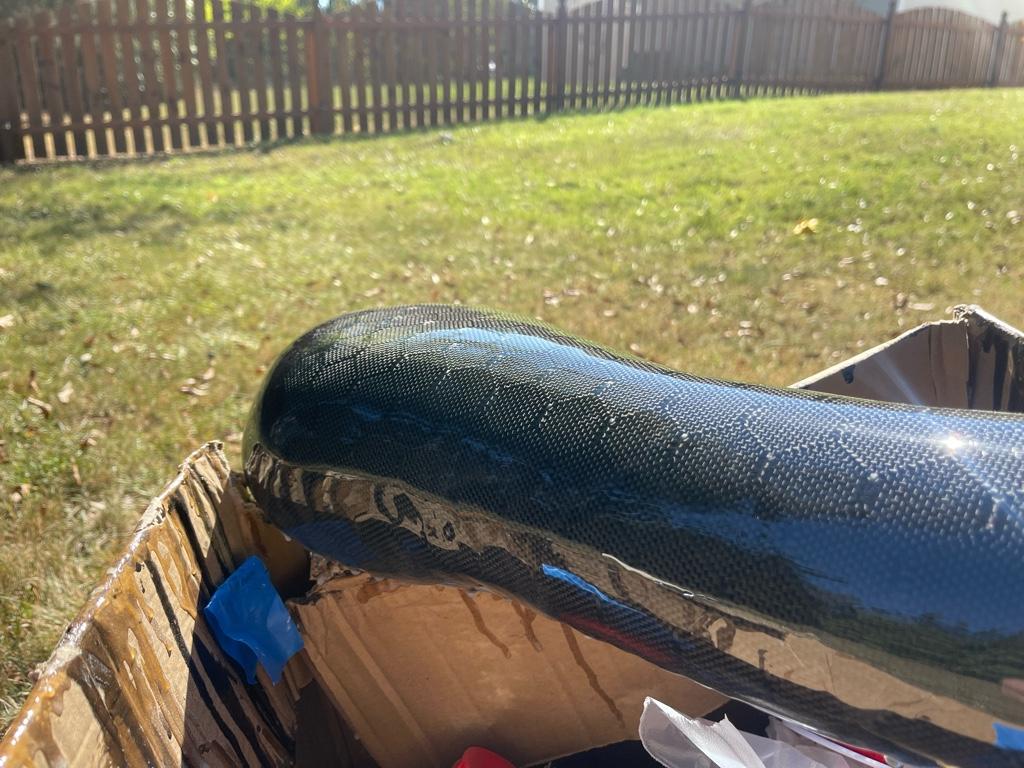
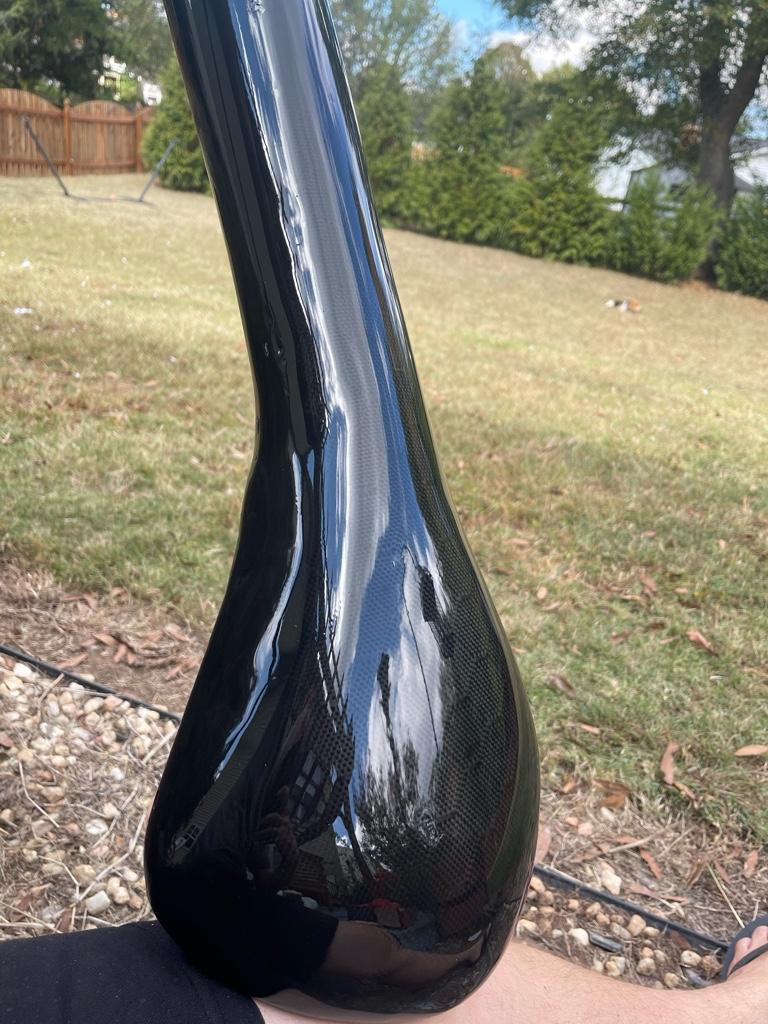
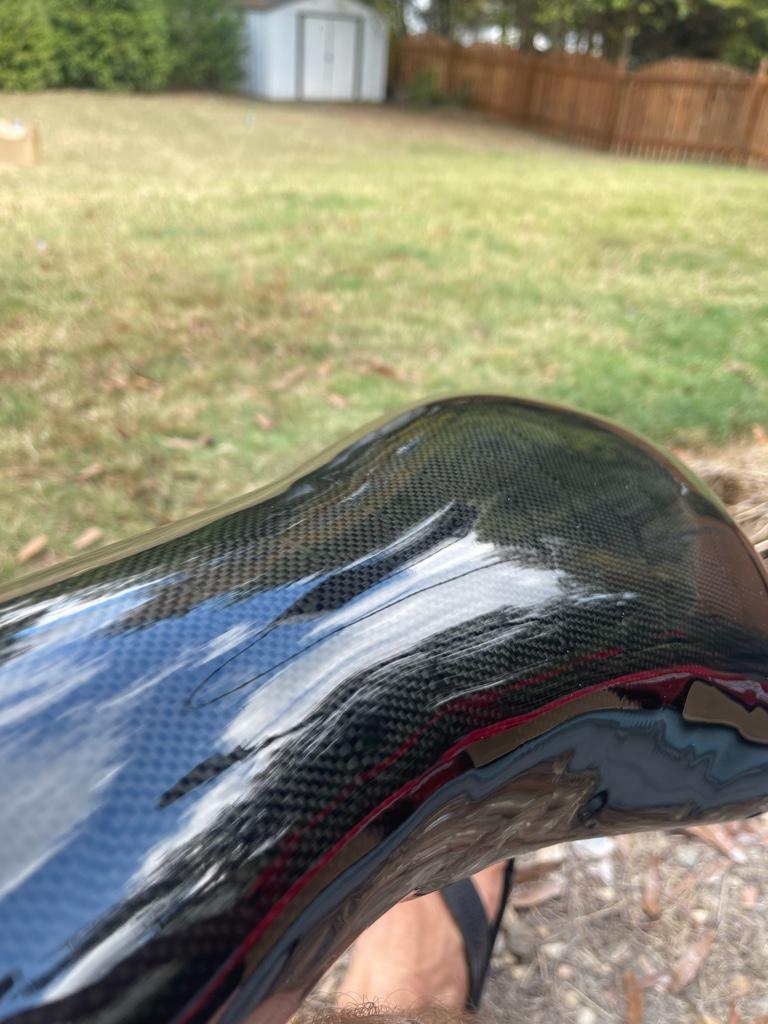
Coming out pretty damn good. Going to take a lot of sanding still for sure but not terrible on the visible face. My plan is to paint the back, top and a small strip around the base in black before I clear it to create some separation and hide imperfections in the carbon.
A vintage TRD tri color sticker should set it off nice too afterwards.
Sent from my iPhone using Tapatalk
Coming out pretty damn good. Going to take a lot of sanding still for sure but not terrible on the visible face. My plan is to paint the back, top and a small strip around the base in black before I clear it to create some separation and hide imperfections in the carbon.
A vintage TRD tri color sticker should set it off nice too afterwards.
Sent from my iPhone using Tapatalk
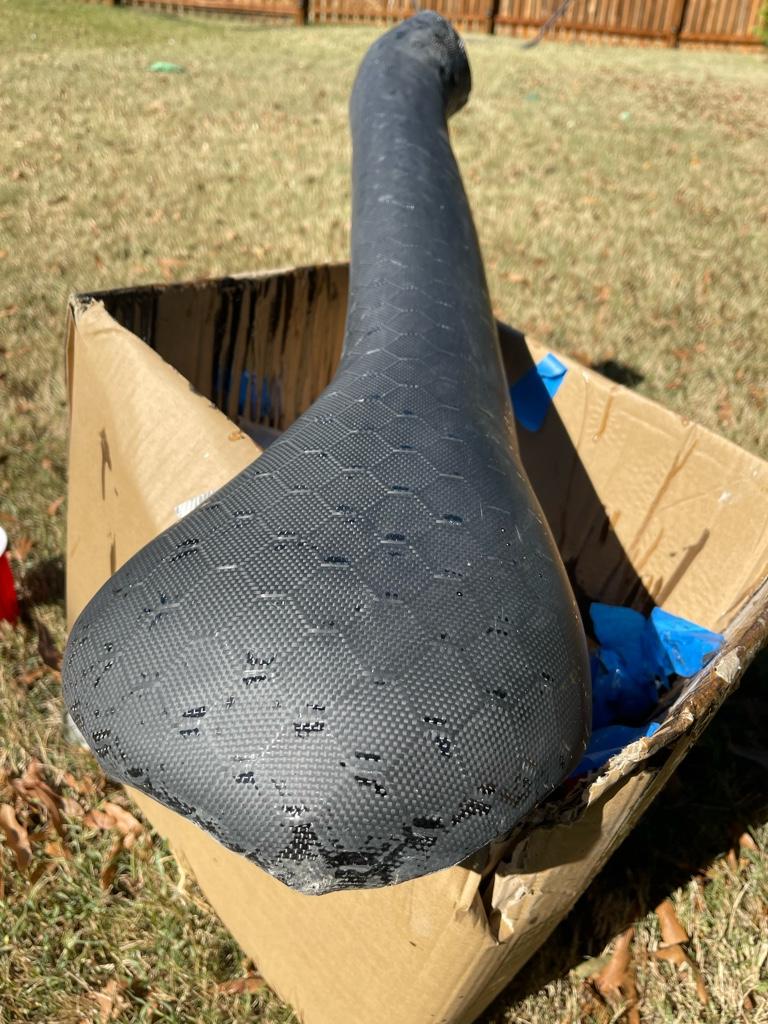
And then there was more sanding… this time on the second layer of the resin. Gave it a good sanding to flatten all the raised areas and poured a 3rd layer on. Hopefully this is the last one before I can do a final wet sand, paint the edges and back black, clear it, wet sand it and re clear it again. Looking promising to have this portion complete by the weekend..
Sent from my iPhone using Tapatalk
Sent from my iPhone using Tapatalk
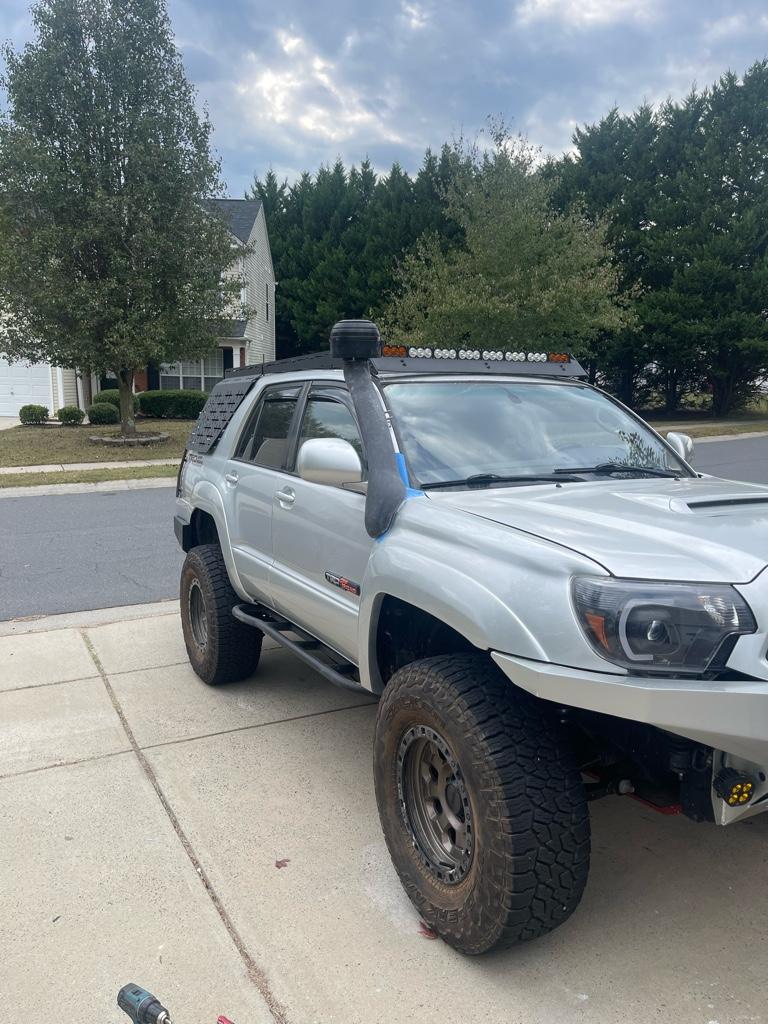
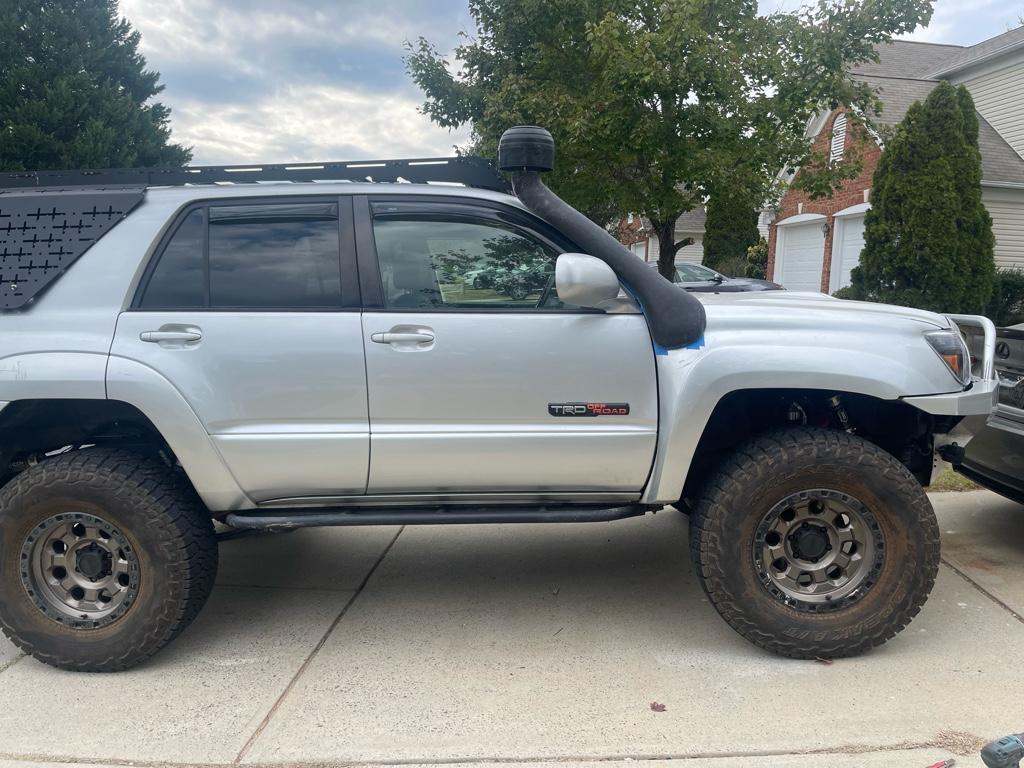
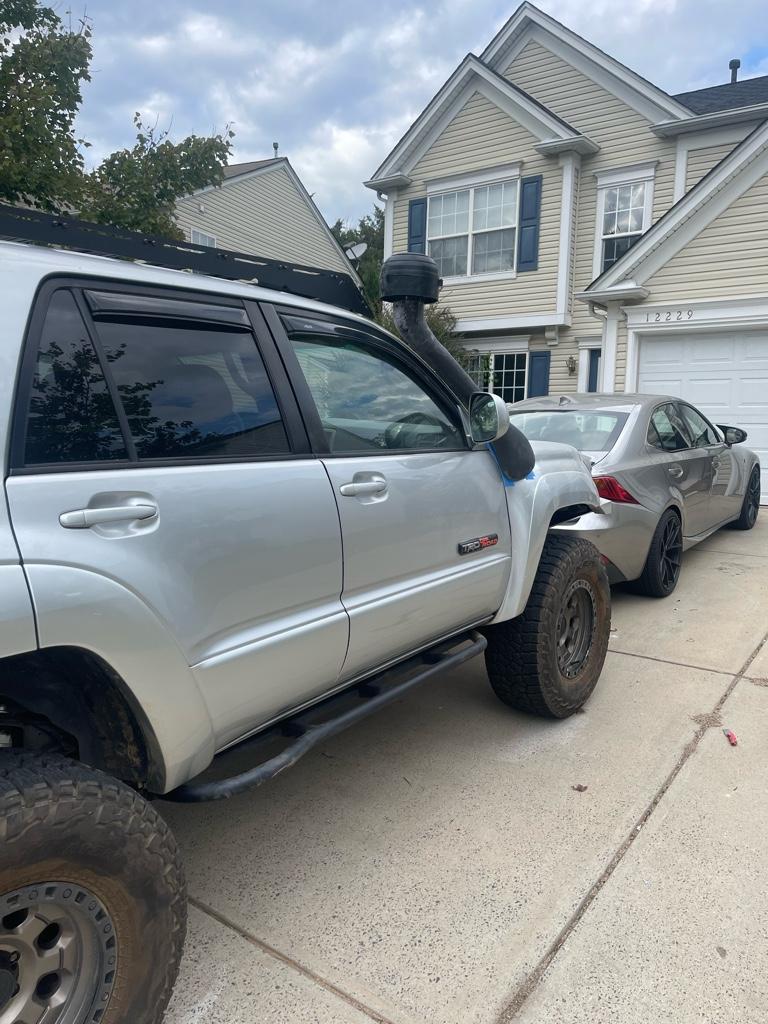
That moment when you’re almost done, but you do a test fit and realize it came out about 8 inches taller than you wanted… yay. Lol
So now I get to cut a section out of it and fuse it back together to make it a bit shorter so it doesn’t look so goofy.
Sent from my iPhone using Tapatalk
So now I get to cut a section out of it and fuse it back together to make it a bit shorter so it doesn’t look so goofy.
Sent from my iPhone using Tapatalk
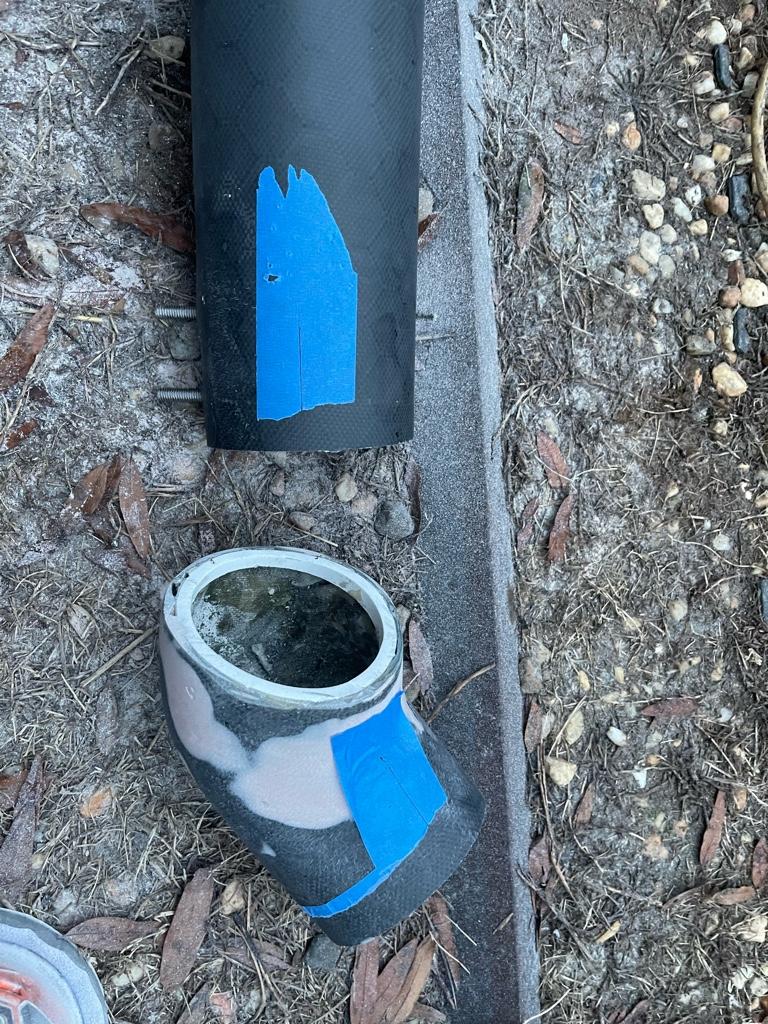
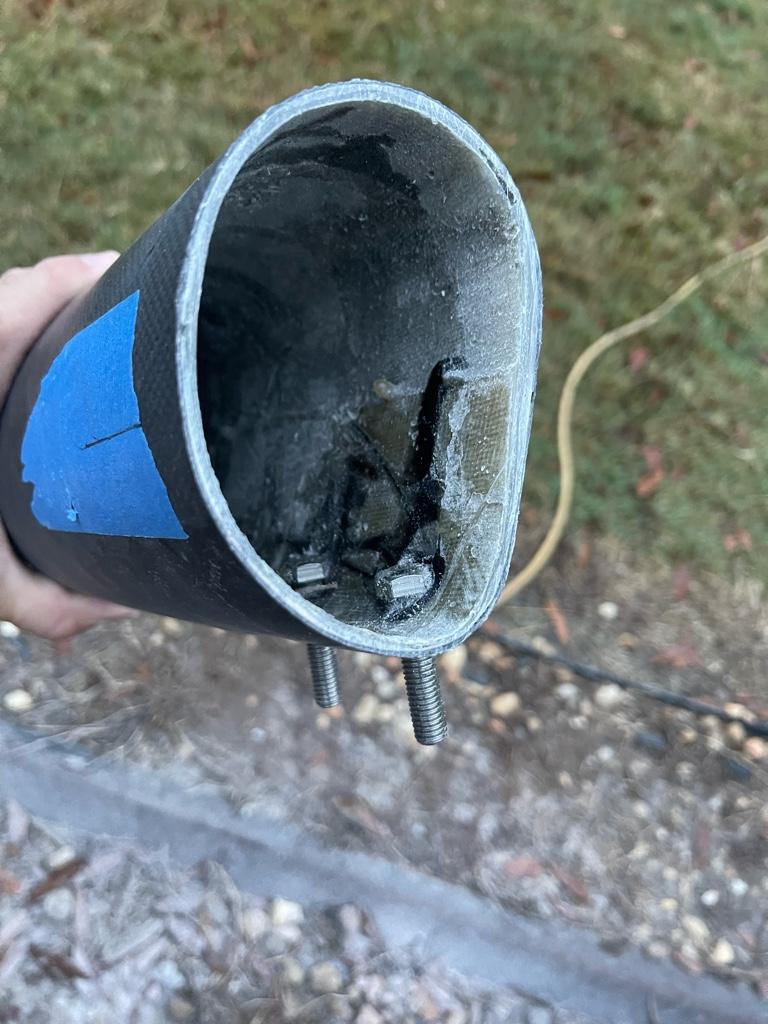
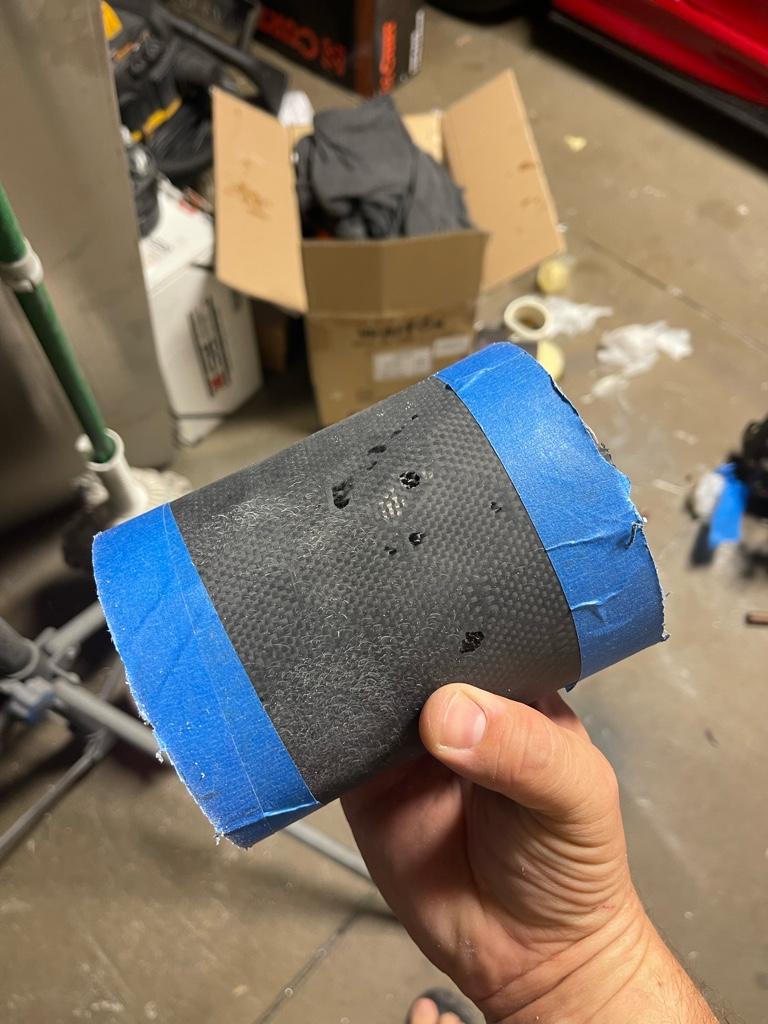
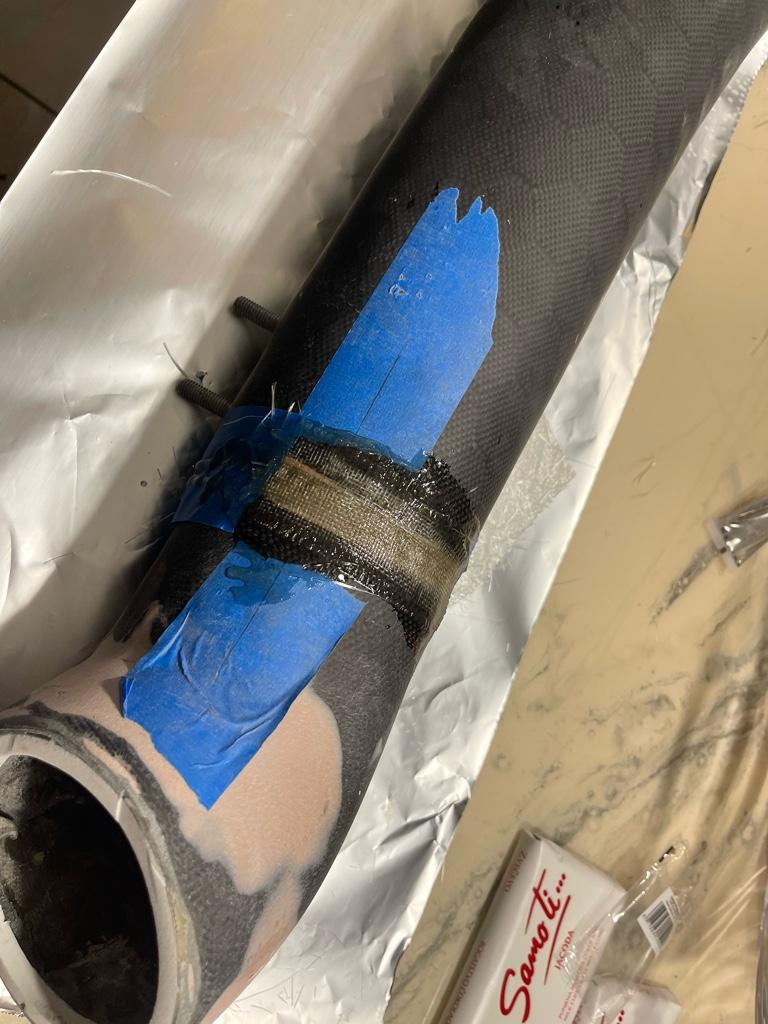
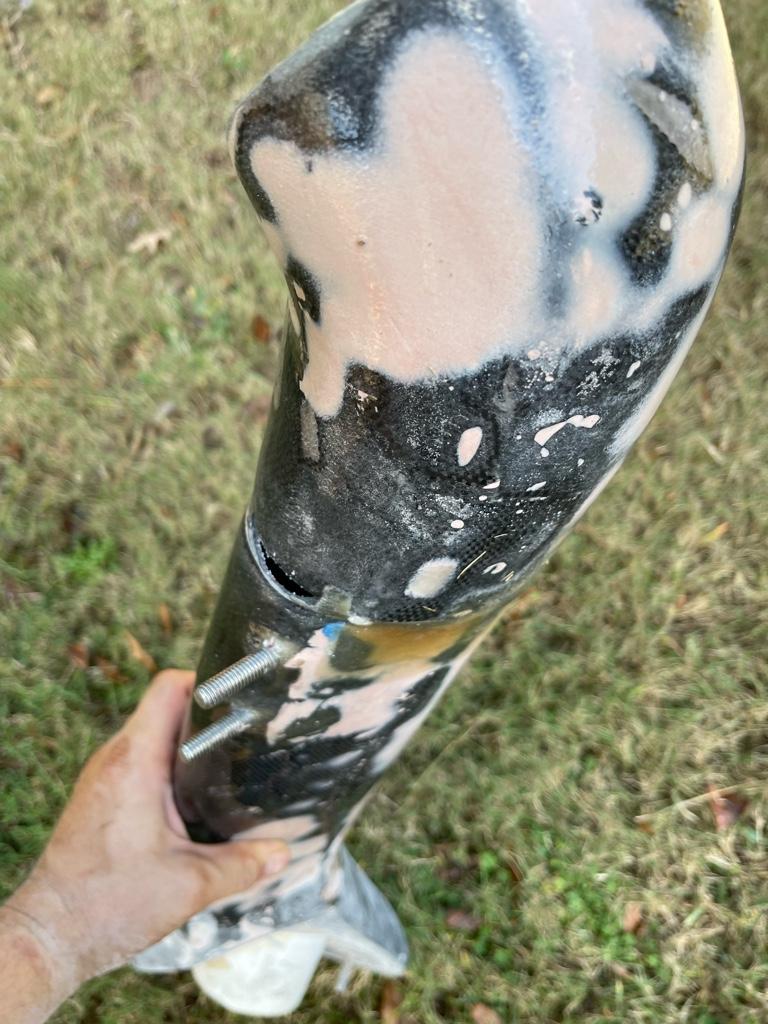
After my highly discouraging test fit I decided that with all the hard work already in this project it didn’t make sense to give up. So before work early this morning I took on a little fiber glass surgery.
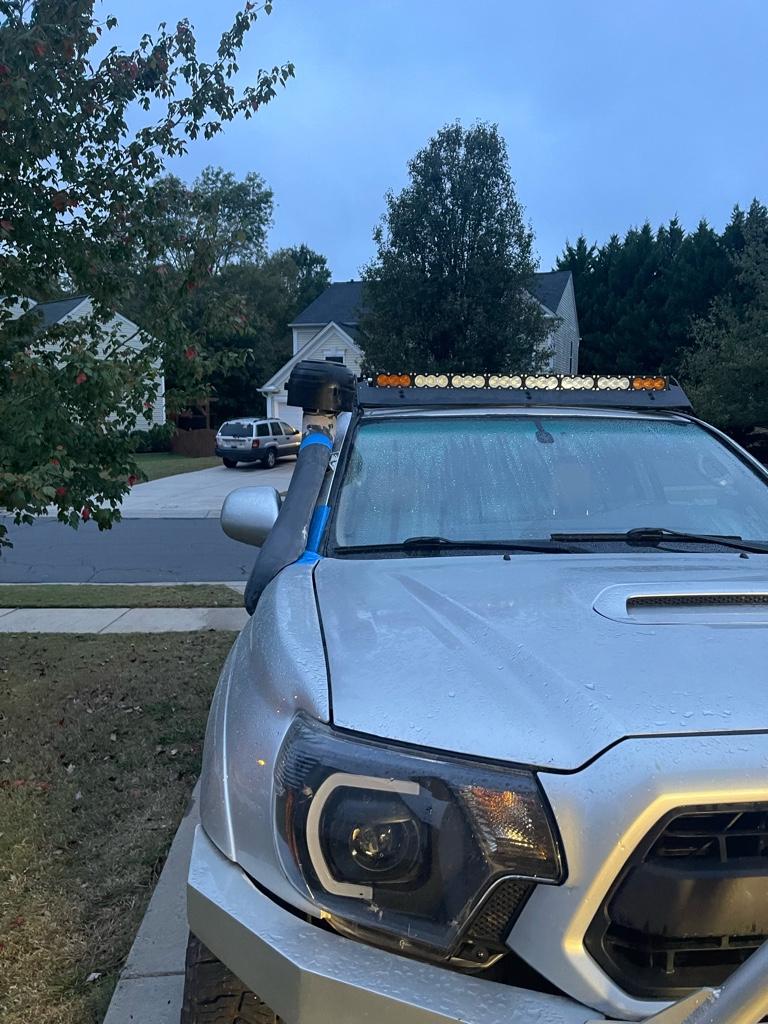
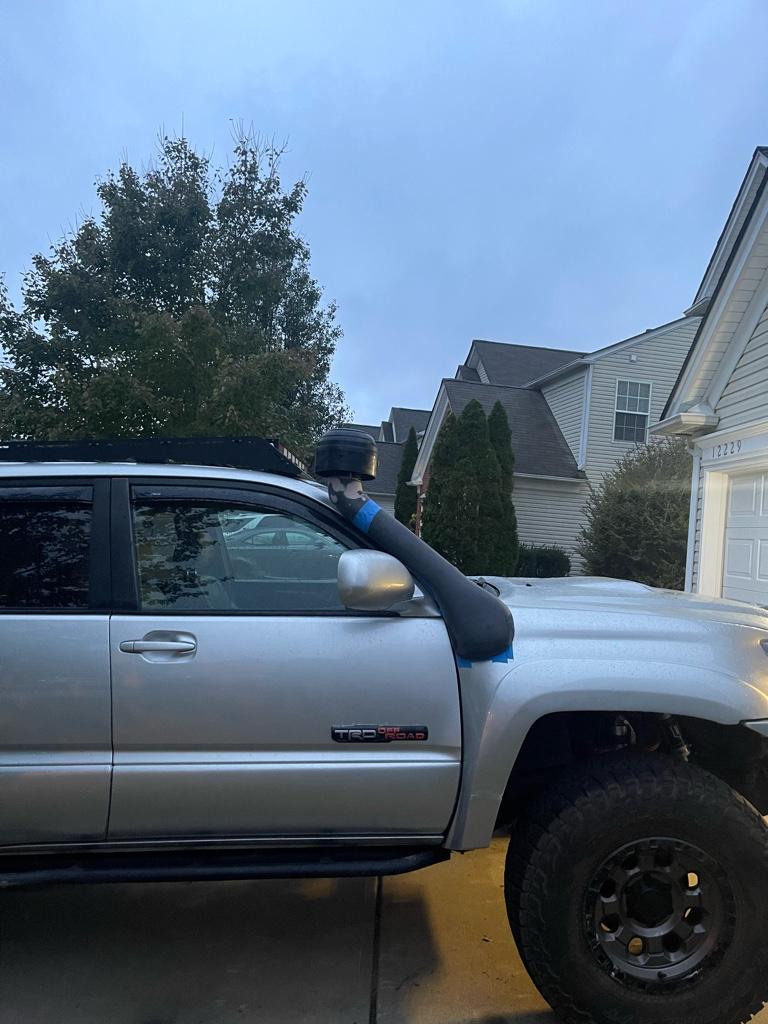
I cut out 5-6” of tube between the pre filter mount and my mounting bolts and got busy fusing it back together. After it cures, some bondo glass should make quick work of the transition. It’s not perfect but close enough to make work. I also took this opportunity to reinforce the mounting screws with additional fiberglass from the inside since I had clear access to it after cutting it open.
The new test fit is significantly closer to what I first envisioned, although still maybe a couple of inches higher but I wasn’t about to cut out the mounting screws and redo that portion for another inch.
Sent from my iPhone using Tapatalk
I cut out 5-6” of tube between the pre filter mount and my mounting bolts and got busy fusing it back together. After it cures, some bondo glass should make quick work of the transition. It’s not perfect but close enough to make work. I also took this opportunity to reinforce the mounting screws with additional fiberglass from the inside since I had clear access to it after cutting it open.
The new test fit is significantly closer to what I first envisioned, although still maybe a couple of inches higher but I wasn’t about to cut out the mounting screws and redo that portion for another inch.
Sent from my iPhone using Tapatalk
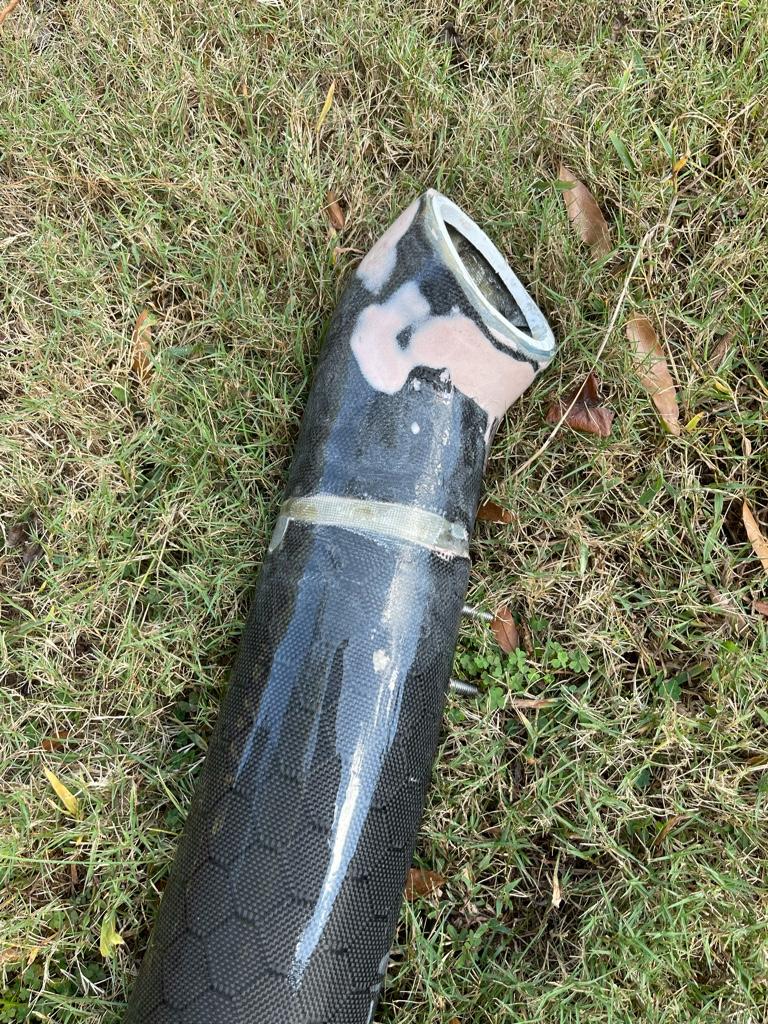
A little lunch time magic. Now onto some bondo glass to fill in the rest and get it smooth again.
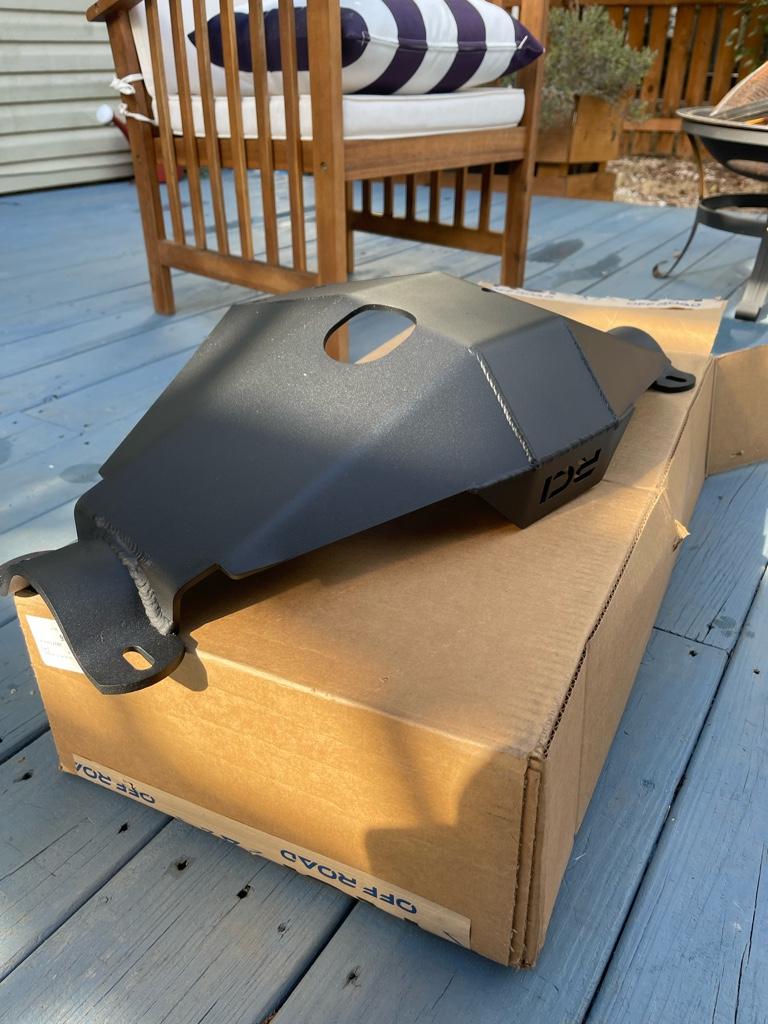
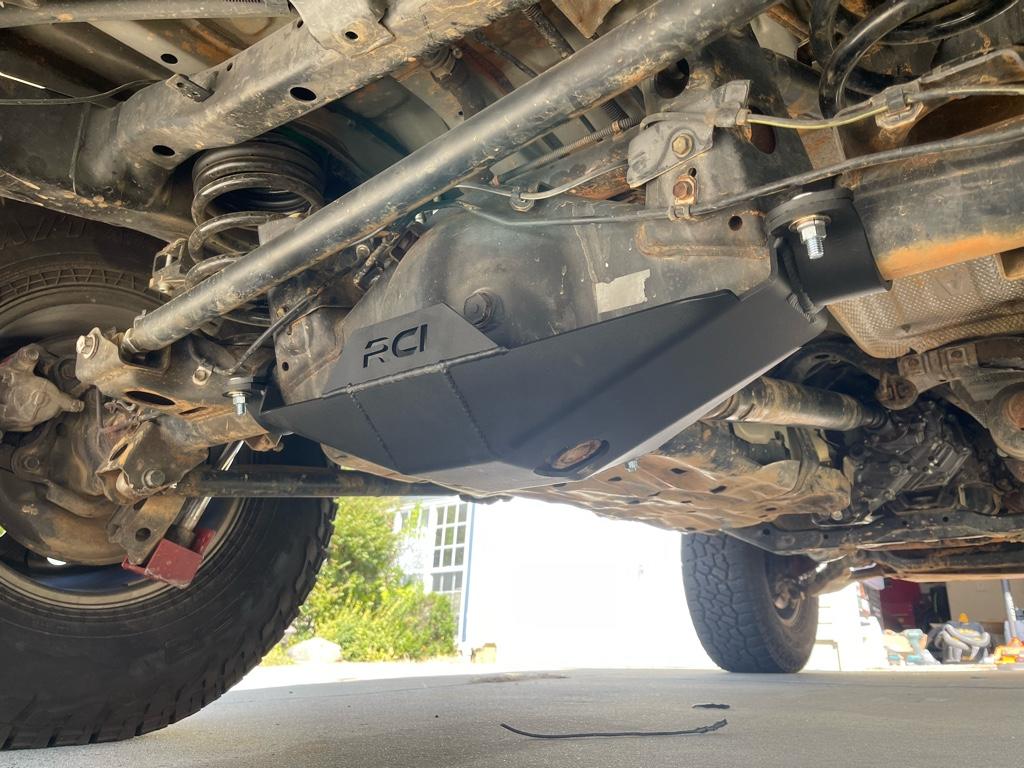
Oh yea, FedEx also made a delivery of my RCI diff skid I ordered a little bit ago. 10 minutes later and that’s also on and ready to bash on some rocks lol
Sent from my iPhone using Tapatalk
Oh yea, FedEx also made a delivery of my RCI diff skid I ordered a little bit ago. 10 minutes later and that’s also on and ready to bash on some rocks lol
Sent from my iPhone using Tapatalk
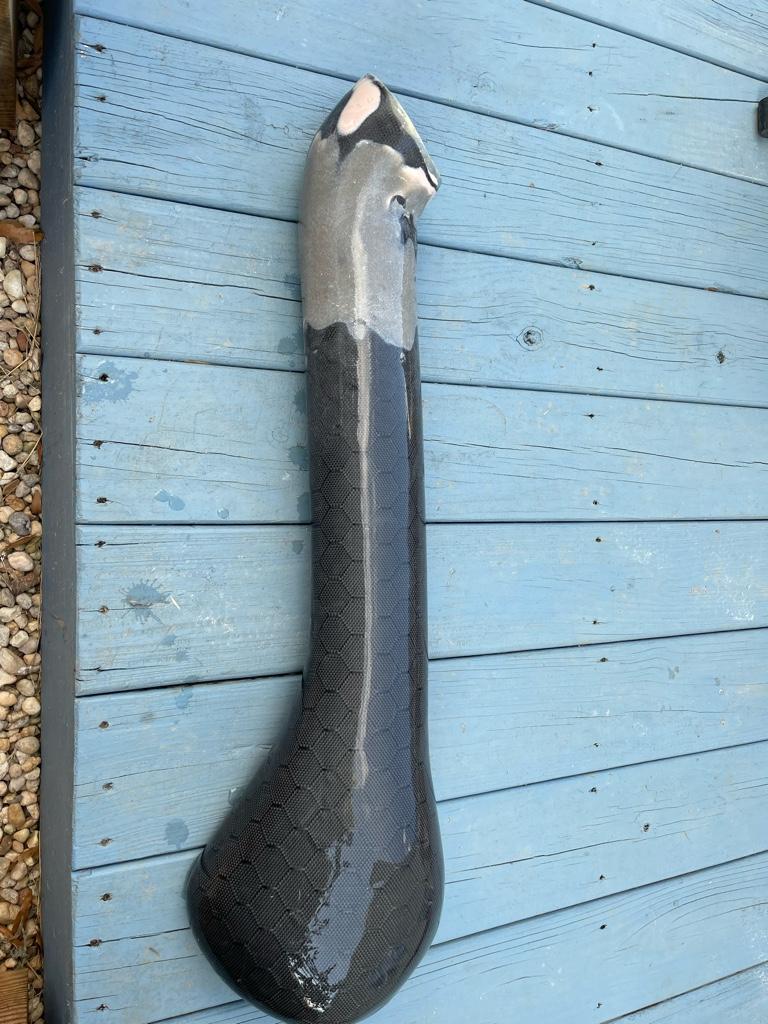
After hours and hours and then more hours of work I decided that I was a point where it was acceptable. Not looking for perfection here, just got enough to match the rest of the car. I masked it off and painted the back and edges and am now experimenting with dyeing the clear coat black in order to fade in the edges. The first couple of layers are on and I think this may just work ..
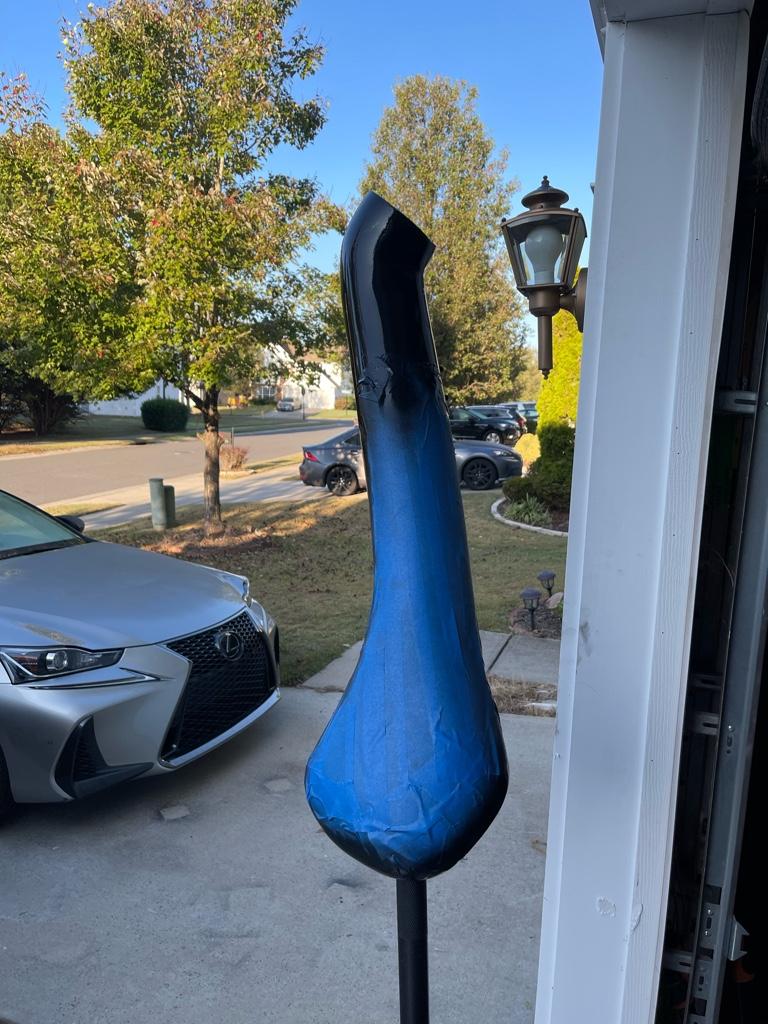
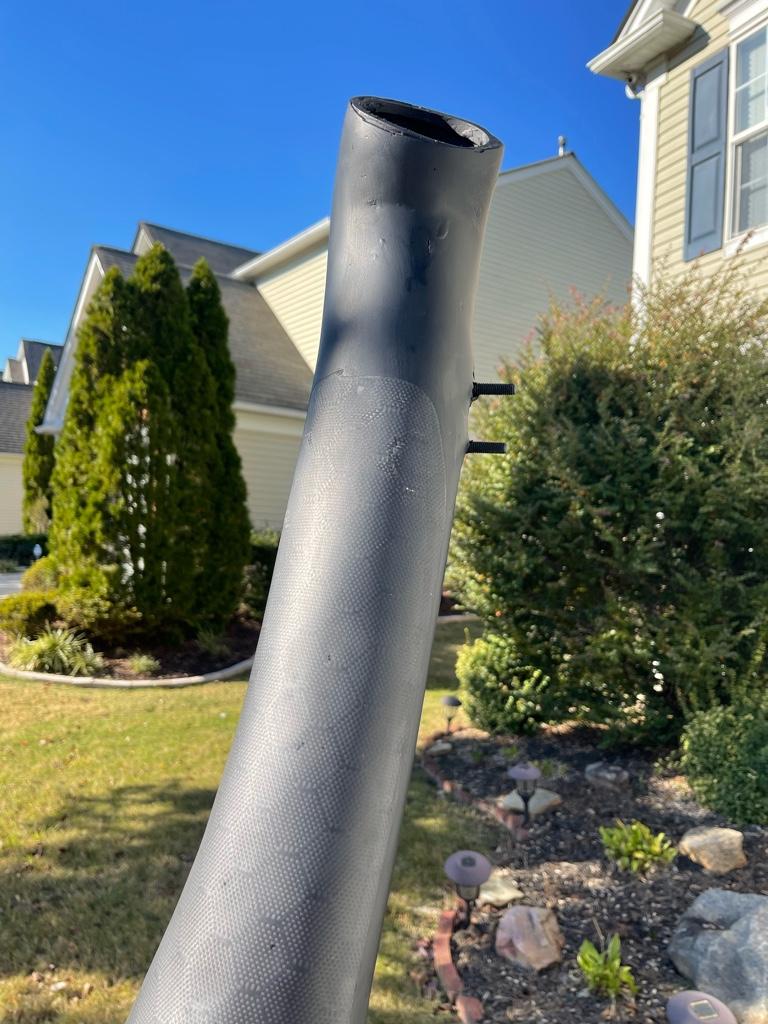
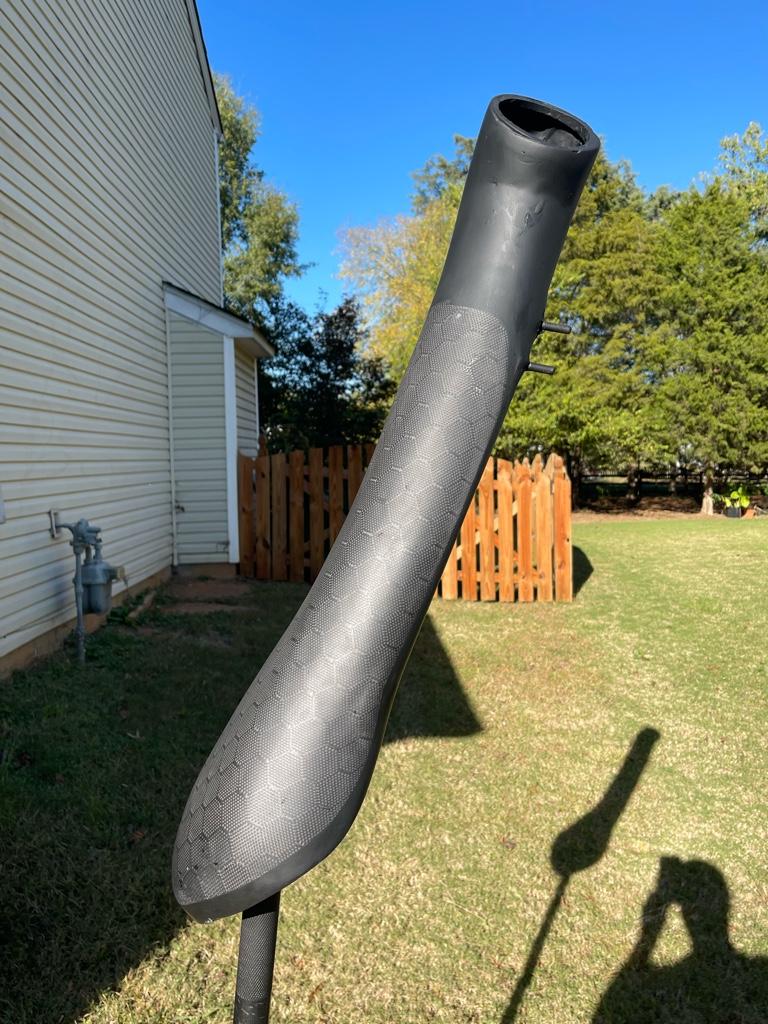
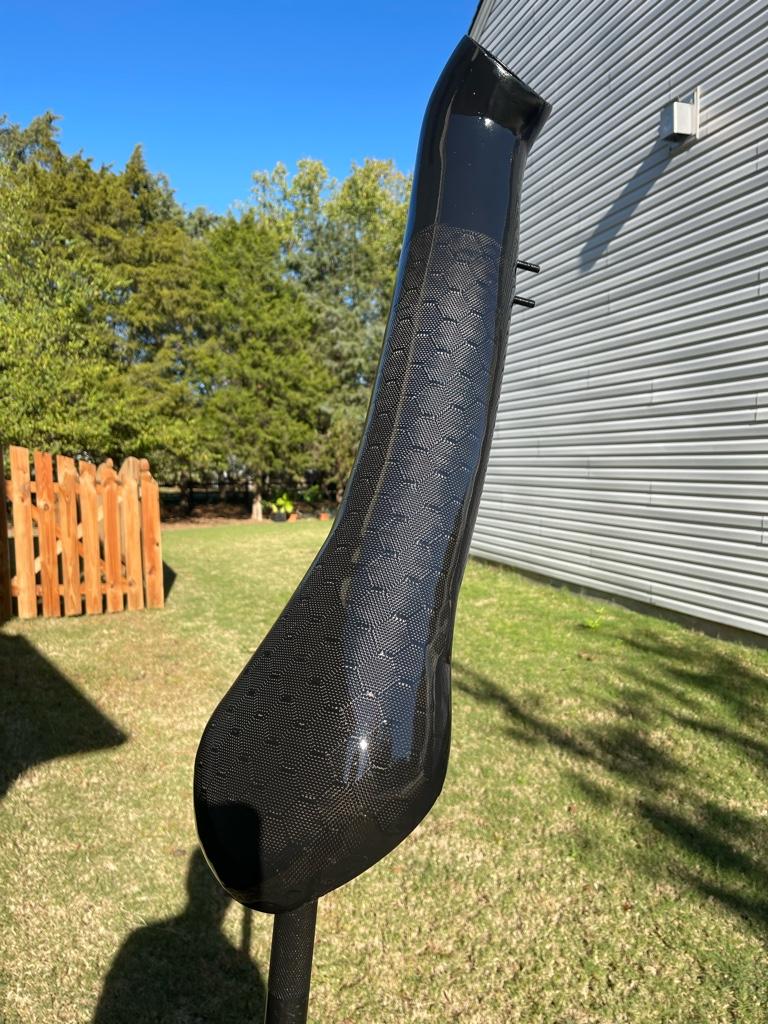
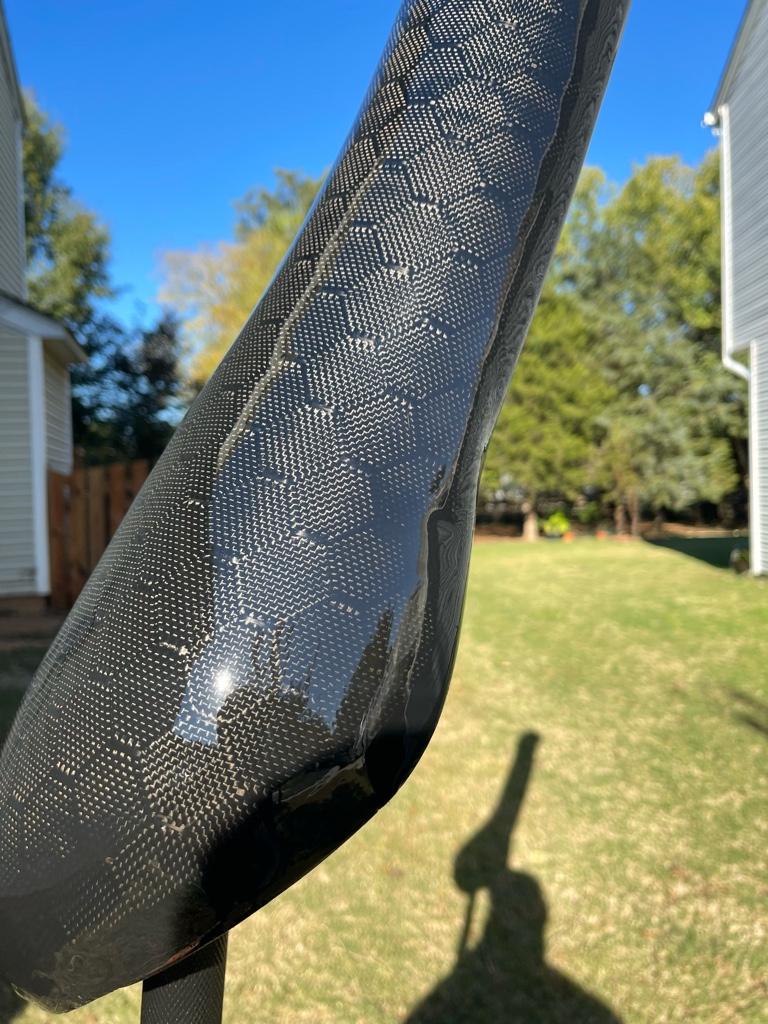
Sent from my iPhone using Tapatalk
Sent from my iPhone using Tapatalk
The initial fading came out a lot darker than expected so I stripped the center section down and redid the fading a bit better and less dark. Getting very close to complete now. Should be able to test fit with the clear dried by end of day. Getting excited.
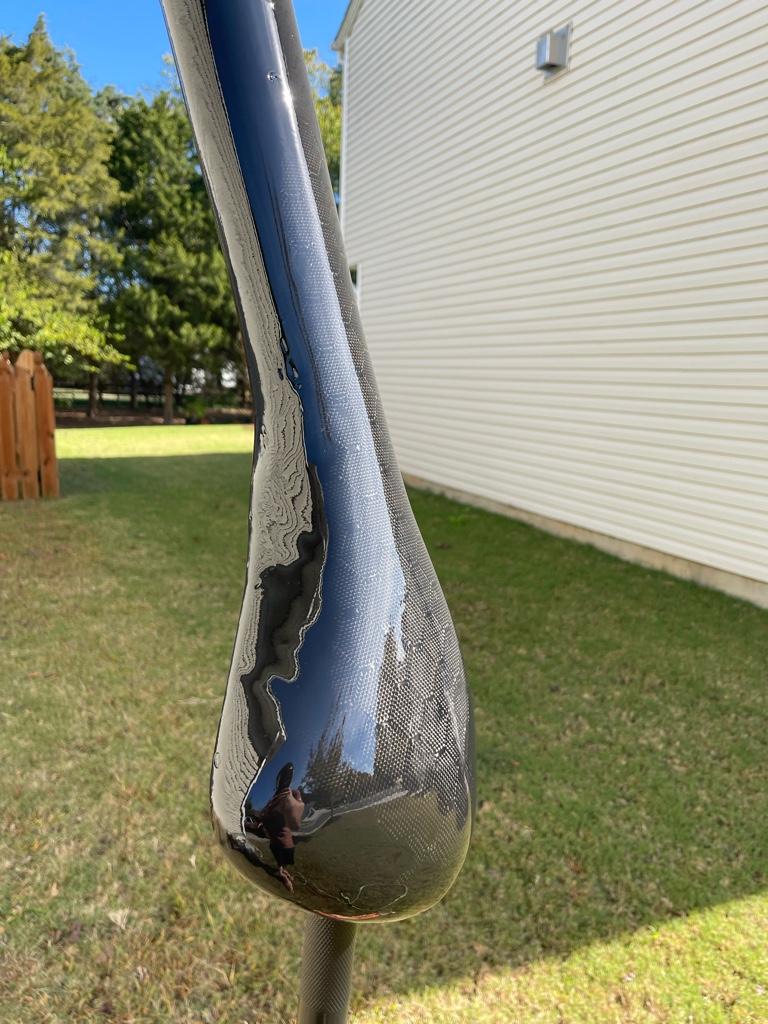
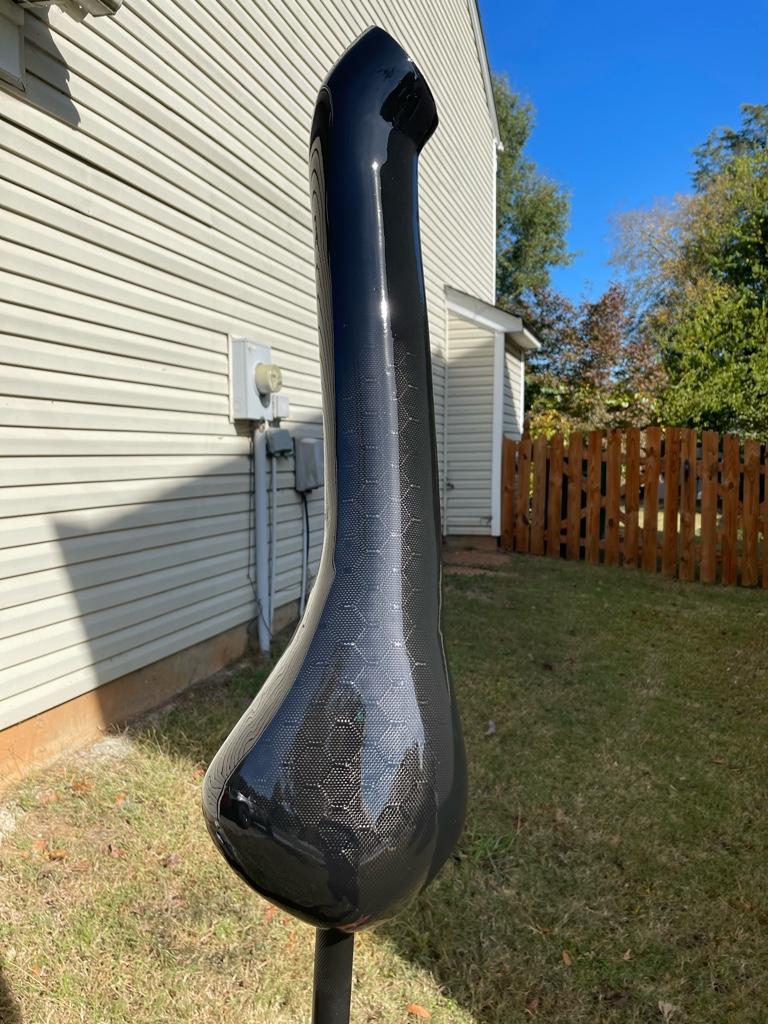
Sent from my iPhone using Tapatalk
Sent from my iPhone using Tapatalk
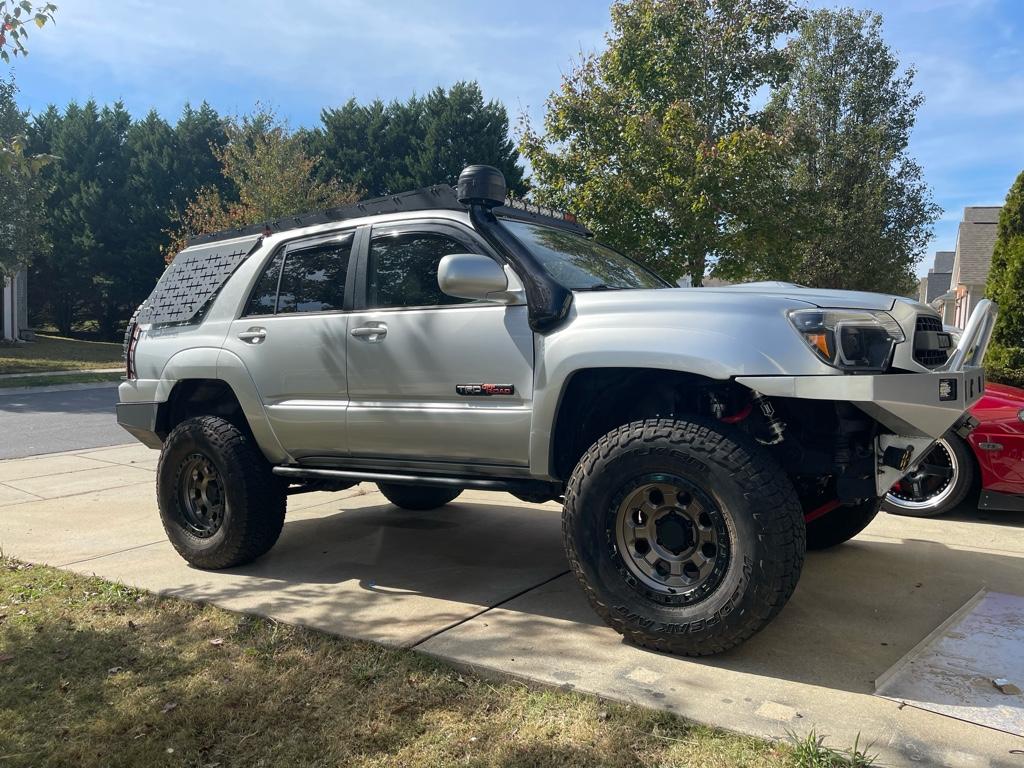
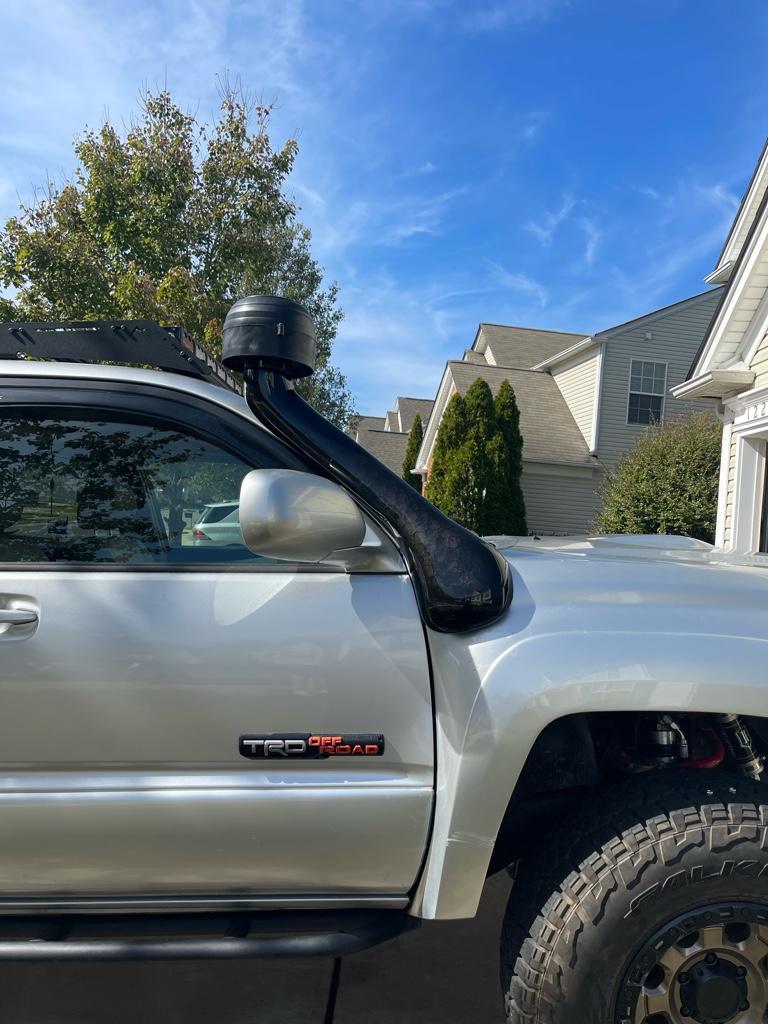
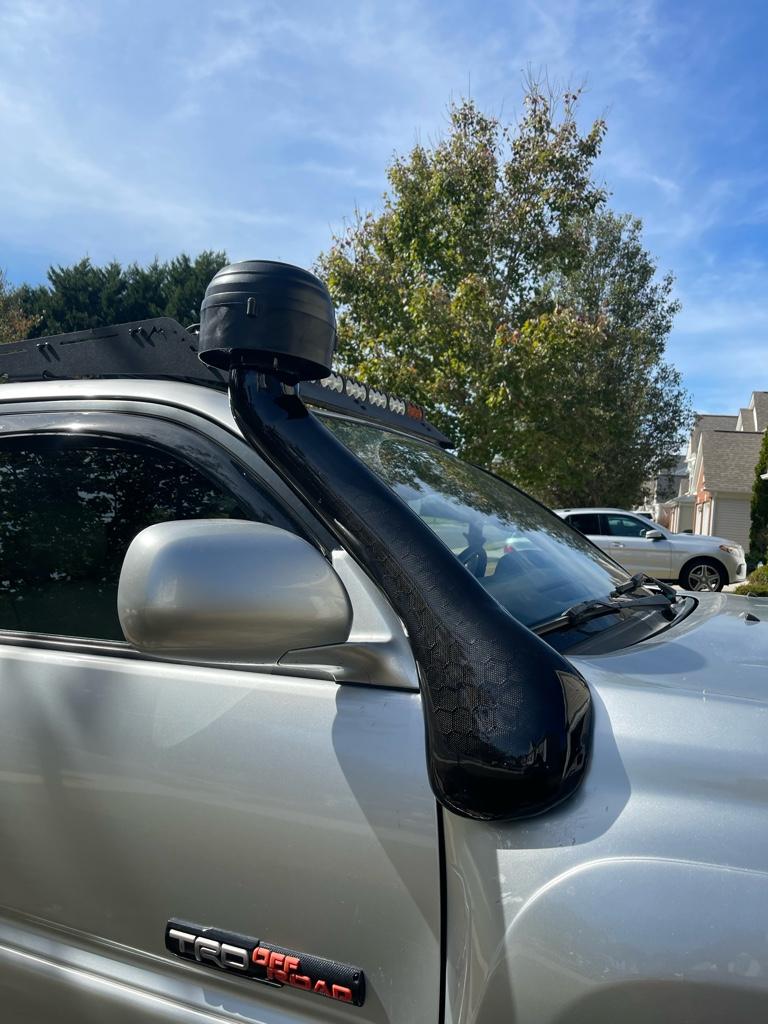
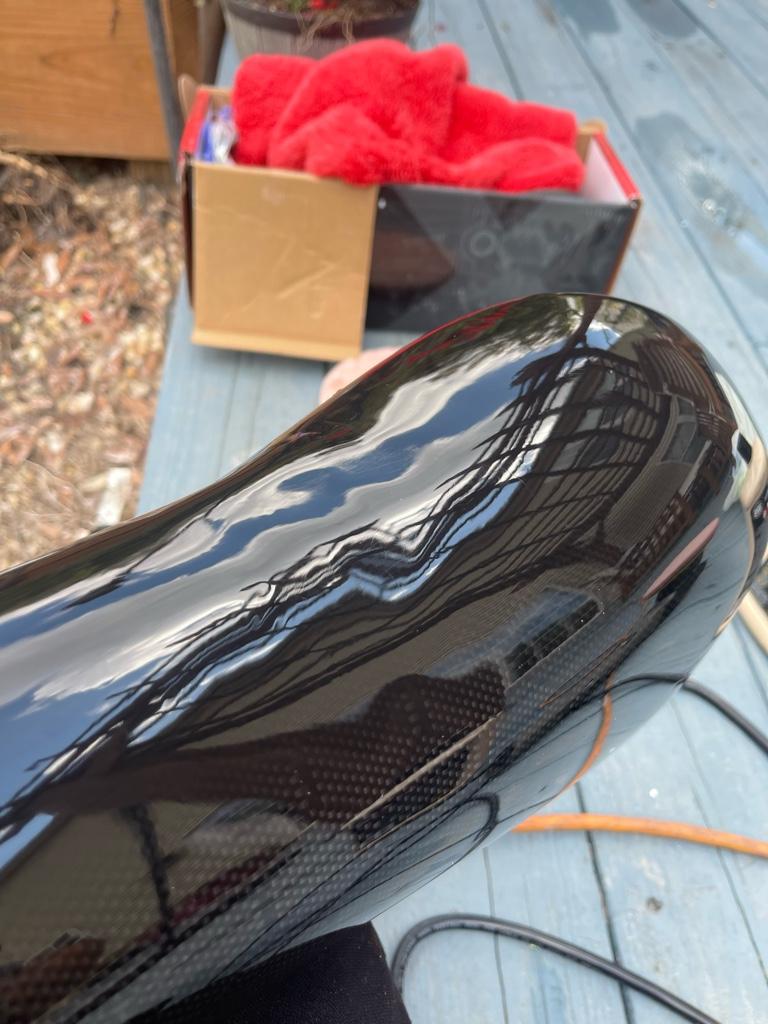
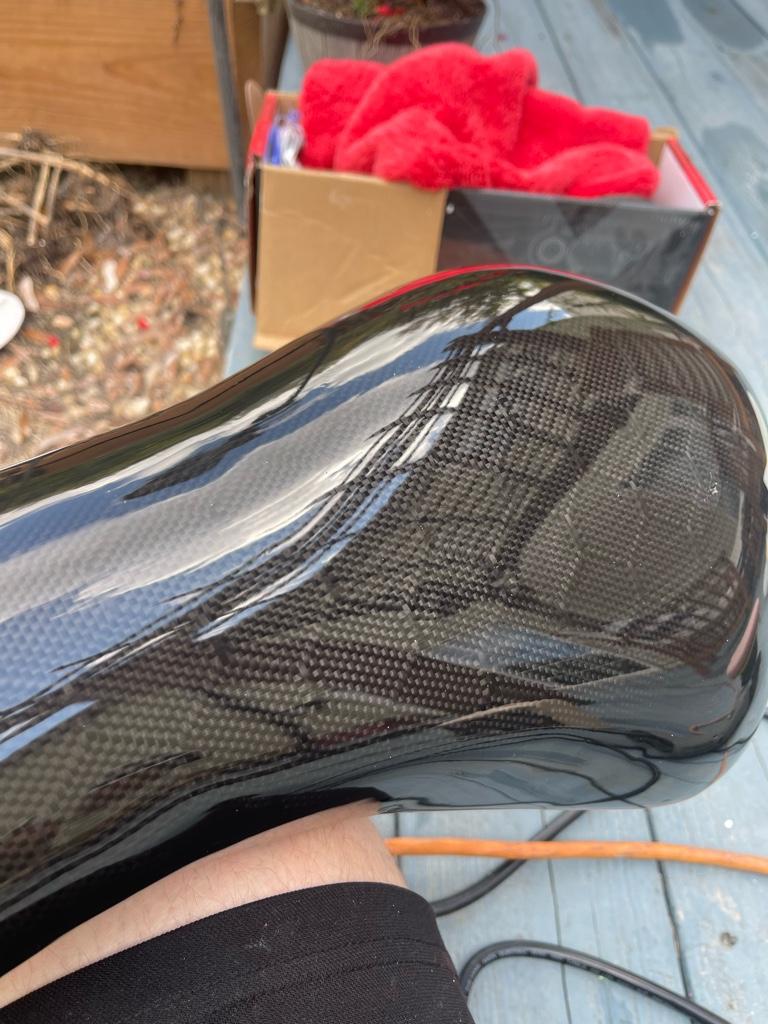
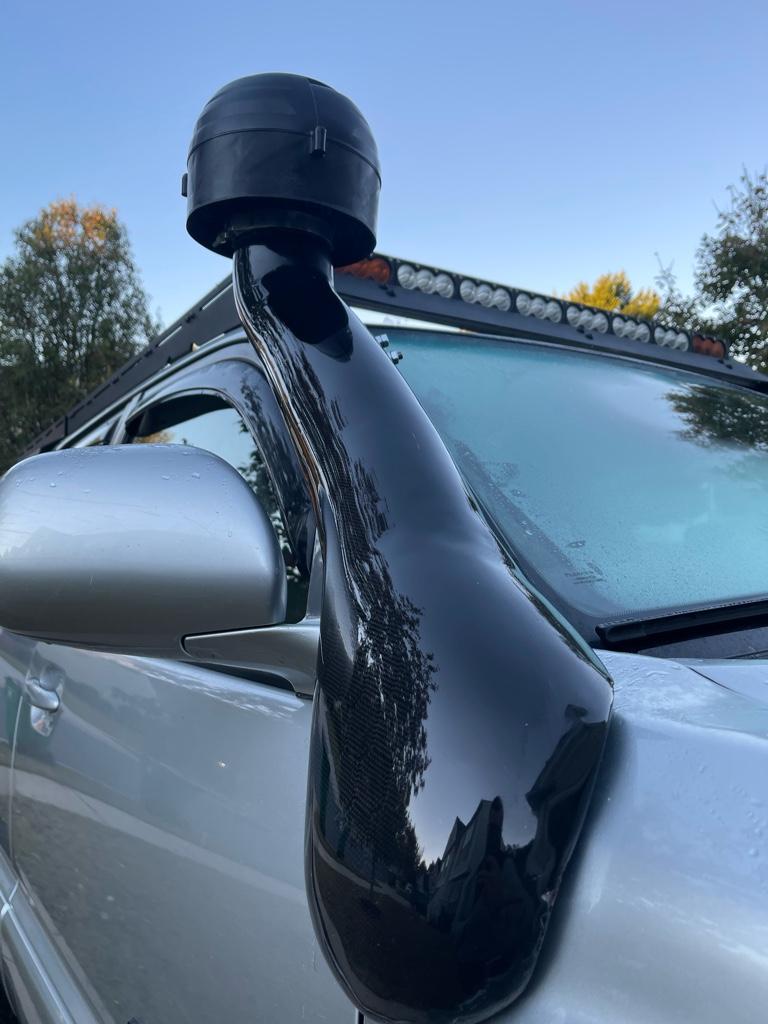
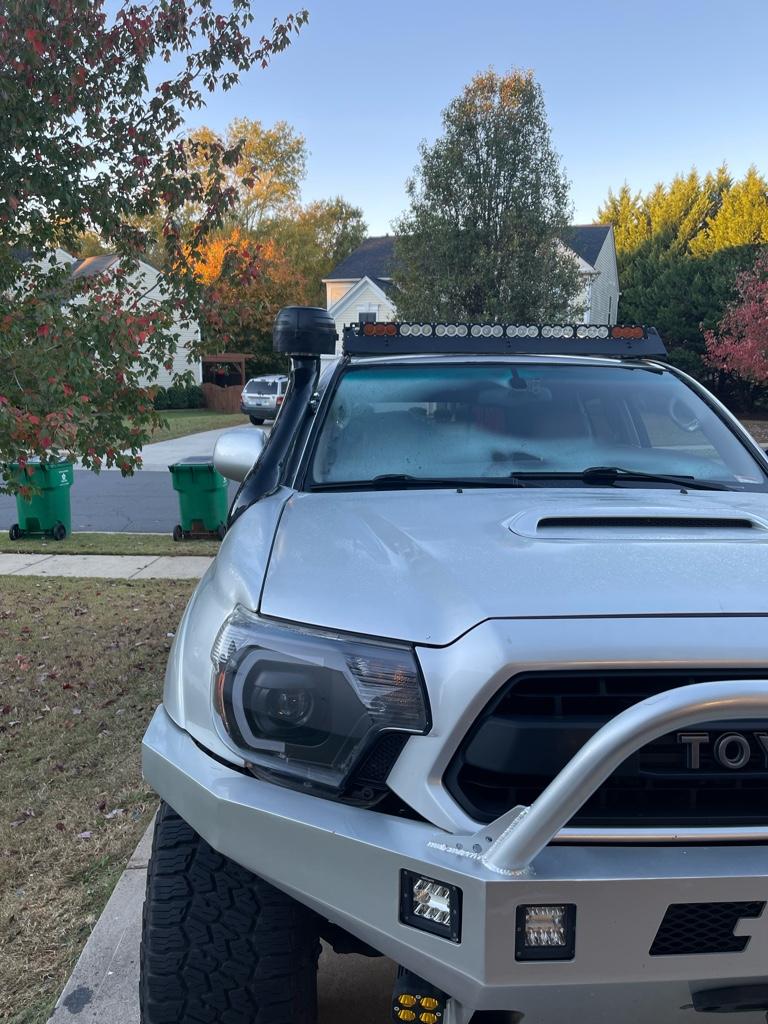
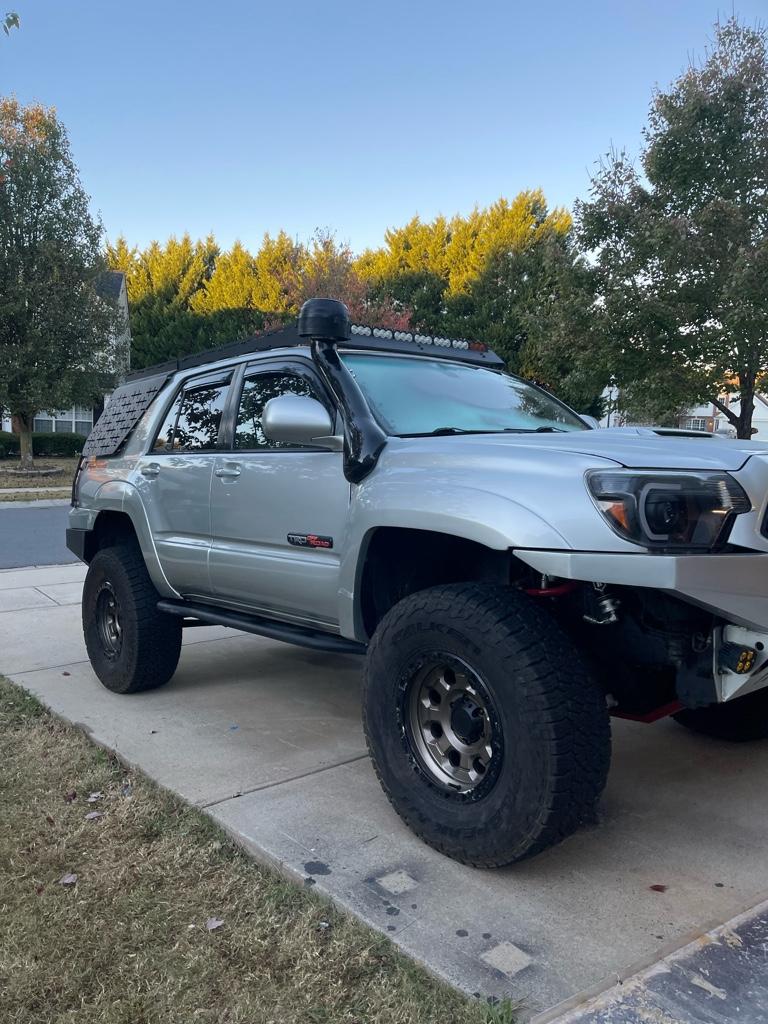
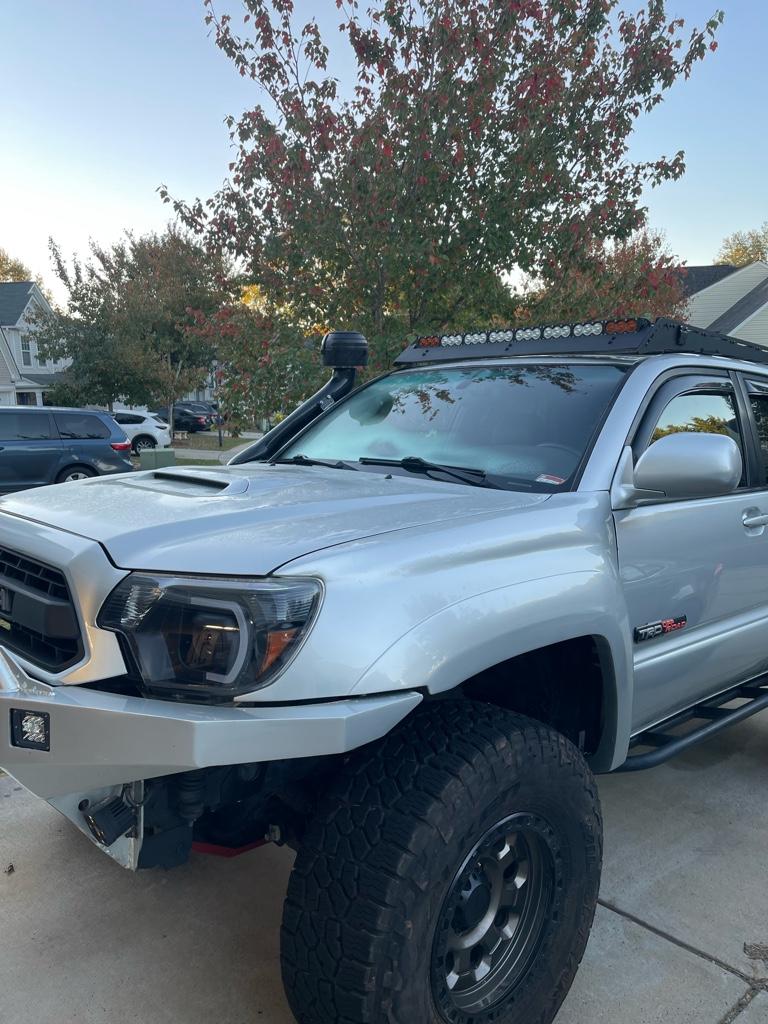
Well… I think it’s done.. mounting it was an absolute pain in the ass so I hope I don’t have to take it off.. at least any time soon. The hardest part getting the last part of the pvc piping in between two couplers under the fender. I think what I may do in the future is just cut out the Center section of the piping and use some corrugated flex pipe to span in between. That would certainly make life easier.
I also need to get some black foam material to cut to shape and stuff between the snorkel base and fender. I ended up with a slight gap and want to fill it with something other than silicone or expanding foam.
Overall it came out pretty sweet. Not perfect by a long shot, but I can’t justify more hours into this for what I need it to do. Hopefully my mounting system holds up ok and the fender says together since that is what the base is mounted to lol.
It’s a 5 footer, and anything from further than 5 feet out it looks awesome [emoji41]
Sent from my iPhone using Tapatalk
I also need to get some black foam material to cut to shape and stuff between the snorkel base and fender. I ended up with a slight gap and want to fill it with something other than silicone or expanding foam.
Overall it came out pretty sweet. Not perfect by a long shot, but I can’t justify more hours into this for what I need it to do. Hopefully my mounting system holds up ok and the fender says together since that is what the base is mounted to lol.
It’s a 5 footer, and anything from further than 5 feet out it looks awesome [emoji41]
Sent from my iPhone using Tapatalk
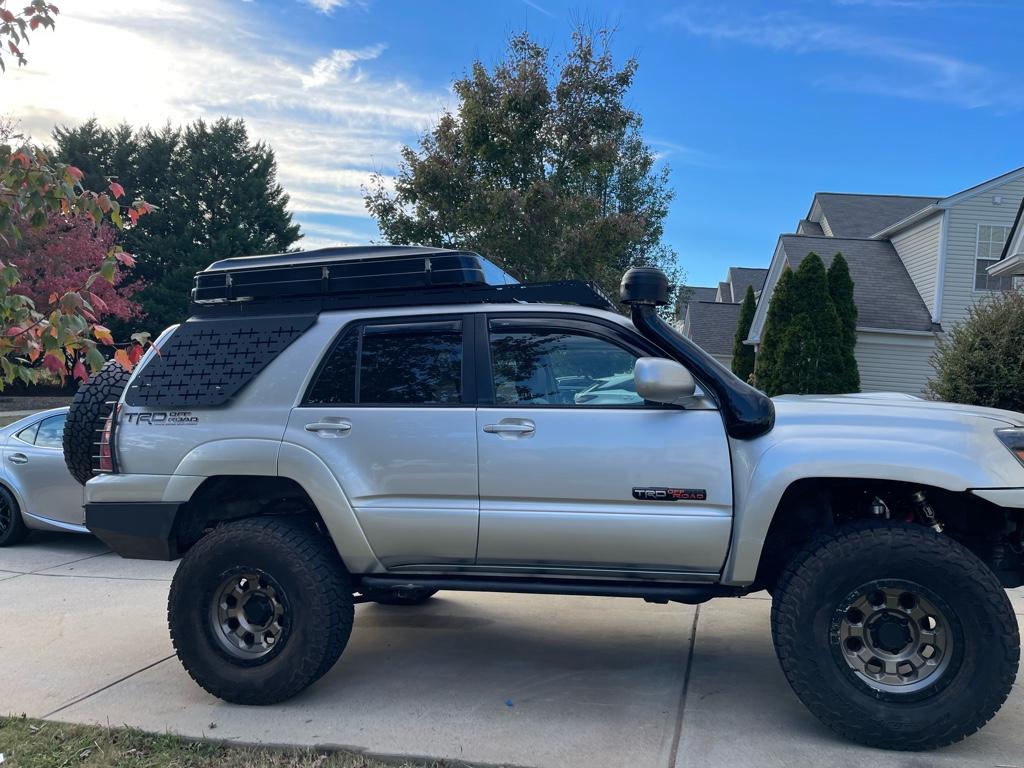
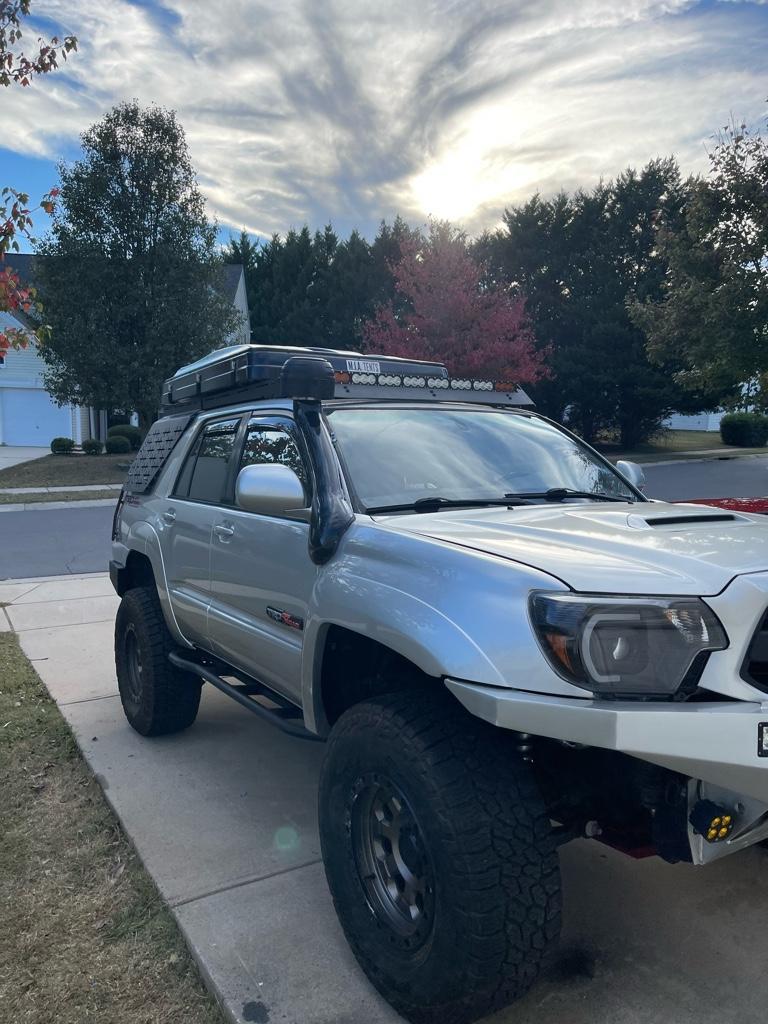
Andddd my mobile home is finally here. MIA overland hard shell from Costco that I got for 2000 shipped. Overall great, padding a bit thin so I’ll be putting in a pad under, but for a fraction of the cost of the ikamper I think it’s pretty sweet.
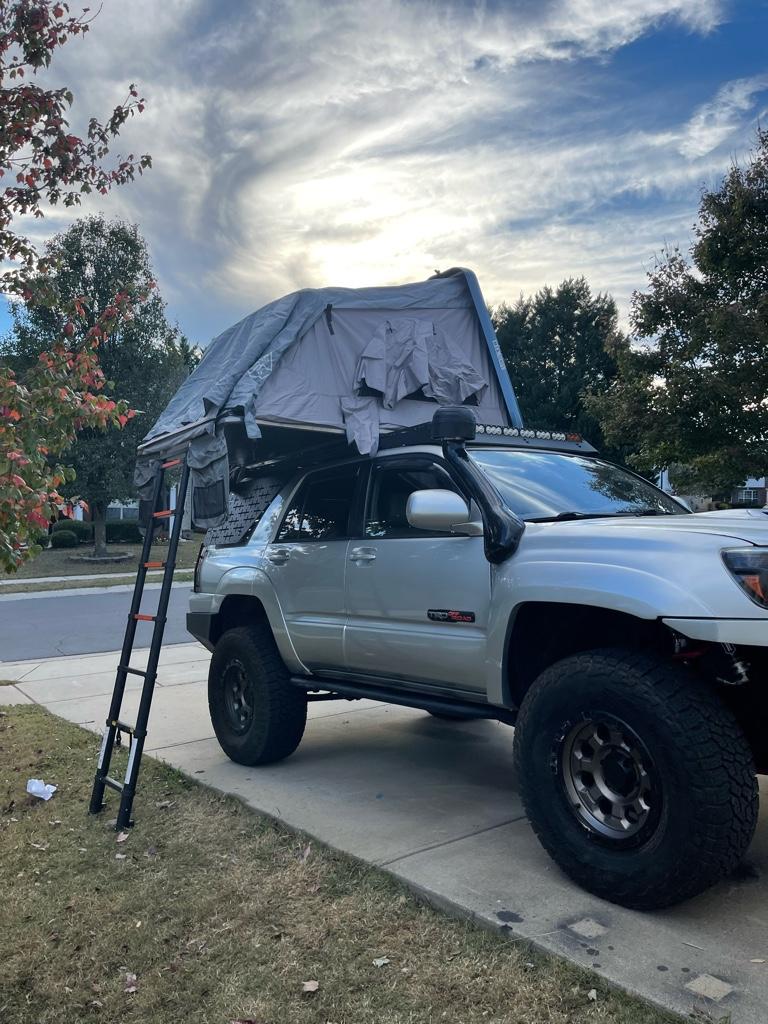
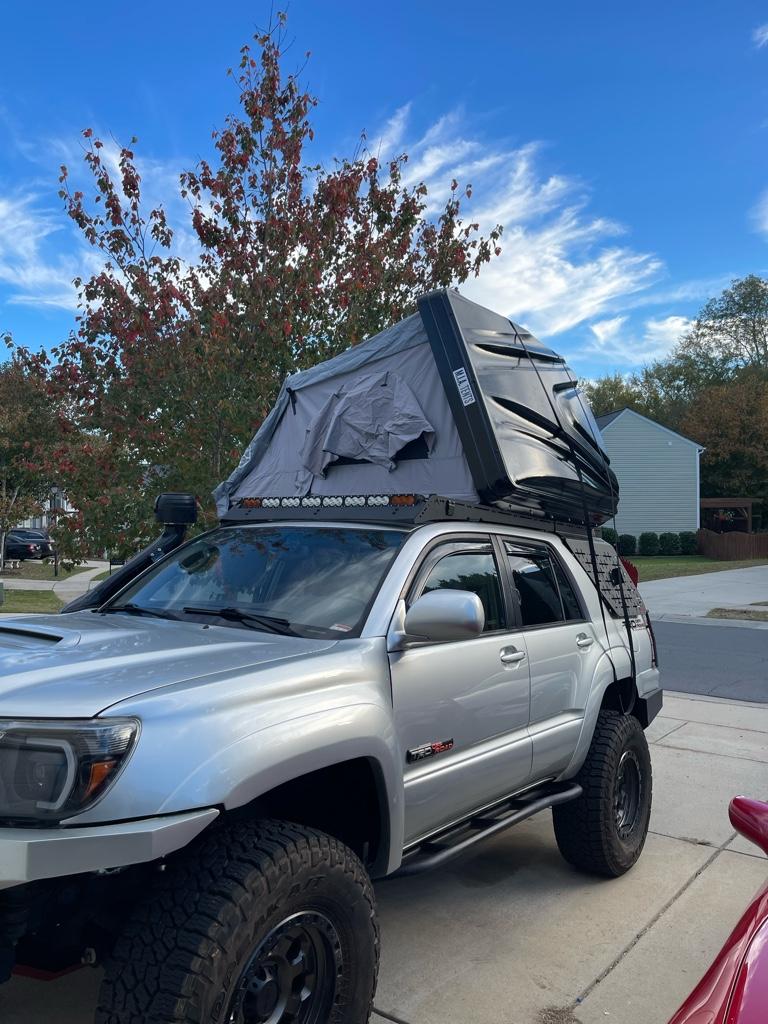
Sent from my iPhone using Tapatalk
Sent from my iPhone using Tapatalk

snydmax
New member
Andddd my mobile home is finally here. MIA overland hard shell from Costco that I got for 2000 shipped. Overall great, padding a bit thin so I’ll be putting in a pad under, but for a fraction of the cost of the ikamper I think it’s pretty sweet.
Sent from my iPhone using Tapatalk
Was $2k a member price or have they increased... maybe you rounded down?
$2399 right now...
Sent from my iPhone using Tapatalk
Was $2k a member price or have they increased... maybe you rounded down?
$2399 right now...
Sent from my iPhone using Tapatalk
It was $2,399 and was $400 off at the moment so my total with tax and free shipping was $2,144.99. When the logistics company missed their second scheduled delivery with a no-call-no-show I emailed and complained to them and they gave me a $100 refund against the order. So at the moment I'm in it for right at $2,044.99. pretty sweet deal for a hardshell.
I have 2 complaints with it:
#1: the latches. They use a steel cable that you need to hook around a mount under the tent and the latch the latching mechanism. It looks almost identical to other tents, but because it sits so low on my rack it can be a little difficult to get my fingers under to latch the cable around. Not a huge deal, and I guess technically I could space it up a little, or make small notches to increase spacing, we'll see. Or possibly remove the current latches and replace with something different.
#2: mattress. It is thin and not for a side sleeper for sure. But after digging online it looks like that the nearly $4k iKamper has identical complaints with people upgrading to different iteration of padding, self inflating mattresses, etc, so not a big deal. I just bought a $160 self inflating 4" thick pad on amazon that is almost a perfect fit inside and am planning on taking out the factory pad completely and replacing it with the self inflator. This would also free up some vertical space when its closed since the inflating pad is much thinner when deflated than the stock mattress pad and will allow me to easily store sheets, covers and hopefully 2 pillows inside without having to throw them in the car.
**EDIT**
right after typing this up about the latches I came up with what I think is a genius idea... there's no reason to switch out the latches on the tent at all... I'm just going to get 3 latch hook bases and mount them directly to the roof rack under each latch and latch straight down to them.. Problem solved and all for about $10.
Last edited:
Took some time this morning to implement an easier latching mechanism for the MIA overlander tent.
I didn’t feel like reaching my hand under the tent to loop the latch around, and didn’t want to raise it either. A quick and easy solution was just to rivet on 3 additional hooks under the latches right to the roof rack. $10 and now it’s truly a really quick open/close tent.
Obviously this locks it in location front to back , but I’m not planning on moving it any. Also if I ever have to remove the tent I have to be mindful of undoing these latches and closing it down on the factory ones lol.
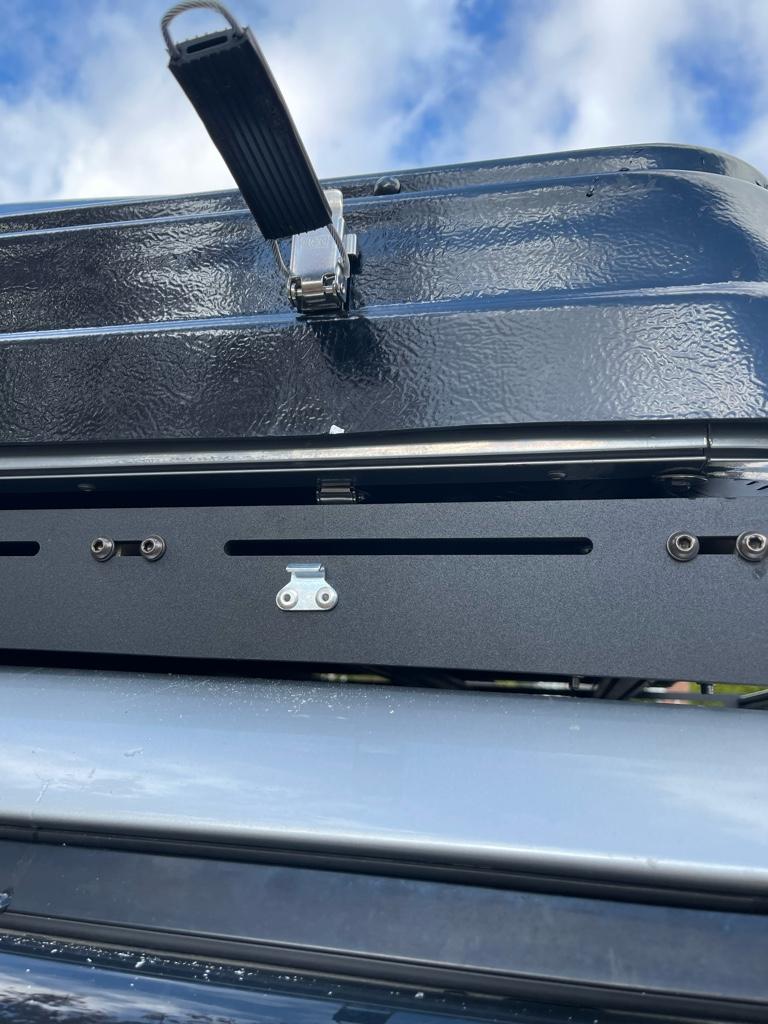
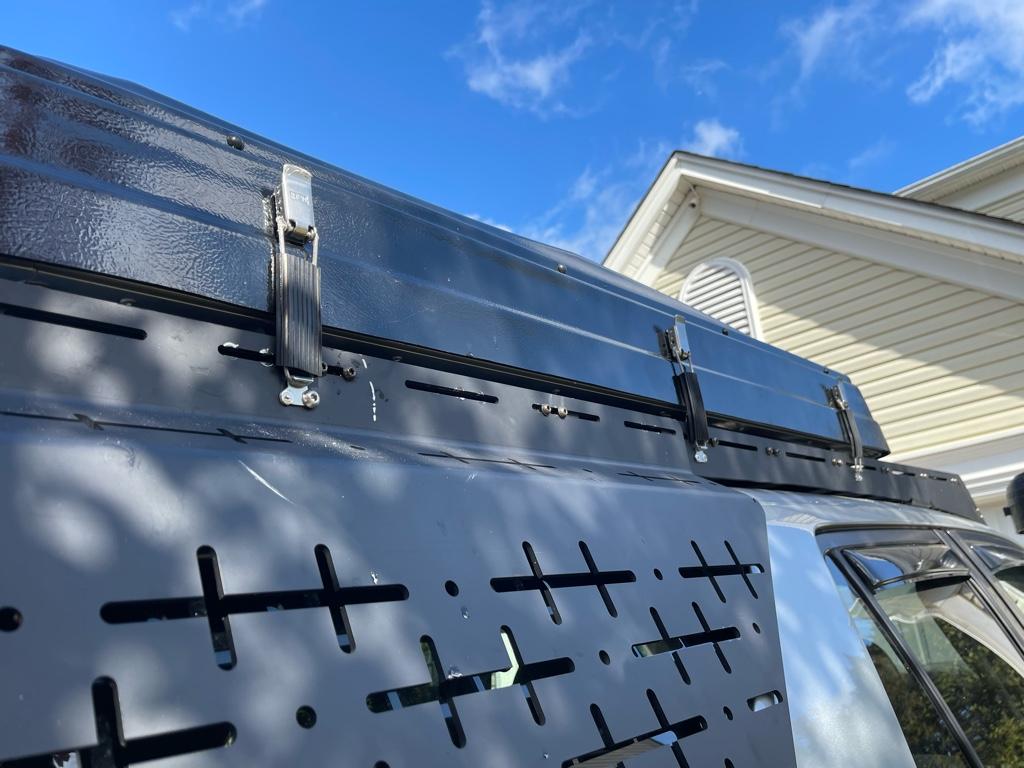
Sent from my iPhone using Tapatalk
I didn’t feel like reaching my hand under the tent to loop the latch around, and didn’t want to raise it either. A quick and easy solution was just to rivet on 3 additional hooks under the latches right to the roof rack. $10 and now it’s truly a really quick open/close tent.
Obviously this locks it in location front to back , but I’m not planning on moving it any. Also if I ever have to remove the tent I have to be mindful of undoing these latches and closing it down on the factory ones lol.
Sent from my iPhone using Tapatalk
the last week hasn't been much of a progress, mainly because I kind of ran out of things to work on lol.
I did upgrade the RTT to a Self Inflating (false advertisement) 4" air pad in place of the factory pad it came with. Night and day difference. A $20 amazon rechargeable pump fills up the pad in no time at all and when its deflated I can keep it in the tent along with bedding and still close it with ease. Now its just to be able to get out and actually do some camping damn it!
knowing myself, I am full aware that my rig won't stay as is for very long I went ahead and started plotting a project for sometime next year that should cross off just about everything I will ever want to do to my build...
Solid Axle swap is officially under planning/budgeting steps..
Here is what I have come up with so far:
-2010 F250 Dana 60 front and Sterline 10.5" rear axle (can be sourced locally from the junkyard for around $600 total)
-4.88 or 5.xx gearing
-ARB lockers
-3-link front/rear setup
-LC steering box
-rear axle truss
-12-14" ORI front struts with 14-16 ORI rear struts
-custom driveshafts (haven't figured out best route for this yet)
-limit straps to keep everything in check
The current pricing of things with some buffer looks like falls right around the $16k mark (mainly because of the hefty $5500 price tag on the ORI's, but they have internal bump stops, don't require springs, and are fully adjustable down to the necessary ride height) which sounds bad, until I started figuring in the pricing of components I could sell off from my current build. If I could get even remotely close to my asking price for things like my ICON shocks, RCV axles, complete front/rear 4.56 air locked front/rear, controls arms, spindles, skids, etc etc I could potentially end up somewhere in the 8.5-9.5K range for a completely badass SAS 4th gen front and rear..
I know I'm completely underplaying the amount of work that needs to happen to make this setup function, but the more I look at other builds the less scary it looks... lots of grinding and cutting, and grinding and cutting some more, and a ton of welding, but nothing that I couldn't do. Making sure all the measurements are spot on is the key process, but once everything is laid out to get it burned it is just a matter of time... am I crazy here? Probably, but I'm pretty close to a finalize list after which I think I'm slowly going to start keeping an eye out for various parts that I need to acquire over time. We'll see what sort of sale I come across between the holidays to hopefully take off a healthy chuck from the price as well
 arty:
arty:
I did upgrade the RTT to a Self Inflating (false advertisement) 4" air pad in place of the factory pad it came with. Night and day difference. A $20 amazon rechargeable pump fills up the pad in no time at all and when its deflated I can keep it in the tent along with bedding and still close it with ease. Now its just to be able to get out and actually do some camping damn it!
knowing myself, I am full aware that my rig won't stay as is for very long I went ahead and started plotting a project for sometime next year that should cross off just about everything I will ever want to do to my build...
Solid Axle swap is officially under planning/budgeting steps..
Here is what I have come up with so far:
-2010 F250 Dana 60 front and Sterline 10.5" rear axle (can be sourced locally from the junkyard for around $600 total)
-4.88 or 5.xx gearing
-ARB lockers
-3-link front/rear setup
-LC steering box
-rear axle truss
-12-14" ORI front struts with 14-16 ORI rear struts
-custom driveshafts (haven't figured out best route for this yet)
-limit straps to keep everything in check
The current pricing of things with some buffer looks like falls right around the $16k mark (mainly because of the hefty $5500 price tag on the ORI's, but they have internal bump stops, don't require springs, and are fully adjustable down to the necessary ride height) which sounds bad, until I started figuring in the pricing of components I could sell off from my current build. If I could get even remotely close to my asking price for things like my ICON shocks, RCV axles, complete front/rear 4.56 air locked front/rear, controls arms, spindles, skids, etc etc I could potentially end up somewhere in the 8.5-9.5K range for a completely badass SAS 4th gen front and rear..
I know I'm completely underplaying the amount of work that needs to happen to make this setup function, but the more I look at other builds the less scary it looks... lots of grinding and cutting, and grinding and cutting some more, and a ton of welding, but nothing that I couldn't do. Making sure all the measurements are spot on is the key process, but once everything is laid out to get it burned it is just a matter of time... am I crazy here? Probably, but I'm pretty close to a finalize list after which I think I'm slowly going to start keeping an eye out for various parts that I need to acquire over time. We'll see what sort of sale I come across between the holidays to hopefully take off a healthy chuck from the price as well
arty:
phatcheeks
New member
the last week hasn't been much of a progress, mainly because I kind of ran out of things to work on lol.
I did upgrade the RTT to a Self Inflating (false advertisement) 4" air pad in place of the factory pad it came with. Night and day difference. A $20 amazon rechargeable pump fills up the pad in no time at all and when its deflated I can keep it in the tent along with bedding and still close it with ease. Now its just to be able to get out and actually do some camping damn it!
knowing myself, I am full aware that my rig won't stay as is for very long I went ahead and started plotting a project for sometime next year that should cross off just about everything I will ever want to do to my build...
Solid Axle swap is officially under planning/budgeting steps..
Here is what I have come up with so far:
-2010 F250 Dana 60 front and Sterline 10.5" rear axle (can be sourced locally from the junkyard for around $600 total)
-4.88 or 5.xx gearing
-ARB lockers
-3-link front/rear setup
-LC steering box
-rear axle truss
-12-14" ORI front struts with 14-16 ORI rear struts
-custom driveshafts (haven't figured out best route for this yet)
-limit straps to keep everything in check
The current pricing of things with some buffer looks like falls right around the $16k mark (mainly because of the hefty $5500 price tag on the ORI's, but they have internal bump stops, don't require springs, and are fully adjustable down to the necessary ride height) which sounds bad, until I started figuring in the pricing of components I could sell off from my current build. If I could get even remotely close to my asking price for things like my ICON shocks, RCV axles, complete front/rear 4.56 air locked front/rear, controls arms, spindles, skids, etc etc I could potentially end up somewhere in the 8.5-9.5K range for a completely badass SAS 4th gen front and rear..
I know I'm completely underplaying the amount of work that needs to happen to make this setup function, but the more I look at other builds the less scary it looks... lots of grinding and cutting, and grinding and cutting some more, and a ton of welding, but nothing that I couldn't do. Making sure all the measurements are spot on is the key process, but once everything is laid out to get it burned it is just a matter of time... am I crazy here? Probably, but I'm pretty close to a finalize list after which I think I'm slowly going to start keeping an eye out for various parts that I need to acquire over time. We'll see what sort of sale I come across between the holidays to hopefully take off a healthy chuck from the price as well
You should check out Offroad Hub on youtube. He is doing a similar build on his FJ. So much fabrication has gone into it.
Cant wait to see your build.
You should check out Offroad Hub on youtube. He is doing a similar build on his FJ. So much fabrication has gone into it.
Cant wait to see your build.
Talk about opening up a rabbit hole with off-road hub man…. Great documentation and definitely will make me wait just a little longer to get all my ducks in a row. It’s definitely going to take more time and space than I considered lol. Not to mention I’ll have to double my budget for cut off wheels and sanding disks lol
Sent from my iPhone using Tapatalk
A quick update on the taco while I have some time..
-somehow managed to rip off my front skid plate during the last night time wheeling session.. came down hard on a sharp rock at the right angle to catch it and rip the bolts out. I must have been missing a bolt or 2 for it to happen, but whatever. In the process of sourcing some M8-sized nuts to weld back into place and beef it up a little while also getting rid of the need for a 1/2" spacer.
-while troubleshooting the source of a popping noise in the front somewhere, while also having the skid plate off, I found out I have a coolant leak. yay! Luckily it appears to be coming from the thermostat housing where it connects to the water bypass tube. I believe that's what its called and I THINK I have the right one on order... I can see some coolant pooled right around the base of where the tube meets the seat so thats what i'm starting with.
-the good news is that I think i found and fixed my popping noise I kept hearing while backing out of the drive way with the steering wheel turned, or taking off from a medium/hard stop with my wheel cranked.. looks like my drivers side UCA ball joint nut that holds it down to the spindle was a bit loose and allowed the shank to pull out just a bit during decompression. Tightened it almost a full turn and a quick drive did not produce the same noise.
-found out that the worm-gear clamps I used on the RCV axle boots were a bit too sharp and tight and I have a couple of small tears in the boot that I was trying to seal for the past 3 months, i finally gave up and ordered 2 new boots, grease and some smooth edge bands to install after. These axles are life time warranty with no questions asked, and when I asked about the boots they said that basically as long as I am not actively trying to destroy the axle they'll still honor it and do me right.. I just don't want to hassle with sending these off right now and being stuck with no car for a couple of months since they would reboot these and not send new replacements since they aren't technically broken. I figured I have to get in for some front end work anyhow and this will only add an hour on top of it so why not.
-my cheap O2 sensor fix only works here and there. During idle and light cruising the O2 sensor isn't seeing enough exhaust flow since its so far out and triggers a P0156 code thinking that the sensor is bad. Currently my CEL is back on and I am considering either trying to open up the hole some more and placing the O2 sensor a little lower, or just tapping back into the driver's side O2 sensor like I had before until my other CAT is dead as well. Really not wanting to replace the catalytic converts due to cost/amount of work... if I end up having to do that I would ideally want some long tube headers with high-flow cats instead... I'll probably pay damn near the same amount of money but at least end up with more performance. It sucks that o2 simulator isn't an option for me..
I'll throw some pictures up in a while for those that like picture books and not just rambling of some random dude online lol.
Oh, and also, after hours of watching the offroad hub youtube SAS conversion I'm back to the drawing board on the future of my build.. I don't know if I can invest the amount of time to do the SAS right currently... definitely don't have the space, and financially I just don't think it's a very wise choice for something I don't need lol.
I'm not against a LT setup upfront though with a 3-link setup in the rear... that I could realistically do and for a fairly cheap amount comparing to SAS. I would really like to run a 37's at some point but that is at least a year down the road if not more.
I think what I will work on in the meantime is increasing a bit of up-travel in the rear by trimming out the bumper, door and quarter so that I can maximize the tire travel up towards the actual sheetmetal under the plastic covers. If my thinking is correct I should be able to get at least another 1" of up travel in the rear which will help a bit, and will also set me up to already be trimmed for the 37's in the future.
-somehow managed to rip off my front skid plate during the last night time wheeling session.. came down hard on a sharp rock at the right angle to catch it and rip the bolts out. I must have been missing a bolt or 2 for it to happen, but whatever. In the process of sourcing some M8-sized nuts to weld back into place and beef it up a little while also getting rid of the need for a 1/2" spacer.
-while troubleshooting the source of a popping noise in the front somewhere, while also having the skid plate off, I found out I have a coolant leak. yay! Luckily it appears to be coming from the thermostat housing where it connects to the water bypass tube. I believe that's what its called and I THINK I have the right one on order... I can see some coolant pooled right around the base of where the tube meets the seat so thats what i'm starting with.
-the good news is that I think i found and fixed my popping noise I kept hearing while backing out of the drive way with the steering wheel turned, or taking off from a medium/hard stop with my wheel cranked.. looks like my drivers side UCA ball joint nut that holds it down to the spindle was a bit loose and allowed the shank to pull out just a bit during decompression. Tightened it almost a full turn and a quick drive did not produce the same noise.
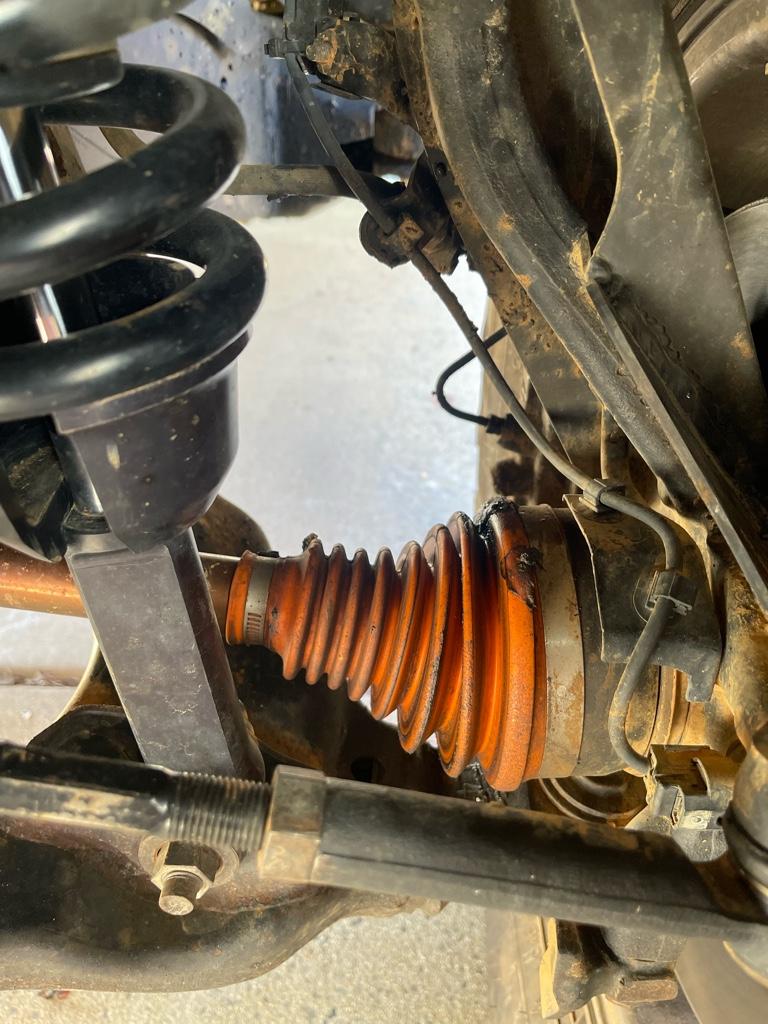
-found out that the worm-gear clamps I used on the RCV axle boots were a bit too sharp and tight and I have a couple of small tears in the boot that I was trying to seal for the past 3 months, i finally gave up and ordered 2 new boots, grease and some smooth edge bands to install after. These axles are life time warranty with no questions asked, and when I asked about the boots they said that basically as long as I am not actively trying to destroy the axle they'll still honor it and do me right.. I just don't want to hassle with sending these off right now and being stuck with no car for a couple of months since they would reboot these and not send new replacements since they aren't technically broken. I figured I have to get in for some front end work anyhow and this will only add an hour on top of it so why not.
-my cheap O2 sensor fix only works here and there. During idle and light cruising the O2 sensor isn't seeing enough exhaust flow since its so far out and triggers a P0156 code thinking that the sensor is bad. Currently my CEL is back on and I am considering either trying to open up the hole some more and placing the O2 sensor a little lower, or just tapping back into the driver's side O2 sensor like I had before until my other CAT is dead as well. Really not wanting to replace the catalytic converts due to cost/amount of work... if I end up having to do that I would ideally want some long tube headers with high-flow cats instead... I'll probably pay damn near the same amount of money but at least end up with more performance. It sucks that o2 simulator isn't an option for me..
I'll throw some pictures up in a while for those that like picture books and not just rambling of some random dude online lol.
Oh, and also, after hours of watching the offroad hub youtube SAS conversion I'm back to the drawing board on the future of my build.. I don't know if I can invest the amount of time to do the SAS right currently... definitely don't have the space, and financially I just don't think it's a very wise choice for something I don't need lol.
I'm not against a LT setup upfront though with a 3-link setup in the rear... that I could realistically do and for a fairly cheap amount comparing to SAS. I would really like to run a 37's at some point but that is at least a year down the road if not more.
I think what I will work on in the meantime is increasing a bit of up-travel in the rear by trimming out the bumper, door and quarter so that I can maximize the tire travel up towards the actual sheetmetal under the plastic covers. If my thinking is correct I should be able to get at least another 1" of up travel in the rear which will help a bit, and will also set me up to already be trimmed for the 37's in the future.
Last edited:
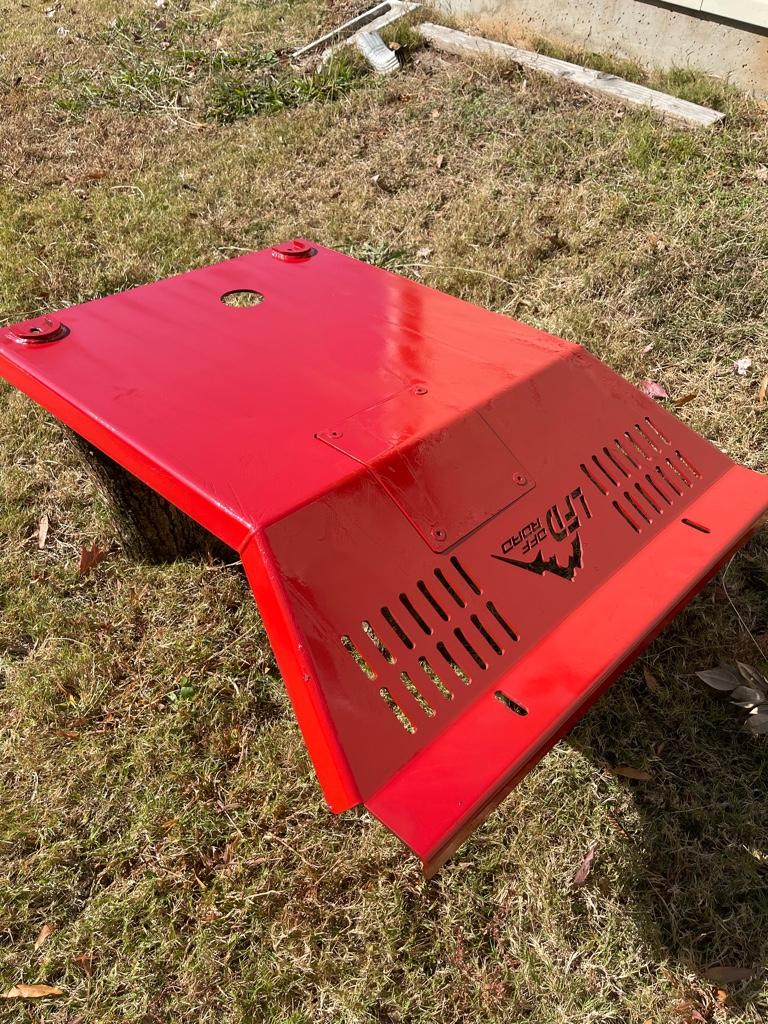
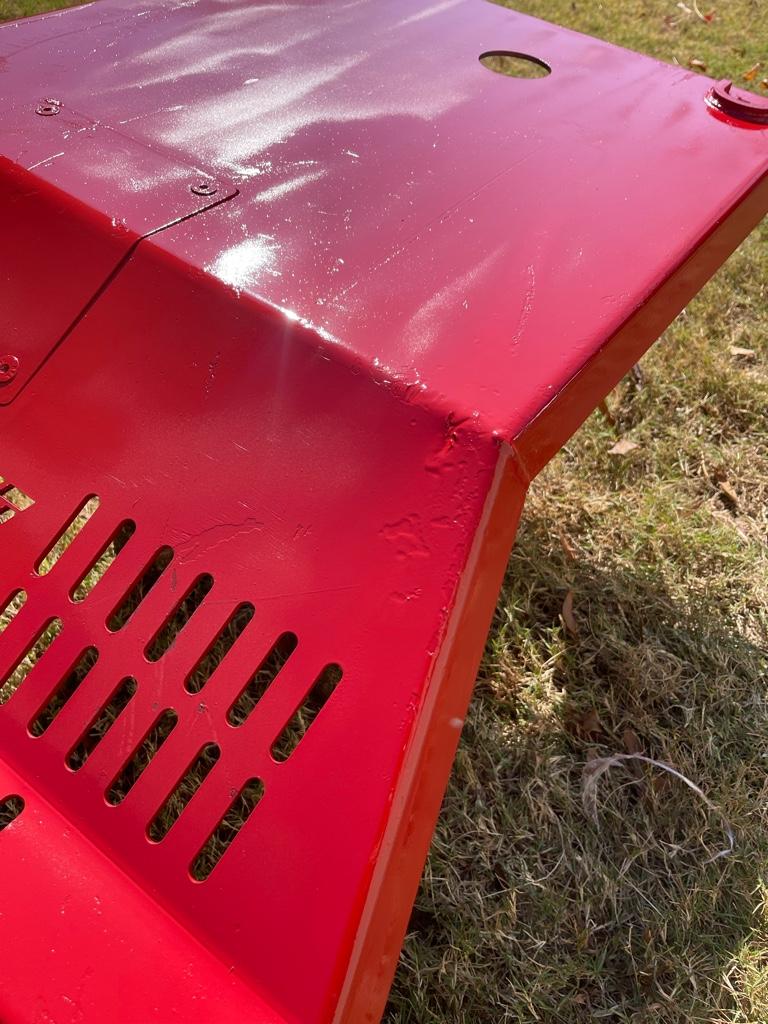
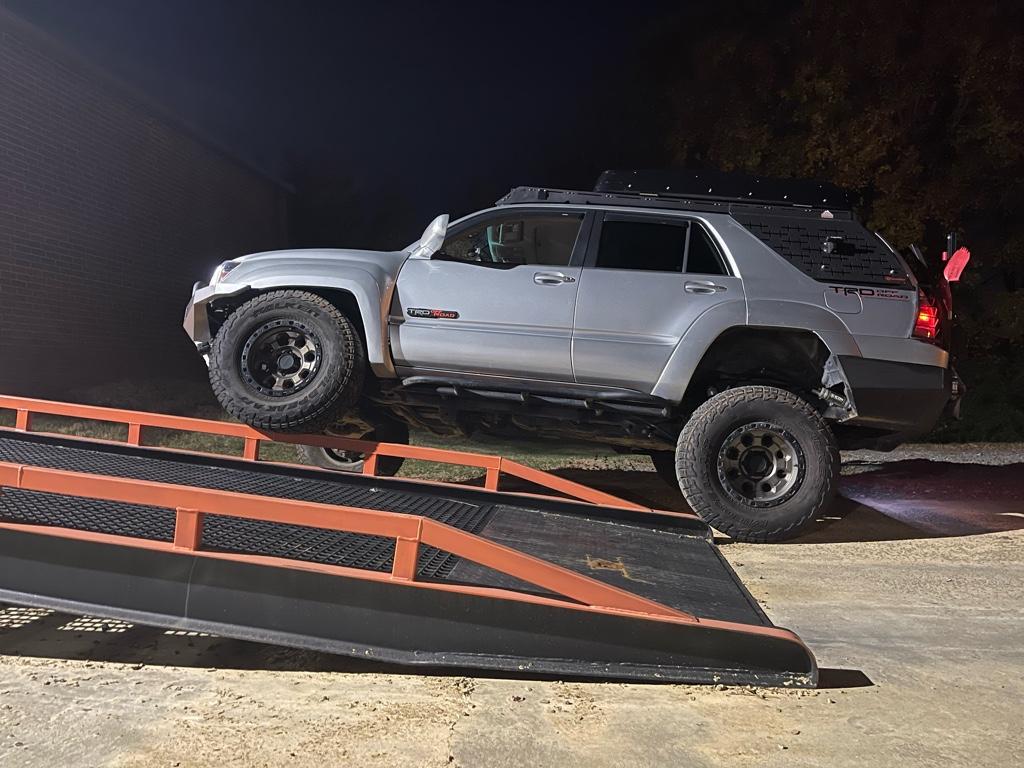
I went through painting the skid that was put to some very good use. Also checked over all my run spots and I have a bit more clearance to make for the 35 in order to have 100% full articulation.
The Rcv boot has given up and I have it 2 waiting to go on soon. Not looking forward to it but it’s all good.
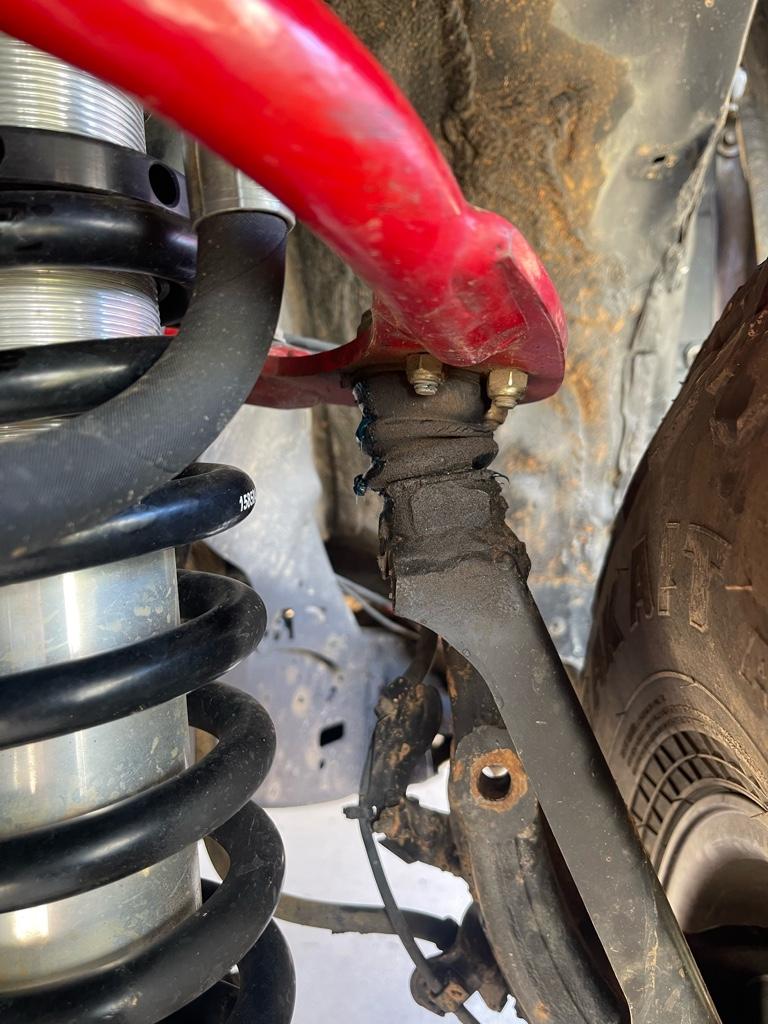
The JBA UCA boots didn’t last for shit which is disappointing. They are cracked all to hell and weren’t on there all that long. On top of that I think the clunk I have been hearing with the steering wheel cut to either side and taking off from a stop is coming from the ball joints starting to fail … I can’t produce the sound rocking the car side to side or breaking /accelerating hard but as soon as I turn the steering wheel and compress or decompress the suspension. That kinda pisses me off because these done have very much use on them at all though I am on 35s… I just ordered 2 replacement joints for $132 shipped and will swap them out when they come to see if that is the case.. more to follow.
I need more flex .. much much more.. lol. The front while sitting on the bump stop is fairly close to the fender and fender apron .. I don’t think I could get much more without tubing the the firewall to radiator support.. especially since I would eventually like to run 37s.
The rear however could have more up travel if I decided to reduce my bump stop and clearance the bumper, door and flare a little… I would love to 3link the rear with with some 14 inch shocks and some long arms in the rear to really get some things articulating… but that won’t happen for a while.
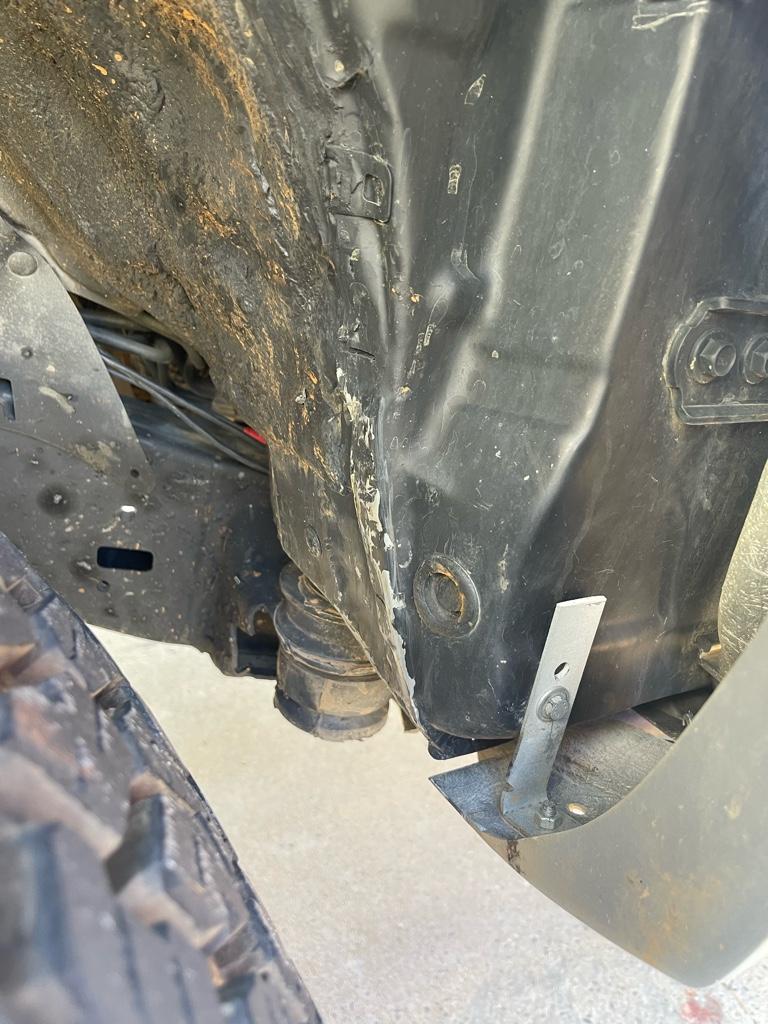
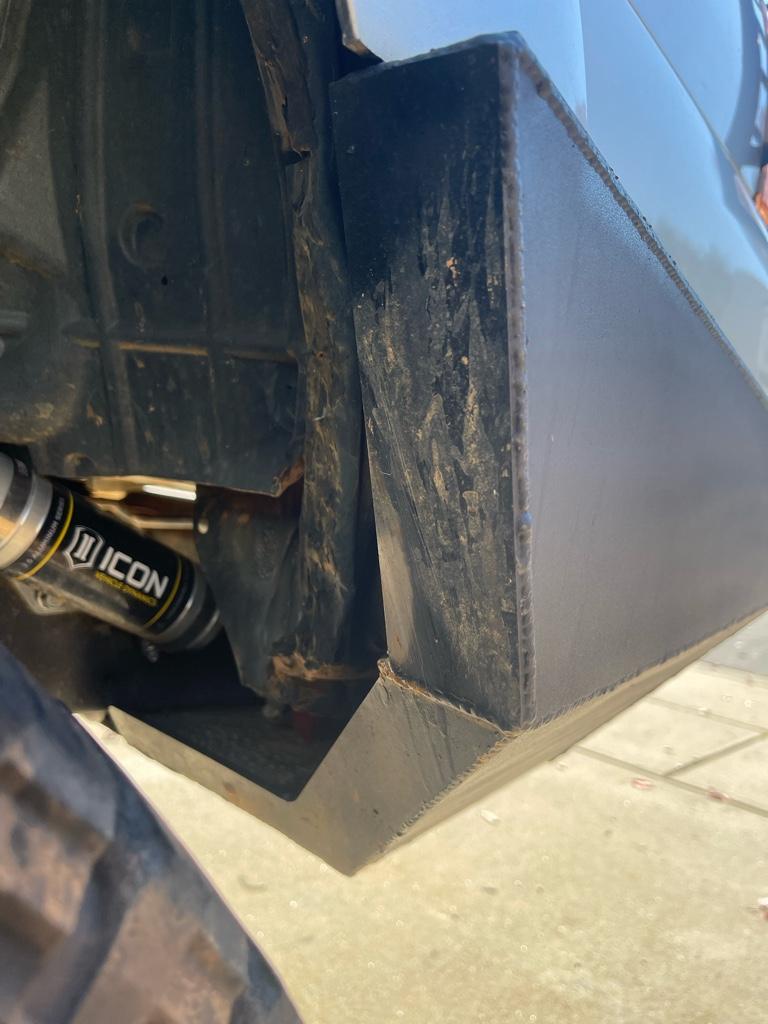
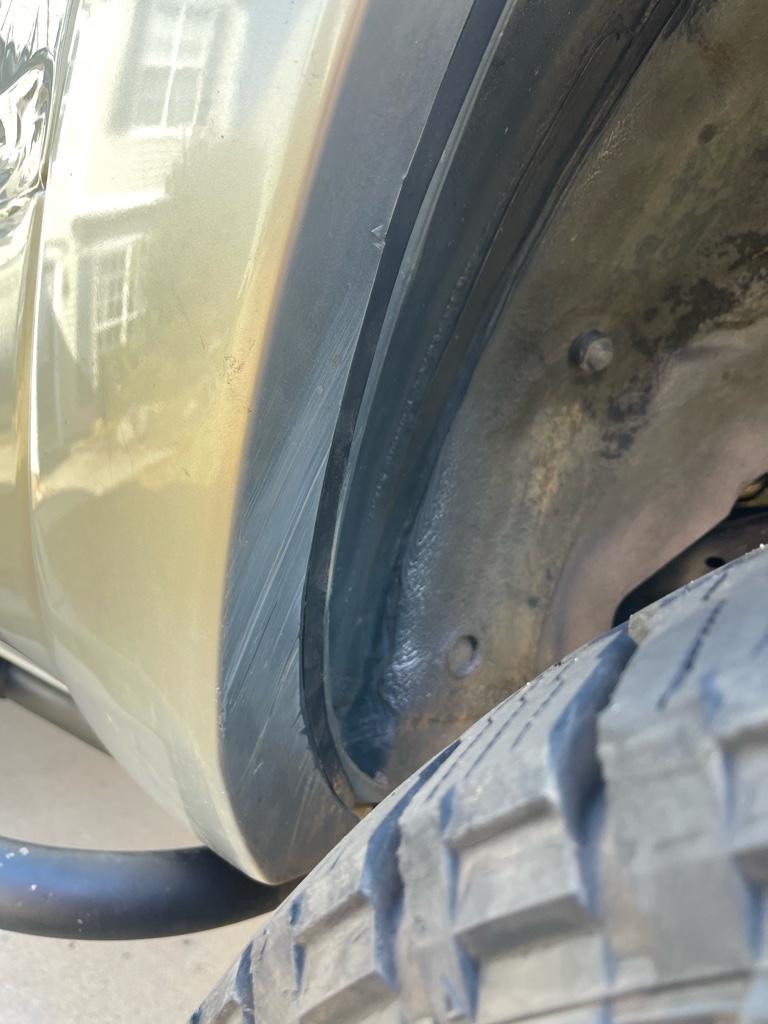
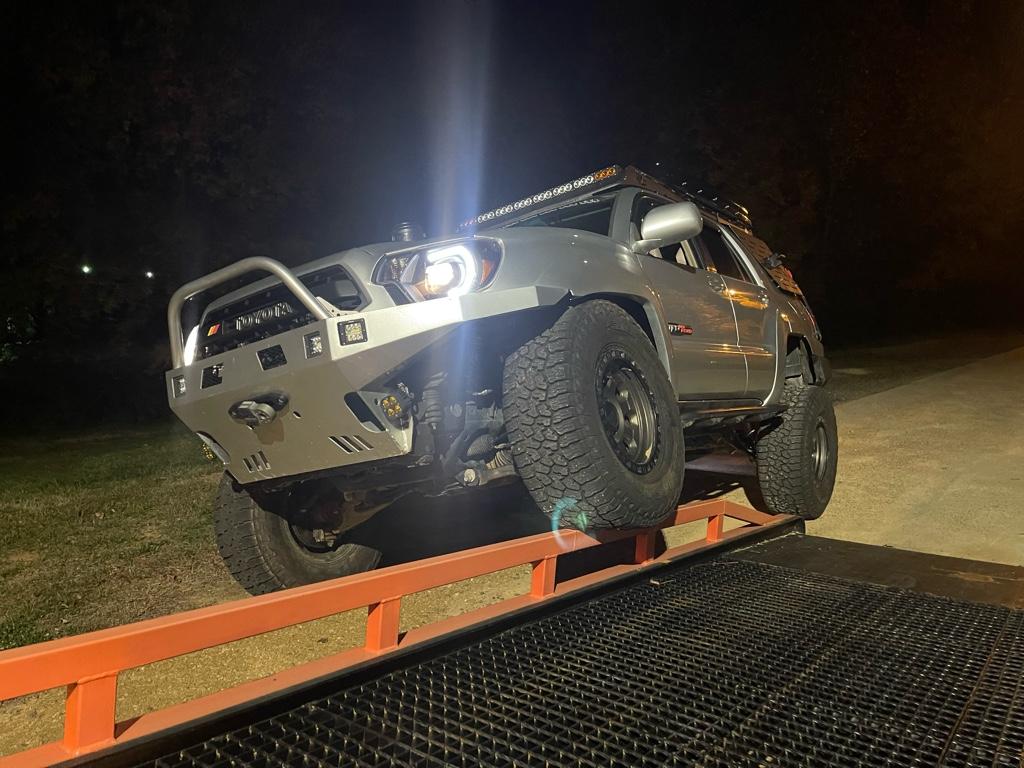
Sent from my iPhone using Tapatalk
The Rcv boot has given up and I have it 2 waiting to go on soon. Not looking forward to it but it’s all good.
The JBA UCA boots didn’t last for shit which is disappointing. They are cracked all to hell and weren’t on there all that long. On top of that I think the clunk I have been hearing with the steering wheel cut to either side and taking off from a stop is coming from the ball joints starting to fail … I can’t produce the sound rocking the car side to side or breaking /accelerating hard but as soon as I turn the steering wheel and compress or decompress the suspension. That kinda pisses me off because these done have very much use on them at all though I am on 35s… I just ordered 2 replacement joints for $132 shipped and will swap them out when they come to see if that is the case.. more to follow.
I need more flex .. much much more.. lol. The front while sitting on the bump stop is fairly close to the fender and fender apron .. I don’t think I could get much more without tubing the the firewall to radiator support.. especially since I would eventually like to run 37s.
The rear however could have more up travel if I decided to reduce my bump stop and clearance the bumper, door and flare a little… I would love to 3link the rear with with some 14 inch shocks and some long arms in the rear to really get some things articulating… but that won’t happen for a while.
Sent from my iPhone using Tapatalk
Similar threads

- Replies
- 2
- Views
- 484


