

You are using an out of date browser. It may not display this or other websites correctly.
You should upgrade or use an alternative browser.
You should upgrade or use an alternative browser.
aemravan's build thread - project TacoRunner
- Thread starter aemravan
- Start date
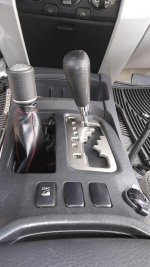
I was able to stretch the wires for the original cig port and just relocated a new one in there.
Too many electronics to charge these days to lose an outlet up front lol
I have a dual usb charger plug I wired in place of the original lighter in the center console so I’m covered there.
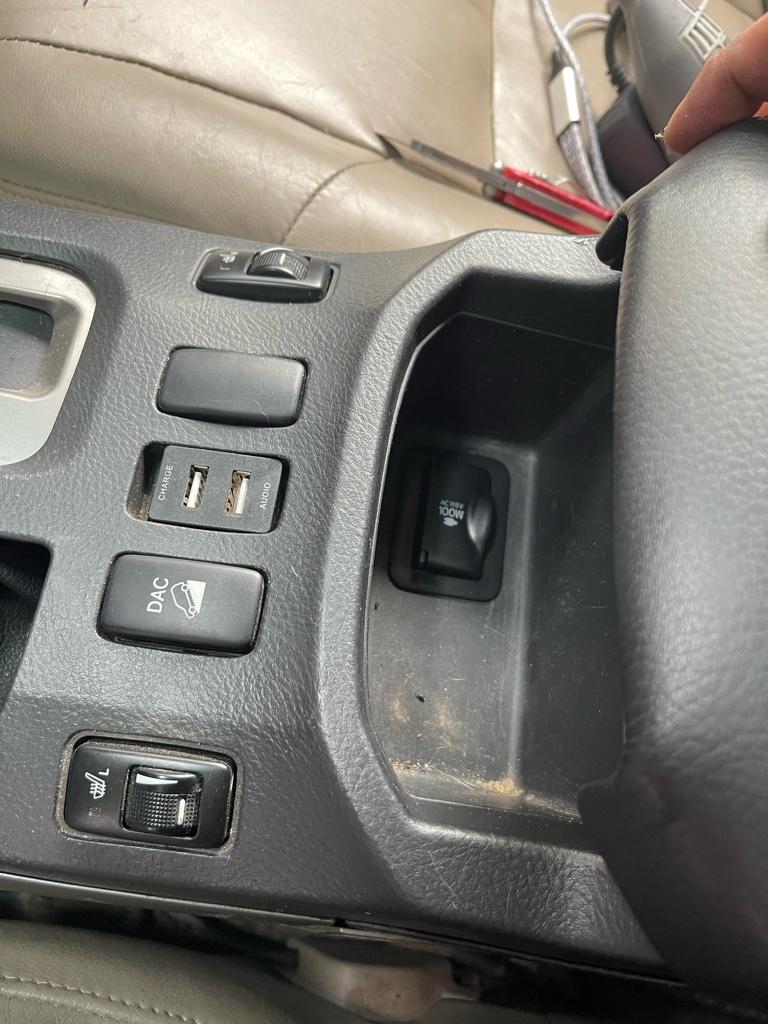
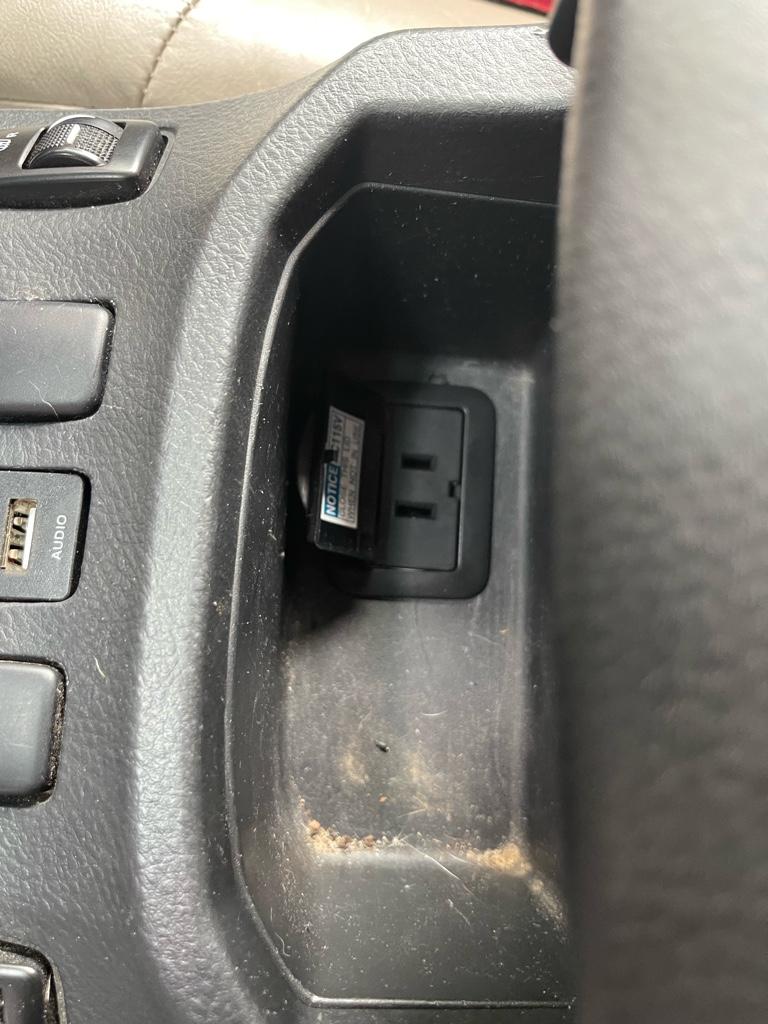
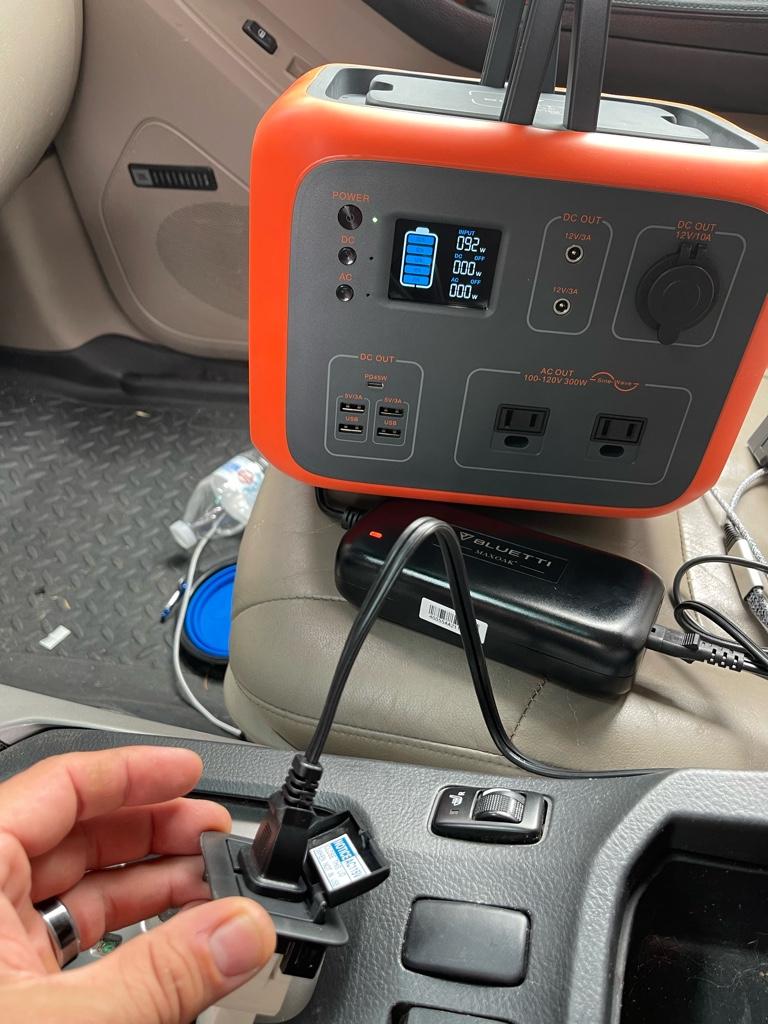
Ended up being able to relocate the 115v AC plug close by as well, my midland radio has lines running through the original location and I figured running it all the way to the back was not reasonable.. I want to be able to see my battery pack charging and unplug it while driving if needed. I was pleasantly surprised to see that I was getting the same near-100watt output in car as I was with my household outlet. This will charge up the battery packs as fast as it’s possible to charge them.
Now all I have left to do is run my lines to the auxbeam fuse box..
Sent from my iPhone using Tapatalk
4RunnerAquasport
Senior Member
Is that a factory 115v AC inverter?
If it is I didnt know the 4th gens had that option.
If it is I didnt know the 4th gens had that option.
Is that a factory 115v AC inverter?
If it is I didnt know the 4th gens had that option.
It is. I have a button on the dash next to the factory diff lock button that says 115V AC/100w. The plug was originally located down in the glove box. Didn't realize this was not standard across all 4runners.
4RunnerAquasport
Senior Member
I have one in my 5th gen Limited, which has one in the console and in the pass side cargo area. It is the same circuit though.It is. I have a button on the dash next to the factory diff lock button that says 115V AC/100w. The plug was originally located down in the glove box. Didn't realize this was not standard across all 4runners.
Never knew they came in the 4th gen.

AuSeeker
Elite Member
Is that a factory 115v AC inverter?
If it is I didnt know the 4th gens had that option.
It is. I have a button on the dash next to the factory diff lock button that says 115V AC/100w. The plug was originally located down in the glove box. Didn't realize this was not standard across all 4runners.
I have one in my 5th gen Limited, which has one in the console and in the pass side cargo area. It is the same circuit though.
Never knew they came in the 4th gen.
The 110V outlet came in the Limited trims in the 4th Gens.
Well then.. I feel very fortunate to have picked up a wrecked limited model. Until now I always thought it was a neat thing to have but didn't really see a need for it.. boy was I wrong. Having a moving household outlet with you on the road is pretty damn sweet.
I received by BLUETTI battery pack yesterday, the 500 watt-hour one, charged it up and plugged my fridge in to run. Started the test at 3:40 pm yesterday with the fridge at room temperature and not precooled. Woke up this morning and it's still running. As of 8 a.m. right now it has been running for a bit over 16 hours (if my math is right :laugh and the battery indicator is still up at the 40-60% tab. So even worst case scenario I may have burned through 3/5th of the battery and still going strong. I don't see an issue with it hitting another 8 hours which is awesome. This should definitely give me enough off-road juice to run the fridge for the weekend if I have it powered off the rig while driving and am able to top off the battery packs a bit with the solar panels if needed.
Edit** the battery pack ended up running 24.5 hours before I turned it off. Probably still had more juice left in it but 24 hours is more than plenty for me.
I received by BLUETTI battery pack yesterday, the 500 watt-hour one, charged it up and plugged my fridge in to run. Started the test at 3:40 pm yesterday with the fridge at room temperature and not precooled. Woke up this morning and it's still running. As of 8 a.m. right now it has been running for a bit over 16 hours (if my math is right :laugh
and the battery indicator is still up at the 40-60% tab. So even worst case scenario I may have burned through 3/5th of the battery and still going strong. I don't see an issue with it hitting another 8 hours which is awesome. This should definitely give me enough off-road juice to run the fridge for the weekend if I have it powered off the rig while driving and am able to top off the battery packs a bit with the solar panels if needed.Edit** the battery pack ended up running 24.5 hours before I turned it off. Probably still had more juice left in it but 24 hours is more than plenty for me.
Last edited:
 Must've been a highly optioned out Sport :lmao:





originalg00kster
New member
^^ OMG bro.....why were you even posting the 4runner this whole time?? haha I hope one day...I can build out my dream car. I would love a NSX.
^^ OMG bro.....why were you even posting the 4runner this whole time?? haha I hope one day...I can build out my dream car. I would love a NSX.
it is the 4runner forums after all

But yea, I'm super grateful that I've been able to own and build my supra for the past 18 years. It's never done and forever evolving, granted a little less now that I have the 4runner to spend time and money on lol. The NSX platform is also awesome. Anything from the 90's Japanese sports car era has a special place in my heart.
back to the regular scheduled programming of 4runner content..
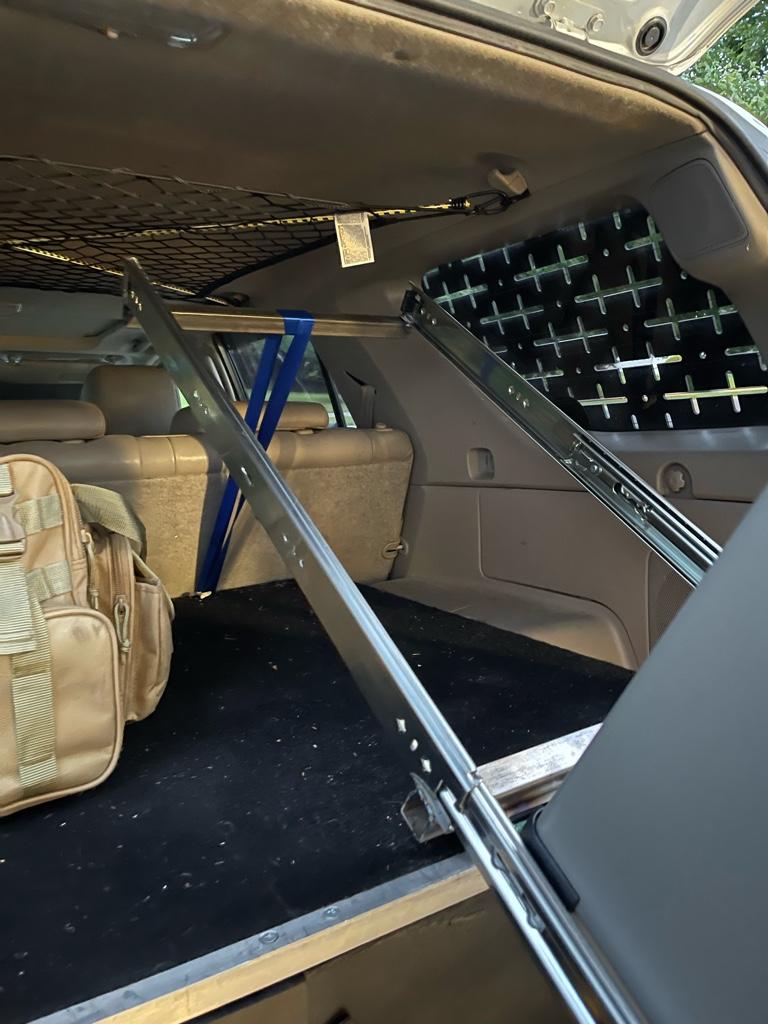
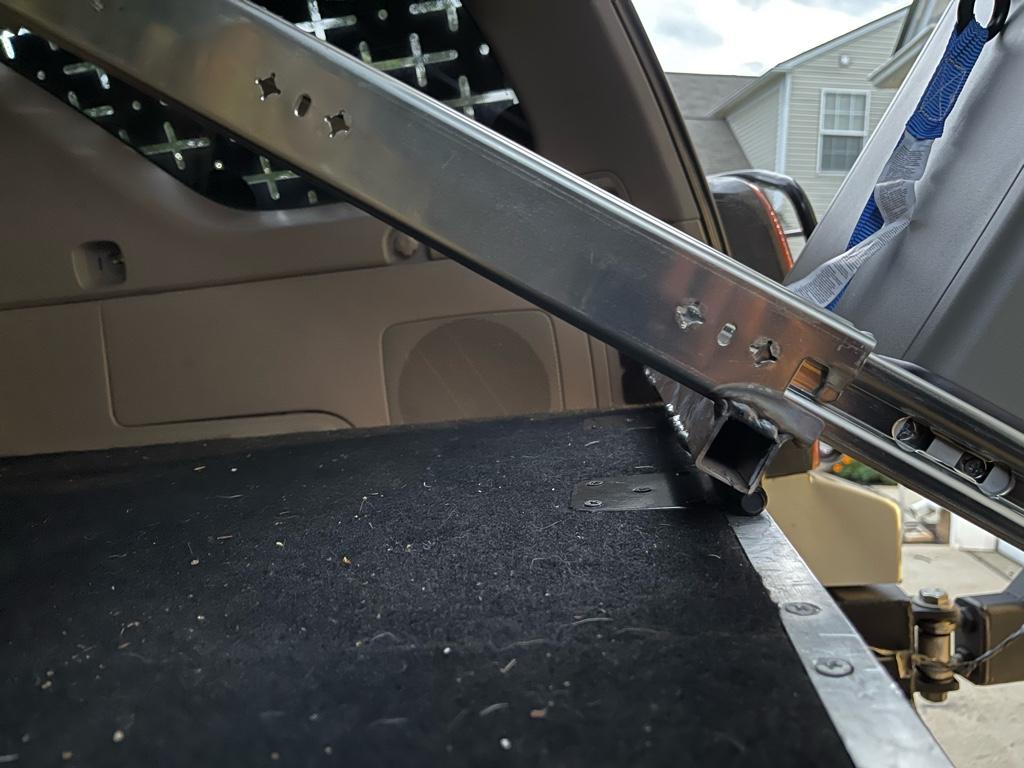
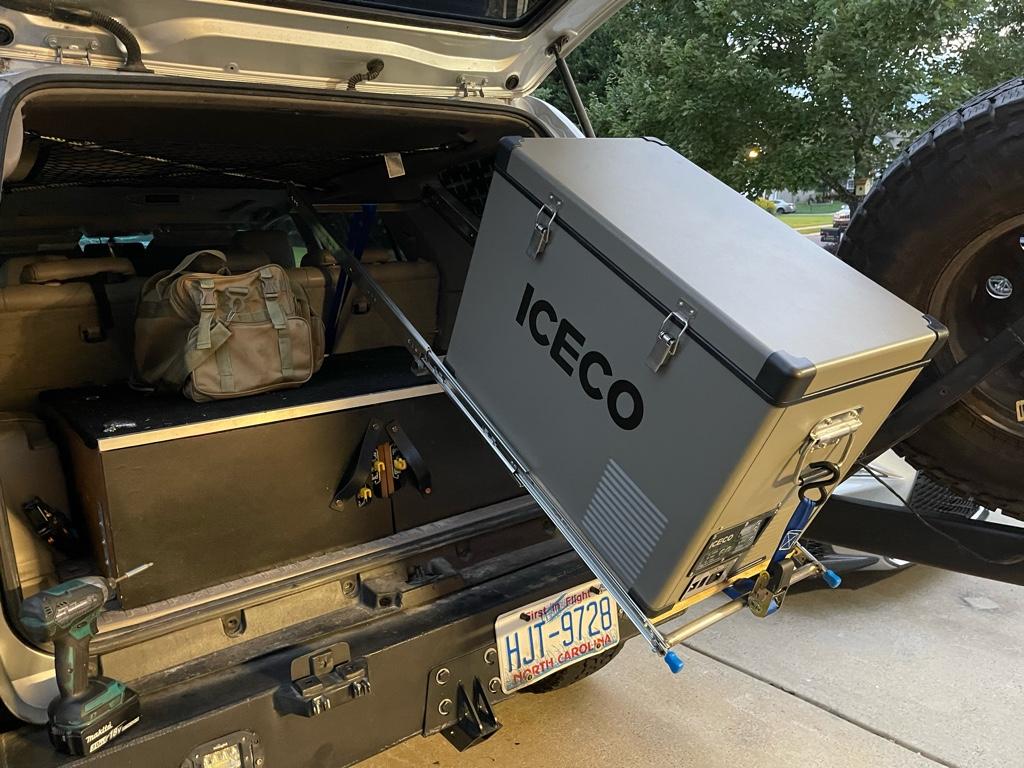
Finally made some time to run and grab some slide/tilt drawer supplies for the fridge. Looked at a few designs from some DIY videos and put together my own take from a few different ones I liked.
The platform is a 3/4" plywood sheet (holy hell did the prices go up on these! 2x4' sheet was $34 damn !!) that is screwed in between the 2 locking 30" slides I got from ebay.
I went with slides slightly longer than the fridge itself so it would give me some roof for straps and a little handle. The idea is to then weld 2 1' square tubes right to the bottom of the slides. The front tube will then get 2 gate hinges welded to it and ultimately bolted down to the top of the rear drawer system. The rear square tube will have a limit strap attached to it so that the fridge has something stopping it from fully pitching forward.
The fridge itself will be held down by a strap that loops under the 3/4" plywood and goes from handle to handle. Should be plenty strong enough to hold it in place, but I may also add a small lip to the front of the plywood to help distribute the weight when the assembly is tilted downward.
I also elected to get a 3/4" tube to weld between the 2 leading edges of the slide to give it a bit more reinforcement as well as provide a pull handle when the sliding latches are unlocked.
Taking this setup to weld up really quick this evening so we'll see how it comes out.. so far I'm in about $74 bucks and 30 minutes of work.
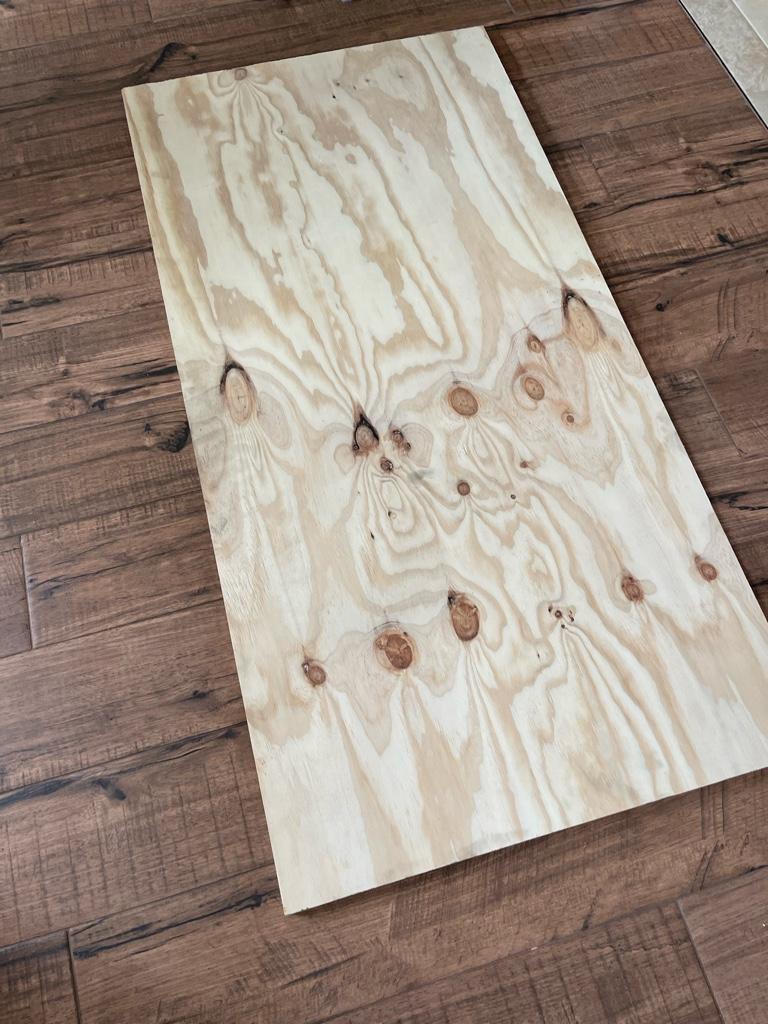
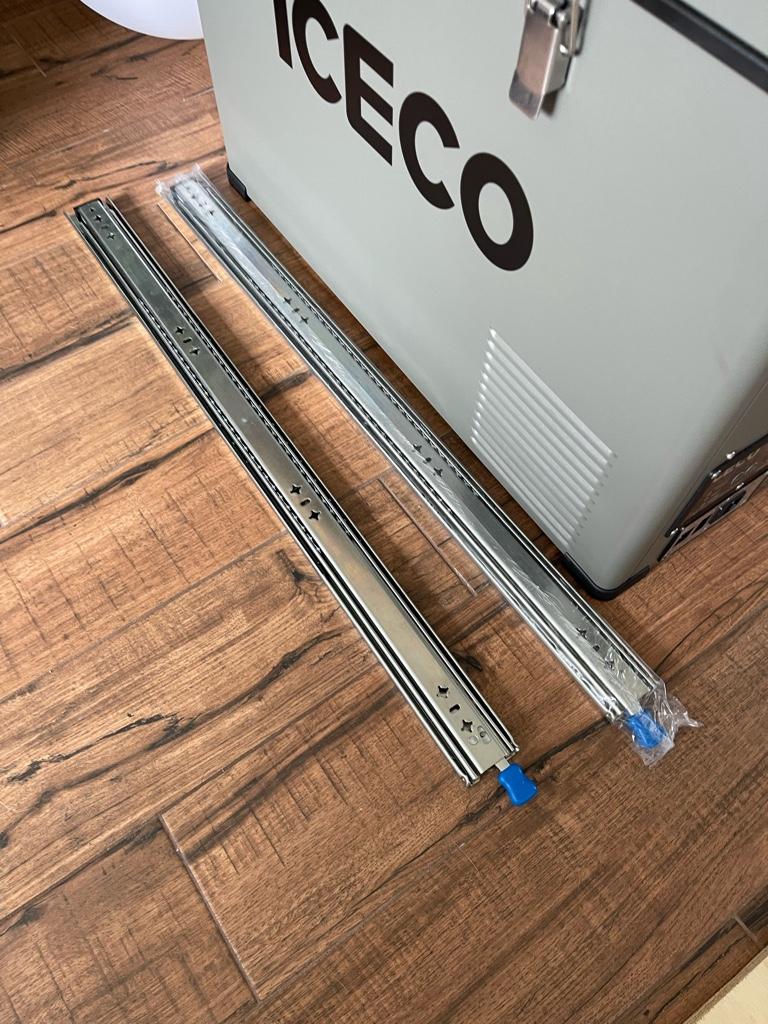
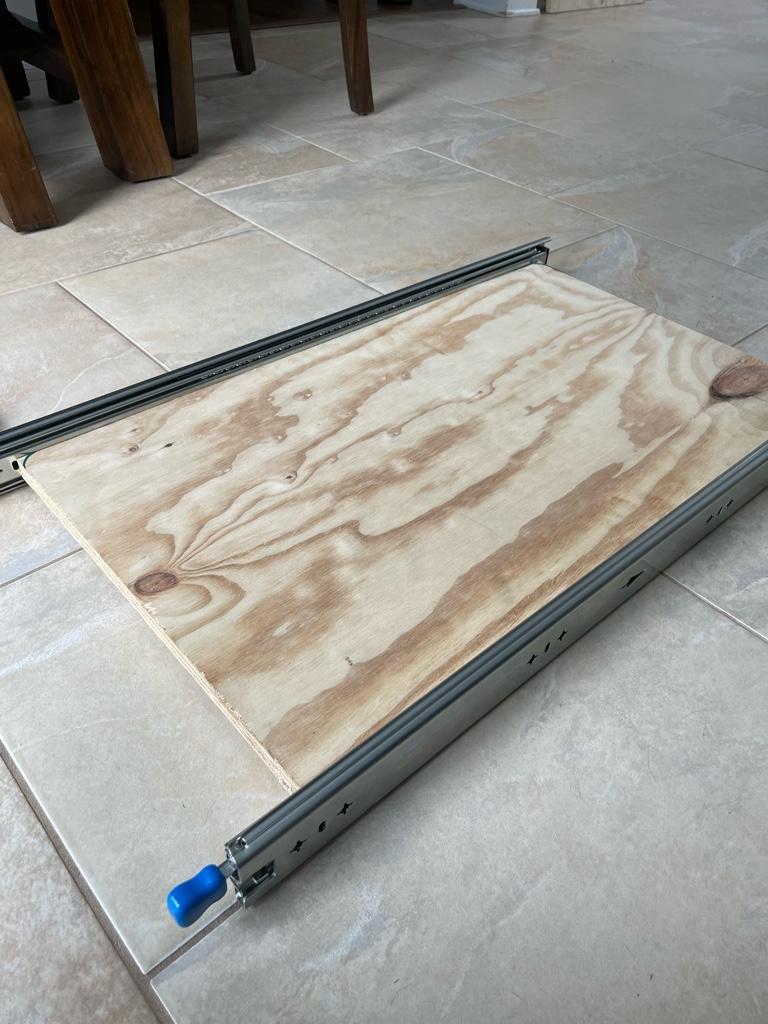
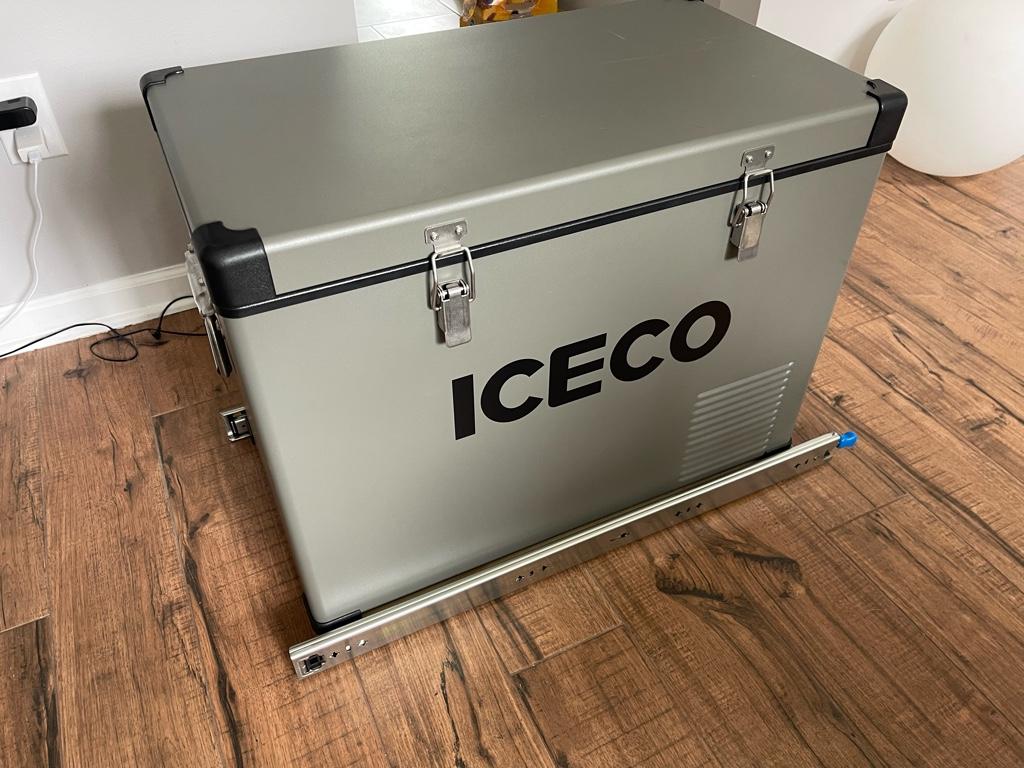
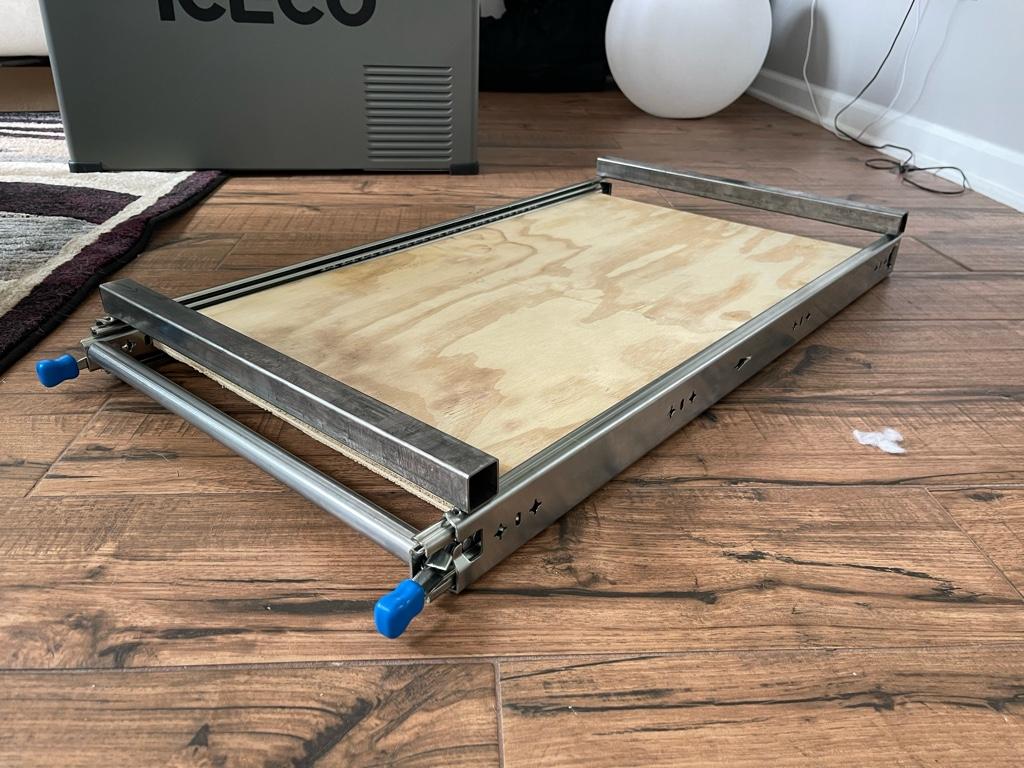
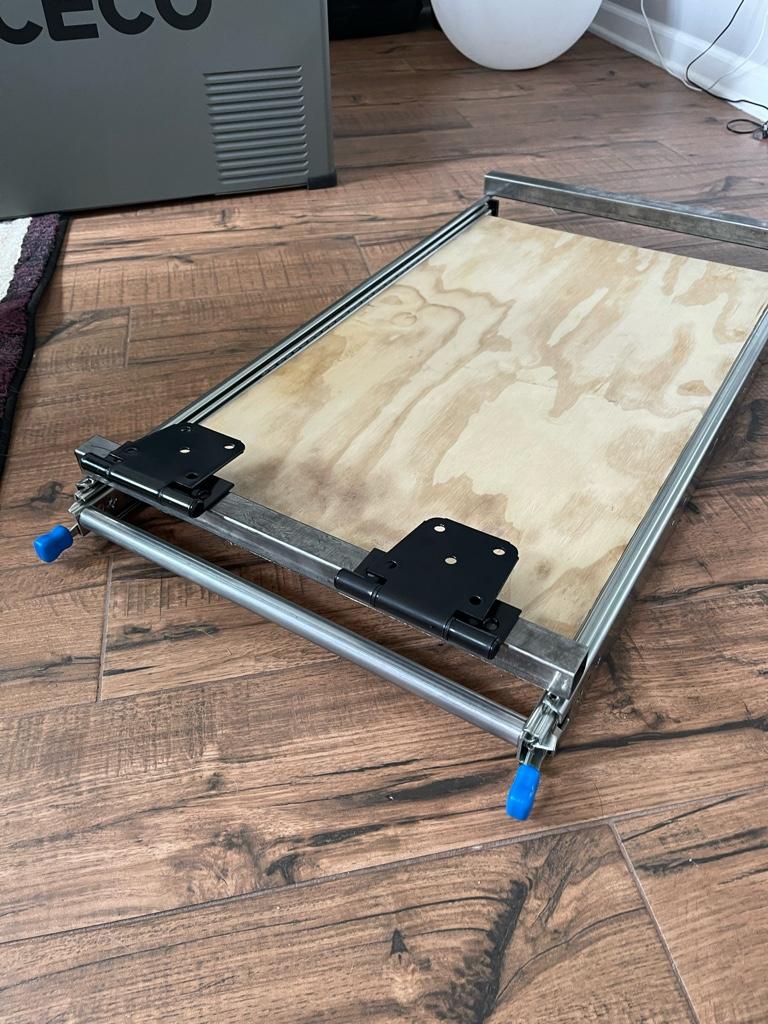
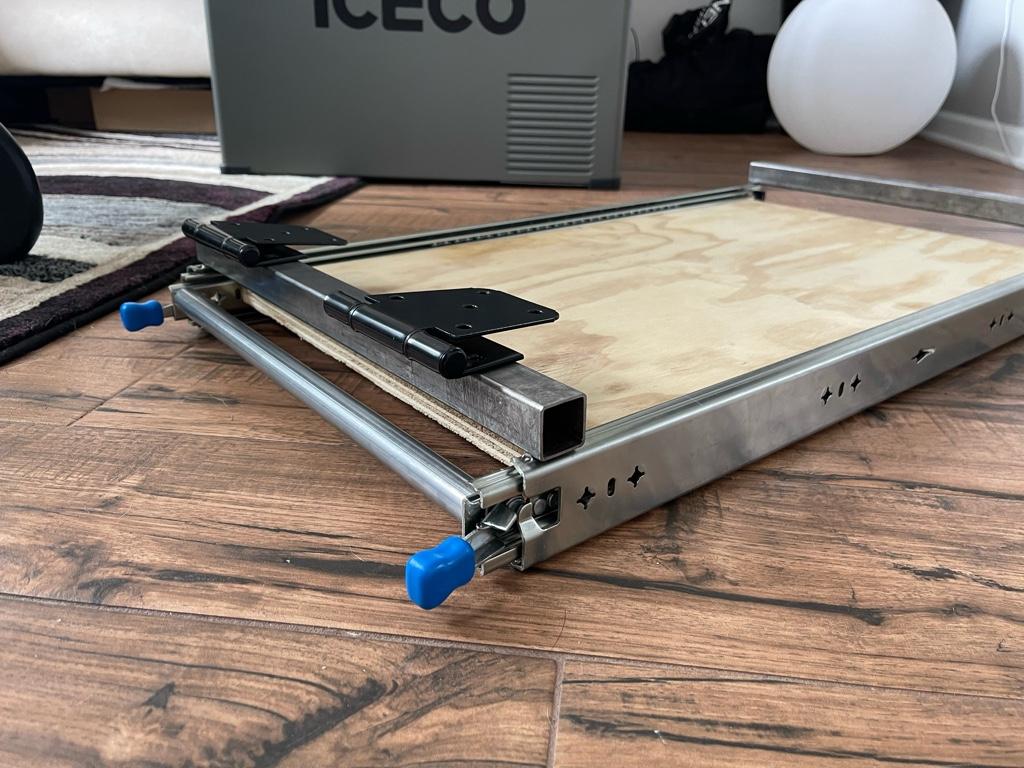
Finally made some time to run and grab some slide/tilt drawer supplies for the fridge. Looked at a few designs from some DIY videos and put together my own take from a few different ones I liked.
The platform is a 3/4" plywood sheet (holy hell did the prices go up on these! 2x4' sheet was $34 damn !!) that is screwed in between the 2 locking 30" slides I got from ebay.
I went with slides slightly longer than the fridge itself so it would give me some roof for straps and a little handle. The idea is to then weld 2 1' square tubes right to the bottom of the slides. The front tube will then get 2 gate hinges welded to it and ultimately bolted down to the top of the rear drawer system. The rear square tube will have a limit strap attached to it so that the fridge has something stopping it from fully pitching forward.
The fridge itself will be held down by a strap that loops under the 3/4" plywood and goes from handle to handle. Should be plenty strong enough to hold it in place, but I may also add a small lip to the front of the plywood to help distribute the weight when the assembly is tilted downward.
I also elected to get a 3/4" tube to weld between the 2 leading edges of the slide to give it a bit more reinforcement as well as provide a pull handle when the sliding latches are unlocked.
Taking this setup to weld up really quick this evening so we'll see how it comes out.. so far I'm in about $74 bucks and 30 minutes of work.
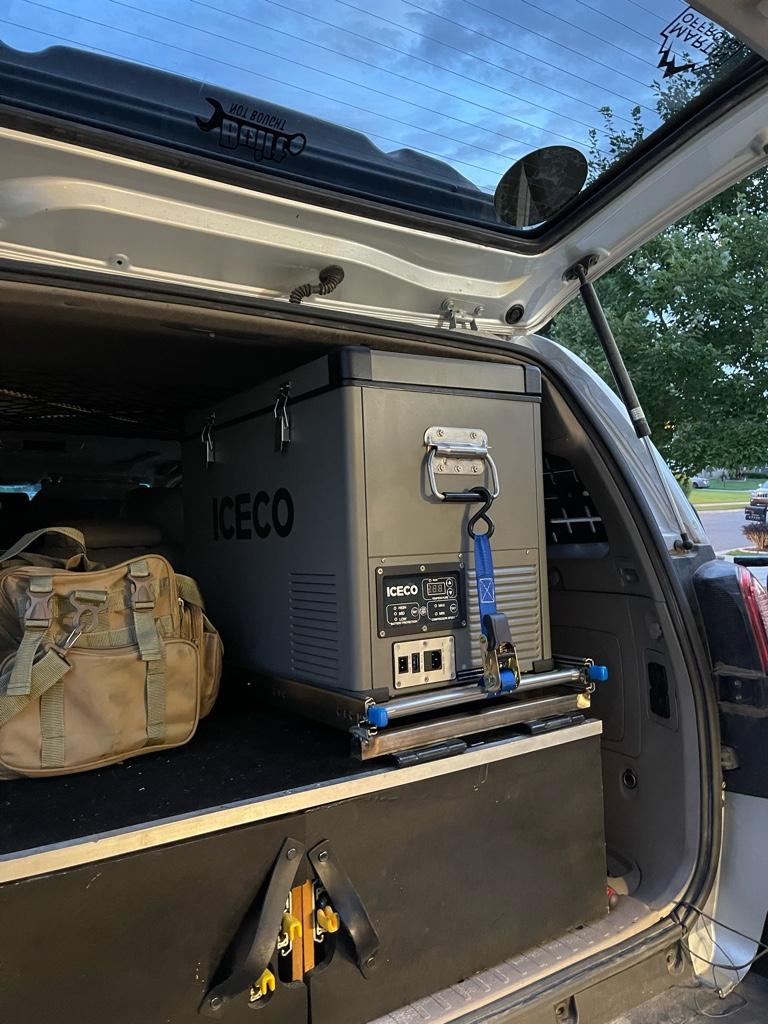
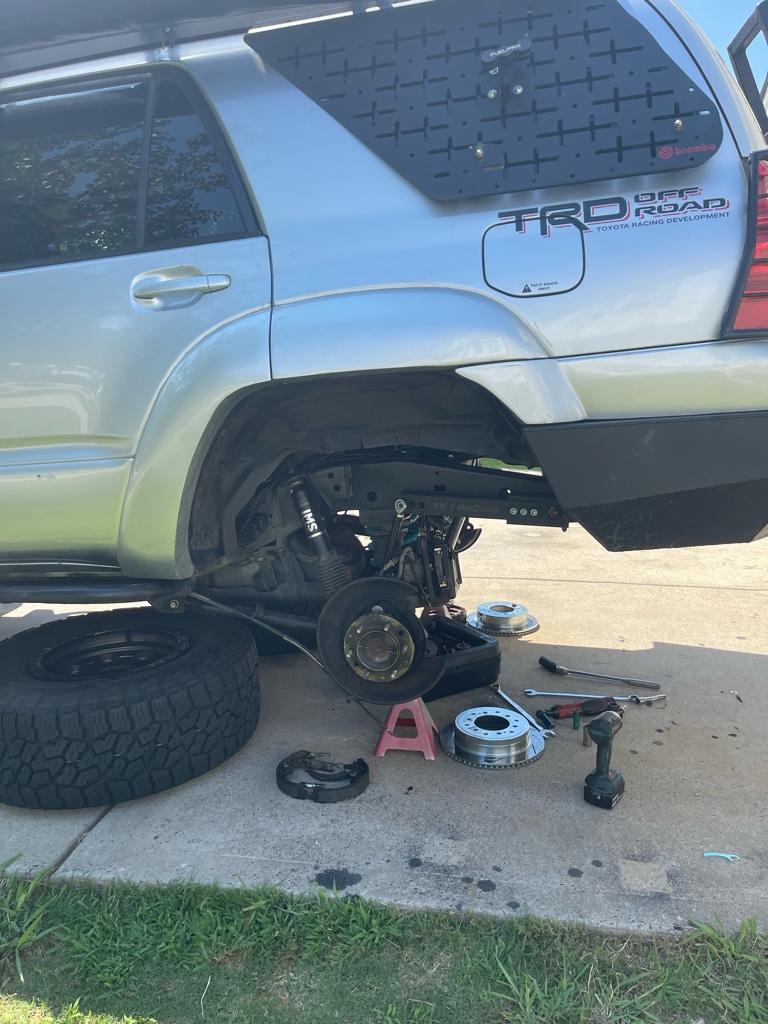
Took some time during lunch to brake down the rear axles. Only took an hour to pull, but I know it will take at least 3 times longer to put together with those damn rear drum brakes lol.
What I found was very significant play when holding the Axle and wiggling the backing plate, I am assuming there should be 0 play with a good bearing. One side was worse than the other but both were pretty bad.
I imagine this is the cause of the noises I’m hearing. Going to take it over to my dads press tomorrow and see if I can get this swapped out. I’m a dummy though.. I didn’t realize at all that I needed new wheel studs for the new axles… could have ordered a decent replacement online but now I’ll be picking up a Dorman replacement set from Napa in the morning. Would have been nice to go with something like an arp stud that was extended but I can’t wait.
Sent from my iPhone using Tapatalk
What I found was very significant play when holding the Axle and wiggling the backing plate, I am assuming there should be 0 play with a good bearing. One side was worse than the other but both were pretty bad.
I imagine this is the cause of the noises I’m hearing. Going to take it over to my dads press tomorrow and see if I can get this swapped out. I’m a dummy though.. I didn’t realize at all that I needed new wheel studs for the new axles… could have ordered a decent replacement online but now I’ll be picking up a Dorman replacement set from Napa in the morning. Would have been nice to go with something like an arp stud that was extended but I can’t wait.
Sent from my iPhone using Tapatalk
4RunnerAquasport
Senior Member
Check the knurl diameter of the axle hub before you buy the studs. It may not match up with a dorman replacement stud. Had it happen w my front dorman hubs a couple years ago. PIATook some time during lunch to brake down the rear axles. Only took an hour to pull, but I know it will take at least 3 times longer to put together with those damn rear drum brakes lol.
What I found was very significant play when holding the Axle and wiggling the backing plate, I am assuming there should be 0 play with a good bearing. One side was worse than the other but both were pretty bad.
I imagine this is the cause of the noises I’m hearing. Going to take it over to my dads press tomorrow and see if I can get this swapped out. I’m a dummy though.. I didn’t realize at all that I needed new wheel studs for the new axles… could have ordered a decent replacement online but now I’ll be picking up a Dorman replacement set from Napa in the morning. Would have been nice to go with something like an arp stud that was extended but I can’t wait.
Sent from my iPhone using Tapatalk
Well.. today really kicked my ass, and im not even done yet.
Firstly, the dorman wheel studs I bought would never have gone into the nitro axles without a 20 ton press. I tried to set them with an impact gun and it was a no go.
I ended up using the press, tried to do all 6 and it wouldn’t go. Had to do 2 at a time. But they are in.
Doing the bearings on the axles was another story.. to make it short, everything went fast until I got to setting the lock ring. The groove wasn’t showing enough so I went back to the press. After 7 attempts and deformed tools and inserts later, I determined that there was just no way that I could seat the bearing any further. It was the same on both axles.
I think this is a nitro axle issue with not having the groove up high enough or having it big enough. Anyhow, I ended up shaving down the two rings just a bit to make it work. Even without the lock rings in place I can’t see these things ever coming off so it should be fine lol.
The axles are in, but now…. I need to put the parking brakes together. And can I just say that whoever designed these deserves to be shot. I gave up after an hour of trying and don’t have even one shoe on. I’ll give it another go in the morning because I’m at a point where I’m ready to break some things.
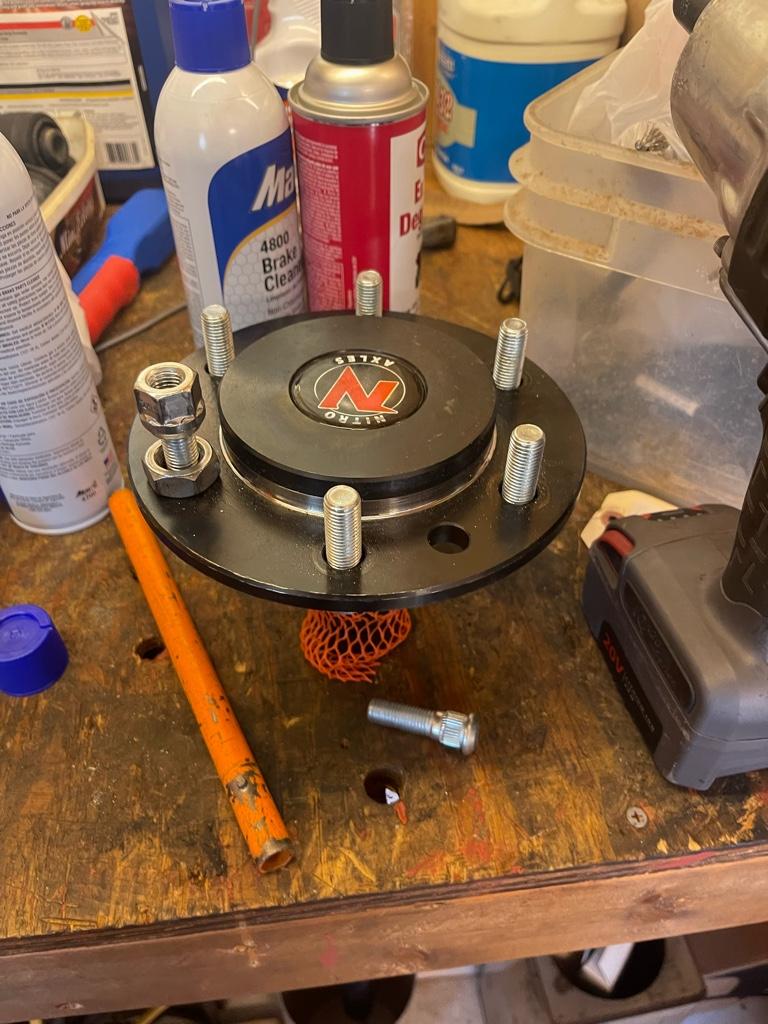
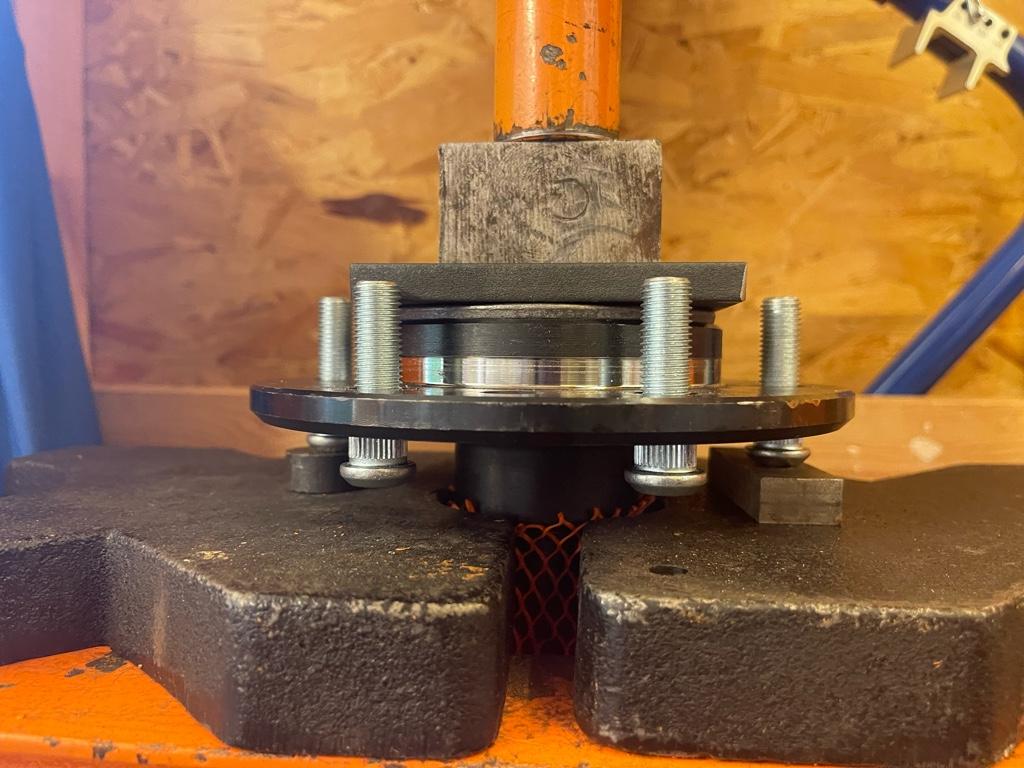
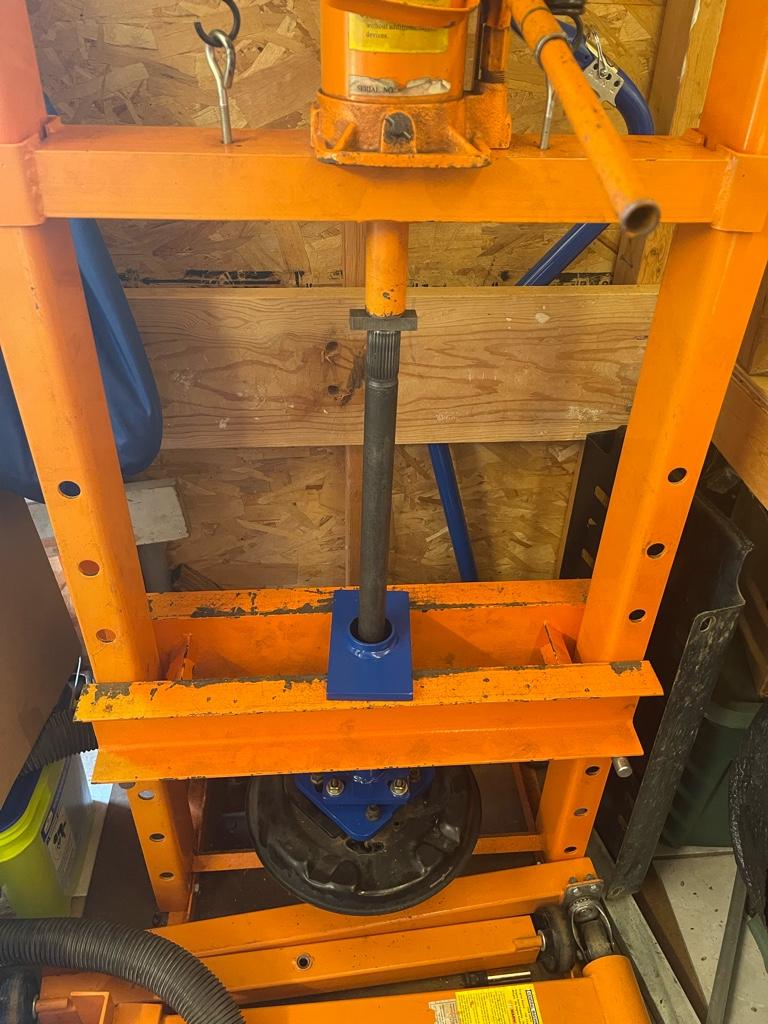
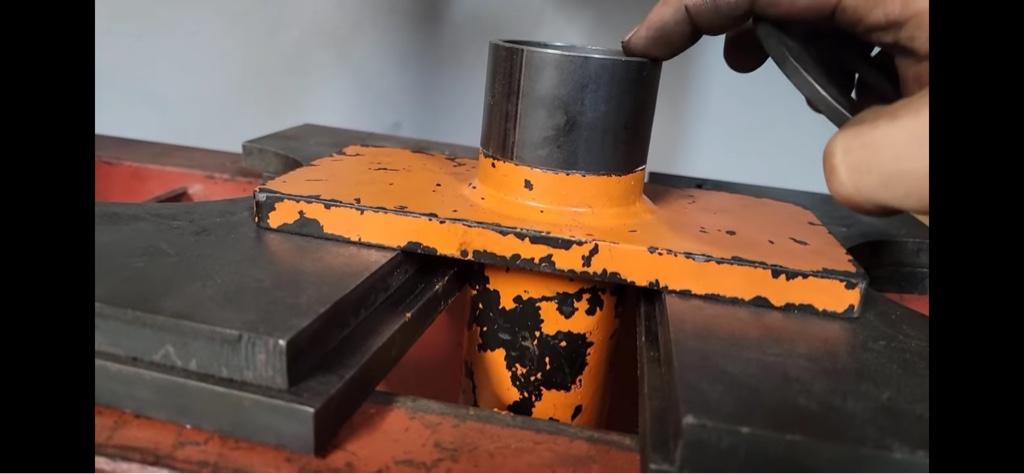
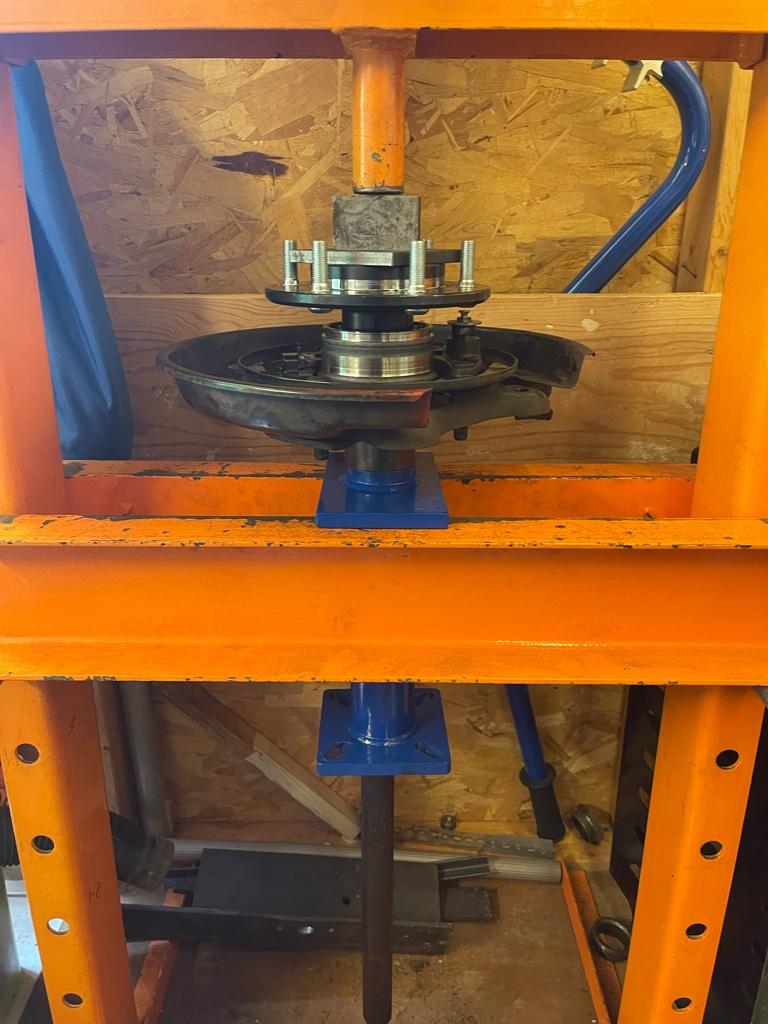
Sent from my iPhone using Tapatalk
Firstly, the dorman wheel studs I bought would never have gone into the nitro axles without a 20 ton press. I tried to set them with an impact gun and it was a no go.
I ended up using the press, tried to do all 6 and it wouldn’t go. Had to do 2 at a time. But they are in.
Doing the bearings on the axles was another story.. to make it short, everything went fast until I got to setting the lock ring. The groove wasn’t showing enough so I went back to the press. After 7 attempts and deformed tools and inserts later, I determined that there was just no way that I could seat the bearing any further. It was the same on both axles.
I think this is a nitro axle issue with not having the groove up high enough or having it big enough. Anyhow, I ended up shaving down the two rings just a bit to make it work. Even without the lock rings in place I can’t see these things ever coming off so it should be fine lol.
The axles are in, but now…. I need to put the parking brakes together. And can I just say that whoever designed these deserves to be shot. I gave up after an hour of trying and don’t have even one shoe on. I’ll give it another go in the morning because I’m at a point where I’m ready to break some things.
Sent from my iPhone using Tapatalk

Amazing what a little YouTube research can do… anyone doing the drum brakes should get some small zip ties and and pre assemble the spring retainers onto the spindles. You can the just slide the shoes in place and cut the zip ties. Did both sides in 30 minutes. Amazing.
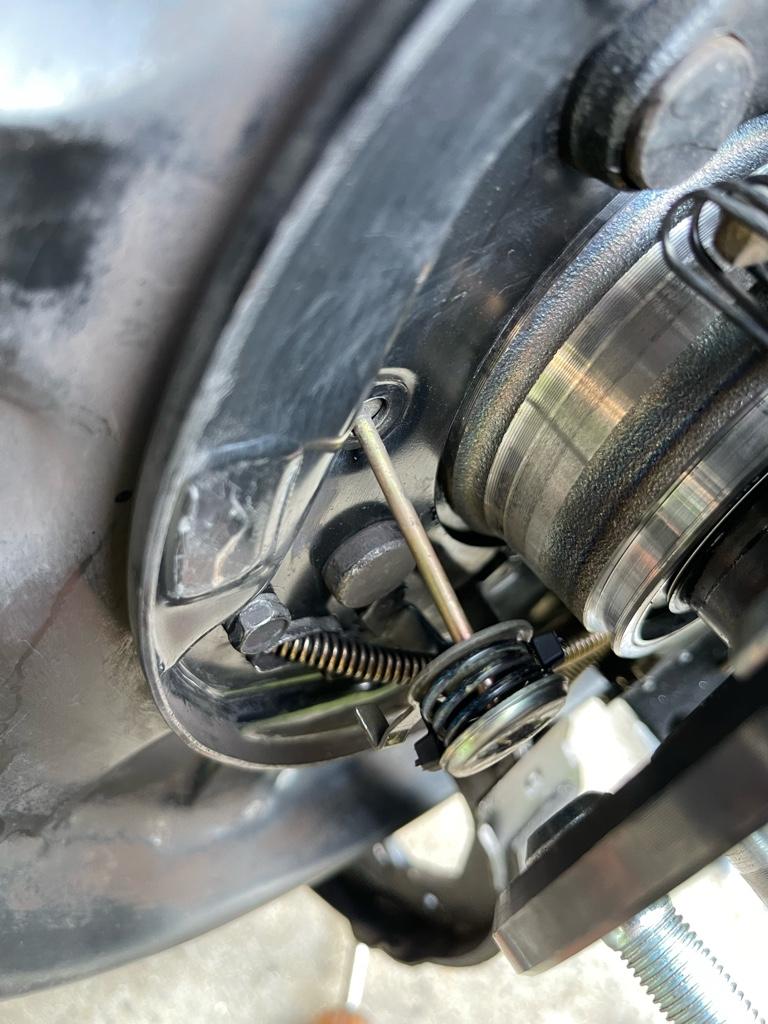
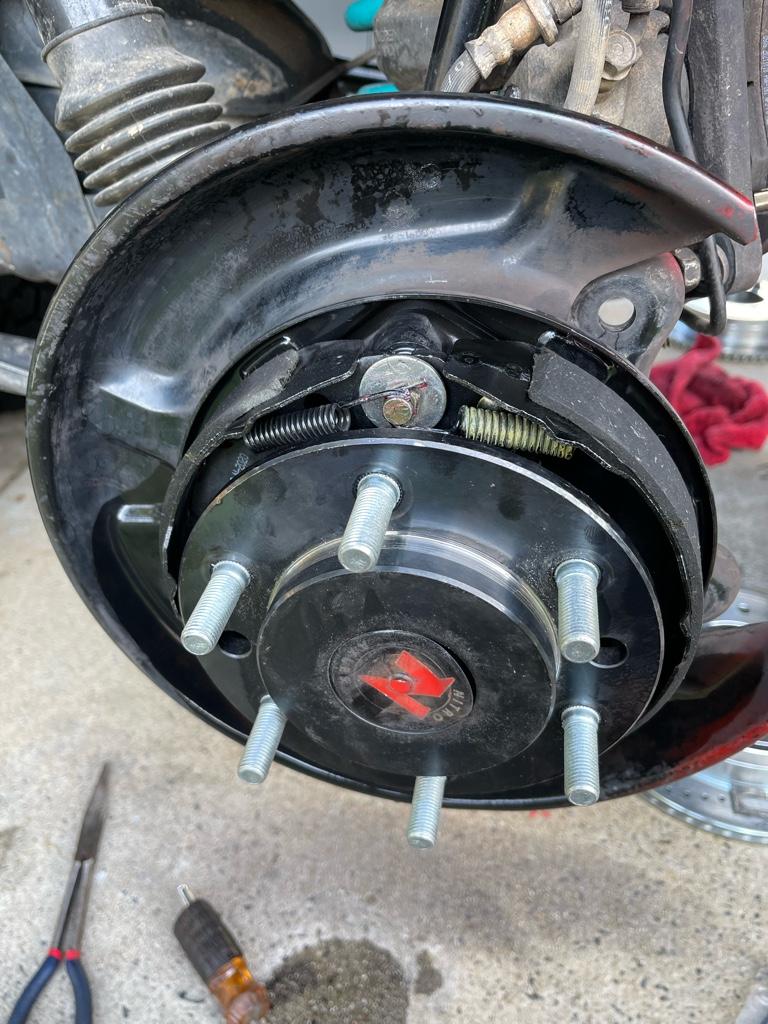
Sent from my iPhone using Tapatalk
Sent from my iPhone using Tapatalk
so now that I finally have this all wrapped up and am a bit rested up I wanted to drop a a couple of comments..
1. Snap ring/snap ring groove on the Nitro axle: I've been thinking about this for a couple of days now.. and I frankly don't know how I could possibly have pressed the bearing and retainer down any further... this had to be just a slight difference between a factory axle and the nitro axle replacement.. I bent the tool I bought to remove and install the bearings.. along with a a few other things I've tried. The 20 ton press was literally at a point where it was starting to twist under load and I couldn't pull down on the pump handle any more without bending it. Maybe some of the coating that is on the nitro axles made it a much tougher press fit, the studs certainly took a bit to press in, but I don't know. I would be VERY hardpressed (no pun intended) to believe that the retainer has any hope at all of moving, even with no snap ring in place, and with normal driving condition I just don't see how the retainer can unpress itself, the shaved down snap ring should be perfectly fine. I think I just needed to talk that through for my personal peace of mind, but I don't see anything backing off/breaking here lol.
2. removing factory bearings: This was a monster.. the tool allowed me to take off the retainer and most of the bearing with no issue at all. However, the front side of the bearing/race never came off the factory axle.. I don't know what it would take to get them off.. but luckily for me I just needed the backing plate. If you're reusing the axles, be prepared for some work (either additional pressing or cutting off very carefully). to be able to reuse.
3. Drum brake/parking brake assembly: I can't stress enough how easy this can actually be, at least for me.. I used 2 small zip ties to compress the springs and assemble the whole thing onto each pin and twist it into the locked position. I was then able to pretty easily, but carefully, slide the shoe slots where they needed to go and use a razor blade to cut the zipties. I put both sides completely together in literally less than 30 minutes. The hardest part was not having a decent pair of pliers to stretch the 2 larger springs back on. I still need to make an adjustment to the parking brake. I thought I had did a decent job, but it doesnt hold one bit lol. The adjustment hole is a bit small.. and the new rotors I have a mis-aligned just a bit vertically, so you really need to have a good feel, but it's definitely doable.
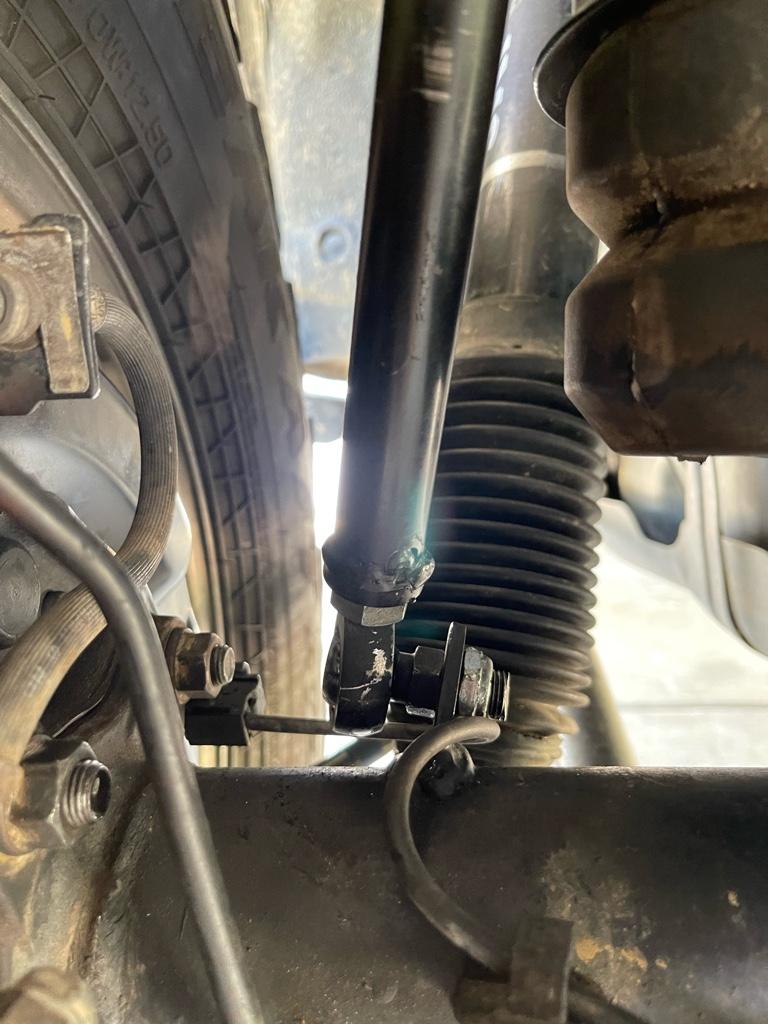
4. Rear Wheel Spacers: I want to get away from running a 2" spacer. As much as I love the spacers and feel comfortable running them when done correctly, 2" is just too much. The only reason they were there was to clear the TK1 racing links when the tire is aired down. Since I very rarely rock crawl at 18 psi it doesnt make sense to stress the system with larger spacers... in order to clear these what I did was flip the link mount at the arm itself towards the frame. This is not ideal since the arms now aren't 100% vertical and I cant flip the lower mount to the inside because then it hits my bump stops... but we'll see how it does. I noticed that my drivers side axle tab already bent inward from the previous trip so I may have to beef these up anyway.. At the same time too, having these links at an axle may actually be better for distributing the force as the axle articulates since it doesn't go straight up and down.. so who knows, may be this is actually better. I have a set of 1" spacers on the way and will swap them on tomorrow while also adjusting the parking brake.
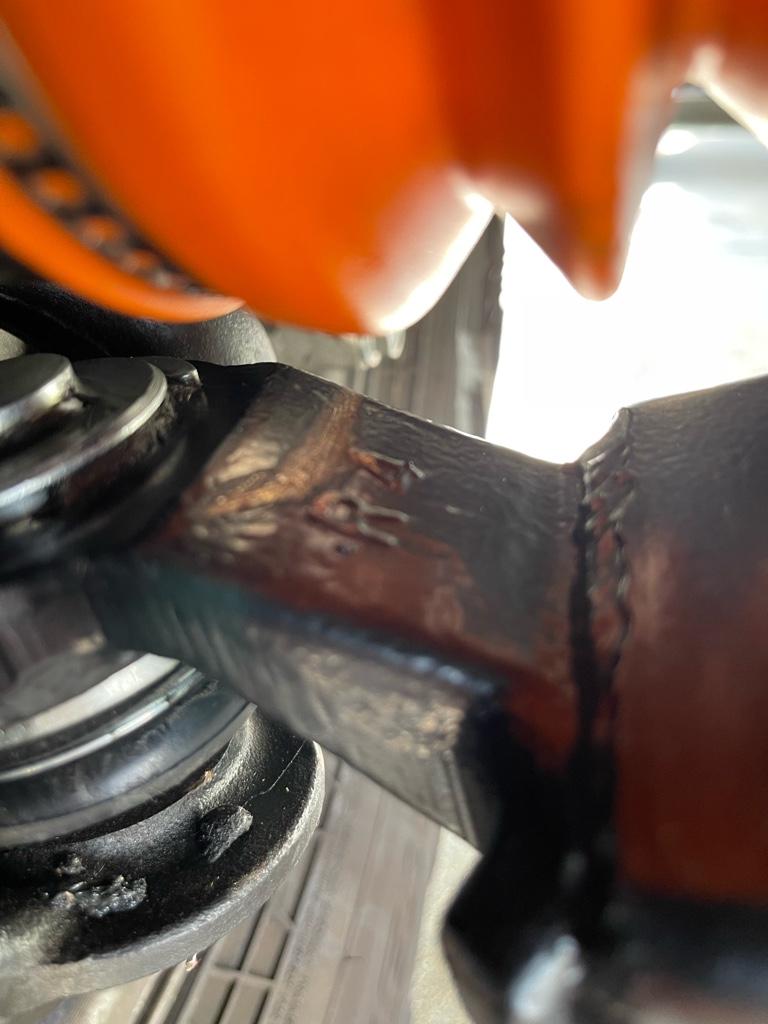
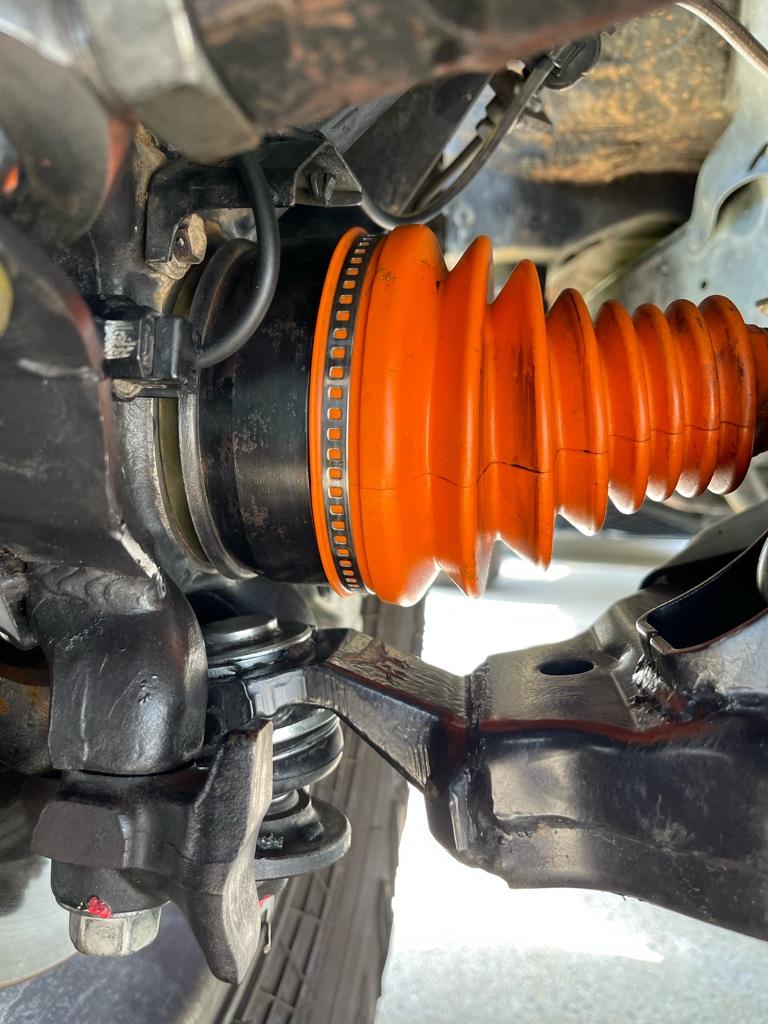
5. Boot clamps on the CV axles: When I first got the RCV's I noticed a little burping from the outer boot due to not very tight factory clamps. I "upgraded" to a worm-gear type clamp to remedy the issue, but in the process ended up putting a tear in the boot. I then got a rounded-edge worm-gear clamp and ran that for a bit. When I lost my wheel and shaved down the lower control arm the replacement I got for some reason WOULD NOT clear the extra height of the worm-gear clamp... I tried shaving it down, but it would still rub. Long story short... I went back to a regular clamp-style band clamp and after packing in a bit more grease and clamping down on the new clamp I haven't had any issues... don't make more work for yourself.. just use a regular CV Boot clamp with a proper tool and you'll be ok... lol.
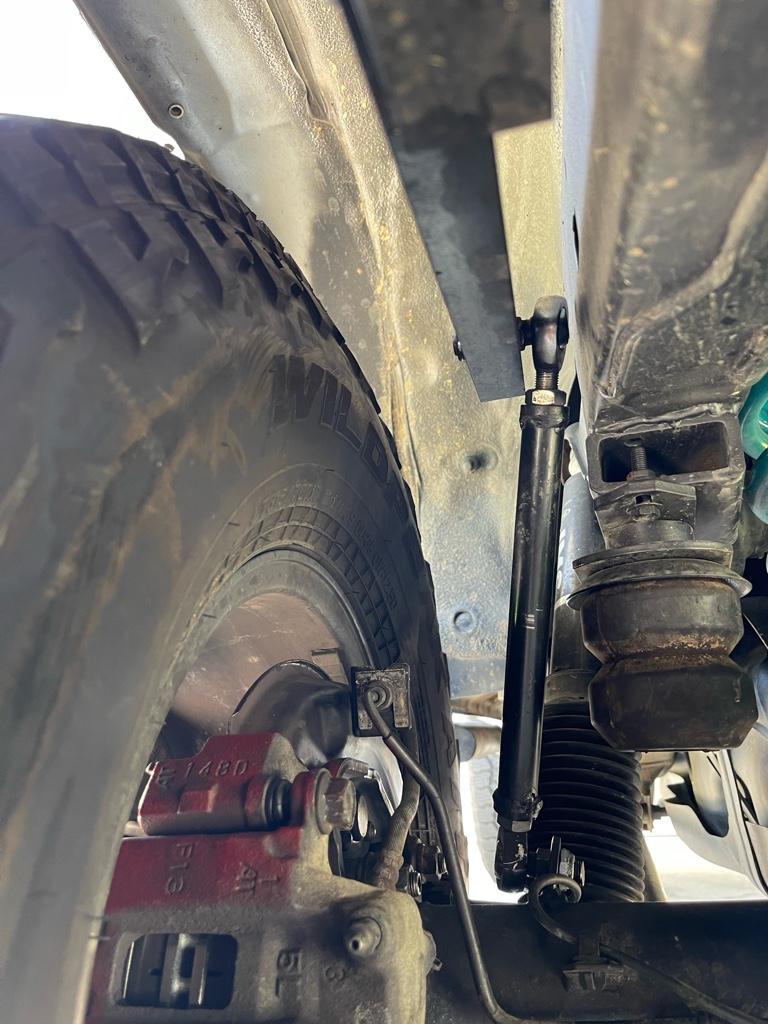
1. Snap ring/snap ring groove on the Nitro axle: I've been thinking about this for a couple of days now.. and I frankly don't know how I could possibly have pressed the bearing and retainer down any further... this had to be just a slight difference between a factory axle and the nitro axle replacement.. I bent the tool I bought to remove and install the bearings.. along with a a few other things I've tried. The 20 ton press was literally at a point where it was starting to twist under load and I couldn't pull down on the pump handle any more without bending it. Maybe some of the coating that is on the nitro axles made it a much tougher press fit, the studs certainly took a bit to press in, but I don't know. I would be VERY hardpressed (no pun intended) to believe that the retainer has any hope at all of moving, even with no snap ring in place, and with normal driving condition I just don't see how the retainer can unpress itself, the shaved down snap ring should be perfectly fine. I think I just needed to talk that through for my personal peace of mind, but I don't see anything backing off/breaking here lol.
2. removing factory bearings: This was a monster.. the tool allowed me to take off the retainer and most of the bearing with no issue at all. However, the front side of the bearing/race never came off the factory axle.. I don't know what it would take to get them off.. but luckily for me I just needed the backing plate. If you're reusing the axles, be prepared for some work (either additional pressing or cutting off very carefully). to be able to reuse.
3. Drum brake/parking brake assembly: I can't stress enough how easy this can actually be, at least for me.. I used 2 small zip ties to compress the springs and assemble the whole thing onto each pin and twist it into the locked position. I was then able to pretty easily, but carefully, slide the shoe slots where they needed to go and use a razor blade to cut the zipties. I put both sides completely together in literally less than 30 minutes. The hardest part was not having a decent pair of pliers to stretch the 2 larger springs back on. I still need to make an adjustment to the parking brake. I thought I had did a decent job, but it doesnt hold one bit lol. The adjustment hole is a bit small.. and the new rotors I have a mis-aligned just a bit vertically, so you really need to have a good feel, but it's definitely doable.
4. Rear Wheel Spacers: I want to get away from running a 2" spacer. As much as I love the spacers and feel comfortable running them when done correctly, 2" is just too much. The only reason they were there was to clear the TK1 racing links when the tire is aired down. Since I very rarely rock crawl at 18 psi it doesnt make sense to stress the system with larger spacers... in order to clear these what I did was flip the link mount at the arm itself towards the frame. This is not ideal since the arms now aren't 100% vertical and I cant flip the lower mount to the inside because then it hits my bump stops... but we'll see how it does. I noticed that my drivers side axle tab already bent inward from the previous trip so I may have to beef these up anyway.. At the same time too, having these links at an axle may actually be better for distributing the force as the axle articulates since it doesn't go straight up and down.. so who knows, may be this is actually better. I have a set of 1" spacers on the way and will swap them on tomorrow while also adjusting the parking brake.
5. Boot clamps on the CV axles: When I first got the RCV's I noticed a little burping from the outer boot due to not very tight factory clamps. I "upgraded" to a worm-gear type clamp to remedy the issue, but in the process ended up putting a tear in the boot. I then got a rounded-edge worm-gear clamp and ran that for a bit. When I lost my wheel and shaved down the lower control arm the replacement I got for some reason WOULD NOT clear the extra height of the worm-gear clamp... I tried shaving it down, but it would still rub. Long story short... I went back to a regular clamp-style band clamp and after packing in a bit more grease and clamping down on the new clamp I haven't had any issues... don't make more work for yourself.. just use a regular CV Boot clamp with a proper tool and you'll be ok... lol.
Last edited:
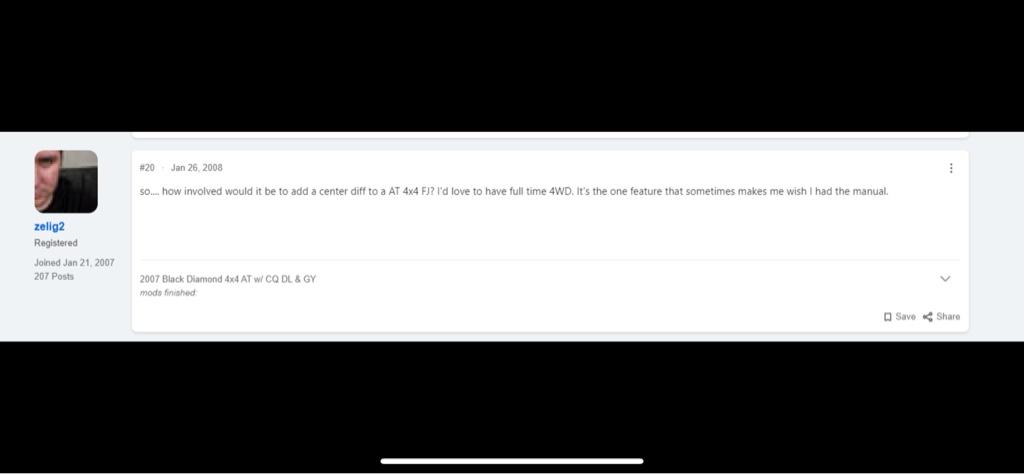
was browsing various forums at lunch and came across, what I found to be, a hilarious question asked years ago on the FJ cruiser forums regarding swapping a 4th gen tcase into the FJ.. oh boy how confused they would have been at that time to learn that we actually want THEIR transfer cases swapped into our rigs instead. lol.
Similar threads

- Replies
- 2
- Views
- 482


