aemravan's build thread - project TacoRunner

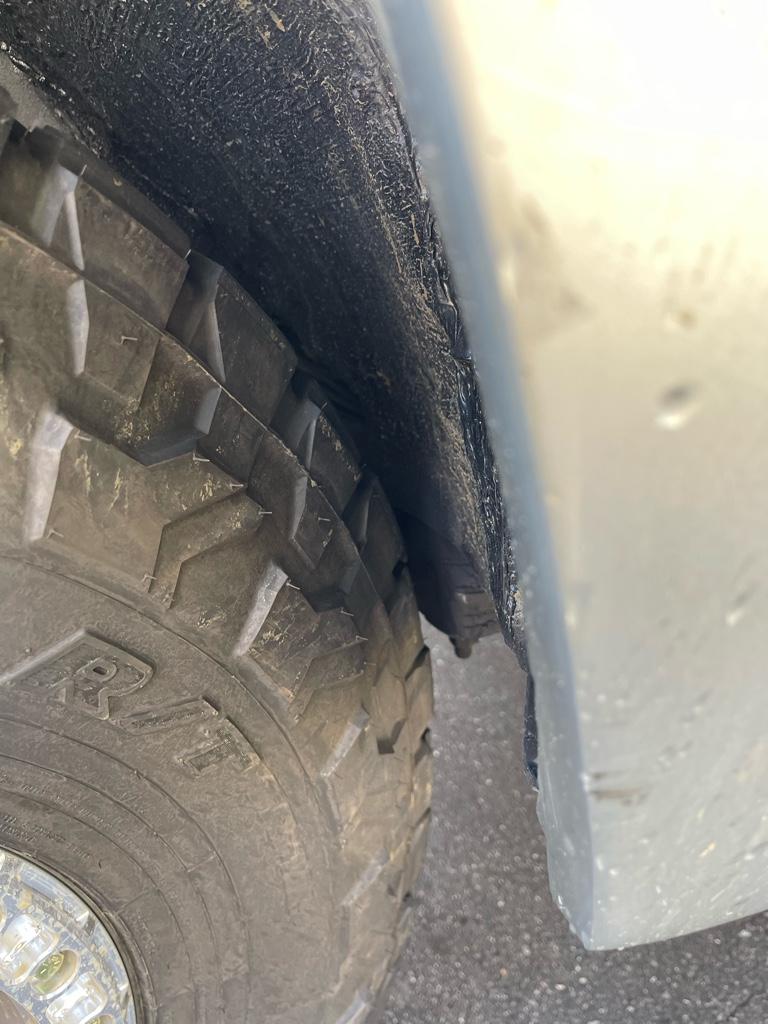
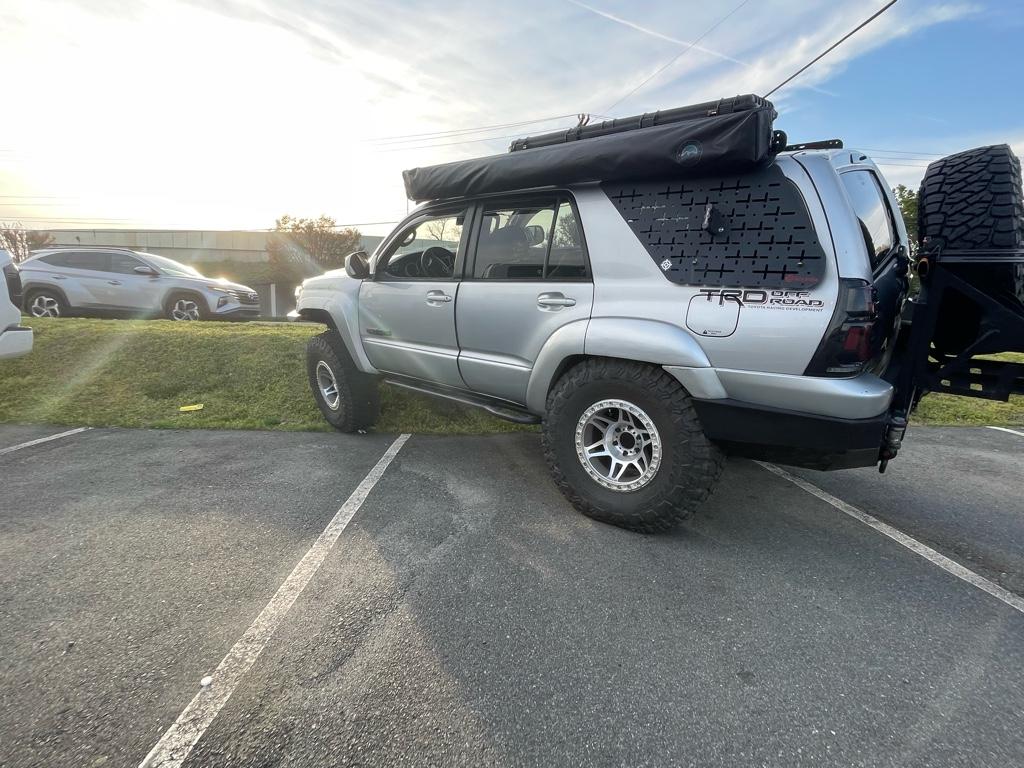
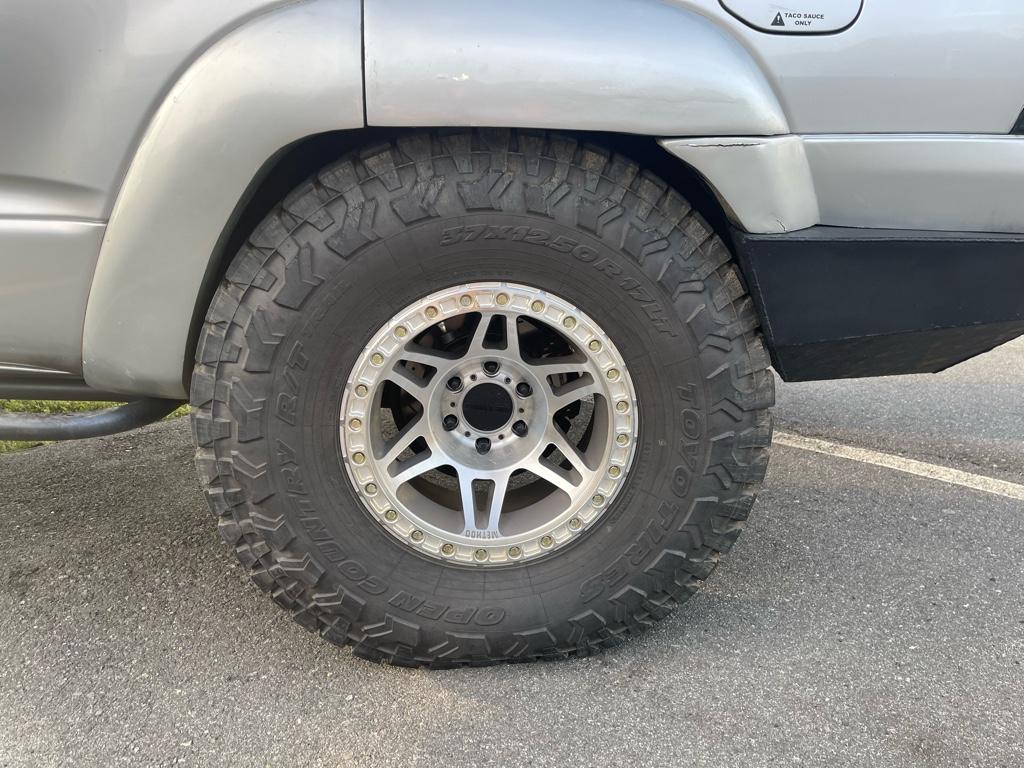
Breaking news .. I don’t fit 37s as well as I thought when the rig is in the ground :facepalm: lol.


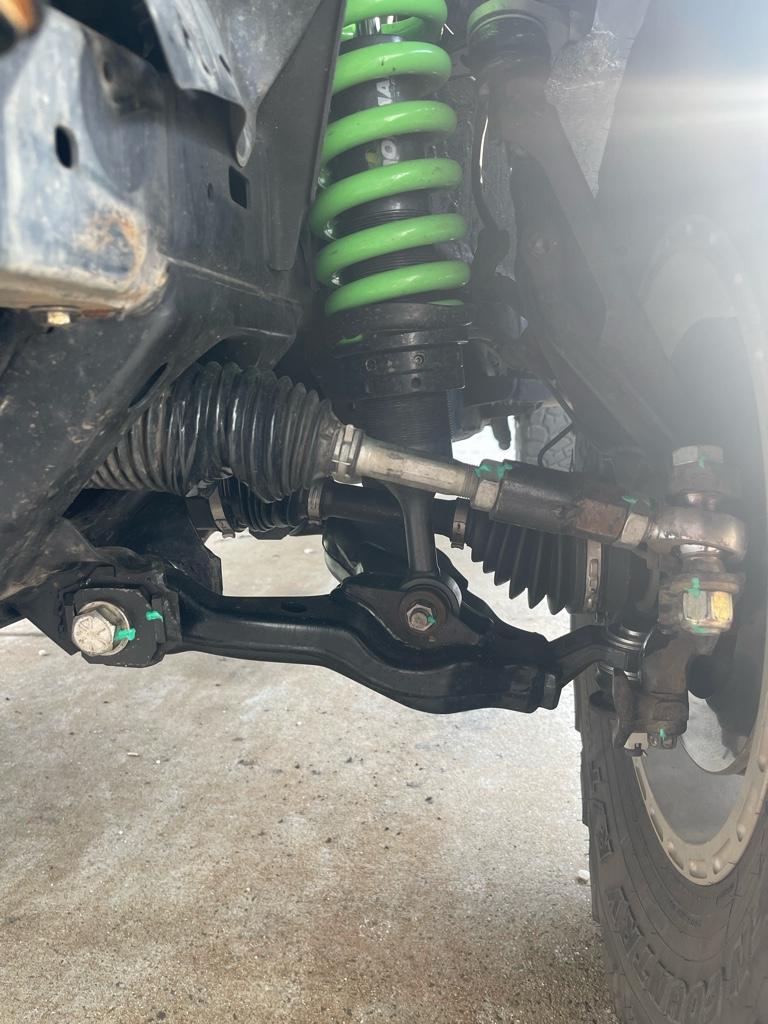
The lower lca bushing move, ALOT under load. Like when in reverse at full lock vs drive. In drive, I have almost a half inch clearance to the body mount .. in reverse .. it hits. Got it ground back a decent amount and everything was good. But then I decided to take a little camber out of the front so I’m not wearing the outside as much .. well .. moving the front setting over just one adjustment gets me the perfect camber I’m after .. butttt I’m back to hitting the mount. Fml. If I knew this .. I would have gone WAY more aggressive in the chop x but it cleared on the stands.. lesson learned .. I guess an option is to get an adjustable UCA that separates camber and caster .. but man.. I don’t know where it ends lol.

Almost ready to pull the trigger on the RCLTHD KIT and call it good lmao.


Sent from my iPhone using Tapatalk
 
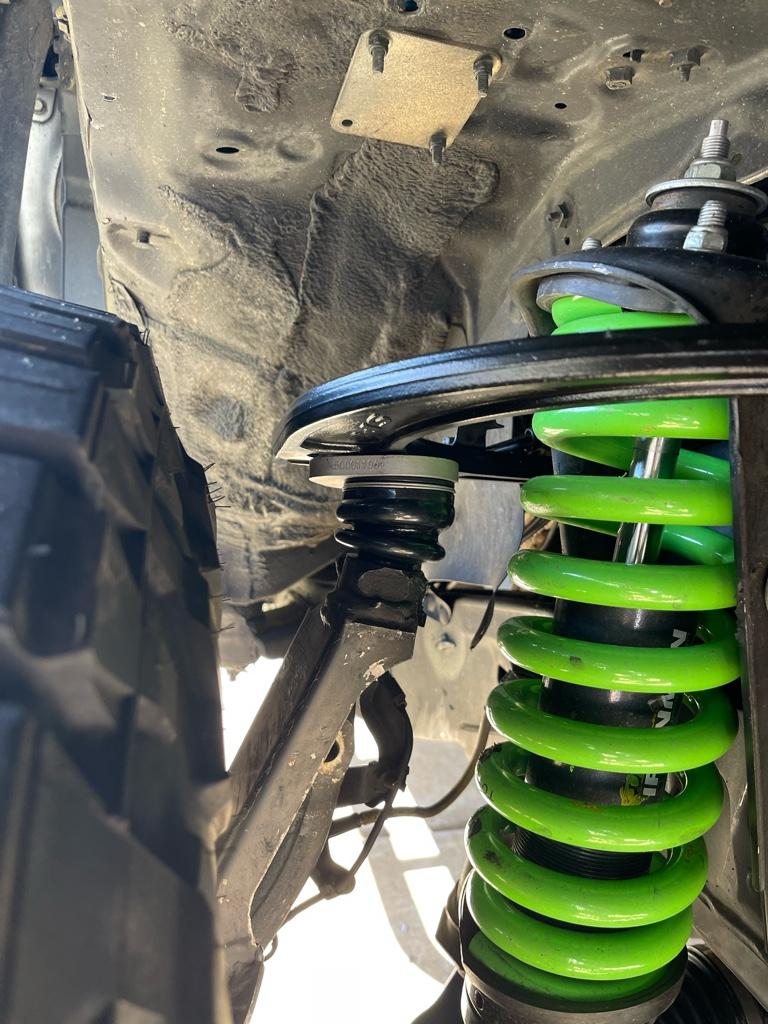
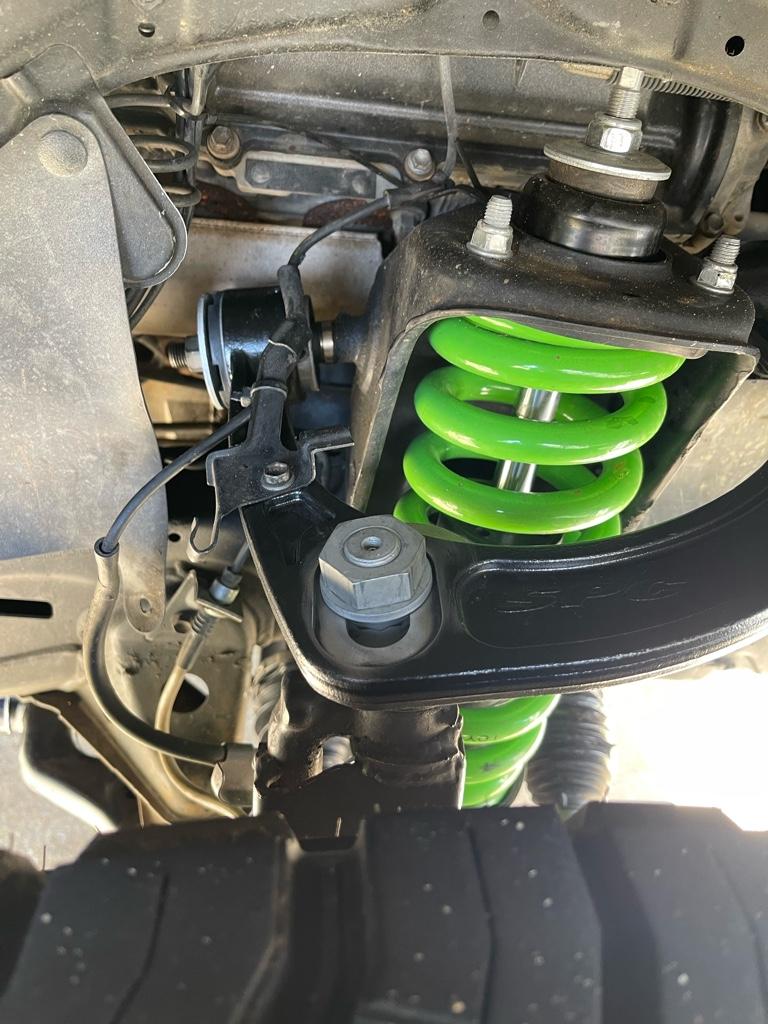
Problem solved (?) Went Google searching and found some SPC uca for $400 .. figured I could probably get half of that back in my jba arms.. from what I heard they can be bit and miss on how long they last .. but with everything else I’ve sunk into the build and swapped out .. what’s another set of arms ? lol

This will let me run camber adjustment independent of caster , and hopefully maximize distance away from the body mount .. I don’t know how much more cutting back I’m willing to do with it


Sent from my iPhone using Tapatalk
 
So.. I just found out about Super Pro offset LCA's... and in true to form fashion of the rest of the build found some for a decent price on ebay.. I had no idea these were even an option before.. and anything that will allow the tire to slide forward any is an absolute must-try for me right now :guitar3:

I'm still looking for exactly how much these LCA's move the wheel forward.. but apparently it is a sizable amount..

My only (partial) concern is that from what I gather, the cam bolt in these arms is larger than the factory one.. meaning that my current cam tab eliminator kit won't work with the these new arms.. not a HUGE deal.. I could just run the cambolt that comes with the kit.. or just look into getting 4 larger diameter bolts to swap out and drill the plates to accept them.. I guess time will tell. But if everything goes to plan.. I 'll have dialed in camber via the SPC UCA (which apparently will either last 50-80k miles , or I'll be swapping bushings and balljionts every oil change :thumb3:) , get some caster back AND have the wheel pushed forward enough to clear the current configuration of the body mount :amen:
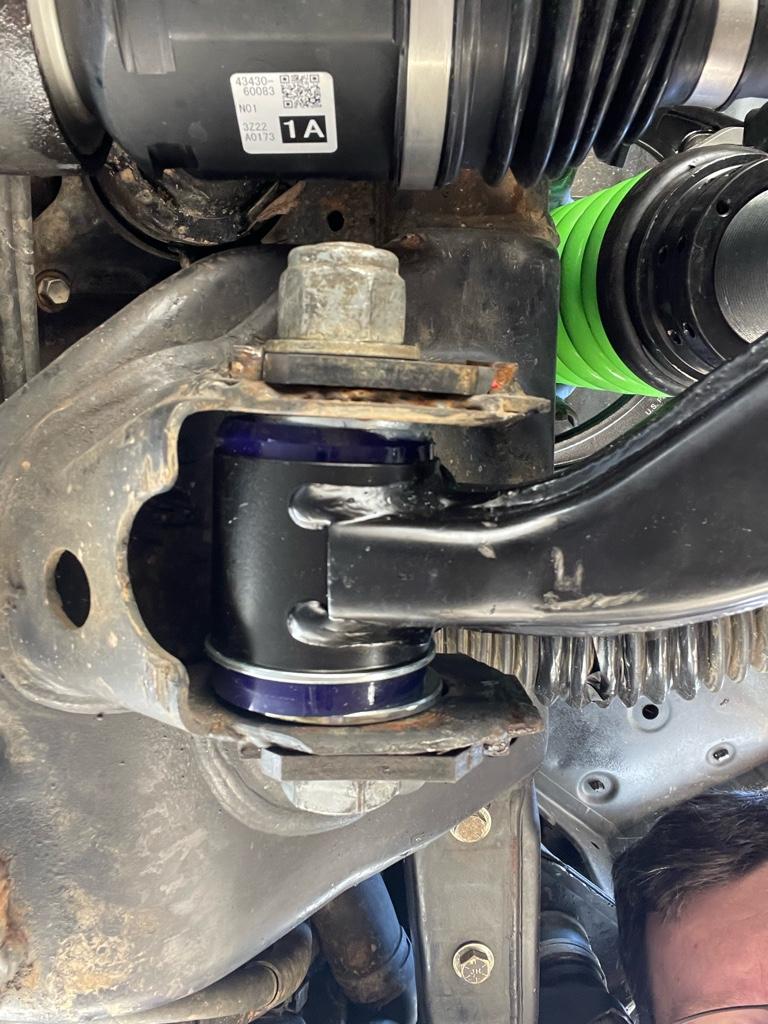
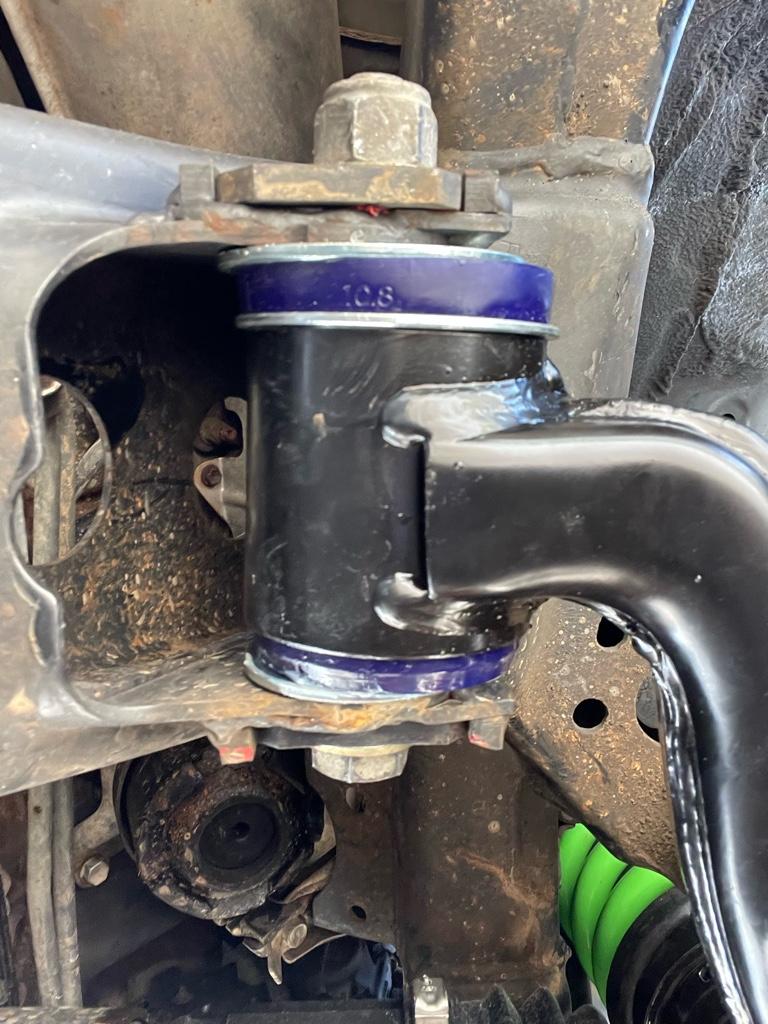
 
SPC UCA's delivered fast as all, as did the double-offset SuperPro LCA.

Both are installed as of yesterday. I must say.. initial thoughts on both is pretty impressive. Whether the SPC balljoint/bushings last is one thing.. I did just find out they have several options for replacements depending on who you bought them from..


1). if you bought from an "authorized dealer" they will warranty the arms

2) buy new arms at $695, and return yours in their place for a $445.95 refund (for $250 this really isn't a terrible deal if all you're doing is swapping out the arms .. )

3) buy and replace your own xaxis bushing (this is $189.. which again, makes option 2 above sound VERY impressive considering you don't do any work yourself and also get new balljoints.. )


The adjustability of the UCA is pretty fantastic.. I corrected quite a bit of positive camber with it. It's nice to have some-what independent adjustments, though you're still partially linked to having caster/camber be related because of how the ball-joint spins for adjustment.


The double-offset LCA's from SuperPro are also pretty damn fantastic.. the offset bushings put a starting point of the rear mount being pushed out and front mount being pushed in, before you even make the adjustment. I didn't have time to measure the physical dispalcement between factory and these arms... but with the combination of the UCA set on the D setting, I now have an added 3/4-1" of clearance to the body mount .. which is pretty wild.


We're trying to throw it on the alignment rack in the next 3 days and dial it in.. but depending on where my caster lands on the current setting, I might even go up some because I feel like I have room to spare for clearance.


Oh, and my concerns with not being able to fit the cam tab delete kit were invalid. The bolts and tabs worked out JUST fine. I actually couldn't use the cam bolt that came with the kit because aparently I welded my cam tabs from Total Chaos a bit too tight and the super pro cam did not fit in between without modifying it. I decided to just use my delete kit instead since I'm looking to max out the setting and let it be.

119e873a96f09c741c72118e23e2dc9a.jpg

42419107cbf5d3db309c2a5535df07a0.jpg

00a2686b126a504586bb04a436d87a60.jpg

c03d4422c1f7abadd4bb0c7b05aae07e.jpg

fda89bb37de8e6e69fb8ca87e519a505.jpg
 
Last edited:
Quick update: Been putting a few street miles on this re-worked setup, and thus far I think I got everything where I need it. Haven't had a chance to get this in for an alignment until my brother gets back from his trip for next week, but my driveway alignment seems to be working well.

The caster setting I currently have feels WAY better than it did with the factory UCA's. A part of this is the SPC adjustment, but also moving the LCA with the double-offset helped a ton. I'm thinking I might even be able to pull a bit of caster out depending on what the numbers read, but so far, I haven't had any contact to the body mount yet.

Now that it's all settled, even the camber is still looking groovy :fro: Might need to add a bit of positive camber to get it 100% flat, but my driveway setup with an angle finder seems to still be reading exactly (or close to) as the rear wheels.

Worked on a backyard project that required quite a few paver stones, loaded up ~1000lbs into the back and happy to report that it rode level as well with no squat/chirping front tires still. Actually felt REALLY good to preload the rear springs. Rode like a damn lexus~ :llama:


The coolant leak seems to be resolved.. so my only leaky situation now are the axle seals at the front diff, and the rear main oil seal that weeps a bit here and there. Both will remain untouched for a while. The arm style drop backet kit I ordered will need a little modification to make work on the passenger side.. after a quick test fit I realized it's meant to mount front AND rear to the sub frame.. well, we dont have a rear mount point. I'll leave this for a later project that will likely go hand in hand with recessing the LC200 rack lower in the cross member, as well as dropping the rear diff mount an inch or so. Until then, i'll get it aligned and see how she does on our Solar Eclipse road trip to Arkansas! :party:
 
When I put my SPC's on I had a copy of my last alignment and went from there. Did my own toe and camber adjust and set the SPC at first + additional caster and it drives great and tires are wearing very evenly, not gone for a "professional" alignment as I don't think nece$$ary. Been two years or so. Also, I installed the alignment cam adjust delete kit set to the center position.
 
When I put my SPC's on I had a copy of my last alignment and went from there. Did my own toe and camber adjust and set the SPC at first + additional caster and it drives great and tires are wearing very evenly, not gone for a "professional" alignment as I don't think nece$$ary. Been two years or so. Also, I installed the alignment cam adjust delete kit set to the center position.

I feel like I got it pretty damn close for Toe adjustment.. My alignments are free via my brother at the body shop when their rack is empty so it won't hurt to get an idea of what my caster is. I might even pull some caster out of it since I'm using the super pro double offset LCA's and I'm running my cam tab delete kit at max forward setup as well lol. I think I have QUITE a bit of caster, even with the first setting lol

I will say.. since the whole SPC thing seems to be split 50/50 between them lasting 30-50K miles or failing between 3-7k I went ahead and ordered a replacement set of ball joints to throw into my gear case... they are stupid easy to replacing (relatively speaking) and for $150 I feel like it on the cheaper side of added protection when I'm 14 hours away from home next month lol.
 
Last edited:
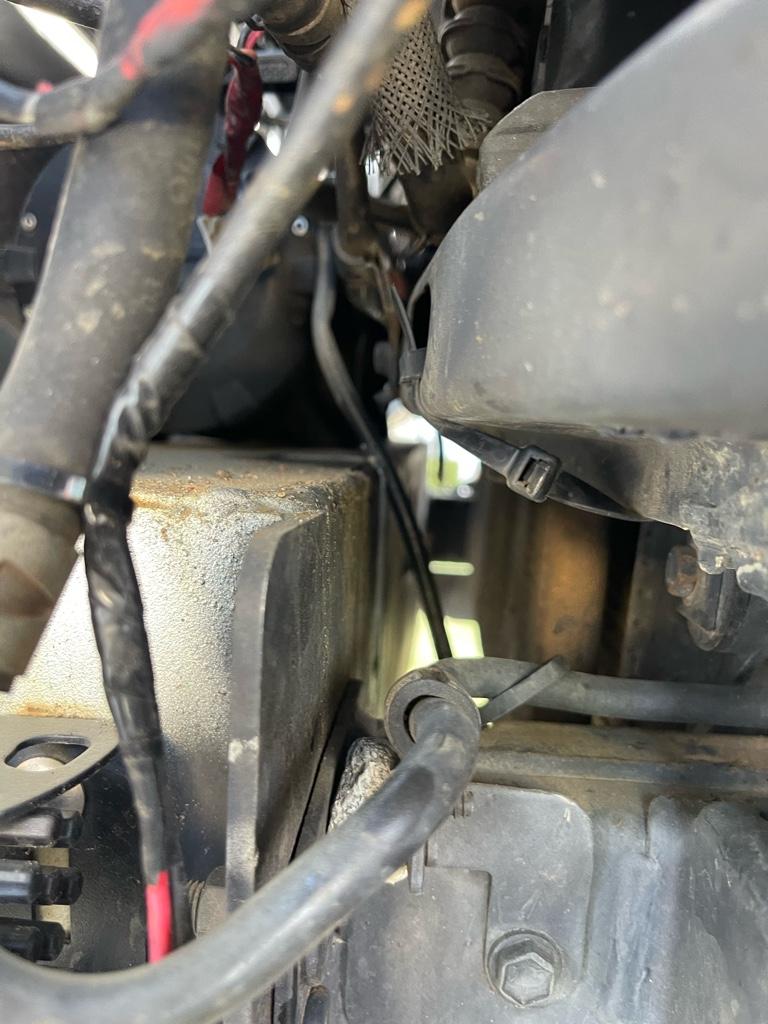
Might have spoken too soon on the coolant fix.. everything’s been bone dry for a week. Pulling back up to the house today spotted some fluid in the driveway.. can’t for the life of me figure out where it’s coming from .. dead smack in the center. Only trace is on a small harness by the crank pulley.. smallest of drips. All else is bone dry with no signs of coolant running. Gonna have to keep an eye on this over the weekend, running out of time to fix stuff before our long trip. Doh!

I did have a messed up factory cap that broke apart when I took it off to refill (with the spring and tip falling into the radiator). I replaced it with an aftermarket bran.. I bought an oem one to replace, but finding it hard to believe it’s cap related.


Sent from my iPhone using Tapatalk
 
Overnight with carboard under the car is 100% dry.. still stumped :noidea:
But I made a 1.5 hour round trip to the airport to pickup my brother and his wife, temps are 100% solid, no visible leaks, no coolant smell, etc. OEM radiator cap is on the way.. it's the only net change in the system..

My overflow reservoir tank is definitely lower than it was when I topped it off, but probably very close to the estimated amount that was in the driveway... plus I should probably more properly burp the system again.. I don't know if I ran it long/hot enough to fully purge.. maybe an air bubble made it's way up and out after I parked :noidea:
 
Finally had a chance to get an alignment. Looks like my driveway alignment was pretty much dead on, pretty stoked about that. Had to do a minor toe adjustment and a little camber on passenger side.

Casted ended up at 3.8 degrees. Have plenty of adjustment for it, but it drives great and I went for added clearance to firewall instead. We’ll see how these spcs hold up.

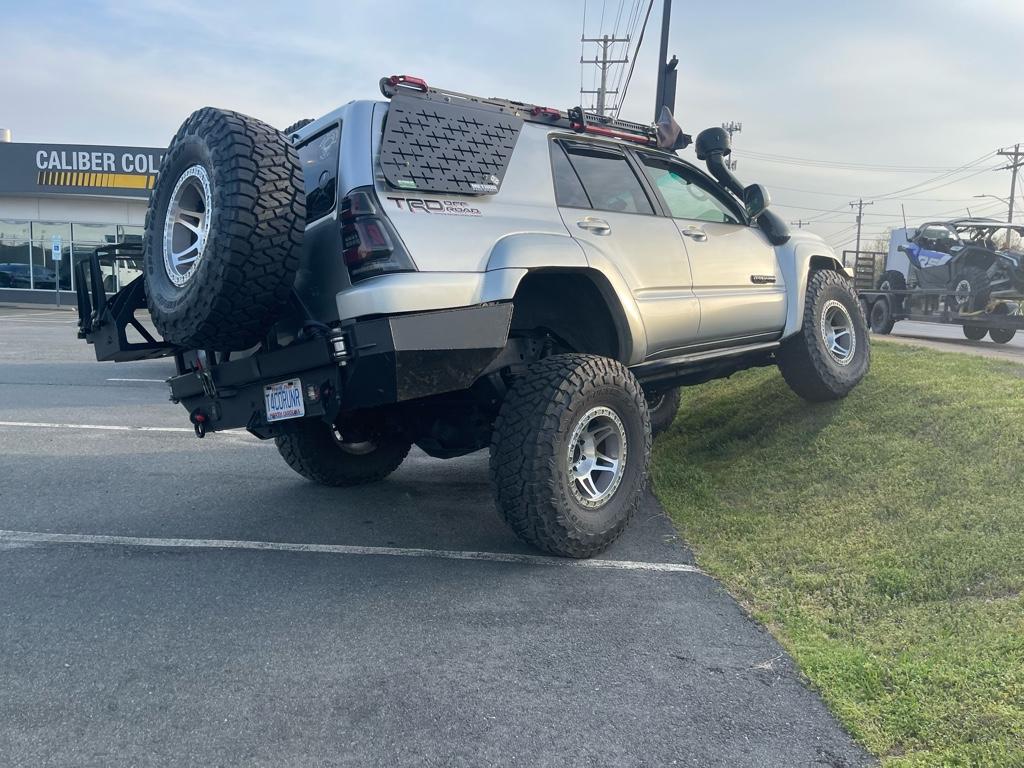
Did a little flex test and man talk about stuffing the 37!

Kissing the rear bumper and flare above but nothing that needs to be addressed. The spring in this pic was loose-ish. Not popping out, but still worthwhile throwing limit straps on just in case since the shock had plenty more down travel to go.

a6924699ef0321507d787c0a0f43f90f.jpg

99ff954476965d3a60b6099f0c4a91b0.jpg

1ef7132bea7e19154783bbb818c68f2d.jpg


Sent from my iPhone using Tapatalk
 
Overnight with carboard under the car is 100% dry.. still stumped :noidea:
But I made a 1.5 hour round trip to the airport to pickup my brother and his wife, temps are 100% solid, no visible leaks, no coolant smell, etc. OEM radiator cap is on the way.. it's the only net change in the system..

My overflow reservoir tank is definitely lower than it was when I topped it off, but probably very close to the estimated amount that was in the driveway... plus I should probably more properly burp the system again.. I don't know if I ran it long/hot enough to fully purge.. maybe an air bubble made it's way up and out after I parked :noidea:

IMO if you drive long enough for the thermostat to fully open you have purged your cooling system of air. A 1.5 hour round trip definitely did that.
 
Still had a minor leak since the 1.5 hour round trip unfortunately..

So decided to put it up on ramps and really run it through a purge .. ran it for a while at varying engine speed up to 4k rpm and I must say I felt like I got quite a bit of air out of the system. I should mention I neglected to put on the heat last time I did it .. this was full blast heat to fill up the heater core.

I watched quite a bit of air come out. Watched the coolant rise and drop a number of times. When I felt like it finally stopped, I topped it off and let it be. So far it’s been 3 days and seems to be happy for the time being .. I also did a pressure test on the system to make sure there were no apparent leaks, everything stayed put at 10psi without dropping of developing leaks .. so unless it comes back .. I’ll just have to attribute this to some freak air burp from somewhere near the rear of the engine :shrug:


Sent from my iPhone using Tapatalk
 
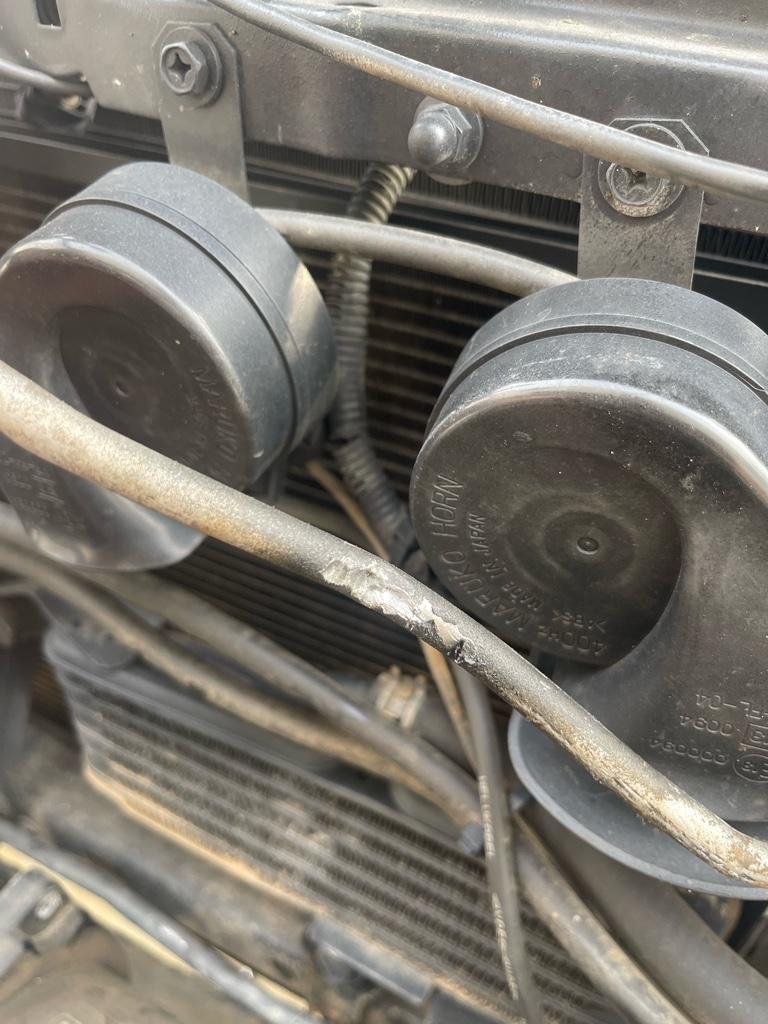
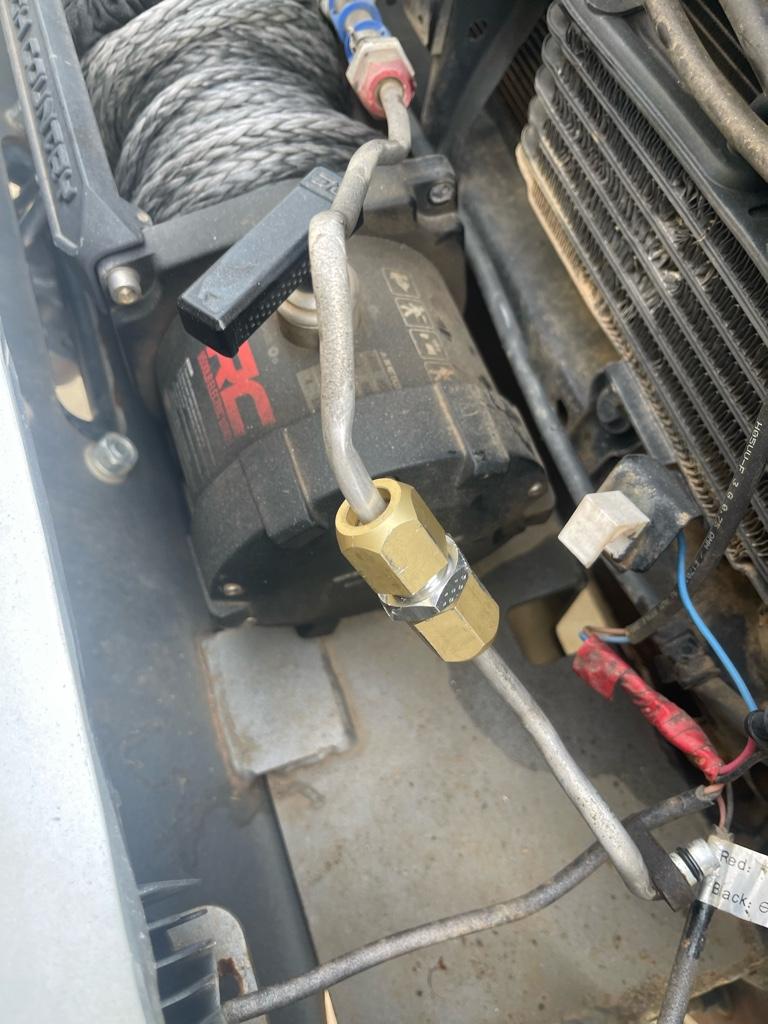
Better this weekend than in the 1300mile drive next weekend I guess.. came out from dinner last night to a nice little puddle under the front end .. come to find out my AC line was barely rubbing on the bumper edge and finally rubbed through .. :faceplam:

Got a couple of patch kits on the way from Amazon tomorrow .. even if I wanted to spend the $200 on an oem line it won’t get here in time .. hopefully it holds.. would be nice to have AC now that’s it’s getting 80+ out lol.

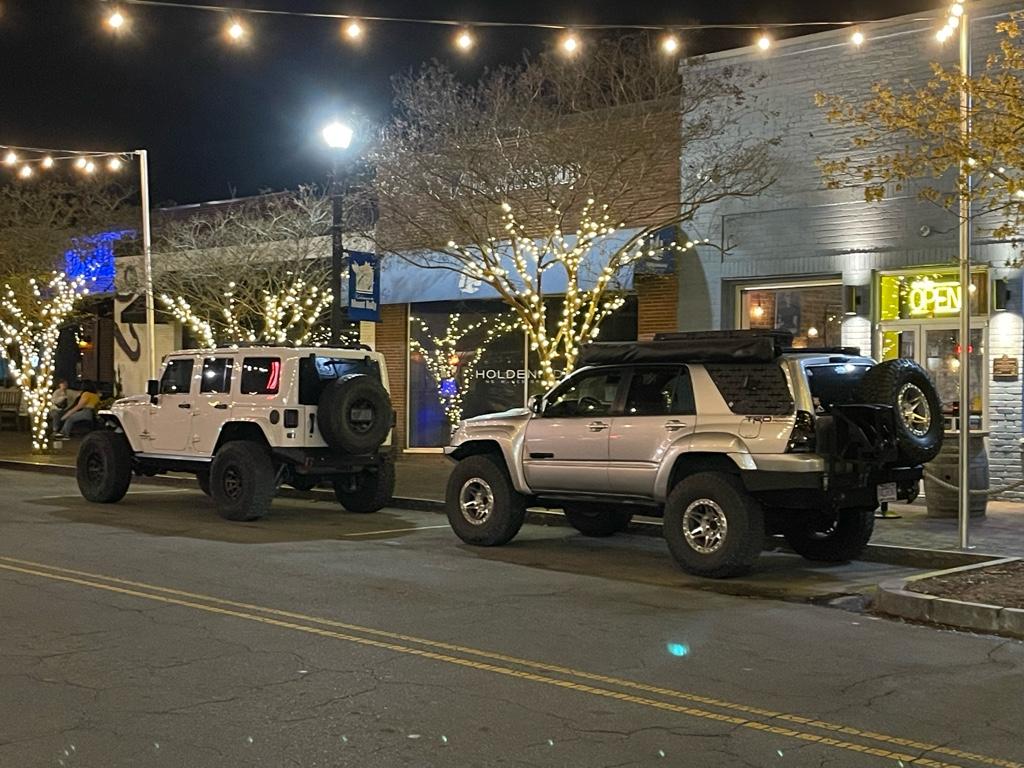
On the bright side, the street parking pics came out pretty sweet. Brothers jeep is on 37s as welll, finally nice not to look tiny when out with him lol.
e3101c198eff9aef25b1ddc1745103f5.jpg


0b867d56b6b12b3057a7fa0cffedb740.jpg


Sent from my iPhone using Tapatalk
 
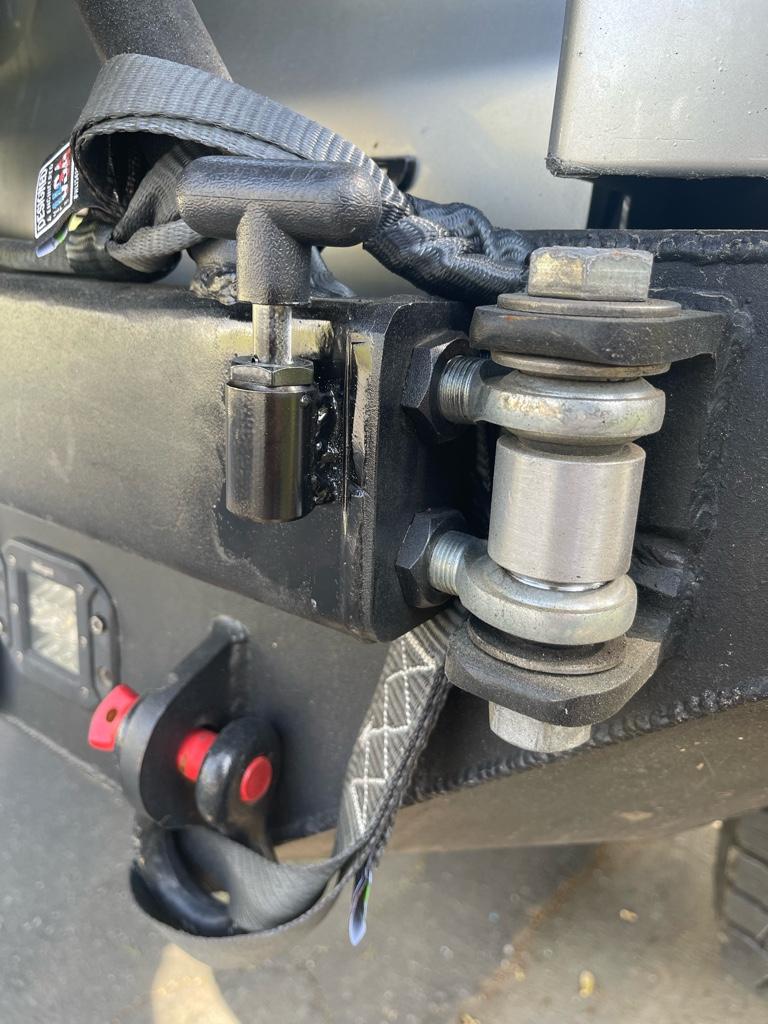
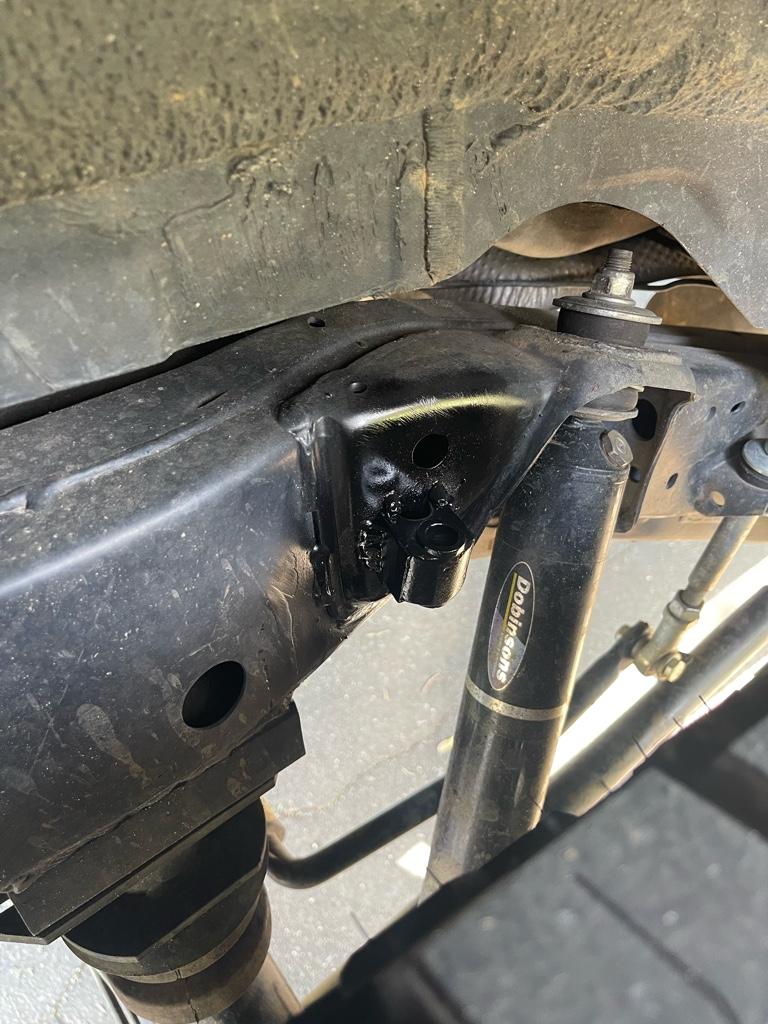
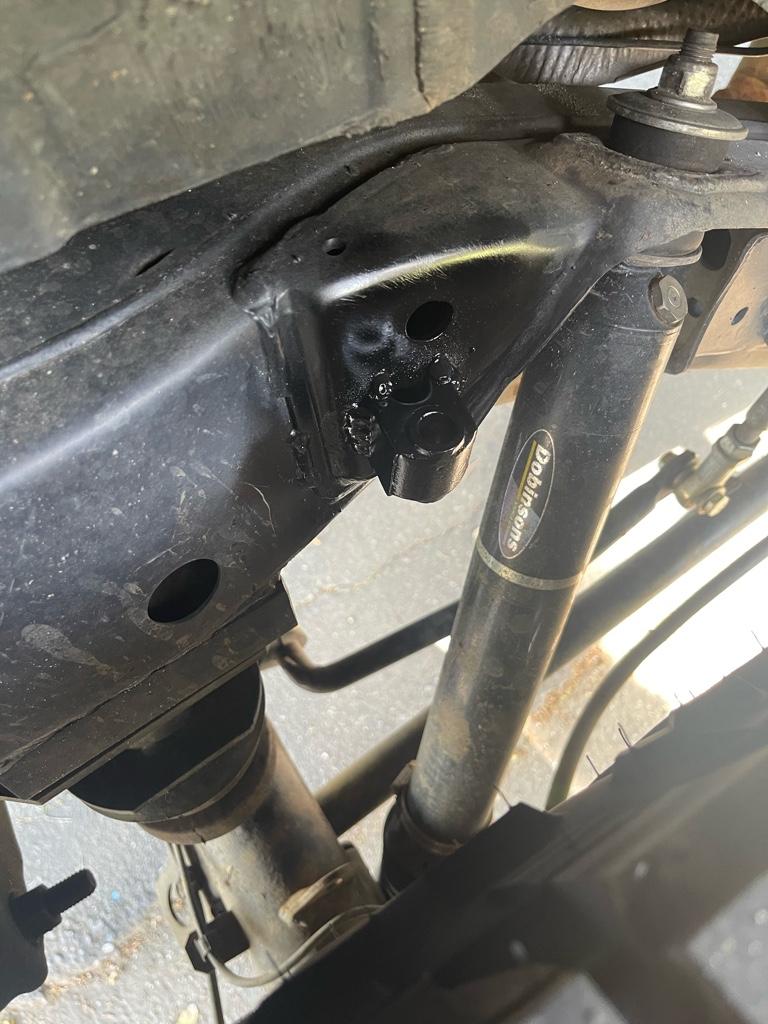
Took a few minutes yesterday to weld on some remaining pieces.

The swing out lockout pin is on, this was a must for the coming up trip since I tension the awning against it. But I also got the limit strap brackets on the frame. Won’t need to run limit straps for the on road trips, but want to finalize the measurements and get straps on order just as some insurance to not drop a spring out on the trail ..these will connect to my old TK1racing sway bar brackets on the axle.

eca5611ab42651844caaf8d80cab5705.jpg

f8556ebcb39de2ea9096f3847b09a303.jpg

020984928e4ee1baf26899763dfb0e1a.jpg


I got quite a hefty checklist together of things i need to go over before we hit the road early Friday. #1 is to try and patch the AC line with couple of kits I got from amazon. Hopefully it holds decent enough to at least have some cool air. I don't have a vacuum kit to properly fill the system, but I'm hoping I can get enough it to run the compressor with no damage.

In a very close second (probably should be first? lol) is going over all my nuts and bolts to make sure everything is torqued, and then marked with some torque paste for quick visual inspection. I'm SUPER paranoid about taking this Frankenstein of a build so far away from home (particularly because my wife and dogs are with me, wouldn't be as much of an issue if it was just me) so I'm doing everything I can to have some confidence before we head out. Brining all the spare parts I can gather (really just front wheel bearings, extra fluids, extra drive belt, etc), making sure everything is topped off the best I can and see what happens.. This is REALLY making me look forward to possibly picking up the new Landcruiser as a family travel rig in a couple of years for the trips that don't require any sort of extreme offroad capabilities lol.


Sent from my iPhone using Tapatalk
 
Last edited:
Let’s see if this patch works ..
Also wen through all of the bolts I could think off, checked torque and marked, green to match the new springs lol

bbbb6652986126e549aa88045eacd5f1.jpg

578f4c874e3477e1d3274a22baee0d4a.jpg

f6ca8597250431276b61310c6599df20.jpg


Sent from my iPhone using Tapatalk
 
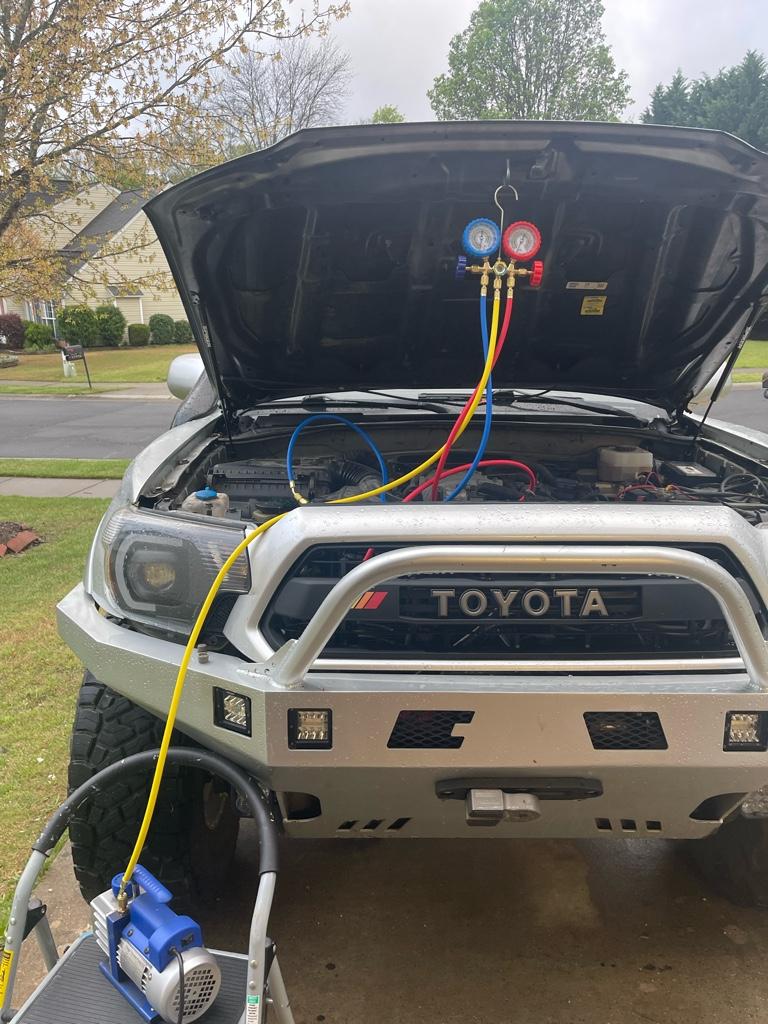
YouTube certified AC fill tech now lol

30 mins in vacuum still holding .. seems promising. I didn’t get any compressor oil to fill since I imagine all or most of it should still be in the system and did not evacuate during the leak .. hopefully I’m right :shrug:

Giving this another 30 mins, pulling vacuum for 45 more and then filling with some R34. Don’t need it ice cold .. but some cool air would be welcomed.

90fd6653a8aa83edafecbef31cc952f9.jpg


Sent from my iPhone using Tapatalk
 
well, vacuum held without moving a smidge.. so leads me to believe the leak is not there (at least for now). Held for over an hour.
Pulled some additional vacuum for almost an hour after before filling it up.
The kit I got from amazon ended up sort of janky.. struggled with getting the bottles to want to feed, and there was no purge valve to get rid of air in the line.. not sure if it's an issue or not.. but it took just about 2 full cans that I read it needed.. :shrug:

was reading pressures on the low pressure side of around 35-45 depending on whether the compressor was cycling, and the high side was somewhere around 130-160. For some reason I thought it should be higher.. but maybe i'm wrong.

Never paid attention before to know for sure.. but I have a feeling the compressor is cycling on and off too often. Seems to come on and stay on for about 7-8 seconds, and turn off for about 7-10 seconds and repeat. Air is blowing cold, or at least as cold as it did before.. doing some digging to see if this is a normal/expected behavior, or if maybe I have too much or too little in the system.. :shrug:
 
just stumbled across why I struggled to get the R134a to fill.. my adapter kit is for the puncture style cans... not the self sealing ones that I have.. :doh:

there's a good chance that in my attempts to get it to flow I got some air in the system.. my manifold gauge set didn't have a purge valve, and I definitely didn't unscrew the line to purge the air before it got going so I'm thinking the pressures I'm seeing are very likely caused by some air in the system :shrug:

If I have time, I might give it another go tomorrow.. it does blow decently cold, but I also don't want to overwork my compressor clutch with it kicking off every 10 seconds while we spend 13 hours on the road. :behindsofa:
 
replacement adapter for self sealing cans is here and everything goes together like it should. Double-checked the system for leaks one more time, held nice and steady at 30mmHg for over an hour, safe to say it's pretty solid.

Though it would be my luck that our temps today have plummeted to high 40's low 50's... quickly discovered its not best practice or recommended to fill the system below 55... now I'm sitting on pins and needles waiting for 3 p.m. when we should be around 60F. Still 5degrees lower than the pressure chart for R134a low/high pressures reads.. but I feel comfortable enough extrapolating where it should be pressure wise... fingers crossed this works lol.

Had a couple of guys in a FB group confirm that they are seeing similar cycle on/off times on their compressors without known issues... so maybe I'm overthinking this.. but should be easy enough to redo just for peace of mind.
 
replacement adapter for self sealing cans is here and everything goes together like it should. Double-checked the system for leaks one more time, held nice and steady at 30mmHg for over an hour, safe to say it's pretty solid.

Though it would be my luck that our temps today have plummeted to high 40's low 50's... quickly discovered its not best practice or recommended to fill the system below 55... now I'm sitting on pins and needles waiting for 3 p.m. when we should be around 60F. Still 5degrees lower than the pressure chart for R134a low/high pressures reads.. but I feel comfortable enough extrapolating where it should be pressure wise... fingers crossed this works lol.

Had a couple of guys in a FB group confirm that they are seeing similar cycle on/off times on their compressors without known issues... so maybe I'm overthinking this.. but should be easy enough to redo just for peace of mind.

Hey man! I live right around the corner from you and I'm one of those on the FB groups that have talked about our AC systems a few times. I do get extended cycle times compared to other vehicle's I've owned. The cycle times you were seeing are pretty similar to what I've seen. It corresponds to a 5-8 degree temp fluctuation in vent temps. I've got a new compressor, evaporator coil, and expansion valve and it still does it.
 

Members online

Forum statistics

Threads
278,312
Messages
3,554,083
Members
248,016
Latest member
Advally Service

Trending content

Back
Top