Black-N-Blue (build thread)

MAF Calibrator or AFR Calibrator? Notice any power difference? Worth the money to do it?


Sent from my iPhone using Tapatalk

It is the MAF calibrator.
Have had the K&N 63 style intake on for a few years, just recently read about these MAF being needed to optimize the K&N, thought I would try it.
Not much time with it yet but it removed the 'warble' at high speed/full throttle over 60mph.
Seems like it shifts smoother, feels faster, pulls better at high speed.
Gives a way to modify the ECU with software for future modifications.

Seems worth it to me, but only had it for maybe 2 weeks.
 
It is the MAF calibrator.

Have had the K&N 63 style intake on for a few years, just recently read about these MAF being needed to optimize the K&N, thought I would try it.

Not much time with it yet but it removed the 'warble' at high speed/full throttle over 60mph.

Seems like it shifts smoother, feels faster, pulls better at high speed.

Gives a way to modify the ECU with software for future modifications.


Seems worth it to me, but only had it for maybe 2 weeks.


Might look into it. I'm planning on getting the 63 series K&N soon so might be worth it for me


Sent from my iPhone using Tapatalk
 
More air.
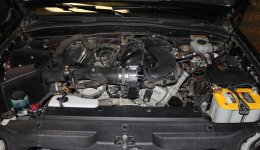
2014 T4R 10k miles, 70mm throttle body and a URD 70mm adapter.
car-part.com
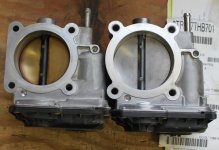
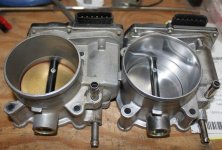
2004 TB is 65mm (63mm at smallest)...was way dirty, like oil blow back from the intake manifold.
The K&N is 68mm tube, the 70mm TB is actually 68mm at its smallest diameter and the URD 70mm spacer is 68mm.
 

Attachments

  • 65mm 70mm tb.jpg
    65mm 70mm tb.jpg
    61.9 KB · Views: 1,019
  • 65mm 70mm TH.jpg
    65mm 70mm TH.jpg
    72.8 KB · Views: 1,061
  • 70mm TB URD adapter.jpg
    70mm TB URD adapter.jpg
    73.7 KB · Views: 983
Seems like I always see some one asking about the 'Nanny' kill switch.

I was getting it a lot last fall, that nanny, finally got fed up with it and did that hack floating around on the forum.

This is a V6/2004.

Works great for some extra wheel spin.
Have used it in 2wd and 4x4...but not center locked. edit, works with center lock too.

Pics are worth a thousand words.
The under hood splice, Red wire.
Switch is backwards, now that I look at the pics. Should be 'ON' for fun.
And the dash lights in action.


You should do a more detailed write up on this
 
You should do a more detailed write up on this

There is a lot of info about this VSC trac disable here.
Not all T4Rs are the same.
Different ways to go about the 'nanny kill'.

I just went the easy route (for a 2004/V6) and cut the red wire on the brake master cylinder, top plug with a red, black and white wire. Then ran 2 wires from the dash (on/off switch) to the master cylinder and spliced in to the cut red wire. WhaLa no more Nanny!

Some reading for you.

Disable VSC, TRAC, and ABS without damaging factory wiring - Toyota 4Runner Forum - Largest 4Runner Forum

VSC Off, ATRAC On Mod complete! - Toyota 4Runner Forum - Largest 4Runner Forum

Happy to answer any questions if I can, I spend way too much time reading about all the great stuff everyone is doing to their runners...a person cant help but want to mod something. Right?
 
Last edited:
Very nice build, first time I've seen it. Keep up the good work!

Interested in more details for the TB and spacer

Thanks
Was just looking for a little bit more power.
The URD 'spacer' is an ADAPTER to fit the 70mm.

gm350reratliff pointed me towards a HUGE long thread on TW by torspd, kudos to both, after some reading over there I had more ideas...:rolleyes:.
https://www.tacomaworld.com/threads/torspd-nevr.203482/

I did the K&N filtercharger 5 years ago and later I read about how many feel its some sort of scam and you actually loose HP and it makes your MAF sensor dirty.

My MAF sensor was perfectly clean with just a TINY bit of dust in the tube inside. The worst part I can see is the oil blow back that is occurring from the PCV valve letting oil into the intake manifold and mucking up the TB and the Intake manifold...nasty messy, burnt oil.
Even the 2014 TB had some at 10k. I did polish and "knife edge" the 70mm TB.
Next mod is the oil catch can to keep all that crap out of the intake.

Then after more reading I see that to get any benefit you need to retune the ECU, thus I installed the URD MAF calibrator.

Then reading a bit more I see that these early runners have a smaller TB than the current T4R offering. So I thought I would see if a 70mm can stuff more air in the V6. The V8 is 76mm BTW.

With the K&N 63, the URD MAF calibrator, the 70mm TB, URD 70mm TB adapter and the Magnaflow cat-back it feels faster. Throttle feels quicker and it seems to run better.
We have had snow and ice for the last week so I haven't got out and really wailed on it yet, but so far I like it better. The K&N by itself just made it louder but all combined it is an improvement in my book.

However its at $1065 so far for maybe 10-20HP if I am lucky, so hard to say if its really worth it.
EDIT--My Scanguage2 had it at 230hp, prior to any mods and with K&N63. Now its has seen 272hp! (13MPG...ouch) Maybe a little more worth it?

Headers and a Y-pipe for the last little bit of power would complete system.

I grew up riding dirtbikes the frist thing you did was put a loud pipe on it and change out the air filter, I guess that mentality is still with me.:der:
 
Last edited:
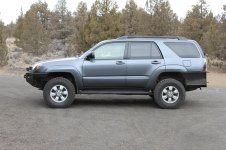
265/75/16
Great tires.
I had to do a little trimming on the front after the 285's.

Ooo. Yeah i had duratrac on my crv and they were reaaly great tires. Just sucks they dont come 255/80 size i might end up switching my 285 for something thinner to save on gas money. Currently am getting 14 mpg and am not armored up like you only have sliders. You did almost all the power mods i though about doing. You think your going to do the intake manifold spacer?
 
Last edited:
Got the RCI skids installed and was noticing how the sliders are already sandblasted to bare metal in a few spots due to the cinders on the road, may need to bedliner them or powdercoat at some point. Or put mud flaps on the front. Starting to regret that I didn't get the skids powdercoated. May turn into a yearly maintenance thing...hit it with some rattle can bed liner, WAY better!

I hit 295HP on the ScanGauge2, mentioned it on another thread and was kindly informed that I was full of :toilet3:
...So I guess I cant really say what the improvement HP gain actually is with the mods I have done without an actual dyno test.
All I can actually say is it is faster and it eats more gas than it did. Edit, Seems to have stabilized at 14.5 MPG, tires may throw it off a little.
Total weight full gas tank, full steel skids no gear and no winch 5100 LBS.

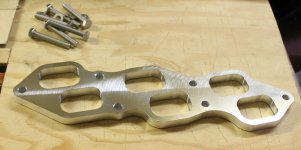
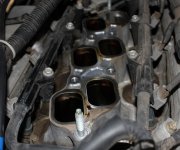
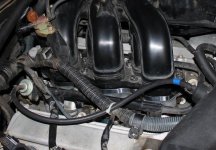
XTP intake manifold spacer installed, so far so good.
The intake manifold was not nearly as oil/dirty as I thought it would be considering how dirty the throttle body was.
The intake ports on the motor were all fairly dirty except the #6.
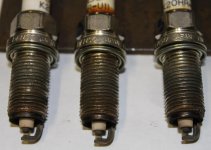
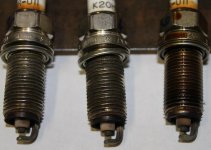
Changed the spark plugs and the #6 was a little darker and had oil on it. The others had no oil on them.

Blasted the PCV valve out with brake cleaner, it was dirty/oil.

Did the front and transfer case oil, the center looked like new, the front was dark and the magnetic drain plug was covered with metal.
Going to run it about 1k and change gear oil again just for the hell of it.
Wonder when that will die? Front locker in the future?

Noticed that my exhaust manifold looks to have a black wart like thing growing on the passenger side...maybe a hole...whoo hooo!...just mud.
 

Attachments

  • XTP intake manifold spacer.JPG
    XTP intake manifold spacer.JPG
    114.3 KB · Views: 764
  • intake.jpg
    intake.jpg
    70.6 KB · Views: 779
  • XTP installed.jpg
    XTP installed.jpg
    80.3 KB · Views: 769
  • plugs 1 3 5   40k to 70k.jpg
    plugs 1 3 5 40k to 70k.jpg
    57.8 KB · Views: 758
  • plugs 2 4 6  40k to 70k.jpg
    plugs 2 4 6 40k to 70k.jpg
    59.5 KB · Views: 740
Last edited:
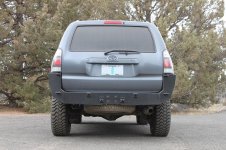
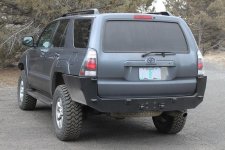
Going through this thread and jealous of your rear bumper, as I like how simplistic and functional it is. How have you liked it to date?

Also I really want your stereo/scanner setup, but my wiring skills are not quite up to snuff.
As always great rig and keep us updated!
 
loving the tires and rear bumper! hoping to throw the same size 285/75/16 on my 4runner once I fix my driver size needle bearing issue and save up some more funds!
 
Going through this thread and jealous of your rear bumper, as I like how simplistic and functional it is. How have you liked it to date?

Also I really want your stereo/scanner setup, but my wiring skills are not quite up to snuff.
As always great rig and keep us updated!

Thanks, your Runner is looking good too, FJ 'phone dial' wheels are some of my favorite.

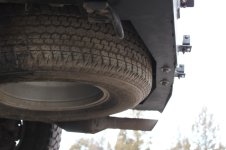
Rear bumper works good, only about 60lbs without the swing arms.
It would look better on a '06 or later because of the way the side wings stick out past the fender flare a bit. Be cool if the hitch mount was incorporated into the bumper so it would not hang down, but that would require cutting the rear x-member...would be better, more clearance.

Only gripe is no recovery points and the square-ness from the side, be nice to have another angle from the lower back towards the tire...that make sense?
Kind of a 45ish degree.

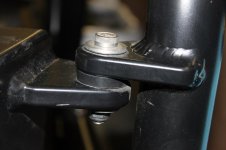
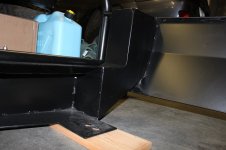
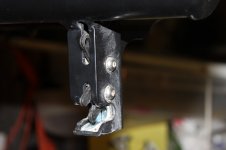
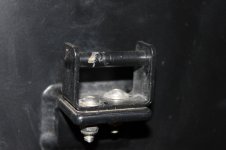
It has plastic bushings on the swingout, gets squeaky with dust (when you open it), but I just clean and dry film lube and its good for another 4 months or so. Makes it harder to see out the back, but now I have some form of extra metal behind me in case any one takes a shot at me.

The Aluminum hinge point at the bumper is starting to enlarge, where the bolt is, may have to figure out some sort of bushing.

Some of you guys, if your serious about a rear bumper, maybe send Aluminess a bunch of E-Mail. Was lack of interest that killed production.

As for the radio/scanner it is pretty straight forward, start at the center console and start pulling, only a couple screws holding it all together. Some trimming, really not to bad.

I think with that PhotoBucket SNAFU I may have deleted a number of the Aluminess pics.
Dropped some here.
 

Attachments

  • Bare Aluminess.jpg
    Bare Aluminess.jpg
    97.7 KB · Views: 640
  • side rear Aluminess.jpg
    side rear Aluminess.jpg
    85.4 KB · Views: 630
  • side view.jpg
    side view.jpg
    139.1 KB · Views: 633
  • hinge Aluminess.jpg
    hinge Aluminess.jpg
    48.6 KB · Views: 652
  • Inside Alumines.JPG
    Inside Alumines.JPG
    130.2 KB · Views: 660
  • latch front side.JPG
    latch front side.JPG
    100.3 KB · Views: 644
  • latch at bumper.JPG
    latch at bumper.JPG
    103.6 KB · Views: 623
  • stock spare.JPG
    stock spare.JPG
    107.8 KB · Views: 623
Last edited:
loving the tires and rear bumper! hoping to throw the same size 285/75/16 on my 4runner once I fix my driver size needle bearing issue and save up some more funds!

Thanks,
I am having issues with the tires, I love the look and the clearance and the traction, was great in the deep snow this last winter they really hookup.

I need more room, I am going to end up ripping the front fenders off with the tires in the whoops at speed.

Slow its OK but fast I slam the fenders. I need firmer coils and more room(bodylift). I need to do the body mount chop and cut some more of the fender/mudflap area. The Rancho Quick-Lift is advertised as 2.5"/1.5" and 285 but I think that's pushing it, 275 would have worked better, less issues. But hey I allways thought these 4th gen look the best with 285's.

A little less offset would be nice these are -16 on a 7" rim. Wish they were closer to a -10.( would help some with the rub, I think).
So I need an extra 1/2" BL or coils.
 
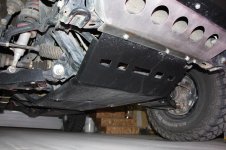
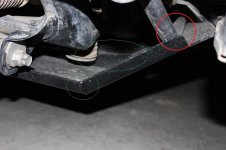
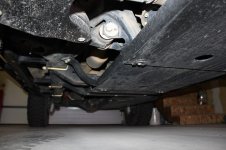
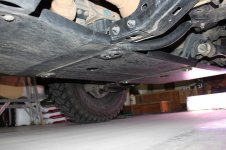
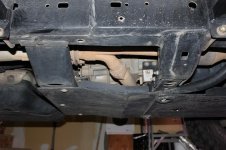
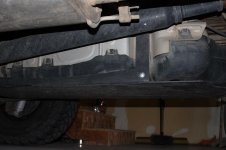
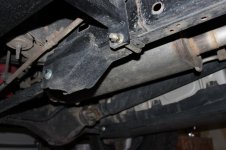
Thought I would add a couple RCI skid pics, installed at the end of Feb. Seems to be all the rage. These are steel painted with rattle can.
Set them on a floor jack to maneuver and lift into place.
Cut the RCI logo out, I am not into advertising.
The sway bar is probably 1/4 to 1/16" clearance.
Looking at another T4R members RCI front skid, has 4 round holes and the RCI logo is at an angle, looks like they braced the front skid with 2 triangles and welded the edge/angle (front to bottom). That was a V8 to so don't know is they are different.
The rear upper link skids wedged in under the U-bolt for the White Knuckle sliders, perfect, keeps the sliders from moving up.
Added some Icon LCA skids and removed logos too.
 

Attachments

  • front skid.jpg
    front skid.jpg
    80.3 KB · Views: 784
  • front skid side.JPG
    front skid side.JPG
    130.3 KB · Views: 728
  • front back.jpg
    front back.jpg
    63.5 KB · Views: 721
  • center forward.jpg
    center forward.jpg
    69.6 KB · Views: 783
  • transfer skid.jpg
    transfer skid.jpg
    71.4 KB · Views: 729
  • fuel tank skid.jpg
    fuel tank skid.jpg
    50.5 KB · Views: 703
  • upper link skid.jpg
    upper link skid.jpg
    59.8 KB · Views: 700

Members online

Forum statistics

Threads
278,310
Messages
3,554,080
Members
248,016
Latest member
Advally Service

Trending content

Back
Top