Black-N-Blue (build thread)

Not much new here.

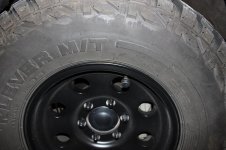
Found out that a dented rear passenger shock and an out of round tire was where my 'bounce' was coming from...nothing bent. Not sure why it was doing it with the Duratracs, maybe one out of round to.
Swapped the wonky tire to the spare and replace the shock and all is good. No more speed bounce.

I blocked the air intake hole in the passenger fender to engine bay.
The way this K&N is it is open in the front. At about 10+ mph its reading the same air temps as it did open. I am thinking CAI is over rated.
Edit ...opened it back up, was getting over 130* at the intake last summer. Sitting in traffic, was 96* outside.

Last thing...
Someone here on T4R.org said they pulled the valve stem cores out of their AirLift 1000 rear air springs and they like how it rode better unloaded.
Thought I would give it a try. Pulled the cores, drilled a small hole in the valve cap and stuffed a little bit of a scour pad, Scotch-Brite, for dust.
Kinda thinking its working a bit like a progressive shock. Harder hits cant push the air out fast so it stays a little firmer. Slow it lets more air out for better articulation.
Been running it like this for a couple months, I like.
...actually worked good like this for over 2 years before i pulled out the air bags, cut open to see if any damage/wear from zero air pressure...nope no damage.
 
Last edited:
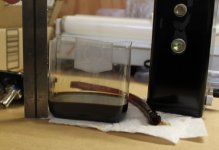
Yikes!
10 months after the oil catch can install...it looks like it works.
Yes that came out of the oil catch can.

This is one of those...I wish I had done earlier mods.
I guess Toyota thinks its a good thing to have motor oil spraying into your air intake?

This is indicative to the motor design not just a Toyota deal...
 

Attachments

  • 10 months.JPG
    10 months.JPG
    107 KB · Views: 568
Last edited:
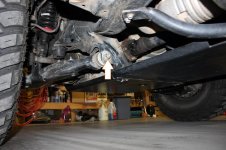
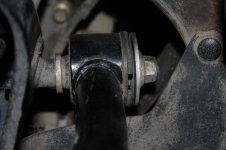
Was getting a weird 'click or pop' sound going thru 'S' corners, as the weight shifted from one side to the other. Tightened up the Alignment Cam Bolts and it seems to have fixed it. pic 1

Was getting a single 'clunk' after backing out of the garage. Just a one time deal, some times right away, sometimes it would wait about a mile at the first stop sign...then give one 'clunk'.
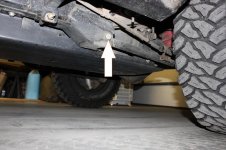
A little bit of wrench to the rear upper mount on the lower trailing arms seems to have fixed that...again...cant seem to keep that thing tight. pic 2

And the BIG deal.
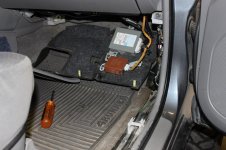
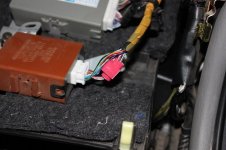
Followed the TPMS delete thread...cant find the post now...there it is...
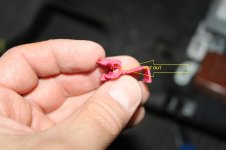
Write-up: How to Disable (Bypass) the TPMS - Toyota 4Runner Forum - Largest 4Runner Forum ,fixed that pesky tire light thats been on for the last year...it would reset from the original wheel set I had sitting in the garage, on the other side of the old 1992 T4R...guess the sensors finally died after 14+ years.
Pink/black and white/black.

Later I see some of you are just pulling the plug and running a little jumper wire to the two wires at the plug end...leaving it unplugged... the no splice method.
 

Attachments

  • Align Cam Bolt.jpg
    Align Cam Bolt.jpg
    72.5 KB · Views: 524
  • Rear LCA bolt.jpg
    Rear LCA bolt.jpg
    75.6 KB · Views: 543
  • TPMS 01.jpg
    TPMS 01.jpg
    72.5 KB · Views: 531
  • TMPS 02.JPG
    TMPS 02.JPG
    99.7 KB · Views: 537
  • TPMS 03.jpg
    TPMS 03.jpg
    62.9 KB · Views: 538
Last edited:
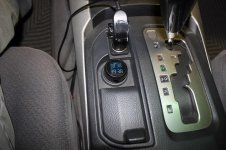
Do share the info. And why do you have tape on your charger?

TPMS

junk Ebay thing...dont bother.


That's the dashcam charger plug, it has a blue light on it that is way to bright so I just put a piece of tape to block the blue glow.
 
Last edited:
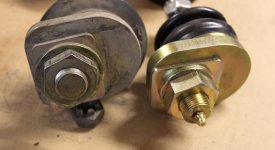
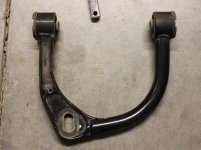
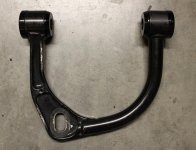
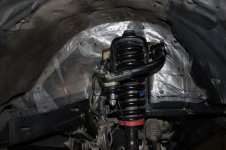
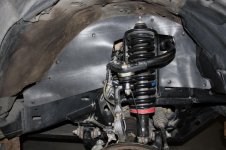
After getting motivated by a couple posts about SPC UCAs I finally installed new ball joints and bushings (SpecRide). Been sitting on the parts for a year.
I was not looking forward to doing the bushings, had read it was a pain...it is.

So this is just a refresh of the old UCAs.

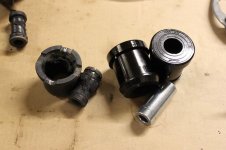
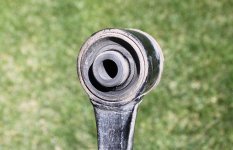
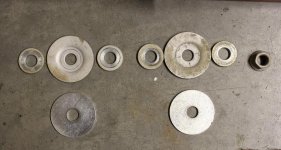
I guess there has been various versions over the years, mine was the 1st version with rubber bushings, they were starting to look a little rotted after 7 years. 6 washers.
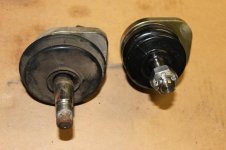
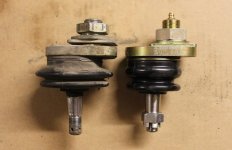
Original style no Zerk ball joints too.

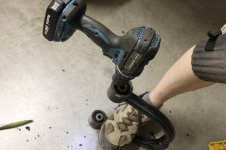
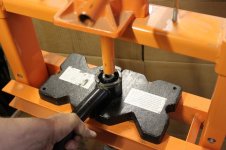
I used a drill to loosen up the old bushings then a press to push out the old inner sleeve.
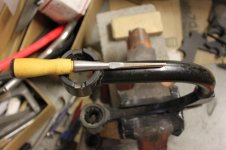
Used a small wood chisel to cut out the old rubber bushing enough to get a saw blade in.
Started cutting the bushing sleeve with a reciprocating saw then finished with a hacksaw. That was the worst part of the whole project, cutting out the bushing sleeve without cutting the control arm. Each UCA ended up with a 1/16th inch cut in the edge of the inside bushing area...damn. No matter how careful I was I couldn't not cut the UCA.

Pressed new SpecRide bushings in with the floor press, starting them at an angle so as not to cut the new bushing. Can cut them if you try and install them straight I have read, seems counter intuitive.
Some Dawn Platinum, supper slippery soap to ease them in.
Also rounded the inner edge of the bushing area on the UCA so it would have less to hang up on.

Holy Hanna! 4 hours per side...I am whipped. UCA off and on is not bad but getting the metal bushing sleeves out was a serious pain in the butt.
If you dont get all the way through it you can hammer on it all you want and it wont budge, have to cut the sleeve completely...and not cut the control arm.
 

Attachments

  • 1st style bushing.jpg
    1st style bushing.jpg
    54.7 KB · Views: 487
  • Drill out rubber.jpg
    Drill out rubber.jpg
    51 KB · Views: 483
  • pressed out.jpg
    pressed out.jpg
    60.7 KB · Views: 479
  • wood chisle.jpg
    wood chisle.jpg
    51.3 KB · Views: 476
  • bushings.jpg
    bushings.jpg
    57.5 KB · Views: 470
  • old rubber.jpg
    old rubber.jpg
    63.5 KB · Views: 487
  • washers old top   new bottom.jpg
    washers old top new bottom.jpg
    73.1 KB · Views: 478
Couple compares of the ball joints and arms.
 

Attachments

  • BJ boot.jpg
    BJ boot.jpg
    50.2 KB · Views: 495
  • BJ side.jpg
    BJ side.jpg
    54.3 KB · Views: 462
  • BJ top.JPG
    BJ top.JPG
    124.3 KB · Views: 495
  • old bushings.jpg
    old bushings.jpg
    73 KB · Views: 472
  • spec ride bushings.jpg
    spec ride bushings.jpg
    75.6 KB · Views: 463
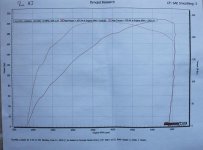
Finally had the T4R on a Dynojet engine dyno.

Not sure if I should be disappointed or not?

So, on the ScanGauge2... I started out seeing 272hp then 295hp then the best I ever saw was 305hp...mashing the skinny pedal to the floor.

The Dynojet saw 207hp at the rear wheels...sigh.
They did say that driveline can eat 30%...that's 62hp so maybe getting 269hp if I am lucky, closer to the original estimate.

I do love the way this T4R sounds now, slightly aggressive but not obnoxious at all...no ricer this. It is louder than stock.
It is the first time I have heard it winding up, not me behind the wheel.
The guys at the shop seemed to like it...American muscle hot rod type guys.

I guess I am happy...its no supercharger but its got a little more juice to it than OEM.
 

Attachments

  • Dyno run3.jpg
    Dyno run3.jpg
    60 KB · Views: 446
What kind of total gains on the dyno have you seen with all of the mods you've done? Everything claiming +8 here, +11 there....it'd be very interesting to see verified results with most of the mods all done.

It would be neat if some one went step by step... intake install then a dyno run, or Muffler install then the dyno run.

I don't have any buddies working at a Dyno shop so it costs $ .

I am all done throwing money at this...lol.
I didn't dyno it stock so I don't really know if I went backwards or not.
It feels faster/better in the butt dyno, for what that's worth.

I wanted it to read out at least 272hp...lol :wacko:
The 207hp that the Dyno spit out was a bit discouraging.
So according to it I lost ponies...245 to 207. They did say that the drive-line can eat 30%...tires/transmission.
Maybe they said that just to make me feel better?


The guy at the shop mentioned that they had a K&N on a car and it lost 5hp...kinda along the lines of what a few others have said here on the forum.

I have a hard time with that...with this V6 motor the K&N gives the intake a straight line to the throttle body...instead of the S-bent OEM.

Every hotrod magazine in the shop looked like they had K&N on almost all the featured cars. They sure know how to advertise!

I guess after all is said and done...I am happy.
It sounds good to my ears and it makes me smile every time I look at the T4R.
Its not obnoxious...until you floor it.

edit
Found a N/A thread on Tacomaworld...looks like 191hp on a Dynojet for a stock'ish 1GR-FE
N/A Power Gains - Dynos w/Mods | Tacoma World
 
Last edited:
After following the instruction to replace the SPC bushings...and granted i did cut the inner part of the UCAs, i am responsible for that i know.

Was making me less than confident in them now.

Seems like other have had good replacement response from SPC.
So i emailed SPC about getting new cast UCAs without the balljoints.

Got a reply that stated that it would cost them too much to stop production for me to get the UCAs minus BJ, for it to be worth their time or my money...


So just a heads up to any that think they want to do the upgrade, Just get new UCAs save yourself the TIME and money.

In other words dont do what i did.
 
Last edited:
Alternator and pulley bearings replaced.

http://www.toyota-4runner.org/4th-gen-t4rs/260528-not-bad-alternator.html

SPC UCAs... still in one piece.

Thinking I might/did make some splash guards for the RCI front skid plate, engine area.
Thought maybe part of the reason the pulley bearing failed might be some mud 'splash'...rethinking that now as I don't seem to get much water/road spray in to the engine area.
Perhaps... T4R age, the water pump leak and the extreme heat this last summer was more likely the culprit.

Bought some neat little LED button lights, thinking a DIY rock light is next on the list. Really bright...and super cheap. Will see if they last.

And the FAIL... that neat/cheap China TPMS...2 bad batteries...not 6 months... 15 years for the OEM...
I may look into replacing the batteries or just check it manual...most likely what I will do...like I allways did before these TPMS came along. Almost like we just add to the laziness of our culture with all these 'Great' features.
 
Guess I cant stop spending money on the T4R...its about my only 'hobby' anymore.

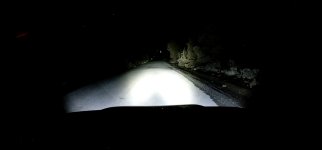
Didn't get the rock lights running yet, but upgraded the LED lights a bit...WOW!

Nite and day difference from that other cheap D5 type LED...that was a joke.
Just a big light splash of light in front of the Runner.

This new setup...is most likely not as good as dumping $2000 over at Baja or Rigid. Still I am happy...under $250. Will see how long they last.
The Gold Runway look very nice... that 120w light bar looks a bit iffy, really puts out the light downrange...super spot like.
 
Last edited:
Guess I cant stop spending money on the T4R...its about my only 'hobby' anymore.


Didn't get the rock lights running yet, but upgraded the LED lights a bit...WOW!

23" 120W 12X10W Single Row CREE Led Strip Work Light Bar Spot Offroad ATV 4x4WD | eBay

...and a lower cost 40w, pods, motocycle...SUPER bright!

2 x Cree Led 40W Work Driving Light Spot Beam Fog lamp Car Motorcycle Boat ATV 600682815291 | eBay


Nite and day difference from that other cheap D5 type LED...that was a joke.

Just a big light splash in front of the Runner.


This new setup...is most likely not as good as dumping $2000 over at Baja or Rigid. Still I am happy...under $250. Will see how long they last.

The Gold Runway look very nice... that 120w light bar looks a bit iffy, really puts out the light downrange...super spot like.
Pics?! Let's head to Cline Butte soon. I should have my lift put on by the end of the month!

Sent from my Pixel 3 using Tapatalk
 
Pics?! Let's head to Cline Butte soon. I should have my lift put on by the end of the month!

Sent from my Pixel 3 using Tapatalk

Wheeling sounds good.

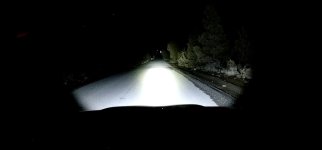
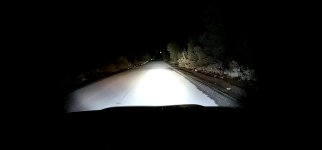
Here are a couple night light shots.
Furthest reflector is close to half a mile away.
Stock
Spot
Pods
All
 

Attachments

  • headlights.JPG
    headlights.JPG
    65 KB · Views: 641
  • 120wSpot.JPG
    120wSpot.JPG
    82.7 KB · Views: 641
  • 40wPods.JPG
    40wPods.JPG
    76.8 KB · Views: 645
  • AllLights.JPG
    AllLights.JPG
    84.4 KB · Views: 648
Added some full coverage splash guards.
Made from 1/16" rubber (leftover from a tile shower floor repair, similar to inner-tube material). Template made with clear sheet plastic.
So far no engine temperature increase...is winter here.

Put this in the, don't try this at home kids section...
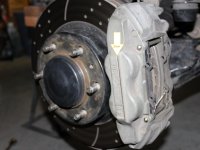
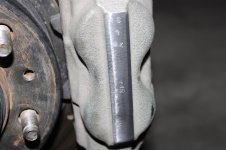
Got fed up with the 1/4" front wheel spacer, to clear the caliper/rub.
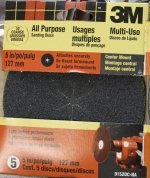
Took after it with a 5" sander disc on the drill, 50 grit made short work of it.
Shaved off 2mm, I will report in if anything blows up. Looks like its so far so good.
 

Attachments

  • IMG_7988.jpg
    IMG_7988.jpg
    63 KB · Views: 598
  • IMG_7989.jpg
    IMG_7989.jpg
    78.8 KB · Views: 620
  • pre shave.jpg
    pre shave.jpg
    65.4 KB · Views: 603
  • shaved.jpg
    shaved.jpg
    72.7 KB · Views: 600
  • 5in disc.jpg
    5in disc.jpg
    136.9 KB · Views: 595
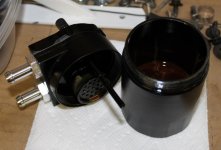
Added a knock-off ADD W1 oil catch can last year. Under $30 eBay.
Cleaned up the drilled holes, metal burs, I didn't want to get sucked into the intake, easy clean up with a drill bit. By hand.

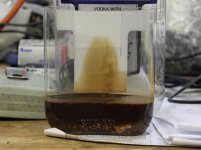
Same amount of oil removed from the intake after 5k miles as the old one. I only put 5k miles a year on the T4R.
1" in the bottom of a pint container, more water look to it than the larger, previous oil catch can. That other can started to leak from the seal at the bottom of the can and the 'inspection tube' was turning dark and warping.

This is coming past the PCV valve, I must just be imagining it...
 

Attachments

  • 5k.jpg
    5k.jpg
    58.1 KB · Views: 551
  • knockoff ADD W1.jpg
    knockoff ADD W1.jpg
    49.9 KB · Views: 559

Members online

Forum statistics

Threads
278,310
Messages
3,554,080
Members
248,016
Latest member
Advally Service

Trending content

Back
Top