Bootown's Thread

Honestly, I didn't know that trick. But in your write-up as it stands the cap is never removed. The only reference is where you say to 'leave the cap off' in Step 9. At least, I've read it twice and that's all I saw. Is that what you meant? If it is supposed to stay on until then, I think you should state that earlier on just to be clear.

Ahhhh, you got me. I did forget to mention removing the cap. Just overlooked the obvious mention that should have started off step 9. Fixed it now. Thank you for looking the post over for errors/omissions! Last thing I want to do is give bad information trying to help others here out. I make these write-ups and do them as detailed as possible because the ones I find usually leave me with some questions.

As for the draining reservoir trick, I'm not absolutely certain it will work if you open the engine drain at the same time as the radiator drain now that I think about it. If you only open the radiator drain (and leave the cap on) it will definitely drain the reservoir though.
 
Last edited:
bootown,

Thanks for taking the time to make this thread, and all the write ups in it. You're doing some great work here... it's in my "Favorites" and I'm sure I'll be getting some good use out of it down the road.

Kudos, sir, and keep up the good work.
 
Steering Knuckle Removal

I found out after driving my 4Runner for 30k that some mechanic at a Toyota dealership snapped one of my lower ball joint bolts and “fixed” it while doing the ball joint recall. His fix was to leave the broken bolt in the steering knuckle then take the snapped off portion of the bolt and shove it into place with black silicone. I decided to take the knuckle into a shop and have them remove remaining bolt and replace the upper ball joint while the knuckle was out.

I was working on the driver’s side but some pictures are of the passenger side since some pictures didn’t come out very clear.


Use this guide at your own risk and double-check everything - procedure and specifications. The factory service manual can be a great help.


Tools & Supplies – you may not need everything listed:
- Factory Service Manual
- Safety glasses
- Wheel chocks
- Jack
- Jack stands
- Torque wrenches (21 in/lbf – 174 ft/lbf)
- 10, 12, 14, 17, 19, 21mm sockets
- 19mm open ended wrench
- Breaker Bar
- Chisel or screwdriver
- Rubber or plastic mallet
- 1 3/8” socket (3/4”)
- 1/2” female to 3/4” male socket adapter (for my 1/2” breaker bar and 1 3/8” socket)
- Needle nose pliers
- Metal hanger or a box to set the caliper on
- Ball joint puller (mine is from Napa - $45)
- Blue threadlocker

Parts – part numbers are for my 4Runner and yours may be different. Not all parts are necessary depending on what you want to reuse.

95381-04045 – Axle Hub Cotter Pin
43525-35010 – Axle Hub Lock Cap (reused)
90179-28007 – Axle Hub Lock Nut (reused)
xxxxx-xxxxx – Upper Ball Joint Cotter Pin


1) Chock the rear wheels
2) Loosen the lug nuts - 21mm socket
3) Raise vehicle and place jack stands under the frame
4) Remove wheel
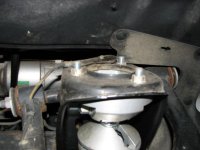
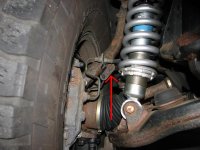
5) Remove lower shock bolt - 19mm socket and 19mm open ended wrench. Remove the three 14mm nuts at the top of the shock but do NOT remove the center nut (if you have a stock setup).

(Picture of lower bolt coming soon)

IMG_5670_30-CoiloverTopNuts.jpg~original


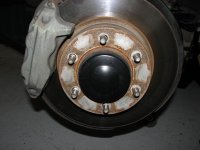
6) Remove the grease cap. I used a sharp, 1” wide chisel. Work your way around the grease cap and eventually it will pop off.

IMG_5615_25-GreaseCap.jpg~original


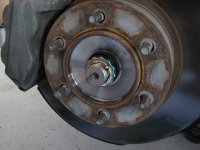
7) Remove cotter pin (needle nose pliers). Remove the lock cap (by hand). Loosen the lock nut. To loosen the lock nut, you need someone to press the brake pedal down while you loosen the nut (breaker bar, 1/2” to 3/4” adapter, 1 3/8” socket)

IMG_5624_35-AxleHub.jpg~original


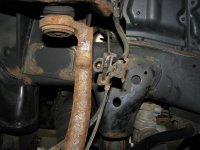
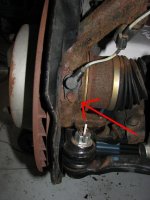
8) Remove the ABS speed sensor bracket from the knuckle (10mm socket)

IMG_5634_30-ABSBracket.jpg~original


9) Remove the brake/ABS bracket from the knuckle (12mm socket). Picture is of the passenger side.

IMG_5667_30-BrakeBracket.jpg~original


10) Remove the ABS speed sensor from the knuckle (10mm socket). Once the bolt was removed I used a chisel to carefully pry the sensor out.

IMG_5640_25-ABSSensor.jpg~original


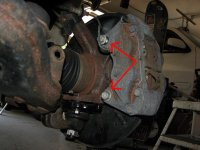
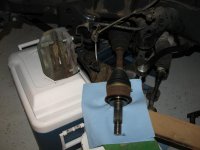
11) Remove the two caliper bolts (17mm socket). Be careful when pulling out the second bolt as the caliper is heavy and may fall on you. Mine was stuck in place pretty good so I didn’t have to worry about that. Use a metal hanger to hang the caliper (so you can avoid disconnecting the brake line) or have a box tall enough to rest the caliper on. I found my cooler did the job.

IMG_5637_30-Caliper.jpg~original

Cooler in action (picture taken after everything was removed)
IMG_5666_30-Cooler.jpg~original


12) Try to remove the rotor. I left the rotor on until the knuckle was completely removed. If you want to try to remove it now, put three lug nuts back on every other stud. The point of the lug nuts is to keep the rotor from completely falling off the lug studs and to the ground when you are hitting the backside of it. Now hit the backside of rotor with a rubber mallet. If the rotor pops free, remove the lug nuts and rotor. If you live in a rust free state you should have no problems removing the rotor now.

12) Remove the 4 lower ball joint bolts. Two of bolts are pictured here (leave the cotter pin and castle nut alone)

04-lowersuspensionarmcastlenut.jpg~original


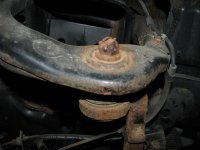
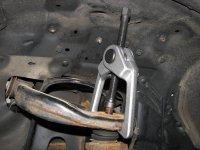
13) Separate the upper ball joint from the upper control arm. Remove the cotter pin and castle nut. Pop the upper ball joint free with a puller. I tightened the puller down some then hit the upper control arm lightly with a hammer. Get ready for a loud bang. Now the upper ball joint is separated from the upper control arm.

IMG_5651_30-UpperBallJoint.jpg~original


10-outertierodpuller.jpg~original


IMG_5657_30-UpperBallJointPuller.jpg~original


14) While pulling the steering knuckle out towards you, hit the drive shaft stud (the end where you removed the lock cap and lock nut from) in with a rubber mallet. A few whacks should be enough.

15) Finally, access to the broken ball joint bolt. Need anymore proof Toyota dealerships are no better than any other shop? I certainly don’t.

IMG_5661_30.jpg~original


Reassembly - at this moment in time everything is still apart so I am just going to provide the torque specs for my 4Runner.

Upper Ball Joint Castle Nut – 80 ft/lbf - Don’t forget to put in a new cotter pin and bend it like the old one. The cotter pin may not line up with hole in the upper ball joint and castle nut. I have seen a Toyota FSM (Sequoia maybe) where it says to continue tightening up (to some certain extent) until everything does line up.

Lower Ball Joint Bolts - torque specs are tricky. 1999 FSM says 59 ft/lbf, 2002 FSM says 37 ft/lbs. I have no idea why they are different. The Sequoia FSM (for what it's worth) says 37 on the two bolts going through the dust cover, 59 on the other two not going through the dust cover. General consensus around this forum is to at least use blue threadlocker on all the bolts. You should probably wait to fully tighten these down until after you have the coilover top nuts and lower bolt in place.

Brake Caliper Bolts - 90 ft/lbf

ABS Speed Sensor - 71 in/lbf
Brake Line Bracket - 21 in/lbf
ABS Speed Sensor Bracket - 71 in/lbf

Drive Shaft Lock Nut - 174 ft/lbf - Don't forget the lock cap and cotter pin

Coilover Top Nuts - 47 ft/lbf
Coilover Lower Bolt - 101 ft/lbf

Lug Nuts - 83 ft/lbf - don't torque down until the wheels are back on the ground.


Please let me know if you find in omissions, errors, have a better method, I did something stupid/dangerous, whatever... I will be going over this post when I put everything back together to double-check the accuracy of this write-up.

 

Attachments

  • IMG_5670_30-CoiloverTopNuts.jpg
    IMG_5670_30-CoiloverTopNuts.jpg
    43.2 KB · Views: 133
  • IMG_5615_25-GreaseCap.jpg
    IMG_5615_25-GreaseCap.jpg
    36.7 KB · Views: 134
  • IMG_5624_35-AxleHub.jpg
    IMG_5624_35-AxleHub.jpg
    38.3 KB · Views: 131
  • IMG_5634_30-ABSBracket.jpg
    IMG_5634_30-ABSBracket.jpg
    56.4 KB · Views: 129
  • IMG_5667_30-BrakeBracket.jpg
    IMG_5667_30-BrakeBracket.jpg
    58.1 KB · Views: 129
  • IMG_5640_25-ABSSensor.jpg
    IMG_5640_25-ABSSensor.jpg
    44.4 KB · Views: 127
  • IMG_5637_30-Caliper.jpg
    IMG_5637_30-Caliper.jpg
    54.8 KB · Views: 131
  • IMG_5666_30-Cooler.jpg
    IMG_5666_30-Cooler.jpg
    46 KB · Views: 115
Last edited:
Lower Ball Joint Bolts - torque specs are tricky. 1999 FSM says 59 ft/lbf, 2002 FSM says 37 ft/lbs. I have no idea why they are different. The Sequoia FSM (for what it's worth) says 37 on the two bolts going through the dust cover, 59 on the other two not going through the dust cover. General consensus around this forum is to at least use blue threadlocker on all the bolts. You should probably wait to fully tighten these down until after you have the coilover top nuts and lower bolt in place.

Another great write up from Bootown! Nice work man.

You bring up an important point here ^^^^. I went back and forth on this discrepancy when I changed out the LBJ's on my '97. Ultimately I torqued them to the higher value of 59 ft/lbs. using new bolts from the dealer and blue threadlocker. I'm wondering if the discrepancy comes from a revision to the manual that accounts for the use of threadlocker on the bolts (because the threadlocker lubricates the bolts, and thereby affects the amount of torque that you achieve @ a certain ft/lb reading on your torque wrench?).

What torque value did you end up going with?
 
What torque value did you end up going with?

The knuckle is at the shop so everything is still disassembled. When I did the LBJ's a few months back I torqued them to 37 (no threadlocker) since this truck is rarely driven and I knew I had to pull the knuckle sometime very soon. 37 seemed a little light to me. When I did 59 ft/lbf with threadlocker on the 99 I thought that was too high...felt like torquing a lug nut or higher.

I'll probably just go around 45-50 w/o threadlocker. When I do the Sequoia within the next week I'll go 59 w/o threadlocker w/o dust covers. Since I sold the 99, the Sequoia is the new DD and I will just check the torque on that from time to time. My thought is that you can easily check for a bolt that is loosening up over time, but there is only one way to find out if a bolt is torqued too high. I'm still waiting to come across a firsthand post about a ball joint bolt falling out (even if I randomly read one instance, what are the odds that the owner knew what they were torqued to beforehand?).

Thanks for the kind words (again) and your Tundra brake write-up...was scratching my head wondering if I missed something when my rotor wouldn't budge from the knuckle...was nice to confirm I just needed to man-up :cheers:
 
Last edited:
Coolant “Flush”


Use this guide at your own risk and double-check everything - procedure and specifications. The factory service manual can be a great help.

This is not a real coolant flush but it’s good enough for me.

Tools & Supplies – you may not need everything listed:
- Coolant (if you get premixed stuff just remember not to add water)
- Distilled Water (at least 6 gallons)
- Ratchet
- Ratchet extensions
- 10, 12mm sockets
- Funnel
- 5/16” inside diameter tubing
- 5 gallon bucket


1) Put your pets inside. Animals are attracted to ethylene glycol (your coolant) and will want to lick it up. A very small amount of coolant can kill an animal. If your pet does lick up any coolant you need to go to a veterinarian immediately and if you just drained your coolant you hopefully have an extra vehicle on hand. Don’t take any chances. If you are worried about the coolant in your vehicle you can use propylene glycol coolant. Toyota only recommends ethylene and I personally do not know how PG will affect your Toyota. PG is harder to find but can be special ordered at an auto parts store.

Edit - forgot a step. Remove your skid plates. There are 9 bolts to remove.
2) Remove 2 clips from the passenger side wheel well splash guard so you can access the engine drain.

IMG_5535_25.jpg~original


3) Directly through the opening is the drain. Slip your 5/16” I.D. tubing over the drain hole and down to a 5 gallon bucket. Place the bucket right under the radiator stopcock.

IMG_5533_25_20.jpg~original


4) Use a 12mm deep socket, about 18” of extension bars and a ratchet to loosen up the drain bolt. If your socket is slipping off make sure the extensions are pretty much pushed up against the underside of the upper control arm to give you the best angle. Loosen the bolt until coolant flows through the tubing (tubing is not in place in this picture). Another option is to skip to step 5 first and the reservoir will drain itself through the radiator. Once the reservoir has been sucked dry, open up the engine drain in addition to the radiator drain.

IMG_5541_25.jpg~original


5) Spin the stopcock on the radiator and let the coolant flow into your bucket (now both drains are open at the same time).

01-transcoolant.jpg~original


6) Time to clean out the coolant reservoir (in front of the battery). Remove the bracket holding the battery in place (12mm socket).

IMG_5542_25.jpg~original


7) Disconnect the hose attaching the reservoir to the radiator. Now pull the reservoir directly up and out. May take some force. Clean out the reservoir.

IMG_5543_25.jpg~original


8) The coolant is probably finished draining out. Reinstall the coolant reservoir. Hook the reservoir hose back up to the radiator. Close the radiator stopcock. Tighten the engine drain bolt but leave your 5/16” tubing in place for now.

9) Remove radiator cap. Fill the radiator with distilled water (about 2 gallons). Leave the radiator cap off and fire up the engine. Turn the heater on hot and high, including the rear heater if so equipped. The level in the radiator will drop so top off if you want. Let the engine run for 5 minutes or so. Turn off the engine.

10) Probably let the engine cool for a while so you’re not draining out really hot water. Open both drain plugs again and drain all the coolant. Close the drain plugs.

11) Repeat steps 9 and 10 one more time. What drained out after the second water fill/drain was a very, very light pink. One more water fill would have been good but I felt it was good enough. Keep doing steps 8 & 9 until the water looks good enough for you.

12) The coolant capacity is 9.5 quarts with the rear heater, 8.5 quarts w/o rear heat. I went with a 50/50 water/coolant mix. Add 1 gallon of coolant to the radiator. Add almost 1 gallon of distilled water to top off the radiator. The reservoir takes about 24 ounces to go from empty to F. I used a 1 quart container to make a small 50/50 mix to fill the reservoir. Fill the reservoir to the F line. Now mix up a quart of 50/50 to have on standby. I like this container made by Rubbermaid that has markings every 4 ounces for easy mixing.

IMG_5546_20.jpg~original


13) Start up the car (radiator cap off) and check for any leaks. Also watch the coolant level drop in the radiator. Took me almost exactly 1 quart of the coolant/water to top off the radiator after starting the engine. Put the radiator cap back on. At this point everything should be back together unless I forgot something here.

14) After driving around recheck your reservoir and add more water/coolant if needed.

15) Put your old coolant into some closed containers and dispose of at a recycle center. Earth911.com

Hey Bootown, I plan on changing my system over from Deathcool (I know, wasn't me!) this weekend and want to make sure I get all of the orange death out. Using this method is there a need to remove my thermostat?

Thanks in advance! Your thread here has been very informative.
 
Nice writeups

Just found this thread, and the Transfer Indicator Switch Replacement post came in handy, thanks...
 
Front Oxygen Sensor Replacement

Problem - CEL P0133

Parts - I found my sensor on amazon for about $50. Denso

2001 & 2002 4WD & 2WD V6; Front: 234-9002, Rear: 234-4261

2000 Cali 4WD manual V6; Front: 234-9001, Rear: 234-4153 2000
Cali 2WD manual V6; Front: 234-9001, Rear: 234-4155

1999 & 2000 Cali auto, 2WD/4WD V6; Front: 234-9002
1999 & 2000 Cali auto, 2WD V6; Rear: 234-4155
1999 & 2000 Cali auto, 4WD V6; Rear: 234-4153

1999 California manual V6 2WD/4WD 4Runner; Front = 234-9003
1999 California manual V6 4Runner; 2WD Rear = 234-4155
1999 California manual V6 4Runner; 4WD Rear = 234-4153

1999 & 2000 49 State 2WD & 4WD auto V6; Front = 234-4162
1999 & 2000 49 State 2WD & 4WD auto V6; Rear = 234-4162

1999 & 2000 49 State manual V6 2WD; Front: 234-4162
1999 & 2000 49 State manual V6 4WD; Front: 234-4161
1999 & 2000 49 State manual V6 2WD & 4WD; Rear: 234-4154


1996-1998 4WD manual V6-3.4; Front = 234-4161
1996-1998 4WD manual; Rear = 234-4154

1998 2WD ALL Front = 234-4162; Rear 234-4154

1996-1998 Auto 4WD V6 3.4; Front = 234-4162
1996-1998 Auto 4WD V6 3.4; Rear = 234-4154

1997 Auto 2WD; V6 3.4 Front = 234-4162, Rear = 234-4153
1997 Manual 2WD; V6 3.4 Front = 234-4161, Rear = 234-4153

1996 All 2WD; V6 3.4 Front = 234-4162
1996 All 2WD; V6-3.4 Rear = 234-4153


New sensor
IMG_3721_25.jpg~original


New and old sensors
IMG_3732_25.jpg~original


Of course my bolt for the electrical connector mount snapped off
IMG_3738_25.jpg~original


Oxygen Sensor - 10mm deep socket or combination wrench
IMG_3725_25.jpg~original

Used this post to confirm that the Denso 234-4161 is what I need for my '99 SR5 4WD Manual non-Cali HighLander.

Robot Check

http://www.amazon.com/gp/product/B0...rue&ref_=ox_sc_act_title_1&smid=ATVPDKIKX0DER

THANK YOU!!
 
[MENTION=32061]bootown[/MENTION] appears the pics are gone. Can you do anything? Great thread.

no, i likely don't have any of those pictures anymore. they were originally hosted on photobucket because you couldn't post pictures within text on t4r and only at the bottom of a post. photobucket changed their hosting policy years ago and now everything is gone. any specific question i can maybe talk you through?
 
no, i likely don't have any of those pictures anymore. they were originally hosted on photobucket because you couldn't post pictures within text on t4r and only at the bottom of a post. photobucket changed their hosting policy years ago and now everything is gone. any specific question i can maybe talk you through?

Yikes. It was more in general, so nothing urgent. I'll definitely shoot you a PM if necessary. Thanks!
 
Yikes. It was more in general, so nothing urgent. I'll definitely shoot you a PM if necessary. Thanks!

Well, years later found the pictures so getting them uploaded again. t4r.org limits 8 pics per post so some posts that originally had more will only have 8 now.

Here are some other steering knuckle pics that I couldn't add to the original write-up
 

Attachments

  • IMG_5651_30-UpperBallJoint.jpg
    IMG_5651_30-UpperBallJoint.jpg
    44.3 KB · Views: 100
  • IMG_5657_30-UpperBallJointPuller.jpg
    IMG_5657_30-UpperBallJointPuller.jpg
    65.2 KB · Views: 97
  • IMG_5661_30.jpg
    IMG_5661_30.jpg
    41.3 KB · Views: 101
Last edited:

Members online

Forum statistics

Threads
278,306
Messages
3,554,045
Members
248,016
Latest member
Advally Service

Trending content

Back
Top