
Brian's FX-R 3" HID Retrofit on 97 4Runner Project (T4R.org)

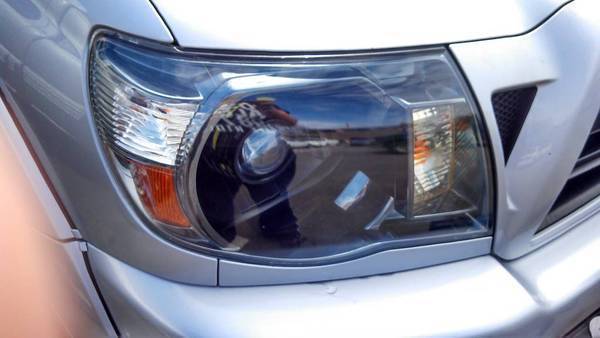
Brian, very clean retro. Painting the inside of the housings looks great on a black vehicle.

What kind of lenses are you running? The FX lenses are quite hazy...thus I switched mine out for a pair of Acura TSX lenses. Wow, what a difference that made. I've got comparison shots of both lenses in my old write up: Another HID Bi-xenon Retrofit Install *PICS* - YotaTech Forums.

BTW, I did my FX retro 4+ years ago...everything is still holding up great. Can't go wrong w/ FX projectors! Keep up the good work.

The new FXR lens are clear lens, so yay for us right?! lol
 
The new FX-Rs come with clear lenses now.

But if you really want TL lenses you can order them through TRS.

I wouldn't get parts from eBay though, a lot of that stuff is fake OEM.
 
The new FX-Rs come with clear lenses now. I wouldn't get parts from eBay though, a lot of that stuff is fake OEM.

Ah, good deal. As you can see, having done my retro so long ago, I've been out of the HID world for quite some time now. Good to hear the lenses have been corrected though. That was a big issue back then for a lot of us.

I agree. You really gotta be careful what HID stuff is being sold on ebay. What few pieces I did get off ebay, I made sure I got the correct parts.
 
Thanks man!

The only difference is 20% lens size lol.

On the TRS website they say it is cosmetic difference only.

I don't think anything else is different when doing the install.

Honestly even when standing 10 ft away it would be difficult to tell difference between the 2.5" & 3" setups.

So just go for the 3"
 
Thanks man!

The only difference is 20% lens size lol.

On the TRS website they say it is cosmetic difference only.

I don't think anything else is different when doing the install.

Honestly even when standing 10 ft away it would be difficult to tell difference between the 2.5" & 3" setups.

So just go for the 3"

I figured as much.

They say 3" is all you need, don't they? I'd better stay with that.
 
Did you mess with the projector spacing to get anymore "flicker" or color at the cutoff? I have been reading a bit about that... Kinda interesting.
 
Did you mess with the projector spacing to get anymore "flicker" or color at the cutoff? I have been reading a bit about that... Kinda interesting.

No I did not. It is quite sufficient at normal levels.

I do strongly suggest modifying the Apollo v2 shrouds to allow more light out. As they are currently shipped it is barely sufficient. I had to use an exacto knife to "widen" the gap therefore allowing more light out.
 
dang man i'd be so bummed having to take mine apart again. That's good it was an easy fix. I think you have convinced me to get some Amber CCFL's for my next set for sure.
 
Looks good Brian. Do you mean the shroud was covering part of the projector thus limiting the light output along the edges?

dang man i'd be so bummed having to take mine apart again. That's good it was an easy fix. I think you have convinced me to get some Amber CCFL's for my next set for sure.

Unfortunately there are no amber ccfl's, they only have amber led halos which are like doubled in cost lol. Looking back i should have gotten them. I finished my retrofit about a week ago and i decided against the led strip since the buyer i got them from built them with loose soldering connections and crappy waterproofing: they were all sticky and fingerprint magnets that couldnt be cleaned off.
 
What I mean is the Apollo 2 shroud has four parts that allow light from the LEDs through the shroud.

That gap is not wide enough, making it difficult to align so the light gets through in all 4 holes. If the LEDs were 10% larger it would fix the problem. I chose to cut the plastic with an exacto knife.

I trimmed the inner part shown below. The picture is pre-trim.

Trim from the INSIDE, not the visible outside.
 
Last edited:
What I mean is the Apollo 2 shroud has four parts that allow light from the LEDs through the shroud.

That gap is not wide enough, making it difficult to align so the light gets through in all 4 holes. If the LEDs were 10% larger it would fix the problem. I chose to cut the plastic with an exacto knife.

I trimmed the inner part shown below. The picture is pre-trim.


Uploaded with ImageShack.us
Oh, i see what you mean. I thought you meant the center hole of the shroud where the projector shines through. But you really mean the 4 slits for the halo to shine through. Looks good anyhow!
 
Theres a compound that you can use to polish glass lens on amazon. Try searching for the name on here, someone posted a tutorial of using it a while back..
 
The jetta has plastic headlamps, and they start yellowing again after a few weeks... sorry that this wasn't more clear.
 
{ Installed Painted Corner Lights }


// THE END

Great minds think alike I guess lol :laugh: that is the same exact set up that is going into my new runner in about 2 weeks, its nice too see how it looks though :P im going with the Apolo 2.0 shrouds with the amber halos too. I wish i was able to just take the set from my taco just finished those last week but that is sold now....
 
With that tape is there any negative effects like heat build up that may be detrimental to the life of the bulb?
 

Members online

Forum statistics

Threads
278,317
Messages
3,554,128
Members
248,016
Latest member
Advally Service

Trending content

Back
Top