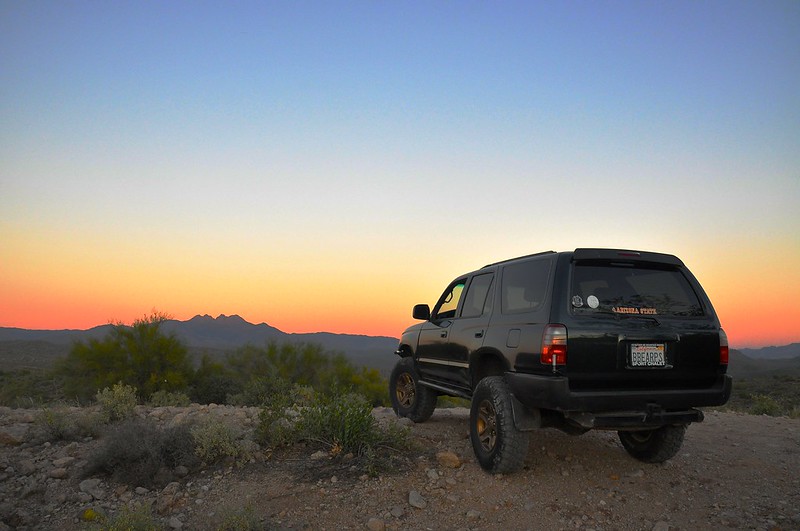
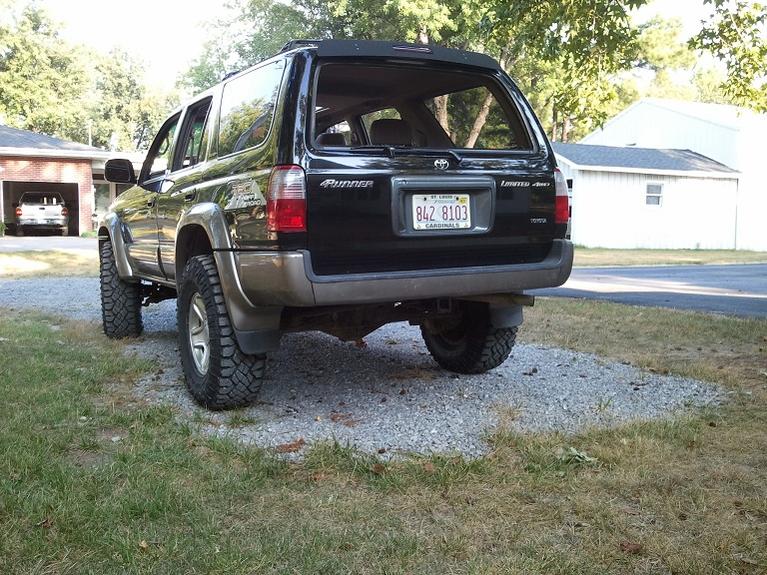
Brilliant's Mod Thread

Awesome setup! What was the reason for removing the 99-02 fat lip bumper?

Yea just because I didn't like the fat lip. Mine was two tone when I did it and that might have exacerbated the issue.

No one has been able to tell me yet... What is keeping some idiot from coming along and stealing that thimble off of your line? ...

Someone stealing it came across my mind too.

It does take snap ring pliars to get off and most don't know what it is or what it costs I'd guess. If someone knew what it was they could snatch it pretty quick. I don't think leaving my truck anywhere will be an issue except in town. Out at trailheads anyone there probably won't have ring pliars.

I was also thinking of a small amount of glue in the snap ring. I could maybe burn the gkue off with a lighter or something.
 
Yea just because I didn't like the fat lip. Mine was two tone when I did it and that might have exacerbated the issue.

That's a common theme it seems. Did you see the custom spoiler I did that has 4" holes for lights? Once I did that, I never looked back.
 
That's a common theme it seems. Did you see the custom spoiler I did that has 4" holes for lights? Once I did that, I never looked back.

I did see that spolier but the lip at the bottom made it a non starter for me. Lips make me think aero kit and a slammed truck like I had when I was younger.

I like the idea nonetheless and its nicely done. Lights in the pre 99 valance makes the later bumper not worth having.

Check this..http://www.toyota-4runner.org/3rd-gen-t4rs/175794-3rd-gen-99-fat-lip-front-bumper-spoiler-2.html
 
That's an interesting idea. You are looking at ways for filling in all the holes right?

Other options to consider would be jb-weld end then sanding it or possibly fiberglass or even epoxy.
 
Just read your build thread. Great work man. I really like your attention to detail.
thanks bud. I checked out the blue runner, looks great.

That's an interesting idea. You are looking at ways for filling in all the holes right?

Other options to consider would be jb-weld end then sanding it or possibly fiberglass or even epoxy.

They're all welded and painted now. I thought about epoxies but everything I read said you want to weld the holes.
 
Last edited:
HD SKO Sliders

Objective: Add sliders for panel protection, add a step

Process:

  • Grind off frame coating
  • Using jackstands, position the slider with a 1/2" gap from panel
  • Weld on
  • Paint with black satin
  • Add step grip tape

aAeKDQw-aS0otdmpakqKnkPqADBKF3ukyWaZQFna2AX2-AMyMDYqjoSKCOtYgTo1gduVPe70XzZ4Y-93TgbGoxSQ-aT5PovWduVkkh3wPvHEn0jIjIhge-aqFH4SsXpkNTW5lG8E159oBM3BE2LgSzWDMuS1SzKPdgQybZucnOJecDFEc28EAyESezTpO32ddScMk-tG2xcMsV-zl6B4VmpBiSaI1ZQNUMBHjacnwsq-G3_aE0KtMu4W_TnNFejFc6J5YKMk9UTFGW36tZG7vurmejPbaL_KFEgjn10c6ij0mXwbUd0ONRZxRJs4nu_rxgb8VnT74pC4JK0XUz-J28-UQLuOGr2L4oeqAI9WNPhhEa4cWjTLJ2-OcG_K-oWrwWfE4oaTZhErIyl8UqCiHCvIRlIhwK4sZVpt5v2T4Que0M5EZtKiloCsH91F0hg9kkT774le8gyvK5fXxfRmzoUzFmcbeKU5BBdN0PaQX01EbLlz6Ryz8Wcb9SiJ_OQf0hDHj1Xsx-muRhCZ8cQ0YJlHyHOnH6EHs5jsQXgO7Kenyn-NWV7b3iaN_jxekkrV12pq_gtQHuxN_BjRz75ZAdVl4i7W8xv3orSxXMc7BKdXfIU3QjHzh8DJgKMwybS6RvMS8VyLENsgHaGwqsutbKmXYfoiu73rBTabwMXl8QRdQkhEOxp9AXKGcejKAG5QLRi3HUd61GO0JZGxzf9vUIIP=w510-h904-no
 
Last edited:
Did some odds and ends today and figured out where to mount these chubbys.

Finished my bug screen for sleeping inside the runner.

EBay 99 cent 25 led panels for map light. I thought about keeping on incad so it could be used while driving at night. These are so bright its probably not the safest thing to have in your face at night.
 
Last edited:
So considering you are the king of mods, I have a suggestion for you to do. This Mod is not my idea but a mod of one of my buddies and his rigs that I look up to and get ideas from. I think that you will really like the idea and hopefully try it. but once again I can't take the credit. It has to do with the rear hitch. One of my complaints has always been how toyota just threw on the hitch almost as an afterthoght. So after trying to think of ideas how to create a better looking and more clearence in the rear without getting a new bumper, i Saw my buddies rig who did this and thought it was easy yet genious. All it consists of is flipping the rear hitch steel bar (3 bolts on each side). Then you will have to cut part of the rear bumper just enough to fit the hitch and two tow hooks. Then put some door trim or rubber trim over what you cut. Then you can flip the hitch and screw the 6 bolts back in. I will try to find some pictures if I can because I know it will help tremendously with the explanation.

http://i39.photobucket.com/albums/e191/bigfishallday/97T4R/cce913af.jpg
 
Last edited:
So considering you are the king of mods, I have a suggestion for you to do. This Mod is not my idea but a mod of one of my buddies and his rigs that I look up to and get ideas from. I think that you will really like the idea and hopefully try it. but once again I can't take the credit. It has to do with the rear hitch. One of my complaints has always been how toyota just threw on the hitch almost as an afterthoght. So after trying to think of ideas how to create a better looking and more clearence in the rear without getting a new bumper, i Saw my buddies rig who did this and thought it was easy yet genious. All it consists of is flipping the rear hitch steel bar (3 bolts on each side). Then you will have to cut part of the rear bumper just enough to fit the hitch and two tow hooks. Then put some door trim or rubber trim over what you cut. Then you can flip the hitch and screw the 6 bolts back in. I will try to find some pictures if I can because I know it will help tremendously with the explanation.
Multiple people including myself have done this.

Not the best photo, but you get the idea
DSC_0137 by 4Running Daily, on Flickr
 
Got the front bumps welded on. Talk about a shitty template and strangely cut bracket. Maybe there is a taco/4runner difference on that part of the frame. It wasn't at all lining up well. To do it again, I'd take it to a professional.

Took a day soak in PB plaster and a run to HF to buy a large pipe wrench to take off the bumps. Pics after the paint dries.

So considering you are the king of mods, I have a suggestion for you to do. This Mod is not my idea but a mod of one of my buddies and his rigs that I look up to and get ideas from. I think that you will really like the idea and hopefully try it. but once again I can't take the credit. It has to do with the rear hitch. One of my complaints has always been how toyota just threw on the hitch almost as an afterthoght. So after trying to think of ideas how to create a better looking and more clearence in the rear without getting a new bumper, i Saw my buddies rig who did this and thought it was easy yet genious. All it consists of is flipping the rear hitch steel bar (3 bolts on each side). Then you will have to cut part of the rear bumper just enough to fit the hitch and two tow hooks. Then put some door trim or rubber trim over what you cut. Then you can flip the hitch and screw the 6 bolts back in. I will try to find some pictures if I can because I know it will help tremendously with the explanation.

http://i39.photobucket.com/albums/e191/bigfishallday/97T4R/cce913af.jpg

yea, I like this idea, but I have the welded hitch so not as easy for me to pull off
[MENTION=50784]Full_Throttle[/MENTION] did something similar which looks even cleaner imo.

68434d1343060253-my-build-thread-imogene-2012-07-23-07.34.50.jpg~original
 
Last edited:
Front Chubby Bumps

Purpose: Softer front end bottoming out

Process:

  • Picked up Donahoe Racing chubby bumps and brackets on closeout
  • Install strike plates
  • Position and weld on chubby bumps
  • Remove rubber bumps

AIL4fc9Qe1llCBVaQ1kGhHGTTBa1PdusCubiz4ZmsPmc2zX6ugvU7Hm9DVqhldpddLSEa__t9GFjBsVqCuHhKjgB9_ZDNEKNKPq034rJuUKoCjZsmDzNcG_X3_z3Oe62B8zO88HDv7r96p61CVljmBXx8rRMBQ=w482-h857-s-no


AIL4fc-0zGf1rLnKU7G247gS01-H3f6szzDwEvDSWLHEi_awymf689RKfAF5F0Ef9_9aM1snouWriKaxB4s7XNwNvlIF0paukfIL42EMFDQLbXHsWXx1MqnpFBrTj85ZctYI6lq-Dd1WPASVeqoVtVYT-6kpYw=w482-h857-s-no
 
Last edited:
Brilliant, can you elaborate on the bug screen? I thought about doing this, but never actually looked to see how to mount it.

Thanks!
 
When you painted your flares desert dune did you buy oem gaskets that go behind the flares(part numbers).My flares are silver and I want to paint them desert dune but I can't really tell if the gaskets are body or flare color?
 
Brilliant, can you elaborate on the bug screen? I thought about doing this, but never actually looked to see how to mount it.
Thanks!

Its pretty straightforward. You get one of those gutter screens and trim it. You can see how it needs to be trimmed when you set it on the window.

Theyre a few bucks. I got a white one, trimmed it to length, then trimmed the top shape, scuffed it with 400 grit, wiped it down, used adhesive promoter, shot it with flat black. I took some screen I got off a roll at the hardware store and epoxied it to the gutter trim, then hit it again with flat black. I might trim it down farther as I really only want a 1/2" crack.

AIL4fc-vEtDXe3wuUAdG09S0c0yXlyk_RUI1ob1mpggb3uQ4IAaC-bzjhww1ovoRprjvgrW7dZpCnBcOF-xsKoYDO4jPakvZ_K1ku682bKHTRejBc7U_HvZSkOq4UlfsyB0wu3sm9IfUp7M3y5IdOgNeie3OCg=w1521-h857-s-no


When you painted your flares desert dune did you buy oem gaskets that go behind the flares(part numbers).My flares are silver and I want to paint them desert dune but I can't really tell if the gaskets are body or flare color?

I got the OEM color for desert dune. I found a desert dune wide flare Vin and used that to order. The color isn't quite the same as dd but its how the color matched flares came from the factory on the dd. I had to call the dealer to get the right part. Another tid bit is that they only make one trim part now. Its the strip from the front fender. If you want I can dig out the part number or give you a Vin from a wide flare color matched dd if you need it. Feel free to pm me if you need the numbers.
 
Last edited:
Plug Insert

I was wading through your build (sweet rig!!) and was wondering were you acquired the 115v plug in this picture (top most). I know it's been a couple years since you did this mod, but I'm looking for something similar for putting an inverter in the back. I'm assuming its a three prong plud underneath that cover. Cheers

DSCN1676_zps90b7f602.jpg~original
 

Members online

Forum statistics

Threads
278,306
Messages
3,554,045
Members
248,016
Latest member
Advally Service

Trending content

Back
Top