Budget Build Retrofits

trd4x4

New member
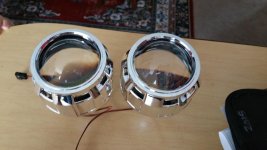
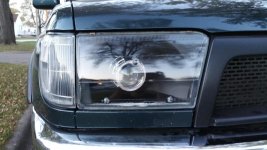
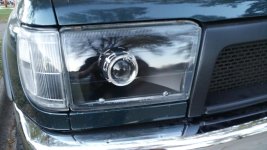
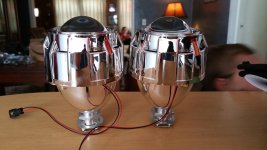
Alright everyone, I am still new to t4r.org and am starting to get used to the site so I figured I would go ahead and do a quick thread on my "budget build retrofits". My retrofits are all amazon items and were really meant to just be a temporary thing, but I am very pleased with them so far so I doubt I will be upgrading them anytime soon! This will not be an in depth "how to", this is just a quick walk through of what I did, and my experience with the product. First thing you gotta do it remove your headlights!
 

Attachments
  • 20151007_153859.jpg
    20151007_153859.jpg
    133.7 KB · Views: 7,631
  • 20151007_153852.jpg
    20151007_153852.jpg
    127.9 KB · Views: 7,441
Last edited:
Register to hide this ad
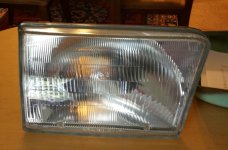
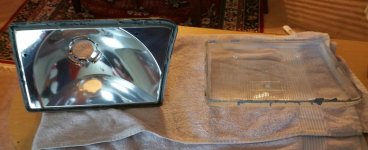
Next I baked my headlights at about 260 degrees for about 10 minutes, if that doesn't do it just throw them in a bit longer. I used a flat head screw driver to slowly pry the lens from the housing, I did not use a lot of pressure I gently pried to keep from chipping or cracking the lens.
 

Attachments

  • 20151009_111640-1.jpg
    20151009_111640-1.jpg
    131.1 KB · Views: 7,451
  • 20151009_113228-1.jpg
    20151009_113228-1.jpg
    140.9 KB · Views: 7,545
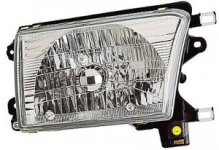
If you have a 4runner without clear lens headlights like I did, you are going to need to order either OEM or aftermarket headlights with clear glass lenses. I used TYC headlights that can be bought on ebay or amazon, I simply just used the glass lens from them because I liked the oem housing I had more.
 

Attachments

  • TYC.jpg
    TYC.jpg
    27.5 KB · Views: 7,189
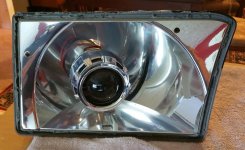
Next step was to test fit the projector into the rear housing, also make sure to test the projector high beam before putting the lens back on. I cycled each projector from low beam to high beam about 50 times just to make sure everything was good to go.
 

Attachments

  • 20151009_113451-1.jpg
    20151009_113451-1.jpg
    139.6 KB · Views: 7,391
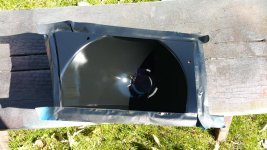
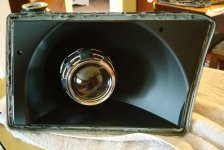
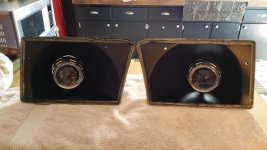
After test fitting and testing the actual projector it was time to paint the rear housing. The prep I did was simply just wet sanding the housing and using a plastic adhesion promoter before using actual paint. I just used flat black paint since that's the look I liked. I let them dry about 2 hours and then put the projectors back in, I recommend adjusting the actual projector before placing the lens back on to make sure that your cutoff and alignment is correct.
 

Attachments

  • 20151009_122728.jpg
    20151009_122728.jpg
    134.8 KB · Views: 7,388
  • 20151009_123841-1.jpg
    20151009_123841-1.jpg
    131.8 KB · Views: 7,372
  • 20151009_151722.jpg
    20151009_151722.jpg
    135.4 KB · Views: 7,331
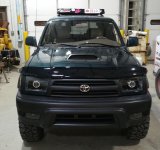
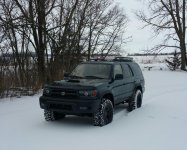
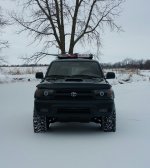
At this point I replaced the lenses and then re-baked the whole assembly at about 240 degrees until I was able to press the lens back into place. Here's the finished product! The cost was around 87 dollars for the projectors, HID kit, and H4 HI/LO harness. The TYC headlight assemblies were about 80 dollars for the pair. So in total the entire retrofit was about 167 dollars!
 

Attachments

  • 20151019_183312.jpg
    20151019_183312.jpg
    135.4 KB · Views: 7,628
  • 20151019_183300.jpg
    20151019_183300.jpg
    133.9 KB · Views: 8,706
  • 20151222_201227.jpg
    20151222_201227.jpg
    120.2 KB · Views: 16,086
  • beast.jpg
    beast.jpg
    137.9 KB · Views: 7,371
  • 20151229_125906-1.jpg
    20151229_125906-1.jpg
    134.2 KB · Views: 7,333
[MENTION=121873]trd4x4[/MENTION] can you provide links to the parts you used? I just did a retrofit using TRS/Morimoto components, but my cousin is looking to do a budget short term/temp retrofit in his 100 series and these might be the ticket.
 
[MENTION=121873]trd4x4[/MENTION] can you provide links to the parts you used? I just did a retrofit using TRS/Morimoto components, but my cousin is looking to do a budget short term/temp retrofit in his 100 series and these might be the ticket.

Here are the exact components I used, I've had them about 5 months now with no issues.

Nilight® 2.5" Mini HID Bixenon Projector Lens for H1 Bulb Car Gift:chrome Shround https://www.amazon.com/dp/B00B21R0TA/ref=cm_sw_r_other_awd_zynOwb09YG9H6
Innovited AC 35W HID Xenon Conversion Kit - H1 - 6000K - 2 Year Warranty https://www.amazon.com/dp/B00KJ8JIM4/ref=cm_sw_r_other_awd_tznOwbM0R4RTZAODE® Xenon HID Kit H4 Hi/Lo Bi-Xenon Controller Relay Harness Wire Control 12V 35W/55W Light Lamp Controller 130279 https://www.amazon.com/dp/B00KGPB9DQ/ref=cm_sw_r_other_awd_gAnOwbJ5D43BB
 
Hm so after all that I don't even get to see them working come on your killing me over here. :bravo::pop2:

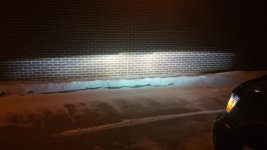
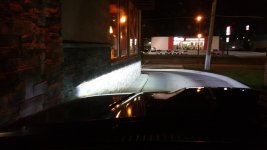
Here's some pics I just took this morning on my way to work. They are far brighter than factory and they have a pretty nice cutoff also! I also bought 6k bulbs but would recommend 5k bulbs, I hate the blueish tint of the 6ks.
 

Attachments

  • 20160121_065145.jpg
    20160121_065145.jpg
    130.9 KB · Views: 8,389
  • 20160121_065306.jpg
    20160121_065306.jpg
    123.9 KB · Views: 7,094
  • 20151203_202926.jpg
    20151203_202926.jpg
    124.3 KB · Views: 7,065
A parts list would be much appreciated because I am very interested in doing this. Also, how do the projectors attach to the housings?
 
Does this literally just bolt right into the headlight housing? Any kind of cutting or modifications to headlight housing required? Pictures of the backside?
 
Last edited:

Members online

Forum statistics

Threads
278,312
Messages
3,554,085
Members
248,016
Latest member
Advally Service

Trending content

Back
Top