Chuckles' 98 Manual SR5 4Runner

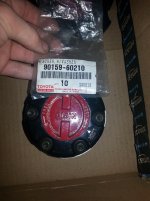
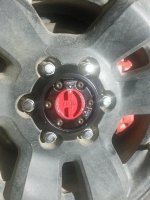
Can you read the part number on the back of the wheel center cap for me.

Thanks

Here is the part: ORNAMENT SUB-ASSY, WHEEL HUB for 1996 TOYOTA TACOMA. #4260335620

They're a little pricey for some center caps, but I haven't ever seen them for sale (even on eBay) except for when I got my other parts.

You painted your CV axles? That's, like, alphabetically-organizing-your-CD-shelf grade OCD right there.

I couldn't let them be the only rusty thing on my truck! They look soooo much better :)

That's a lot of hub pieces! :D You found/hung on to the little balls too? Those are fun to keep track of.

And, um, yeah painted cv bits!

Yes, I have the balls and springs in a separate bag :)
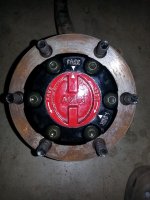
 
Ooh pretty!

2015-12-15 15.36.25.jpg
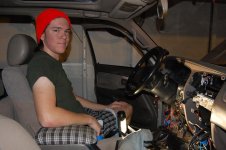
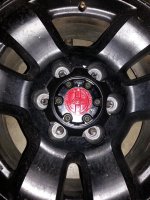
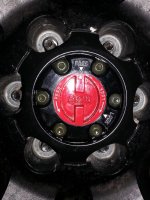
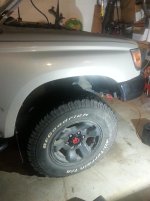
I just had to pull out one of my spare wheels to see how it's going to look haha
2015-12-15 15.46.12.jpg

2015-12-15 15.46.27.jpg
 

Attachments

  • 2015-12-15 15.36.25.jpg
    2015-12-15 15.36.25.jpg
    133.5 KB · Views: 848
  • 2015-12-15 15.46.12.jpg
    2015-12-15 15.46.12.jpg
    136.6 KB · Views: 835
  • 2015-12-15 15.46.27.jpg
    2015-12-15 15.46.27.jpg
    136.3 KB · Views: 862
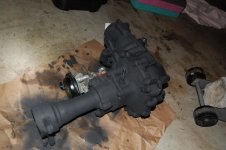
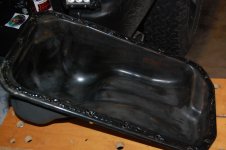
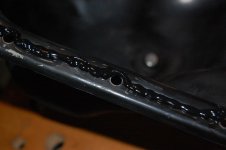
I haven't posted here for a while because I've been sooooooo busy! I have the hubs swapped over. That had a few hiccups along the way. I have part of the engine apart to finish the timing belt. I made a switch panel under the radio. I painted my front diff and cleaned all the stuff under the engine. I replaced the oil pan gasket because I had the differential out. I found out that the PO didn't put the transmission cover back on the bottom of the bellhoising- I have to get the part before I can put anything else back together. Finally, I have discovered that my steering rack started to leak 3 days ago.

I guess I'll start with the differential...
DSC_5230.jpg

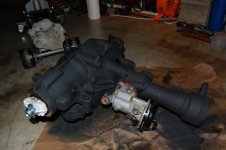
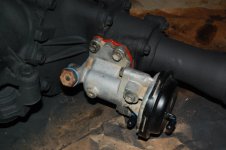
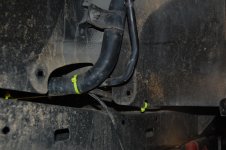
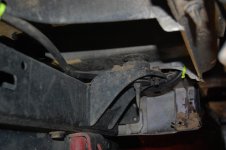
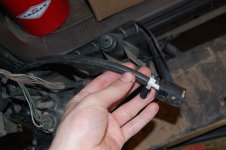
I cleaned the actuator, clamped the sliding fork in place, removed the switch, plugged the air lines, and sealed it back up.
DSC_5231.jpg

DSC_5232.jpg

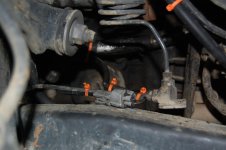
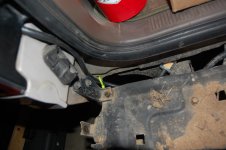
Here is the pigtail that used to go to the diff switch. I simply soldered the two wires together and zip tied it out of the way. The 4WD light works when I pull the lever now!
DSC_5259.jpg


Oil pan
DSC_5221.jpg

DSC_5222.jpg

DSC_5223.jpg
 

Attachments

  • DSC_5230.jpg
    DSC_5230.jpg
    130.3 KB · Views: 844
  • DSC_5231.jpg
    DSC_5231.jpg
    131.4 KB · Views: 890
  • DSC_5232.jpg
    DSC_5232.jpg
    130.9 KB · Views: 844
  • DSC_5221.jpg
    DSC_5221.jpg
    129.7 KB · Views: 860
  • DSC_5222.jpg
    DSC_5222.jpg
    135.6 KB · Views: 853
  • DSC_5223.jpg
    DSC_5223.jpg
    138.9 KB · Views: 797
  • DSC_5259.jpg
    DSC_5259.jpg
    124 KB · Views: 1,009
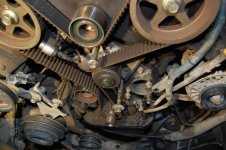
Timing Belt

Partially torn apart
2015-12-16 22.21.15.jpg

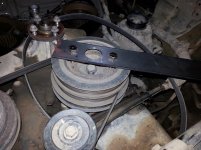
Cranshaft pulley tool I made
2015-12-17 15.28.42.jpg

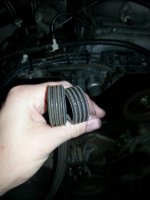
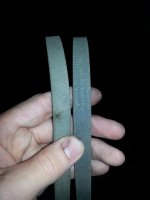
Old belts- possibly original, notice the hole in one of them
2015-12-17 16.01.57.jpg

2015-12-17 16.02.46.jpg

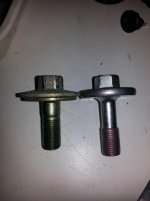
4-cyl vs. V6 pulley bolt. I somehow ordered the wrong one, but it was on the V6 parts sheet. I have the correct one now.
2015-12-18 22.43.00.jpg
 

Attachments

  • 2015-12-16 22.21.15.jpg
    2015-12-16 22.21.15.jpg
    141 KB · Views: 759
  • 2015-12-17 15.28.42.jpg
    2015-12-17 15.28.42.jpg
    134.5 KB · Views: 783
  • 2015-12-17 16.01.57.jpg
    2015-12-17 16.01.57.jpg
    112.2 KB · Views: 862
  • 2015-12-17 16.02.46.jpg
    2015-12-17 16.02.46.jpg
    131.9 KB · Views: 809
  • 2015-12-18 22.43.00.jpg
    2015-12-18 22.43.00.jpg
    133.8 KB · Views: 825
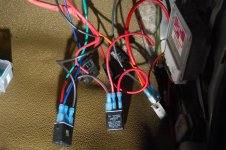
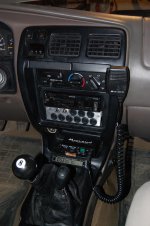
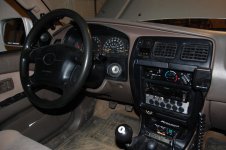
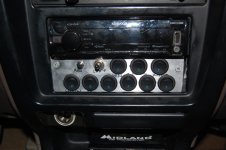
Switch Panel

The wiring guy himself!
DSC_5233.jpg

DSC_5235.jpg

DSC_5236.jpg

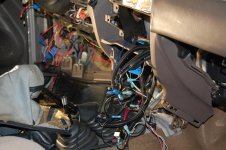
My 3 relays in the passenger kick panel
DSC_5239.jpg

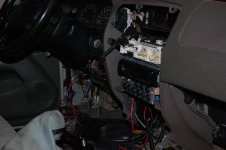
It's not pretty, but it gets the job done! 3 switches are unused
DSC_5241.jpg

DSC_5243.jpg

DSC_5244.jpg

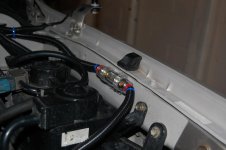
My fancy fuse holder
DSC_5248.jpg
 

Attachments

  • DSC_5233.jpg
    DSC_5233.jpg
    133.6 KB · Views: 806
  • DSC_5235.jpg
    DSC_5235.jpg
    137.6 KB · Views: 767
  • DSC_5236.jpg
    DSC_5236.jpg
    128.4 KB · Views: 864
  • DSC_5239.jpg
    DSC_5239.jpg
    144 KB · Views: 813
  • DSC_5241.jpg
    DSC_5241.jpg
    133.2 KB · Views: 829
  • DSC_5243.jpg
    DSC_5243.jpg
    129.9 KB · Views: 825
  • DSC_5244.jpg
    DSC_5244.jpg
    133.4 KB · Views: 803
  • DSC_5248.jpg
    DSC_5248.jpg
    124.5 KB · Views: 842
Hubs!

The first time I got mu hubs pressed out, I went to my mechanic guy. He was a scout leader in my troop for a loooong time. Well, he should have told me to take them to a machine shop with a real press for this kind of stuff. It would up costing me $150. I still had one hub to be pressed out and pressed into the 4Runner spindle.

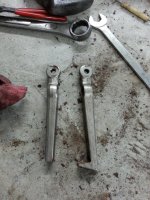
Broken professional puller
2015-12-22 17.46.14.jpg


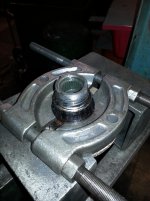
The guy at Carquest in Nashville charged me $25 to do it

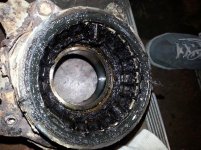
Nasty bearing- took a 20 ton press (10 ton didn't do it)
2015-12-23 14.22.52.jpg

2015-12-23 14.24.48.jpg

Thread damage fix- he ground the threads of the top and saved me $155!
DSC_5217.jpg

DSC_5218.jpg

Allen head bolts for anyone that wants them for their Aisin hubs
2015-12-24 09.59.06.jpg
 

Attachments

  • 2015-12-22 17.46.14.jpg
    2015-12-22 17.46.14.jpg
    136.7 KB · Views: 792
  • 2015-12-23 14.22.52.jpg
    2015-12-23 14.22.52.jpg
    140.7 KB · Views: 786
  • 2015-12-23 14.24.48.jpg
    2015-12-23 14.24.48.jpg
    134.5 KB · Views: 736
  • DSC_5218.jpg
    DSC_5218.jpg
    137.7 KB · Views: 793
  • DSC_5217.jpg
    DSC_5217.jpg
    130 KB · Views: 858
  • 2015-12-24 09.59.06.jpg
    2015-12-24 09.59.06.jpg
    133.2 KB · Views: 745
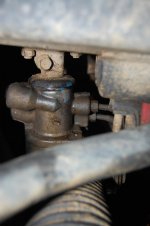
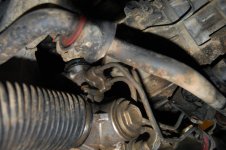
Here's my PS leak. I guess I'll wait 'till it gets worse then I'll replace the rack :( I might be able to buy some seals and fix it at the input shaft, but it's unlikely
DSC_5252.jpg

DSC_5256.jpg

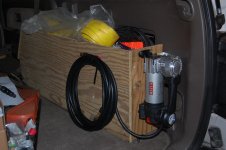
I mounted my compressor on another cargo box that I built. I have a switch on the dash for it.
DSC_5261.jpg

This thingymajigger to put in when I'm ready to tackle another project!
2015-12-17 18.55.17.jpg
 

Attachments

  • DSC_5252.jpg
    DSC_5252.jpg
    125.5 KB · Views: 811
  • DSC_5256.jpg
    DSC_5256.jpg
    131.5 KB · Views: 804
  • DSC_5261.jpg
    DSC_5261.jpg
    133.3 KB · Views: 742
  • 2015-12-17 18.55.17.jpg
    2015-12-17 18.55.17.jpg
    124.3 KB · Views: 829
Last edited:
A) Dads are almost as awesome as moms. Very biased, of course. :D (Like you, I too have the awesomest dad evar!)
B) You've been crazy-busy!
C) And it looks good. :)
 
Rear Diff. Breather Extension 2.0

I got rid of the stupid 1 way valve! Now my axle is free to breathe without sucking water through the axle seals. I don't know why people have writeups that extend the crappy one way valve...
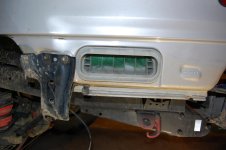
Here is the line running along the body
DSC_5262.jpg

DSC_5263.jpg

In-line fuel filter and line running into taillight area
DSC_5267.jpg

Extra breather filter on the end for added protection
DSC_5264.jpg
 

Attachments

  • DSC_5262.jpg
    DSC_5262.jpg
    133 KB · Views: 752
  • DSC_5263.jpg
    DSC_5263.jpg
    127.4 KB · Views: 790
  • DSC_5267.jpg
    DSC_5267.jpg
    125.6 KB · Views: 950
  • DSC_5264.jpg
    DSC_5264.jpg
    124.1 KB · Views: 785
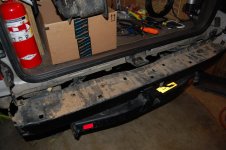
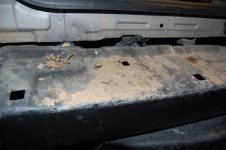
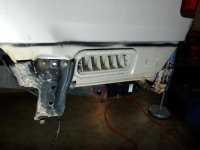
The bumper plastic traps a lot of dirt!
DSC_5265.jpg

DSC_5266.jpg

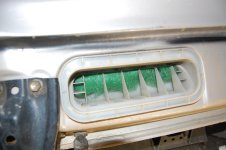
I put a piece of fiberglass filter in the rear vent to prevent so much dust from entering the cargo area
DSC_5268.jpg

Also cleaned off my overspray from touching up the bumper
DSC_5269.jpg

Before
2015-12-28 18.08.23.jpg
 

Attachments

  • DSC_5265.jpg
    DSC_5265.jpg
    134.5 KB · Views: 758
  • DSC_5266.jpg
    DSC_5266.jpg
    133 KB · Views: 720
  • DSC_5268.jpg
    DSC_5268.jpg
    128.2 KB · Views: 813
  • DSC_5269.jpg
    DSC_5269.jpg
    128.8 KB · Views: 797
  • 2015-12-28 18.08.23.jpg
    2015-12-28 18.08.23.jpg
    117 KB · Views: 833
Last edited:
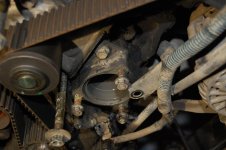
Engine cleaning

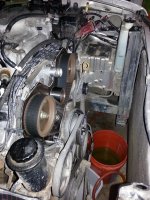
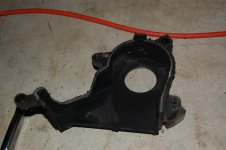
I cleaned a lot of the front of the engine yesterday. I still need to do more tomorrow. I think most of the gunk was coming from the dipstick tube.
DSC_5270.jpg

DSC_5271.jpg

DSC_5272.jpg

Here's the only part that you could tell a difference that it is cleaner
2015-12-29 16.46.59.jpg

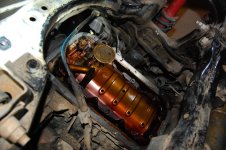
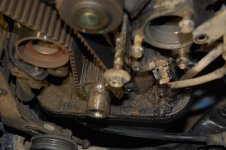
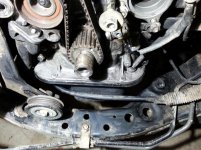
Lower timing cover. Yes, that is a timing belt rib stuck to it
DSC_5274.jpg

DSC_5275.jpg

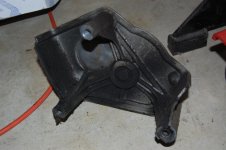
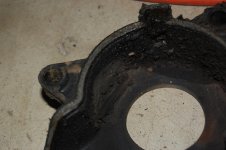
Pulley bracket
DSC_5276.jpg

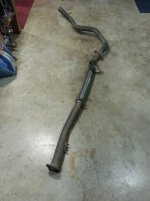
Not engine related, but I will be putting the straight pipe exhaust back on just to show off to the guys since they have only heard mine quiet haha! Don't worry, it won't be on there for long.
2015-12-30 14.32.06.jpg
 

Attachments

  • DSC_5270.jpg
    DSC_5270.jpg
    139.1 KB · Views: 731
  • DSC_5271.jpg
    DSC_5271.jpg
    130.1 KB · Views: 739
  • DSC_5272.jpg
    DSC_5272.jpg
    130.6 KB · Views: 766
  • DSC_5274.jpg
    DSC_5274.jpg
    133.6 KB · Views: 741
  • DSC_5275.jpg
    DSC_5275.jpg
    132.1 KB · Views: 788
  • DSC_5276.jpg
    DSC_5276.jpg
    134.8 KB · Views: 726
  • 2015-12-30 14.32.06.jpg
    2015-12-30 14.32.06.jpg
    131.6 KB · Views: 713
  • 2015-12-29 16.46.59.jpg
    2015-12-29 16.46.59.jpg
    137 KB · Views: 821
So tonight, i discovered where my other clunking sound was coming from......

After 10 months of ownership, I finally found that the transmission was not bolted to the cross member. :frusty: Smithville tire and service does about the worst work I have ever seen...

View attachment 167198


I promptly stuck some bolts in. I haven't driven it yet, but I will tomorrow. I'm sure it will make a huge difference.
View attachment 167199

Do you happen to know the bolt size or part number for those bolts?

Also, do you know the torque specs for those bolts?
 
Do you happen to know the bolt size or part number for those bolts?

Also, do you know the torque specs for those bolts?

Sorry, but I have no idea on what size they are. I just grabbed some random bolts out of the metric bolts jar and got 4 that fit.

I just got them good and tight...
 
Keep it up! Except now you got me leaning towards another mod:tape2:
Love the manual hubs, nice job!
 
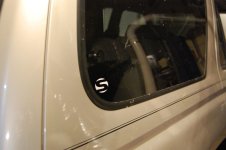
Part of a Savage Offroad sticker (I accidentally cut the stickers and salvaged this)
DSC_5332.jpg

Torquing things
DSC_5338.jpg

Pulling the pin!
DSC_5345.jpg

Belt rotates correctly!
DSC_5348.jpg

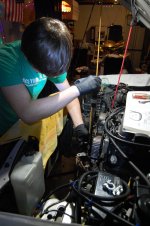
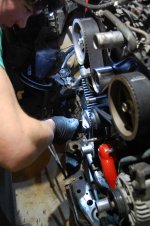
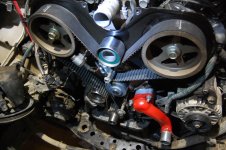
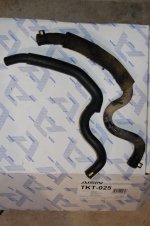
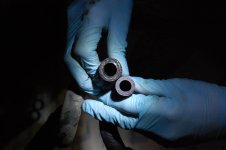
So I get everything else installed this morning and pour the coolant into the upper radiator hose and I discovered a leak :( I think it came from the thermostat housing. Tonight, me and my dad put some thermostat sealant around it in hopes to seal up the mating surfaces. I also replaced the oil cooler hose because it was in really bad shape. I plan to replace a lot more hoses this summer.


Old vs. New
DSC_5350.jpg

DSC_5354.jpg

I also got a new Toyota battery and a positive terminal
DSC_5355.jpg

DSC_5357.jpg
 

Attachments

  • DSC_5332.jpg
    DSC_5332.jpg
    124.8 KB · Views: 643
  • DSC_5338.jpg
    DSC_5338.jpg
    136.6 KB · Views: 663
  • DSC_5345.jpg
    DSC_5345.jpg
    132.1 KB · Views: 662
  • DSC_5348.jpg
    DSC_5348.jpg
    140 KB · Views: 712
  • DSC_5350.jpg
    DSC_5350.jpg
    130.7 KB · Views: 671
  • DSC_5354.jpg
    DSC_5354.jpg
    130.5 KB · Views: 672
  • DSC_5355.jpg
    DSC_5355.jpg
    131.1 KB · Views: 740
  • DSC_5357.jpg
    DSC_5357.jpg
    138.8 KB · Views: 737
Nice work. My wife and I just looked at your thread together, and her comment was he's got skills, clean work...that pretty high praise from an ole cowgirl.

I agree, good stuff young man.

Are you interested in wrenching as a career?

If you are I want to share an opportunity in industrial mechanics with you, shoot me a PM with your email.
 
Nice work. My wife and I just looked at your thread together, and her comment was he's got skills, clean work...that pretty high praise from an ole cowgirl.

I agree, good stuff young man.

Are you interested in wrenching as a career?

If you are I want to share an opportunity in industrial mechanics with you, shoot me a PM with your email.

Thanks that's awesome! And just think all of this stuff I learned on my own with help from my dad and the internet!

I am currently studying computer science (I think that's in here somewhere) and I like it so far. I've always thought that I could fall back on to mechanic work if I don't like CS or something. I'll send you a PM with my email in a few minutes.
 

Members online

Forum statistics

Threads
278,310
Messages
3,554,080
Members
248,016
Latest member
Advally Service

Trending content

Back
Top