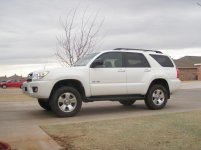
daystar 2.5/1/5 install

Okay so there is no negative rake on the running board, the rear is about a 1/2 inch higher. I will measure the roof rack height, but i do know it will fit in my garage door, but that also may be different from your garage door, Let me get back to you
 
My TE finally got some attention this weekend with some help from a friend using the above mentioned instructions. Install was very straightforward. The Daystar kit I installed was the combo preload/topout kit still available from wheelers offroad and required disassembly of the front shocks for the spacers but with a heavy duty spring compressor this was very easy. Overall install time was right around 4 hours with plenty of time spent making sure we werent breaking anything or double checking things were back to together properly. If I had to do it again I could do it with a friend in probably 2.5 hrs. The rear was pretty easy too but def needs two people. With the preload spacer the ride is firmer but still very comfortable. Tires are 255/75r17 GYSA's on ProComp 7098 17", there is some minor rubbing but only at full lock in reverse coming down my driveway. Tires need some more help in the balance dept but Ill be working on that this week. Alignment also ran into typical issues, initial alignment resulted in a very twitchy ride but after I took it back and told them to max out the caster (2.1 a side was all I could get) the steering is much more manageable. Overall extremely happy with the results and the writeup here certainly made for very smooth sailing.
2010-08-08150207.jpg~original
 
My TE finally got some attention this weekend with some help from a friend using the above mentioned instructions. Install was very straightforward. The Daystar kit I installed was the combo preload/topout kit still available from wheelers offroad and required disassembly of the front shocks for the spacers but with a heavy duty spring compressor this was very easy. Overall install time was right around 4 hours with plenty of time spent making sure we werent breaking anything or double checking things were back to together properly. If I had to do it again I could do it with a friend in probably 2.5 hrs. The rear was pretty easy too but def needs two people. With the preload spacer the ride is firmer but still very comfortable. Tires are 255/75r17 GYSA's on ProComp 7098 17", there is some minor rubbing but only at full lock in reverse coming down my driveway. Tires need some more help in the balance dept but Ill be working on that this week. Alignment also ran into typical issues, initial alignment resulted in a very twitchy ride but after I took it back and told them to max out the caster (2.1 a side was all I could get) the steering is much more manageable. Overall extremely happy with the results and the writeup here certainly made for very smooth sailing.
2010-08-08150207.jpg~original

What is your total lift? Rear and front?
 
Synister & all who support! Thanks for the replys and support! Im glad this write up helped out!!

As far as the ride goes the only thing I've noticed so far is that my truck drifts or sways a little bit in the front end when driving past 50 mph +/-, BUT this is probably only because I HAVE NOT had an alignment performed. I'm waiting for tires but ran out of $$$

Other than that there is a really subtle and nice ride height difference at first! AND ITS ALLLL GOOOD, feels great.

Next step now is to retorque everything including spidertrax
 
I'm having problems with the rear. I have the springs out, but I cannot figure out a technique to get them back in place. They wont stay put at the top solid enough to pry it back on the axle pad -- it just keeps slipping off.

Quite infuriating. I'm considering getting a spring compressor for the spring. I cant seem to drop the axle any farther, either. If I could drop it another inch, it would be cake. I dont know what I'm going to run into if I start disconnecting the linkages, though. :\
 
I'm having problems with the rear. I have the springs out, but I cannot figure out a technique to get them back in place. They wont stay put at the top solid enough to pry it back on the axle pad -- it just keeps slipping off.

Quite infuriating. I'm considering getting a spring compressor for the spring. I cant seem to drop the axle any farther, either. If I could drop it another inch, it would be cake. I dont know what I'm going to run into if I start disconnecting the linkages, though. :\

Disconnect the linkage. Just make sure you have the rear axle supported so it don't slam on the ground. (Oops) Makes it way easy to get in. Just gotta drop your jack a bit, put the spring in place and jack it back up so you can get the bolt back in the shock. Lot easier than trying to pry the spring back into place and having it slip off, etc. That's what we did anyways, on the second side.
 
Disconnect the linkage. Just make sure you have the rear axle supported so it don't slam on the ground. (Oops) Makes it way easy to get in. Just gotta drop your jack a bit, put the spring in place and jack it back up so you can get the bolt back in the shock. Lot easier than trying to pry the spring back into place and having it slip off, etc. That's what we did anyways, on the second side.

Actually, I started disconnecting the things that would be easy to re-connect. Removing the swaybar from the axle did just the trick and put alot more play in the axle. After I did that, I was able to shoehorn the springs up over the axle pad with a little bit of elbow grease and finesse.

Thanks! Looks great -- now just gotta go get my tires mounted and balanced.
:beer:

Edit: and an alignment.
 
Finally installed my Daystar 2.5/1.5 today. Father-in-law helped out and took about 4-5 hours. Rented the strut/compressor from Autozone. Figured out I need to invest in a new hydraulic lift that provides at least 20" of lift...

Thanks for your write-up Richierollz!

Here are my measurements I took pre/post install:

Grount to highest point fender.
Stock (approx.):
Front L - 33 3/8"
Rear L - 35 3/8"

Daystar installed (approx.):
Front L - 36 3/8"
Rear L - 37 3/8"
 

Attachments

  • P2200156.jpg
    P2200156.jpg
    62.6 KB · Views: 1,826
I had the older kit with the pre-load/top-out spaces. Wasn't too bad. Now that I know how to do it, I could probably install the kit a bit faster now.

Glad I had a partner to assist, especially with installing the longer bolts in the top shock/strut plate. Didn't have a vice to hold this plate, so I used two short 2x4s to knock out and install the bolts (rested the plate on the 2x4 corners/edges).

Definitely could have used a bigger hydraulic lift...spent a lot of time moving jack stands and my various lifts around to get the clearance I needed. Not sure the Toyota one will work when I need to change a flat. Guess I better check.....

I can see how the xreas might be an issue installing the rear suspension, if you over extend (lower) the rear axel; anyone with xreas agree here?

Wear gloves.
 
Last edited:
Nice write-up. Absolute 4Runner noob here. I'll be installing the DS2.5/1.5 top out kit this Saturday. These instructions look much easier that what's provided with the kit. :thanks:
 
Thanks for write up. I am a novice when it comes to mechanics, and this thread made me feel a lot better about tackeling this project.

Me and a buddy did a 2.5/1.5 daystar lift yesterday. I expected to spend about 5 hours doing it, but it only took about 2 hours for the front, and 45 min for the back. Totally recomend getting that second set of hands, that made all the difference. The back was really easy, 4 bolts, tilt the axel, remove spring, etc...

During the process, i identified that one of my shocks (XReas) was leaking fluid. SO looks like im going to be looking for a new set of shocks.

Anywho, now going to have to get a new jack to carry with in the truck, not sure if the factory jack is big enough now with the DS lift and new 265/70/17 tires, lol.


(ps, also recomend a breaker bar, i didnt have one, but my buddy did. Totally helped out to get those tightly fitted nuts)
 
Last edited:
Yesterday I installed the front and back kit by myself, took about 5 hours, including a few dummy moments, and air tool problems. Very avg mechanic here, just sucked it up and went for it. And I'm 53yrs and sore as heck today. LOL. I'll add a few quick notes, maybe help somebody:

Did everything with one small rolling floor jack, and two good jackstands, with a few 2x4 and 4x4 blocks for longer reach when needed.

Front: Never needed to loosen any steering tie rods, or the alignment points as mentioned above. Then I got the shock/spring loose from its top/bottom bolts, was able to turn it and walk the coil down quite a bit to gain better access to install the new top bolts. Hint: be sure and drop the spacer on -after- you install the new bolts, haha :redbrick:. And it only goes on one way, its not rerversible. The flair on the big hole goes downward.

Rear: Dropped the spare for easier work, good move. I only pulled the lower shock bolts, and one bolt on the left side of that long sway bar. Then on left side, crammed the floor jack in between the axle and the frame bump stop, and with a 2x4 block was able jack and gain enough clearance for the spring to easily come out. Install spacer, then cone, then cram in and let jack down very slowly while positioning spring. Repeat right side.

Again, working alone, just think it out and use common sense and gloves!, they definitely saved some skin.

Pics are just like all the others here, silver 2004 looks better. Spidertrax spacers will be on the way shortly. :thumb3:

 
I'm in the minority here. It took my father and I about 10 hours all said and done, but we were working on a vehicle that had a fair amount of rust. We're both handy mechanics, and he was a helicopter mechanic in the marines.

This thread helped, thanks guys!

The only thing I'll add that I didn't see in here is that dropping the rear swaybar helps get the rear end low enough to get the springs and spacers in without a compressor.
 
Hey All,
Im an idiot and forgot all the pics to this write up were attached to my photobucket account, which i deleted a while ago.
I apologize and will try to put this back together or just post a new one

Rich
 

Members online

Forum statistics

Threads
278,310
Messages
3,554,079
Members
248,016
Latest member
Advally Service

Trending content

Back
Top