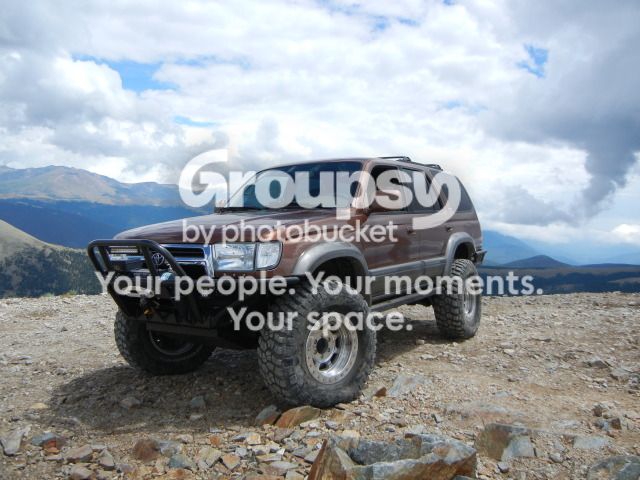
Dirtco's 1999 4Runner Build

Hey Dirtco, truck is looking great as always and I am liking that lower shock washer mod.... and wow I want a Lil' Skip tank skid, that thing obviously can take your beating so it should be able to what I can try and throw at it! haha

I actually am running those All-Pro skids on my 4Runner right now. They either need to be trimmed down like 1/8" off the rear facing portion, or you do what I did, and bolt them on and let the impact gun suck the bolt up and slightly bend the mounting surface. That probably doesnt make sense but I will snap a pic next time I'm under there. Holy, I never realized they were so expensive, I got them for free so I thought I would try them....

Thanks rickashay!

Yeah, that makes since. That's good to know, I was just looking at the pictures and they didn't seem quite right (without some modification). I'm sure they have to charge that to make money off them, but mine were free and only took around an hour to make (including finding the material, and figuring out how I wanted to put them together).

And sweet pictures, it looks like you've had a couple great trips lately!
 
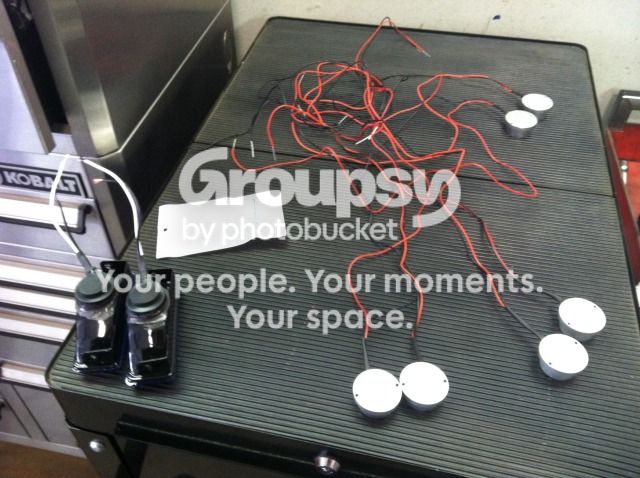
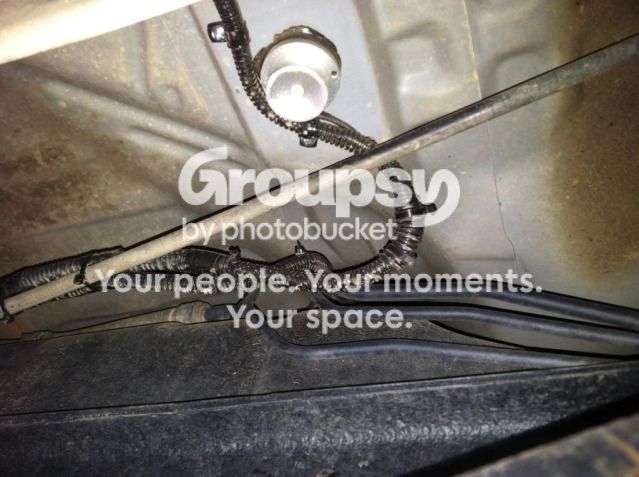
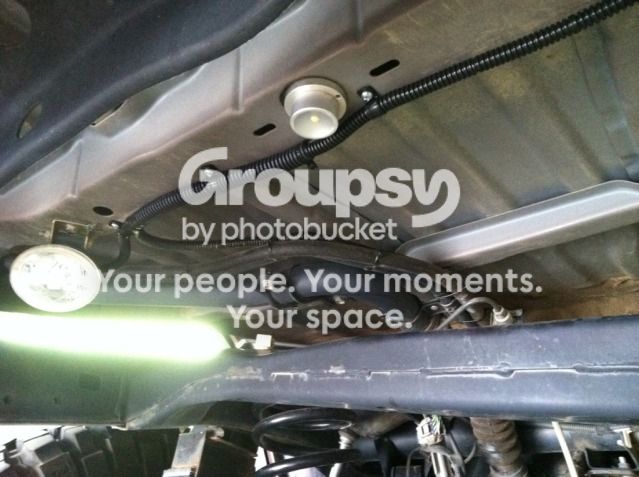
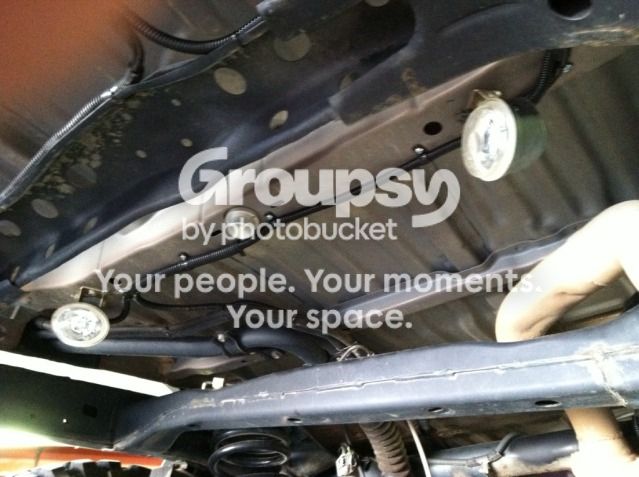
I also started working on my rock lights, and wiring the auxiliary reverse lights. I’ve found that rock lights are not just nice for wheeling in the rocks at night; but also for camping, recovery, airing up, and trail repairs.

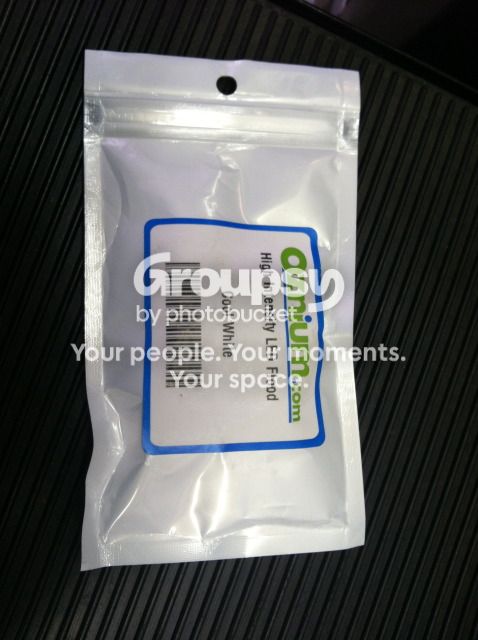
I used two different styles of lights; the first are Oznium waterproof LED floodlights, they are small but very bright for the size!

High-Intensity LED Flood Light

IMG_0340.jpg~original


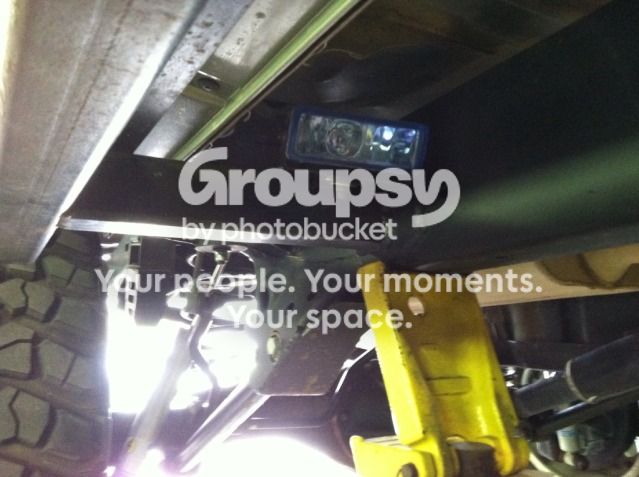
Those lights are awesome, but I felt that I wanted some more light output off to the sides of the 4Runner too. I bought some cheap Autozone fog lights for the job and I silicone the hell out of them to make them waterproof. I really don’t see them lasting very long but I needed something there to start the wiring process; I plan on upgrading them to something better, and higher quality in future.

IMG_0341.jpg~original


I mounted the actual fog lights on the rear leg of the slider, and I added the LED light to shine some light on the rear tires.

9b2c2ceb.jpg~original


f0bb726a.jpg~original


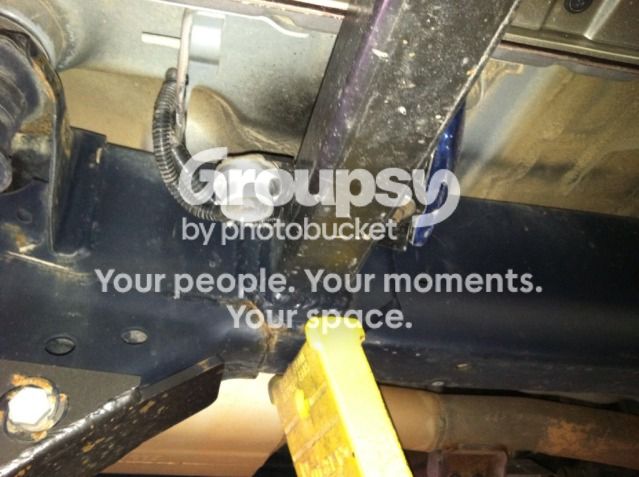
I decided to add a light right under the middle of the 4Runner (under the driveshaft).

2bc261c8.jpg~original


d89e2f3a.jpg~original


And one under the middle of the rear cargo area, this will be nice for unloading/stashing camping gear. The two other lights are my auxiliary reverse lights.

8ef54a0a.jpg~original


278b22dd.jpg~original


And, I have lights on the rear corners of the 4Runner, for spotting rocks and tire placement. That’s as far as I got, I still to run wiring to the trailer plug (Yes, the trailer has rock lights and a reverse light :D) and run the wiring into the cab where I can complete the wiring.

a29275c2.jpg~original


eadbcc6d.jpg~original
 
Looks fantastic. Viewing the pictures took me down a little rabbit trail.......


I notice the body lift spacers, starting thinking about a 1" BL for my own rig, went back to the beginning of your project log, read your install notes, and now I have a question about the rag joint. lol

Did you end up just drilling the spacer out? Did you ever get the steering to feel like stock again after the install or modifying the spacer?
 
Looks fantastic. Viewing the pictures took me down a little rabbit trail.......


I notice the body lift spacers, starting thinking about a 1" BL for my own rig, went back to the beginning of your project log, read your install notes, and now I have a question about the rag joint. lol

Did you end up just drilling the spacer out? Did you ever get the steering to feel like stock again after the install or modifying the spacer?

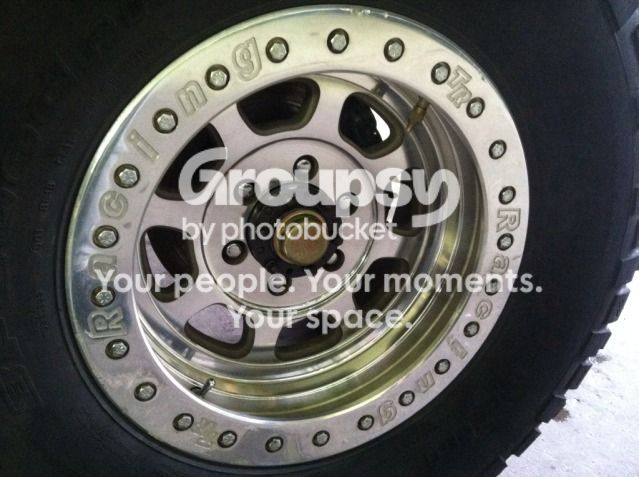
In all honesty, I totally forgot about it. Between the supercharger issue's, the defective beadlock wheels and the spindles hitting the front coils, I just spaced it out back then. I went back and copied the original post...

I would love to get some input on this...

On 3rd gen 4Runners and Tacomas you need to install a spacer at the steering rag joint. The spacer has holes drilled in it for the longer bolts, and some voids machined for the studs coming off the steering rack side. The voids do not go all the way through the spacer. I installed it with the wheels straight ahead, and it looked like this (but at a lower angle).

DSCN0306.jpg~original


I took it for a drive and the steering felt like it had a little more resistance to it. I brought it back to the shop and loosened the slip shaft to release any tension that might be stored. I also looked at the spacer from another angle and it looks like this.

DSCN0307.jpg~original


The studs are bottoming out in the machined voids and stressing the rag joint. So... I'm sure it costs more to machine a void, than to drill a hole. Does anyone know why they are constructed this way? Is this done on purpose? In stock form there is no pressure on the studs. I'm not complaining about the product, it just seems odd to me.

I think between the all the upgrades (wheels, tires, lift, alignments, armor, etc), the feel of the vehicle has changed so much it's hard to know how much of an effect it's having. After looking at the pictures I remember why I didn't like it, and I still feel that way. I'm half temped to drill all the way though the spacer, but I'm concerned water is going to set in those voids and start rusting the pins/hardware. I'm guessing that's why they machine a void instead of drilling a hole. The next time it's on the lift I'll take a look at the rag joint and see if over stressing it is causing any cracks, or extra wear on the joint.

Edit - I guess I could drill a very small hole in the side of the spacer to let the water escape.
 
Last edited:
Dirtco, I've been eyeing those Oznium LED's for a while! If you get a chance, could you post some output pics of just the LED's on at night? I'm curious how bright they are and am thinking about ordering them too. Nice and clean install as usual.... great job!
 
Dirtco, I've been eyeing those Oznium LED's for a while! If you get a chance, could you post some output pics of just the LED's on at night? I'm curious how bright they are and am thinking about ordering them too. Nice and clean install as usual.... great job!

Thanks! They are quite bright for their size, and what they are. I have them wired on the trailer, so the next time it's dark and I have some time to make a trip to the shop, I'll snap a couple pictures for you.

I am wondering the light output as well. Was curious why you didn't just go with the Tantrum Rock Light Kit ??

From what I saw on several different forums the Oznium LED's are quite a bit brighter than the Tantrum kit. The Tantrum kit is cool because it has the control module that lets you set the lights to strobe, chase, dance, etc; but I really never see myself using that (unless I have too many cold ones at camp :D). The Tantrum kit was also going to complicate the wiring, since the trailer also has rock lights that are wired to two circuits (both the truck, and the trailers electrical system).
 
Last weekend I made a trip over Webster Pass, Red Cone and Radical Hill. I ran Webster Pass, and then met up with Jeff (sn0wrunner) and his buddy Drew at the Red Cone trailhead.

Webster Pass

DSCN1485.jpg~original


DSCN1491.jpg~original


DSCN1490.jpg~original


Bottom of the valley

DSCN1493.jpg~original
 
We got to the top of Red Cone and there was a bunch of mountain goats hanging out (this is actually pretty normal, as long as you give them a little room they are not scared of humans).

DSCN1494.jpg~original


DSCN1495.jpg~original


What’s cooler than mountain goats? Baby goats of course!

DSCN1496.jpg~original


Poser shot

DSCN1497.jpg~original


Jeff and Drew coming down the steep section

DSCN1499.jpg~original


DSCN1501.jpg~original


DSCN1503.jpg~original


More goats

DSCN1504.jpg~original


Goat traffic jam! They walked down the middle of the trail for a good 15-20 minutes and wouldn’t let us pass; we weren’t in a hurry (and it is their home) so we just let them do their thing.

DSCN1505.jpg~original


6e416ce7.jpg~original
 
I am wondering the light output as well. Was curious why you didn't just go with the Tantrum Rock Light Kit ??

Agreeing with what Dirtco said.... a couple of my buddies run this kit and I have not been very impressed.

One of them has the multi-colored set which does nothing; NO light output So Gay

The other has the white LEDs on his Wrangler which hardly lights up the ground, so on an even longer vehicle IE. 4runner, I think it would be even worse
 
Well, it’s been an expensive couple weeks! :(

I’ll start out with the fact that both rear axle shafts are bent on the 4Runner. I have guessed one was a little bent for a while, but now it seems both are bent. I think it’s time for a little trip down memory lane (Sorry, this is going to get long).

When I ran Wheeler Lake last fall it was the first real wheeling trip in the 4Runner; it’s not a super hard trail, but with 8” of fresh wet snow things get a whole lot harder. I did not have my ARB compressor installed, so I was still open in the front. There was a nasty little ledge that was covered in snow, I got the front of the 4Runner on the ledge but I had to give it a little bump to make it all the way up. The rear of the 4Runner bounced a little harder than I like, but I didn’t think anything of it. Hell, I’ve jumped the crap out of my old green 4Runner and never bent a shaft (the housing yes, but not an axle shaft).

KC8.jpg~original


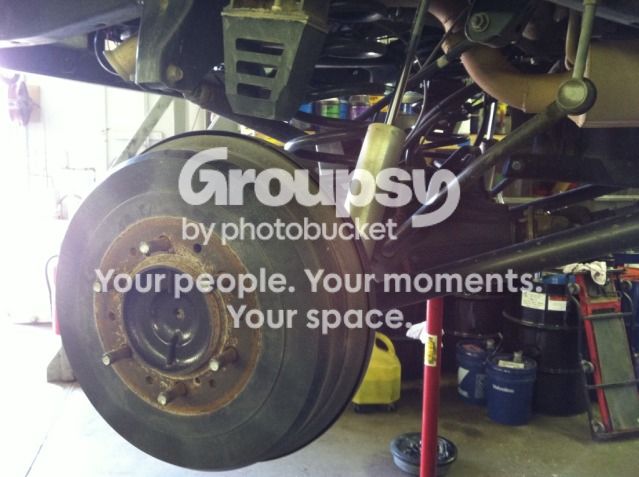
After that the rear brakes were making some odd noises, but I figured it was just ice building up inside the drum from the water crossing and I ignored it for the rest of the day. The following day I was driving the 4Runner and the rear brakes seemed a little “jumpy”, I still had stock front rotors which were a little warped so I didn’t notice anything in the pedal. So I replaced the shoes, drums and hardware kit; something still didn’t feel right but it was hard to pinpoint with the balance of the MTR’s.
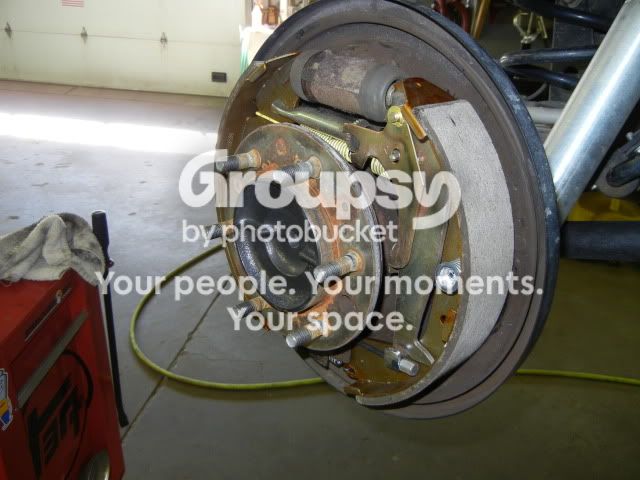
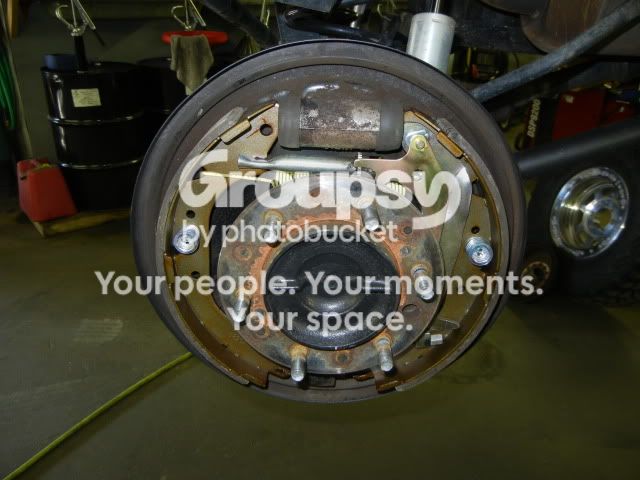
DSCN0884.jpg~original


DSCN0883.jpg~original


I noticed some vibration in the rear brakes after the Tundra swap; the old front rotors were warped like crazy so I didn’t know what was going on until after I replaced them. It’s a long story with little clues/issues along the way, but it all makes since now. It’s clear the driver side rear axle has been bent since Wheeler Lake, and after Holy Cross it just got worse. I think that’s when I slightly bent the second axle (not as bad); I didn’t beat on the 4Runner, but I did baja down Shrine Pass and there were a couple potholes I couldn’t stop for. Between the weight of all my gear and the tongue weight of the trailer it must have done the trick.

The vibration while driving and braking was really bad, or not so bad at times. It was confusing, but I realized that having an open diff would change the relationship between the two axles; at times the axle shafts are in sync and shake like crazy, after a turn they cancel themselves out and it’s not so bad. I was really in disbelieve, but after doing some searching it looks like this is a fairly common thing on 3rd Gen 4Runners and Tacoma’s that really get wheeled. Vermejo on Yotatech went through three rear axle shafts in a year; he had a 3rd Gen on 35’s and wheeled the crap out of his rig.

I looked for replacement HD chromo shafts, but they don’t offer them for the 3rd Gen 4Runner (just the Tacoma) and I called Poly Performance, they said the Tacoma shafts would not fit my 4Runner. So I really had two options; stock weak junkyard axles, or a full float FROR kit. After a lot of thought, and planning where I plan to take the 4Runner with the trailer, the stock axles were not going to cut it.

 
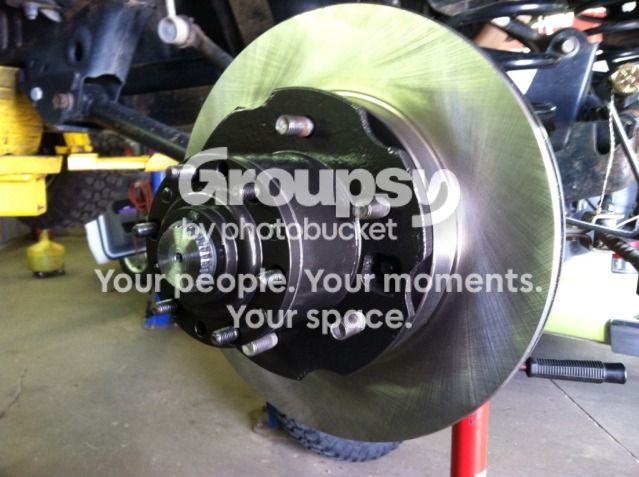
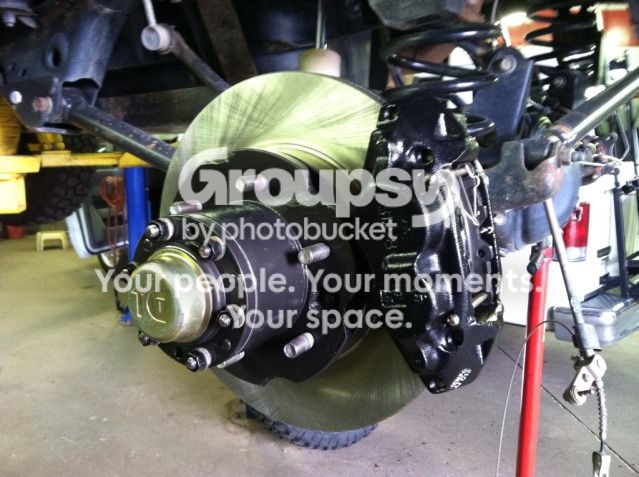
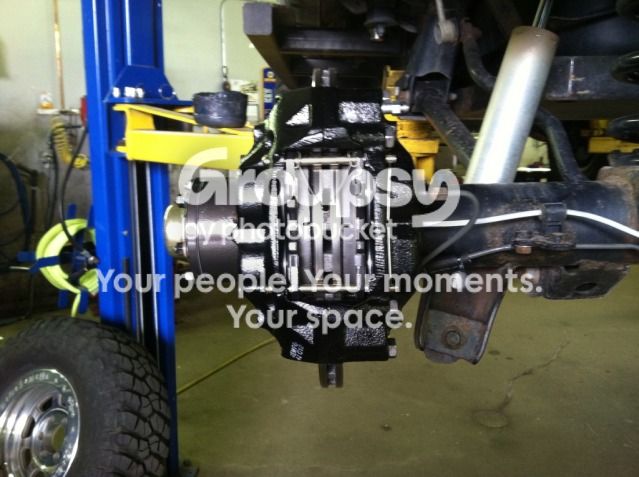
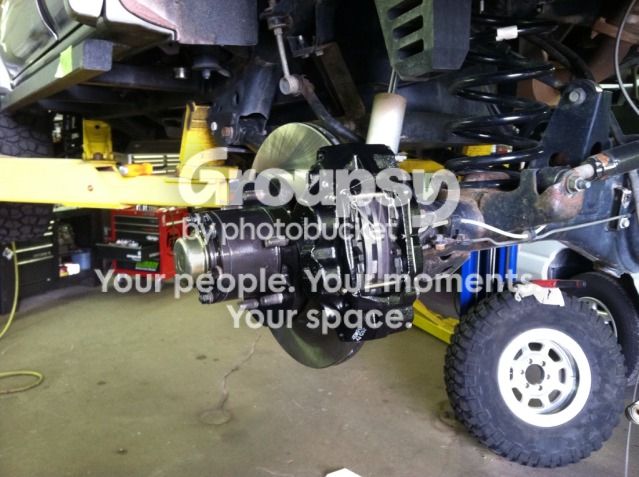
So I broke down and ordered the kit, it was more than I wanted to spend but the benefits of the kit are awesome! It has 4340 Chromoly axle shafts and it converts the rear to disc brakes; it has adapters that use the stock mini-truck front solid axle spindles, and after that it’s just like building an old front solid axle. Here is a link to the kit with more info:
Front Range Off-Road Fabrication

I wasn’t planning on doing a full write-up; I was in a hurry to get the 4Runner done for the Jamboree and I don’t see a whole lot of people converting to this set-up. The link above does have a link to a full write-up, and there is a bunch of info all over the Internet on rebuilding the front of a mini-truck axle. If you have any specific questions let me know. Here we go…

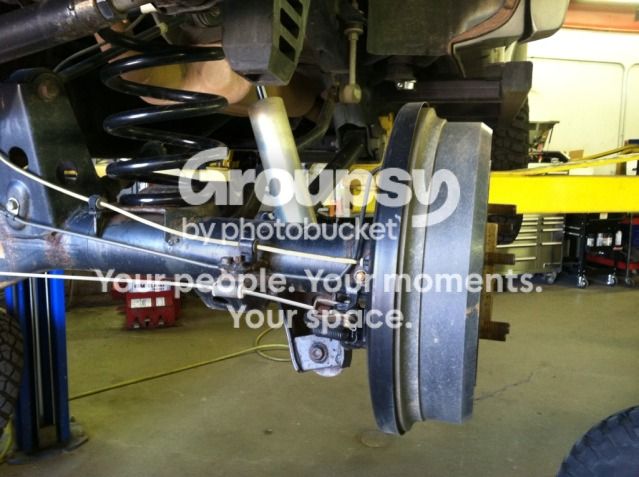
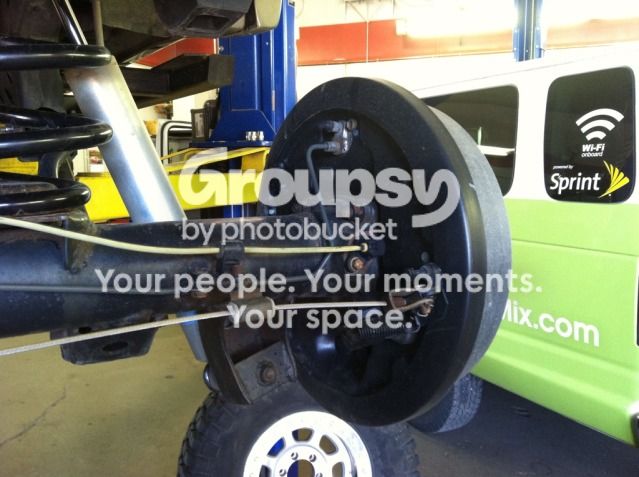
The old stock drum brakes, I won’t be missing these anytime soon!

bb87d1da.jpg~original


f7abc55e.jpg~original


0df03705.jpg~original


Stripped down to the axle housing

8ce06e7f.jpg~original
 
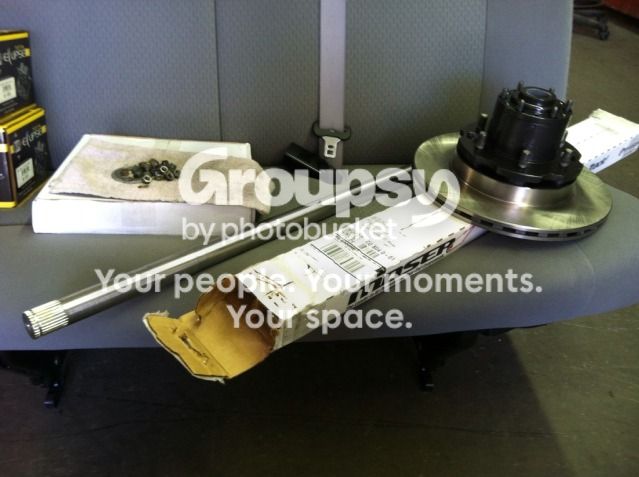
Just a fraction of the new parts, I had parts everywhere!

8413041b.jpg~original


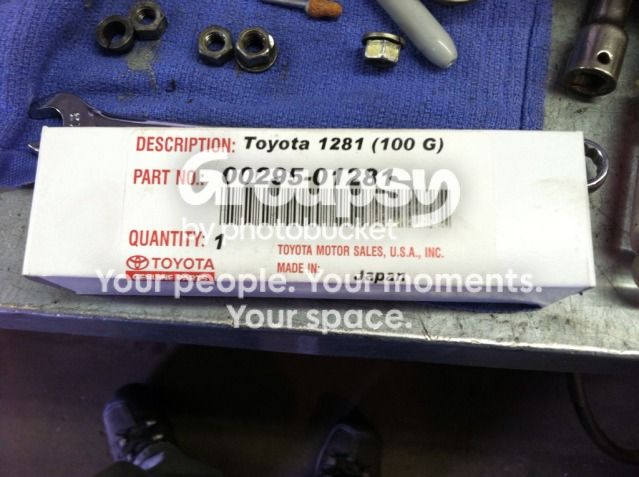
I always use factory Toyota gasket maker for this kind of stuff

c7821bcf.jpg~original


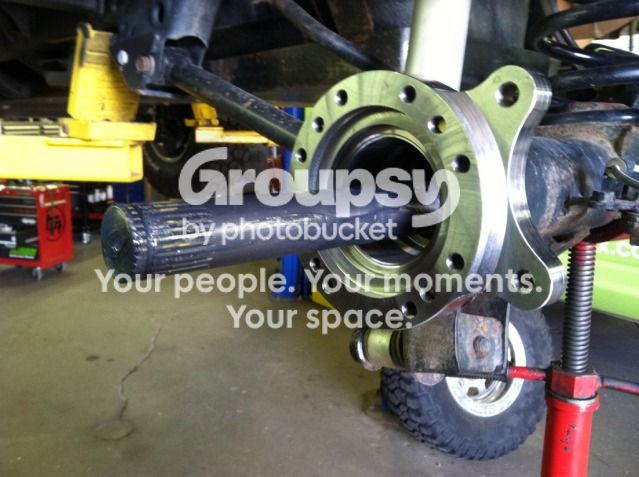
Special adapter sealed and installed, along with the new HD axle shaft installed

e2a98d91.jpg~original


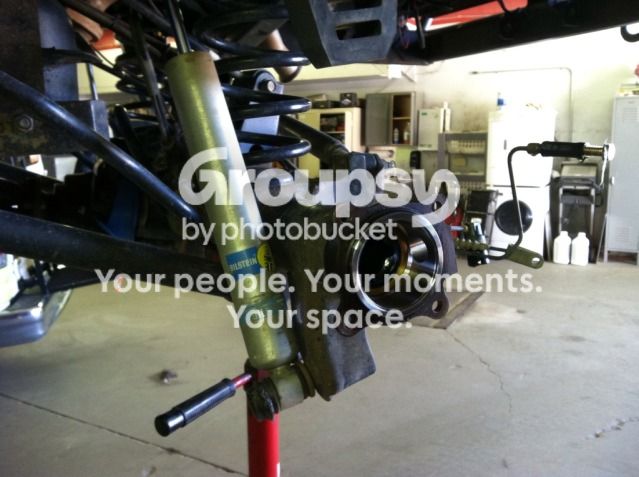
Spindle, wheel hub, Genuine Koyo wheel bearings/races, Trail-Gear chromoly Creeper flanges and FJ-60 vented rotors

19d6bbf6.jpg~original


Front brake calipers from a 1987 IFS 4cyl. 4Runner; these should provide more than enough stopping power, especially with the large Tundra brakes up front

80ea1795.jpg~original


3ace8706.jpg~original


a0673d38.jpg~original


Wheel / Hub Clearance

efd7eeae.jpg~original
 
WOW! I don't even want to think about how much all that cost. All I know is that I like, I love, I want some more of it!
 
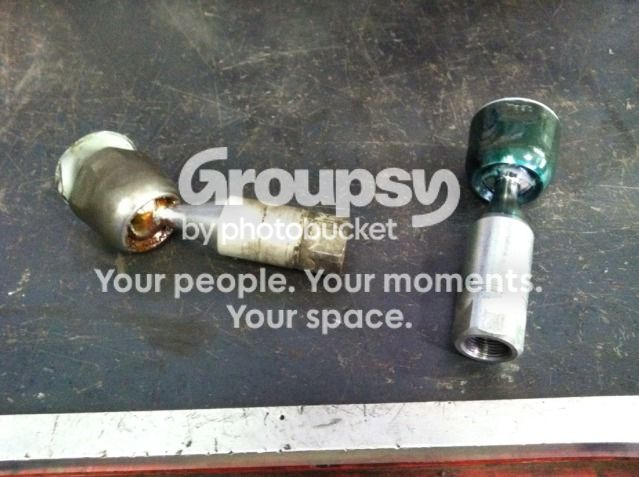
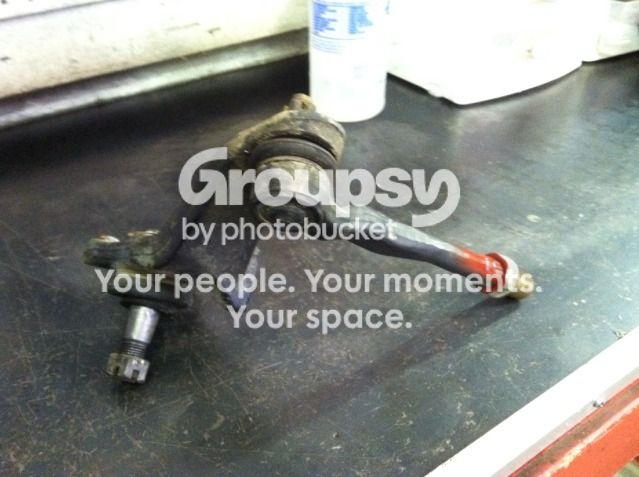
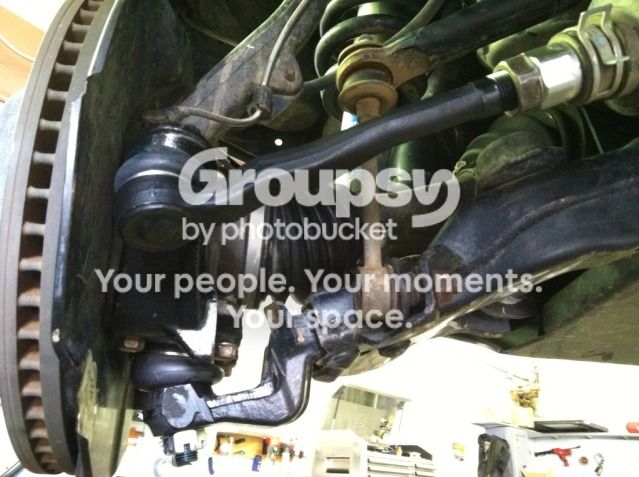
I also had to replace a bunch of the front-end components. After running Red Cone I noticed more than the usual clunking and noise coming from the front of the 4Runner. After checking it out at the shop the inner tie rod ends were loose, and the lower ball joints were puking grease. With all the lower ball joint failures around here I figured I should just replace everything; lower ball joints and inner / outer tie rod ends. It really could not have come at a worse time with the rear axle issues, but that’s wheeling for you!

The fact that this is my daily driver, the amount of wheeling I do, and the 35’s with heavy beadlock wheels meant I really only had one choice: Factory Toyota parts (in other words $$$).

Once you get in there it’s a pretty easy job. BigFishAllDay had a couple helpful links in this thread that will let you know what you’re getting into.

http://www.toyota-4runner.org/3rd-g...toyota-4runner-build-thread-7.html#post931136

Inner tie rod end – Old vs New.

69074312.jpg~original


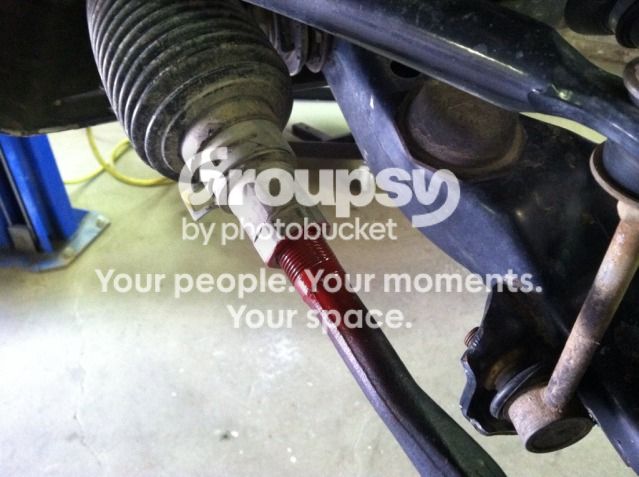
While the old parts were worn out, they are still in good enough shape to use as trail spares. I made it a point not to mess up any of the threads on the parts so I can use them if I need to, I also left the outer tie rod connected to the lower ball joint so it’s easier to disassemble & install, and I painted the alignment (I had to re-use the jam nuts) so I don’t have to guess on the trail. It might be seem a little OCD but a couple minutes in the shop go a long way on the trail.

2598efc1.jpg~original


74720c26.jpg~original


And all the new parts installed (new LBJ bolts not pictured, I had to wait another day for them to show up), I really hope they last a couple years!

2283701a.jpg~original
 
WOW! I don't even want to think about how much all that cost. All I know is that I like, I love, I want some more of it!

Thanks man, I don't want to think about it either!

I was in a hurry to get to the Colorado Toyota Jamboree and I was wrapping up the install the day of the first trail ride. I got a bad caliper, so after replacing it I hooked up the trailer, headed up to my house to pack and i took off. I was amazed by the braking power, it stopped better with the trailer than it stopped before without the trailer! I still need to fine tune the proportioning valve, but so far I very impressed!

The downsides to the swap are:

1. $$$
2. I lost the parking brake (which I really never use)
3. I had to de-activate the ABS (which might be for the best)
 
Props to you for that great rear work. My Autumn Blaze Mica will never see that kind of work done to it.

Props also for spending the $$$ on Toyota ITRs. My Sankei 555s are still tight after two years, but I like to replace OEM with OEM.

How many threads did you have showing on those OTRs at the end? I don't think I have ever seen that many exposed.
 

Members online

Forum statistics

Threads
278,314
Messages
3,554,093
Members
248,016
Latest member
Advally Service

Trending content

Back
Top