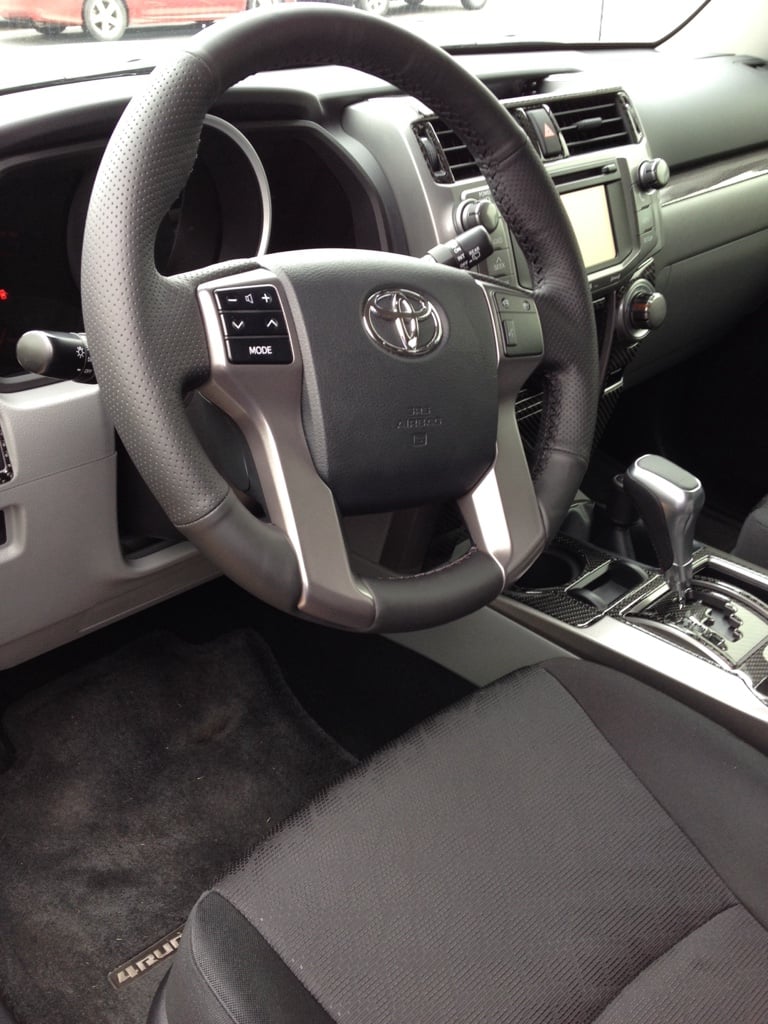
DIY Leather Steering Wheel

on relaquering the steering wheel, no. that is not something I would attempt. I would get a new steering wheel either from a junkyard or buy it new.

heating element, while interesting, would be a bit complicated with the cabling going through the steering wheel.
 
I have been waiting over 3 years for someone to come out with a nice steering wheel kit that would not look cheap, this one looks better than I expected, ordered mine. headed out to a horse supply store to get some saddle soap, it is a cream that softens leather, specifically saddle leather, I have used it on past steering wheel cover installations I work in a bit before hand on the inside, then once done I put on leather driving gloves and rub it into the steering wheel cover after it is installed, it smoothes out any rough edges and helps the leather take shape while acting as a preservative. cant wait to get mine.

I would not suggest using it on the inside of the skin. You need to use double-sided tape to hold it in place for the installation and having the saddle soap on there will keep it from sticking, which will allow the whole thing to be rotated on the steering wheel once you're done!

The most annoying thing with old steering wheels is when you can "twist" the foam/vinyl on the metal hoop!!!
 

Looks like it came out way better than mine! Great job on it!!!

I still think it was a pain to do, maybe it was a lot easier since you removed the wheel completely, while I worked on mine with everything still on it.

Still love the feel of my steering wheel, took a road trip last weekend and it was very comfy to grip for 5+hours straight.
 
I recieved mine on friday but made the mistake of trying to do a rush job, I ended up breaking one of the trim pieces on the steering wheel, 187 bucks ouch. I got about half way finished and I backed out, I will try again when I have the time to do it right.
 
Installed mine today. It's not perfect (my fault), but very happy with it.

I removed the steering wheel, which only takes 5 minutes. Not sure how long it took overall, as I worked on it off and on all day during conference calls and such, but probably twice as long as average (not good at arts&crafts projects like this).

Didn't have enough tape in the Amazon kit.

IMG_20150616_214741.jpg
 
Yes prying on it like a dumba$$ totally my fault, i can do it i just need to plan to do it when i have the time
 
I'm amazed how well these are turning out. Mine was leather from the factory, but it is starting to wear after 3 years and 70,000km. I will definitely be doing this is the future
 
Yeah, I looked at the wheelskins version, but thought it looked a bit "floppy" on their website! It just didn't fit tight and smooth, almost as if it was either too thick or just a bit too large for the wheels they installed it on.

This cover feels so much better than the stock wheel, even after several weeks of having it on! I actually want to cover the wife's Honduh before we do a road trip in it!

And for Jeremy, I ran out of double-stick adhesive too, they really needed another foot of that stuff! That's why I suggest to anyone doing this, you might wanna get some double stick tape from the hardware store (I think carpet tape would work, but don't quote me on that, you'll have to experiment if you run out!) before you start the job!

I love how all these wheels are turnin' out though! Its well worth the little work in the end!!!
 
Yes prying on it like a dumba$$ totally my fault, i can do it i just need to plan to do it when i have the time
 
Okay, that was a lot of fiddly work, dammit! I'll be honest with y'all, I am definitely no seamstress, and I would not tackle this one again! No, it wasn't super hard, but it was a long, drawn out process to get it done right! Lots and lots of internet videos to get this one done, but I have to say it feels a LOT better than the sticky rubber wheel that was damaged by the last owner's hand lotion or whatever the hell he/she used!

I found that I needed more than what they provided me, luckily I own a sign shop and the tape is nothing more than "banner tape". We use this stuff to hem banners, rather than actually stitching the banners, its very, VERY strong double-sided tape. I assume you could use carpet tape too, that would probably be pretty close too, and probably not nearly as much as my 10 dollar roll costs!

I cleaned the steering wheel with isopropyl alcohol to get as much oils and dirt off of it before starting, but I definitely put way too many other chemicals and oils on the rubber to remove the sticky feeling in the past 4+ months! I ended up having to use 3M's "94" tape primer on the wheel to get the tape to stick in a few spots!

Overall, I'm very happy with the way it turned out, but it took me close to 5 hours to finish it, with about an hour searching around the 'net to figure out how the hell to start the stitching

I even had to figure out how to thread the needle properly, didn't see anywhere that said you have to pull the thread through the needle halfway, tie the ends together, trim excess string right up against the knot, then thread through the leather on the back side, from the inside first!

My fingers are definitely sore now, you pull on the thread quite hard to cinch the seam together. I thought for sure I would tear through the leather with the amount of tension I had, but I didn't, surpringly!

Took the vehicle for a quick drive and must say it feels really nice! Looks completely stock and doesn't twist or spin on the steering wheel, which was one of my other concerns about this "mod".

If I have any issues with it down the road, I'll post back here, but I doubt there'll be any---I hope!

It is not PIA, you just have to be patient and align everything just right. Treading it is the easy part. The best $50 Mod I ever done.


I just got my Xuji from aliexpress, and will be installing it on my next day off. I went through the threads here and on Tundra Talk, and watched several videos, but still have some questions on the install.

1. How do you end/tie off the thread at the end of the section?
-I think I have the start and stitching process down.

2. Is tape really needed around the entire wheel, along all of the stitching, or is it just needed in the "Flap" areas. Personally, I rather use as little tape as possible, but if it is needed (like the pic below) for a good install, I will do it)

whiplash+willy-albums-my+2013+4runner+sr5-picture33918-20150214-110622.jpg


3. At what point do you remove the backing from the tape during the install? If you do it right before the stitching, I would think it would cause issues pulling the seams together during the stitching process.

4. Also, some say it is best to put the tape on the "Flaps" at the very edge of the flap, so when you fold/tuck it in it will stick, and others have said you don't have to fold and tuck. Which way is better?
 
1. How do you end/tie off the thread at the end of the section? -I think I have the start and stitching process down.

There's several vids on youtube on doing this, I'll be honest with ya, I truly don't recall how I did this! I know I snipped the thread as close as possible to the steering wheel though. Try searching youtube for steering wheel stitching.


2. Is tape really needed around the entire wheel, along all of the stitching, or is it just needed in the "Flap" areas. Personally, I rather use as little tape as possible, but if it is needed (like the pic below) for a good install, I will do it)

Yep! If you don't, you'll find that the whole thing will spin around slightly. The tape is what locks it down to the steering wheel, any areas that you don't tape will be allowed to spin. May not happen right away, but once the cover gets older, I'm positive that it will move around.


3. At what point do you remove the backing from the tape during the install? If you do it right before the stitching, I would think it would cause issues pulling the seams together during the stitching process.

I pulled them off as I went around with the stitching. You'll find that you will need to grab the leather and stretch it by hand to get it to fit around the wheel properly, but you'll get the feel of doing this right from the start, so don't worry much about that. You may want to have some tweezers to pull off a couple of them that are really hard to get to, unless you have long fingernails!

4. Also, some say it is best to put the tape on the "Flaps" at the very edge of the flap, so when you fold/tuck it in it will stick, and others have said you don't have to fold and tuck. Which way is better?

I think tape on the very edge worked well for me, I taped, then used the yellow tool to tuck it under the trim pieces, they stuck down enough to where I haven't had any of them come back up yet.

Good luck with the install! Youtube was very necessary for me to install this kit, make sure you watch all their vids two or three times, then do a little extra searching around for a few other vids that show the same or similar process so you really have a good idea on starting, finishing and everything in between!
 
1. It is really simple to secure the end of your thread by just punching trough the leather with needle and tying a knot inside of work.
2. Just like flyinghawaiian said, tape is to keep the skin from twisting. You may find your perfectly aligned seams in new places few month later if no tape is used. Also it keeps some tension when pulled together so you do not have to stress the thread by pulling while stitching.
3. I pulled tape off right before stitching. Watch out for any tape that might of bunched up under there while pulling. It will not flatten later, so take it off and redo it right before threading.
4. I put some tape on short edges where the airbag with horn pad fits because it will be noticeable due to large gap there by design.

Few other tips:
1. Take steering wheel off to make your life easier.
2. Before stretching the cover warm it up some with wife's hair gun. Warm leather is easy to work with. Do not try to close gaps with thread. Unstick the tape, warm the cower up an pull steady until fits together. Use thread only to secure in place and not to pull ends of skin.
3. Take your time and align everything perfectly before final threading.
 
[MENTION=1747]<<<<[/MENTION] [MENTION=118444]flyinhawaiian01[/MENTION],

Thanks for the help/advice. I think I understand the install now. Now all I need is to find some time for the install!
 
Mistakes were made, lessons were learned.

o0dssSY.png


For the love of everything - if you can, take the steering wheel off and take your time. I didn't and it was probably 10 times harder than it needed to be.

It's ok for now, I will want to redo mine in a year or two to get it perfect.
 

Members online

No members online now.

Forum statistics

Threads
278,310
Messages
3,554,080
Members
248,016
Latest member
Advally Service

Trending content

Back
Top