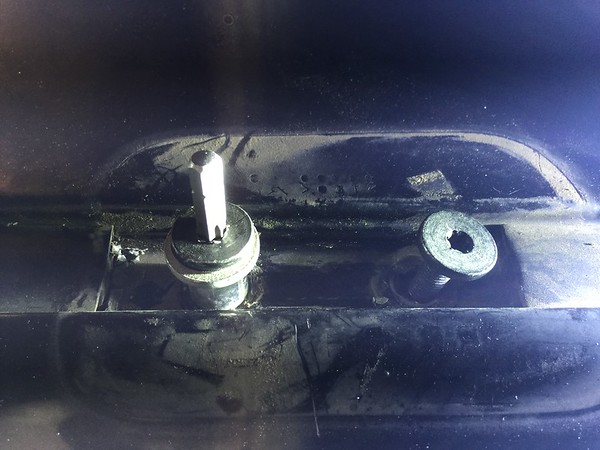
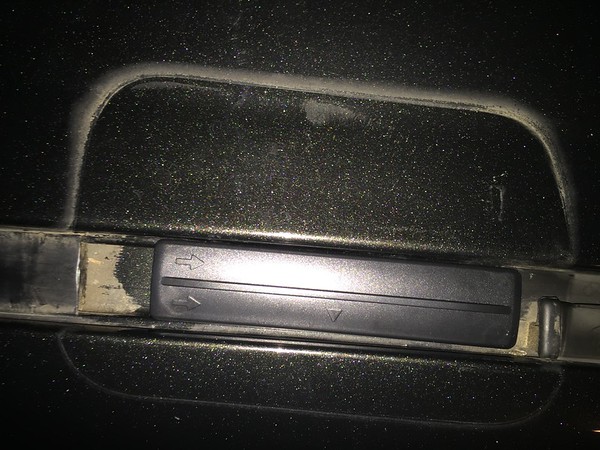
DIY: Roof Rack Delete (w/ pics)

Thanks for the how to post. I was installing factory cross rails so I only needed the first part. For removing the caps, I used a stiff blade putty knife with a beveled edge as well as a rag. The blade is 1.5" wide so it better distributes the load and the leading edge is almost knife thin.

The cheapo molding and trim tool set from HF would probably be good for this too.
 
Thank you for posting this DIY. I just removed the factory rails, then didn't like the naked look, and put them back on (with thread locker and some RTV for the belt + suspenders approach).

Re: removing the rail caps, I first gently heated the caps with a heat gun. For the prying, I used a carpentry grade 2" wide chisel, covered in painters tape. Bevel side of the blade up. Worked very well.

-Mawgie
 
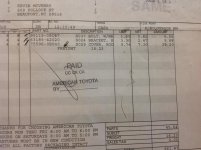
FYI, write those part numbers down before going to the parts counter. Parts guy was incapable of figuring out what parts I needed or, really, why I wanted to remove the rack at all. Annoyingly, at first he wasn't even listening to what I was saying and was trying to ring me up for crossbars.

Ordered them online after I got home.
 
does that mean I dont have to order these and just use the ones on there now ???
way to ask a question in a vacuum—no context whatsoever. :rolleyes:

do you have a 10-13 Trail? if so, then, yeah, you only need the plastic covers and the bolt kit. i can't say whether or not that's true for 14+ Trail since they now have the same roof rack as the SR5 and Limited.

yep, thought i felt a little déjà vu...

the 14+ Trail has the same roof rack as the SR5 & Limited so i can only assume you need the complete kit (bolts, brackets and covers) as laid out in the first post in this thread.
 
The easiest way to get the plastic covers off is to use a household paint can lid removal tool. It has a nice lip at the end that allows you to pull back on the plastic cover to release the clip, instead of simply prying it up.
 
The easiest way to get the plastic covers off is to use a household paint can lid removal tool. It has a nice lip at the end that allows you to pull back on the plastic cover to release the clip, instead of simply prying it up.

This worked like a charm; much better than a screwdriver.

The part numbers listed at the start of the thread also work for a '15 SR5. I'm going to have my ends/bars professionally coated satin black so my install is temporary.
Odd that Toyota saw fit to paint these parts from black to silver for a white 4R.
 
Last edited:
Found out the hard way...

After doing the roof rack delete. I took my 4runner to a automated car wash deals at chevron. And my weather stripping came flying off... I guess with out the roof rack theres absolutely nothing holding these long strips down. So I just add some 3m double side automotive tape and re-installed them.
 
I can't tell you how many times I read these instructions. I was so worried I was going to goof up the end caps. I wanted to remove mine to get them painted black. It was SO EASY to remove. I just couldn't believe it. I had myself worked up for nothing.

I didn't have to pry the end cap to pop it out. I just twisted my screwdriver a little bit. I did go ahead and get the plastic dash kit from Advanced Auto after doing this project. It was about $15 and would have eased my mind a little more.

I just picked up the sliver pieces and I'm going to install them tonight. THANKS for making this thread. Very helpful.
 
Does anybody have the updated part number that would work on a 2014/1015 Trail? When I look up the part numbers (on a few different online toyota parts houses) it looks like they broke up the parts but it's not clear if I need to order 4 of each part, 2 of each part or 1 of each part...
 
I hate to ask a silly question...but here it goes:

I want to paint or plasti-dip the rack on my sr5...If i remove the rack, plasti-dip and re assemble is there anything that I need to do other than reinstall? Should I add more loc-tite to the threads or will re-installation be a good enough seal?

Thanks
 

Attachments

  • image.jpg
    image.jpg
    136.2 KB · Views: 2,542
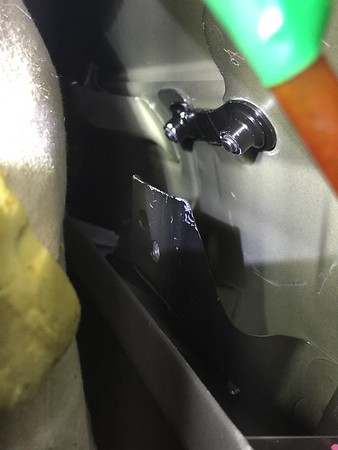
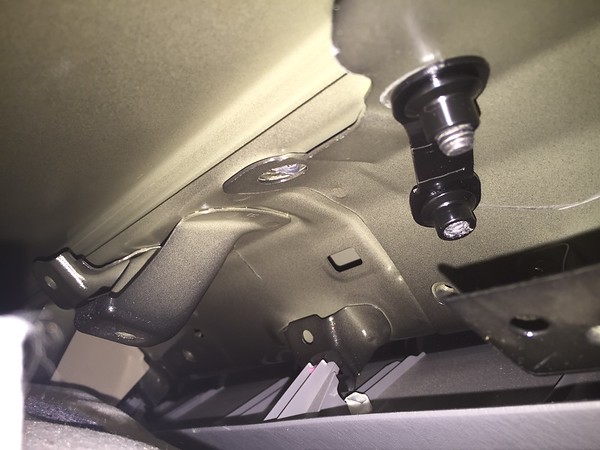
It took me 3 painful hours to remove the roof rack from my 2006 Sport V6 (tubular rack). This is what's under your roof:

IMG_4449-X3.jpg


If you remove one of the bolts completely before starting the other one, here's what happens. The bracket breaks loose and moves freely, so you can't get the other bolt out.

IMG_4439-X3.jpg


IMG_4446-X3.jpg


Please learn from my mistake. Loosen the 2 bolts a little at a time, alternating and breaking the Thread Lock a little more each time.

If this has already happened, you can still recover without removing the headliner (like I did). See if you can get the other bolt back in, and tighten it back up again. Then you'll have the leverage to break the thread lock on the stuck bolt. Be careful not to puncture your headliner!


IMG_4448-X3.jpg
 
Last edited:
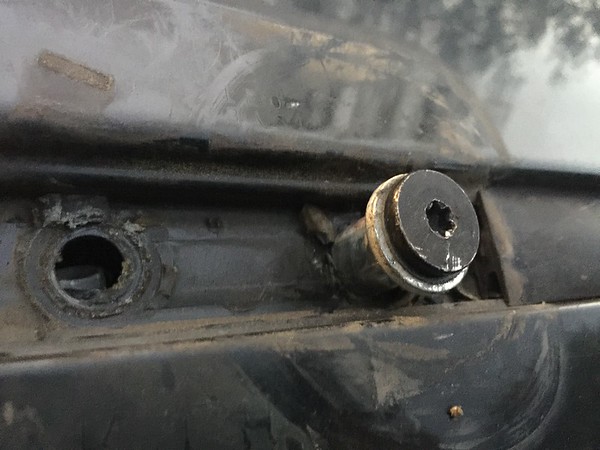
There are a few other differences with the Sport rack. They used star-headed security bolts (instead of hex-head), and they used a ton of thread lock compound. I had a hell of a time removing them, even with my 12" socket wrench.

I removed my rack for 2 reasons. It was hard to wash and wax the roof, and the rack was getting old and looking bad. I might repaint it and put it back on, but I'm more likely to leave it off. I can only think of a few times in 9 years that I actually used it.

Looking forward to lower clearance and easier maintenance! Many thanks to the original poster for providing the list of parts and pictures.

One last note: this is what the result looks like on my Sport V6. I need to buy some new and longer weatherstripping to fill the gaps.

IMG_4441-X3.jpg
 
It took me 3 painful hours to remove the roof rack from my 2006 Sport V6 (tubular rack). This is what's under your roof:

If you remove one of the bolts completely before starting the other one, here's what happens. The bracket breaks loose and moves freely, so you can't get the other bolt out.

Please learn from my mistake. Loosen the 2 bolts a little at a time, alternating and breaking the Thread Lock a little more each time.

If this has already happened, you can still recover without removing the headliner (like I did). See if you can get the other bolt back in, and tighten it back up again. Then you'll have the leverage to break the thread lock on the stuck bolt. Be careful not to puncture your headliner!

There are a few other differences with the Sport rack. They used star-headed security bolts (instead of hex-head), and they used a ton of thread lock compound. I had a hell of a time removing them, even with my 12" socket wrench.

I removed my rack for 2 reasons. It was hard to wash and wax the roof, and the rack was getting old and looking bad. I might repaint it and put it back on, but I'm more likely to leave it off. I can only think of a few times in 9 years that I actually used it.

Looking forward to lower clearance and easier maintenance! Many thanks to the original poster for providing the list of parts and pictures.

One last note: this is what the result looks like on my Sport V6. I need to buy some new and longer weatherstripping to fill the gaps.

You do realize this thread is for the 5th gen 4runner, right? Meaning Model year 2010+...
 

Members online

Forum statistics

Threads
278,316
Messages
3,554,113
Members
248,016
Latest member
Advally Service

Trending content

Back
Top