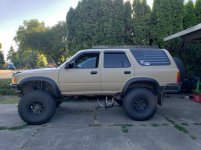
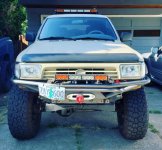
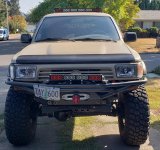
Dropzone's 1994 4Runner Expedition/Overland Build

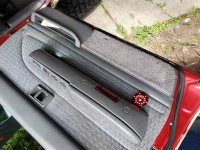
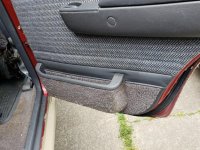
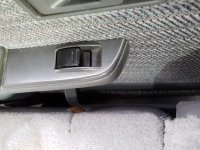
Today's Friday 4Runner Fifteen minute project brings a set of rear door storage pockets because you can never have enough places to stash a bag of zip ties.
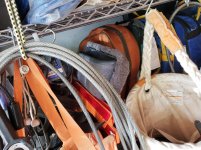
plus I found them stuff on a shelf in the garage.* I believe I pulled these out of a 1st gen 4runner.

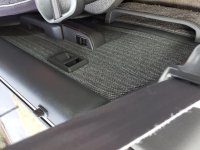
Sort of braincramped checking to see if they would fit. No issues with seat folded up or laying down
 

Attachments

  • 20180615_130043.jpg
    20180615_130043.jpg
    141.2 KB · Views: 1,113
  • 20180615_125942.jpg
    20180615_125942.jpg
    131.7 KB · Views: 1,093
  • 20180615_132812.jpg
    20180615_132812.jpg
    135.4 KB · Views: 1,108
  • 20180615_132757.jpg
    20180615_132757.jpg
    135.2 KB · Views: 1,152
  • 20180615_135200.jpg
    20180615_135200.jpg
    133.6 KB · Views: 1,145
Sweet 4Runner and thank you for documenting your build. I've had fun reading through it over the past couple of weeks. I've definitely gotten some inspiration too for my own truck. Keep it up!
 
Sweet 4Runner and thank you for documenting your build. I've had fun reading through it over the past couple of weeks. I've definitely gotten some inspiration too for my own truck. Keep it up!

glad you like it. Good luck on your truck, these old hunks can be addicting!
 
Nice looking runner. Just bought a 95 runner to fit kids. Had a 99 wrangler, but couldn't get car seats to fit without my knees in the dash. LOL

I'm collecting my parts now and in about 1 month I should be getting to my SAS. I was wanting to go in a very similar direction as you have gone. Glad I found your thread.
 
A week or so I notice a few drops of oil under the 4runner, not enough to be really worried but I had an idea in the back of my head of what the source could be. popped the hood, engine pretty clean, no smoking gun.

Looked at what i was afraid it could be and sure enough it was from the high steer steering rod hitting the oil pan.
oilpan leak by ocdropzone, on Flickr

On late 1st gen and all 2nd gen 4runners or 3rd gen trucks with the 3.0 V6 you are supposed to swap to a 96-98 T100 2WD 3.4l rear sump oil pan...Unless you push your axle forward. I used a frame brace that had the IFS box mount integrated in the stock location so the axle couldn't really be pushed forward a whole lot before I would end up with the steering rods binding when flex.
I had sort of rolled the dice even though I had been sitting on the all the parts for a year.
Anyway sure enough the source of my leak was a small crack in the oil pan
oilpan crack by ocdropzone, on Flickr
stock 3vze oil pan clearance
oilpan stock clearance by ocdropzone, on Flickr

started the swap on sunday, all is going well
bottom end with 205k on it
oil pan removed by ocdropzone, on Flickr

got the deep rear sump and windage tray installed
oil deep rear sump installed by ocdropzone, on Flickr

slap some RTV on the new oilpan...and crap it doesn't fit. Look at the part number, it's for a 2WD 3.0 oilpan, it isn't deep enough. Fudge.
start looking online for the correct 96-98 2wd 3.4L T100 pan...it will be at least a week to get or longer...nobody local has one in stock.
Crap..decide to throw the part number in Amazon...whoohooo.
They have it
ocdropzone, on Flickr
boom with Prime shipping i get the correct pan late tuesday
oilpan t100 by ocdropzone, on Flickr

get the thing installed the morning of 4th of july..no leaks etc, Oil pressure actually running a little higher.
tons of tie rod clearance
oilpan t100 installed by ocdropzone, on Flickr

lame driveway flex shot
flex test by ocdropzone, on Flickr
oilpan clearance post by ocdropzone, on Flickr

i have a set of shorter bump stops on order that will swap out with these Energy Suspension Progressive bumps
progressive bump stop by ocdropzone, on Flickr
 
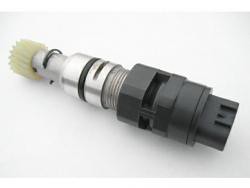
Chain Drive Transfer Case VSS speedo Sensor to gear drive Transfer case speedo sender

this post is mainly so i don't forget how to do this.
This allows you to keep your electric speedometer, saves having to tear apart your cluster and converting to a 4 cylinder mechanical speedo...PITA

thanks for [MENTION=134144]1UZrunner[/MENTION] for the heads up

A Marlin Crawler VSS (Variable Speed Sensor) is needed to get the electronic speedo to work in 92-95 4runners when converting from chain drive to gear drive transfer cases


trouble shooting info
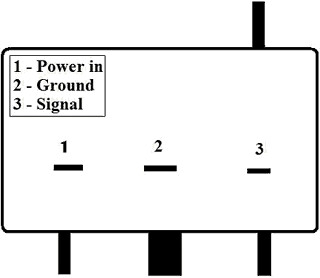
To troubleshoot the operation of the sensor, connect a 12 VDC power source across pins 1 (+VDC) and 2 (GND), and connect a multimeter across pin 3 (SIG) and the power source ground (or pin 2). With your multimeter set to read voltage, you will see two distinct voltage readings as you slowly rotate the shaft of our VSS: 0.07-0.08 VDC and 12 VDC. The lower reading is the nominal voltage (outputs at least this much voltage), and the 12 V reading is the pulsed output signal (which occurs exactly 4 times during one full shaft rotation).

VSS_diagram320

The pulsating output signal (pin 3) will be the same as the input voltage at pin 1 slightly stepped down from internal resistance. If a lower voltage signal is needed, then use a relay, controlled by your vehicle's ignition ON power source, to activate a different power circuit whose voltage has been reduced through a resistor.

Any vehicle input voltage may be supplied and the output will always be the same as the input. The voltage drop due to internal resistance is about 5 millivolts (0.005 VDC) and may be neglected. For example, if you input 5.00 VDC at pin 1, you'll receive 5.00 VDC at pin 3 at four distinct positions per shaft rotation. Connect 8.25 VDC to pin 1, you'll get four 8.25 VDC signals at pin 3. And so on...

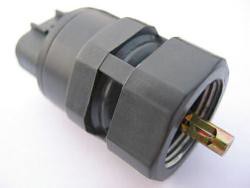
sensor from Marlin:
electric-vehicle-speed-sensor

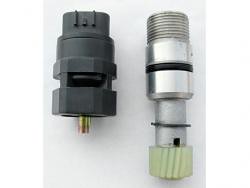
variable speed sensor compared to gear drive sensor
vehicle-speed-sensor-comparison

VSS installed on gear drive sensor
electric-vehicle-speed-sensor-installed
 
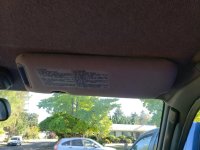
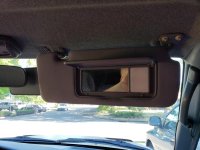
[MENTION=5345]habanero[/MENTION] scored a set of 01-02 Limited Illuminated extendable sunvisors for her 3rd gen and that got me looking.
3rd gen visors will mount directly into a 2nd gen. I was running a set in my 94
having the illuminated mirror and extendable visors would be nice, especially for the missus.
looked on Ebay for the limited visor...sticker shock..if you can find them they want about half of what I originally paid for the 4runner.
so decided to try an alternative: I scored a set of Lexus ES300 visors that were dirty but in great shape and dirt cheap.

not a direct bolt in but I got the features I was looking for. I'll get the light for the mirror wired eventually. I should be able to tap into the map light for some juice.
 

Attachments

  • 20180711_175821.jpg
    20180711_175821.jpg
    135.6 KB · Views: 1,045
  • 20180711_180023.jpg
    20180711_180023.jpg
    133.6 KB · Views: 1,055
Should have been painting the house but it's too dang hot for latex paint so decided to work on the 4runner

Redid the roof rack today
Used some .25"x2.5"×72" aluminum strip for the main rails.
Gained 1.5" in width. May not seem like much but it will make big difference hauling junk.
 

Attachments

  • 20180725_183657.jpg
    20180725_183657.jpg
    136.8 KB · Views: 4,043
  • 20180725_183615.jpg
    20180725_183615.jpg
    134.5 KB · Views: 1,019
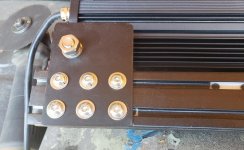
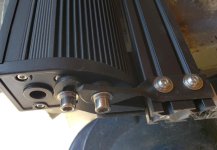
So decided to add some wattage and be able to look more like the big boys

8020 strut is super easy to work with and makes mounting crap a snap

Went with an upper and lower mount for the upper light bar
Both light bars can have the amber come on independently of the center clear lights
I may swap the lower amber lenses out for clear floods
 

Attachments

  • Screenshot_20180728-201312_Gallery.jpg
    Screenshot_20180728-201312_Gallery.jpg
    100.4 KB · Views: 979
  • 20180728_201442.jpg
    20180728_201442.jpg
    59.9 KB · Views: 985
  • 20180728_201424.jpg
    20180728_201424.jpg
    109.8 KB · Views: 1,194
so almost 3 years ago I made a set of heated mirrors out of an extra set of mirrors.
I was troubleshooting a bad door lock solenoid and figured since I had the door apart I should finally install these things
Started on my heated mirror experiment :
$15 heated inserts from eBay
4runner mirror insert by ocdropzone, on Flickr
First step was to get the mirror apart, there is a screw on the bottom of the mirror that will allow you to get the motor assembly and mirror out from the housing
4runner mirrors screw release by ocdropzone, on Flickr
Assemble your chosen weapons:
Is this case a wide putty knife and plastic pry bars worked for separate the mirror from the mount
4runner mirror by ocdropzone, on Flickr
I trimmed the heated insert slightly
42186786460_f7cb3ecb87_b.jpg

No pics but I drilled a couple of holes in the mount to allow the power wires for the heated insert power and remountEd the mirror with some 3M tape

There is a small screw you can remove disassemble the the pivot point on the mount
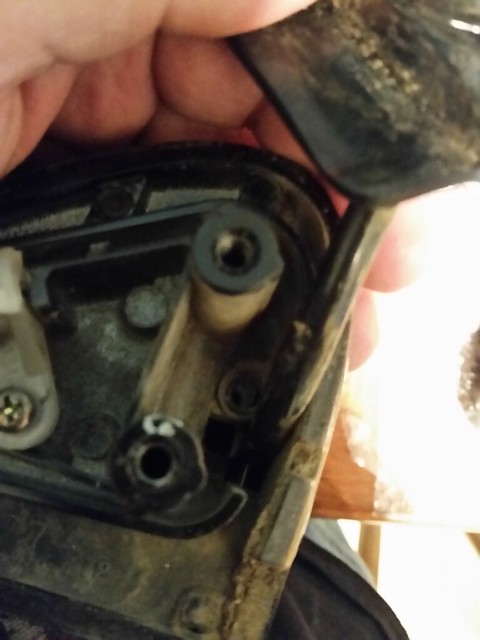
4runner mirror 3 by ocdropzone, on Flickr
Remove that screw in addition to the 3 bigger screws on the bottom of the housing, this will allow access to feed your wires through.
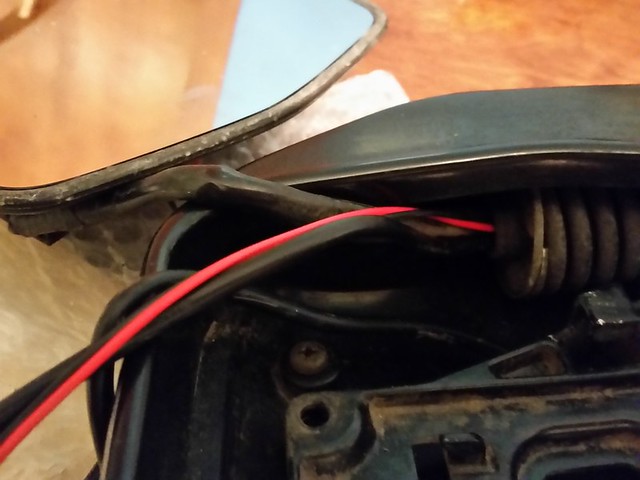
4runner mirror 4 by ocdropzone, on Flickr
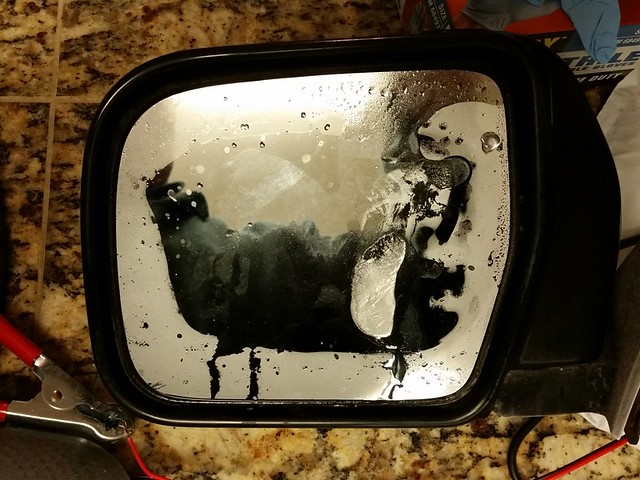
I went ahead and threw it in the freezer so I can test the insert after dinner...update to see iF this was successful.
It needs some touch up paint later on


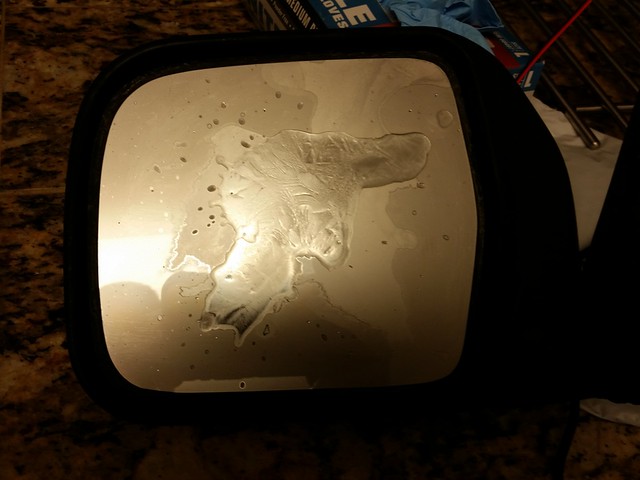
So I threw the mirror in the freezer with some water on it for a couple of hours and went to grab some dinner with friends.
42186793810_58d8cffb0e_z.jpg

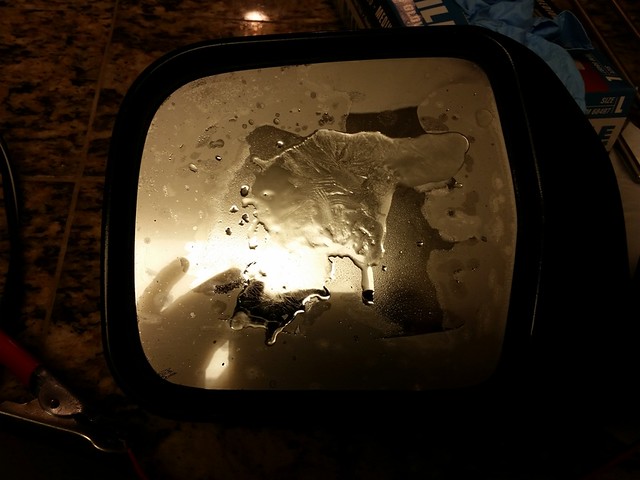
Hooked up the battery charger set to two amps

After about 3-4 minutes
[url=https://flic.kr/p/27gUkcG]
4runner mirror test 2
4runner mirror test 3 by ocdropzone, on Flickr
I have an extra defroster switch that I might use or just wire them into the rear defrost circuit.
Am happy for an experiment they seem to work OK
 
Been working a ton of overtime at work the last couple of months so haven't really done a whole bunch truck project wise.
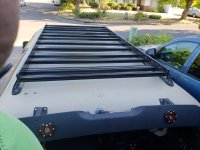
when I mounted my upper lightbar bar one thing that bugged be was as that if I hauled a ladder or something long it would rest on the light bar

I went ahead and reversed the mounts, this lowered the lightbar below the front crossbar. Now the light is about 1.25" lower and right above the roof line. It may have helped the wind resistance a little for the better.
upside is any long load now rests on the crossbar where it should be
 

Attachments

  • Screenshot_20180906-161013_Instagram.jpg
    Screenshot_20180906-161013_Instagram.jpg
    125.2 KB · Views: 958
  • 20180906_161058.jpg
    20180906_161058.jpg
    136.9 KB · Views: 952
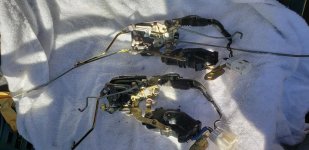
Been fighting an intermittent issue with the driver's side front electric door lock not cooperating. It finally died. Never realized how much I liked power door locks.
Traced it to a bad solenoid. Swapped it out with a good unit.
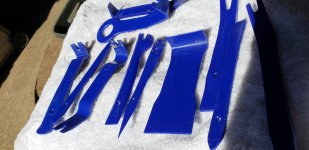
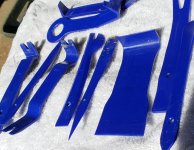
If you do any interior work spend $15 and grab a set of plastic interior tools off Amazon.

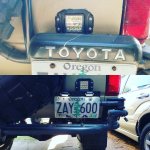
The stock license plate mount on the swing out partially blocked one of the back up lights. Made a new mount the puts it about 3/4" lower.
 

Attachments

  • IMG_20180907_161010_188.jpg
    IMG_20180907_161010_188.jpg
    128.7 KB · Views: 849
  • 20180907_124943.jpg
    20180907_124943.jpg
    142.8 KB · Views: 829
  • Screenshot_20180907-180530_Gallery.jpg
    Screenshot_20180907-180530_Gallery.jpg
    136.1 KB · Views: 858
  • 20180907_121004.jpg
    20180907_121004.jpg
    143.1 KB · Views: 850
What exactly were your locks doing? Mine has started acting up as well. When I hit the lock button only one lock moves anymore. Wondering if it's the same issue as yours.

Sent from my XT1030 using Tapatalk
 
My 95 has similar issues. Almost always the solenoid/actuator. RockAuto has Aisin brand solenoids for $60. You need to be able to pin a connector as it is literally just the solenoid, none of the linkage.

I think they have more complete options on there besides Aisin, but that brand has lasted 20+ years initially so that's who I trust.

Did passenger door last year, passenger rear quit and it's on its way in the mail as we speak.
 
What exactly were your locks doing? Mine has started acting up as well. When I hit the lock button only one lock moves anymore. Wondering if it's the same issue as yours.

Sent from my XT1030 using Tapatalk
it was the driver's door that failed. a few months ago it started acting up, not always going up and down. Than it would act like it wanted to go up and down but just sort of only going up a little bit. I took it apart a few weeks ago, cleaned it and used jumpers to activate it. It worked great for about a week and than gave up the ghost.

The rear driver's side power door lock doesn't work and the window doesn't work using the master window controller. I had another free 94 a friend gave me that I pulled a ton of stuff from the shell. I swapped the door and same problem persisted. I am pretty confident that is internal to the wiring in the pillar. It doesn't bug me enough to start pulling the interior to chase the harness.

Losing the driver's door was one i thought i could live with but it drove me nuts after awhile.

My 95 has similar issues. Almost always the solenoid/actuator. RockAuto has Aisin brand solenoids for $60. You need to be able to pin a connector as it is literally just the solenoid, none of the linkage.

I think they have more complete options on there besides Aisin, but that brand has lasted 20+ years initially so that's who I trust.

Did passenger door last year, passenger rear quit and it's on its way in the mail as we speak.
I was gonna go that route but got the whole assembly cheap on ebay with free returns so went that route. Plus I hate doing pins..I always seem to screw it up. $30 for a plug and play part was worth it to me, plus the seller guaranteed it would work.

Sometime I will tackle the left passenger door. Hardly ever use it, the grandminion's car seat is on the passenger side..
 

Members online

Forum statistics

Threads
278,316
Messages
3,554,120
Members
248,016
Latest member
Advally Service

Trending content

Back
Top