Extreme 3rd Gen Build! Insane!

Do I go FULL HYDRO?


Well, I spent the afternoon and evening doing some extensive research on full hydraulic steering and I must say that I am enamored with the concept of a full on hydro setup on my rig. I found out one of my favorite resources had a really good write up on the subject too. BillaVista.com-Hydraulic Steering Bible Tech Article

I looked at PSC, but ultimately chose to get the Trail-Gear 8" ram kit (Part number: 300892-KIT) with pump and all designed specifically for the 5VZ-FE 3.4 V6. I'll post some pics when it gets here. Summit says it won't ship until 12/30/16.

I'm going FULL HYDRO! :party:
 
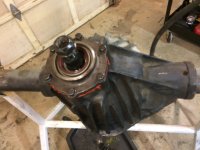
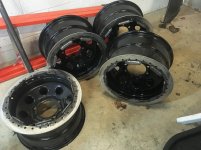
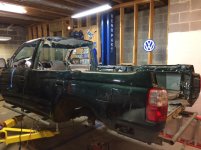
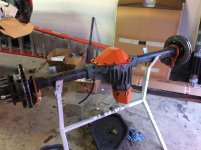
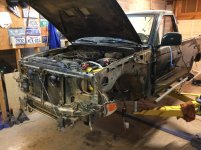
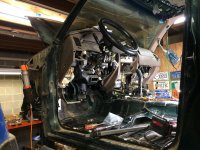
One step closer to mocking up suspension parts! Finished up the 14 bolt axle today, then proceeded to finish cutting up the roof. I'm going 100% topless. :dancin: Mostly because it will make welding the cage much easier. Plan to have a canvas top made so I can cover up when it rains. Got my beadlocks back too.
 

Attachments

  • IMG_6975.jpg
    IMG_6975.jpg
    121.1 KB · Views: 1,182
  • IMG_6978.jpg
    IMG_6978.jpg
    107.1 KB · Views: 1,181
  • IMG_6981.jpg
    IMG_6981.jpg
    123.1 KB · Views: 1,162
  • IMG_6983.jpg
    IMG_6983.jpg
    124 KB · Views: 1,134
  • IMG_6984.jpg
    IMG_6984.jpg
    129.8 KB · Views: 1,170
  • IMG_3007.jpg
    IMG_3007.jpg
    112.4 KB · Views: 1,157
  • IMG_6989.jpg
    IMG_6989.jpg
    119.6 KB · Views: 1,171
One step closer to mocking up suspension parts! Finished up the 14 bolt axle today, then proceeded to finish cutting up the roof. I'm going 100% topless. :dancin: Mostly because it will make welding the cage much easier. Plan to have a canvas top made so I can cover up when it rains. Got my beadlocks back too.


Pain! Horrible Horrible Pain! That's what I feel every time you cut a piece of your project out. [emoji30]


Sent from my SM-G930T using Tapatalk
 
Should've made it a removable hardtop like the first gen. Either way this is pretty cool!

Thought about that, but I also want to save weight. The top off saves me a few hundred pounds. My cage will have the same body lines built from steel tube for strength but will be a little heavier, so the more weight I save the better it will perform.
 
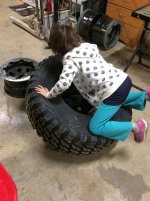
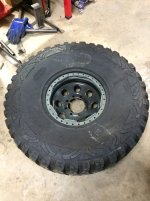
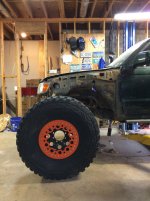
Spent some time painting and assembling my beadlocks today. Mounting those big tires is a PITA but the reward is well worth it! Had my little helper in the shop with me today. It was funny to watch her jump on the tire trying to get it on the rim. I had to put one up next to the 4Runner just to see what the stance I want will look like. I'm going to mount the front axle forward for better climbing ability off-road.

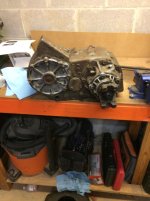
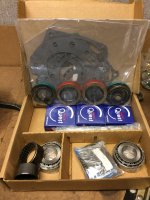
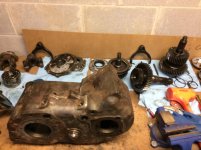
After we mounted the tires, I tore down the transfer case (NP205) to clean it, paint it, and rebuild it. The rebuild kit is from OffRoad Design. Those guys are super cool. This is a junkyard NP205 so it was grimy as all hell. I couldn't finish unfortunately because the one socket that is missing from all my tools is the 1-5/16" socket I needed today. Had to order another one, which will be here Tuesday. Sigh.
 

Attachments

  • IMG_6997.jpg
    IMG_6997.jpg
    119.9 KB · Views: 1,066
  • IMG_7012.jpg
    IMG_7012.jpg
    109.3 KB · Views: 1,112
  • IMG_6995.jpg
    IMG_6995.jpg
    106.4 KB · Views: 1,105
  • IMG_6999.jpg
    IMG_6999.jpg
    118 KB · Views: 1,173
  • IMG_7004.jpg
    IMG_7004.jpg
    94 KB · Views: 1,111
  • IMG_7003.jpg
    IMG_7003.jpg
    122.8 KB · Views: 1,066
  • IMG_7008.jpg
    IMG_7008.jpg
    108.6 KB · Views: 1,102
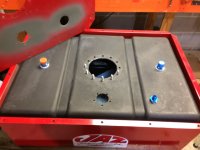
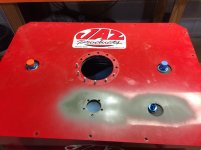
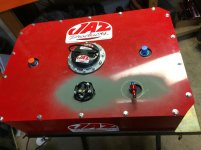
Also Managed to get some work done on the fuel cell. It's a Jaz Products racing cell but its made for carburated engines. I modified it to work with fuel injection by adding a return fitting I got from Summit Racing. I also modified the cell to add a fuel sending unit. Just need to get some red paint to cover up the primer I used to keep the holes from corroding.
 

Attachments

  • IMG_7016.jpg
    IMG_7016.jpg
    96.9 KB · Views: 1,115
  • IMG_7017.jpg
    IMG_7017.jpg
    118.1 KB · Views: 1,106
  • IMG_7018.jpg
    IMG_7018.jpg
    85.5 KB · Views: 1,076
Merry Christmaquansicah!

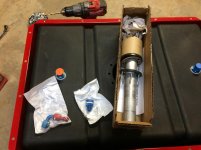
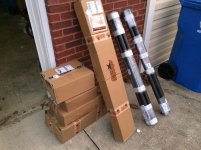
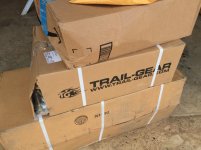
Santa does exist! Even if he did use UPS to get my parts to me on Christmas Eve! It came early!!!!!! :cheer2: My Trail-Gear Full Hydro Kit! I'll unbox it later and post pics. My stuff from Barnes4WD.com and East Coast Gear Supply came today too! Those guys are awesome because they ship super fast! I'm only a few small parts away from having everything to finish this beast! I look around at other builds on here and so far (unless I missed one somewhere) this build is the most radical 3rd gen 4Runner build that I have ever seen. On this site or others. I feel special. :trophy:

Yes, I know it's Christmas eve, but it's a weekend and those are the days I get to work on this project so I'm taking advantage of it. :whistle:

I ended up having to tear down the 14 bolt because I forgot to shave the bottom before I slapped it together. :frusty: Oh well. So, I shaved the bottom, but still screwed it up but cutting too much and then had to weld some back on. :frusty: Grrrrr. But, after an hour or so I had the whole thing back together in it's nearly finished state. Now I mock it up and measure where to put the truss and link mounts etc. Weld it all up, then slap a coat of paint on it, THEN it will be finished.

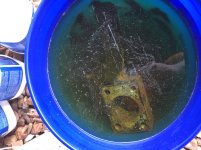
Here's a tip from the pros. Want to rebuild a part that is rusty and all crappy old.... Soak it in Muriatic Acid overnight. Cleans it up like new. You can find Muriatic Acid at any of the home centers (usually in the paint isle by the isotone, etc) or at Wal-Mart where hardware (pool supplies) are. It's used for etching concrete, but I've always used it for cleaning out old motorcycle tanks or lawnmower tanks that are rusting inside. Be sure to use gloves, a face shield, and other PPG. The stuff is not horrible to work with but it will make you blind quick if it splashes in your eyes.

I also managed to finish the Fuel cell today. What a PITA that was. Got the hole wrong for the sender on the outer shell and had to botch a cut job with tin snips to fix it. It looks like crap, but it works, so F**K it! Or as we used to say in the Army, F.I.D.O. F**k It Drive On! I'm not building a show car so a few blotches won't make a hill-of-beans difference if it all functions properly.

I also took off the headlights and fenders up front to prepare for more CUTTING (sorry ZionXIX) :biggrin2:. Tomorrow (after the kid's open presents and begin to destroy my living room with toys and wrappers) I will finish rebuilding the transfer case and hopefully start on the Dana 60 front end.

 

Attachments

  • IMG_7063.jpg
    IMG_7063.jpg
    120.6 KB · Views: 1,061
  • IMG_7072.jpg
    IMG_7072.jpg
    122.6 KB · Views: 1,091
  • IMG_7048.jpg
    IMG_7048.jpg
    99.1 KB · Views: 1,079
  • IMG_7057.jpg
    IMG_7057.jpg
    140.6 KB · Views: 1,038
  • IMG_7068.jpg
    IMG_7068.jpg
    140.6 KB · Views: 1,029
  • IMG_7073.jpg
    IMG_7073.jpg
    86 KB · Views: 1,073
  • IMG_7058.jpg
    IMG_7058.jpg
    134.2 KB · Views: 1,083
Santa does exist! Even if he did use UPS to get my parts to me on Christmas Eve! It came early!!!!!! :cheer2: My Trail-Gear Full Hydro Kit! I'll unbox it later and post pics. My stuff from Barnes4WD.com and East Coast Gear Supply came today too! Those guys are awesome because they ship super fast! I'm only a few small parts away from having everything to finish this beast! I look around at other builds on here and so far (unless I missed one somewhere) this build is the most radical 3rd gen 4Runner build that I have ever seen. On this site or others. I feel special. :trophy:

Yes, I know it's Christmas eve, but it's a weekend and those are the days I get to work on this project so I'm taking advantage of it. :whistle:

I ended up having to tear down the 14 bolt because I forgot to shave the bottom before I slapped it together. :frusty: Oh well. So, I shaved the bottom, but still screwed it up but cutting too much and then had to weld some back on. :frusty: Grrrrr. But, after an hour or so I had the whole thing back together in it's nearly finished state. Now I mock it up and measure where to put the truss and link mounts etc. Weld it all up, then slap a coat of paint on it, THEN it will be finished.

Here's a tip from the pros. Want to rebuild a part that is rusty and all crappy old.... Soak it in Muriatic Acid overnight. Cleans it up like new. You can find Muriatic Acid at any of the home centers (usually in the paint isle by the isotone, etc) or at Wal-Mart where hardware (pool supplies) are. It's used for etching concrete, but I've always used it for cleaning out old motorcycle tanks or lawnmower tanks that are rusting inside. Be sure to use gloves, a face shield, and other PPG. The stuff is not horrible to work with but it will make you blind quick if it splashes in your eyes.

I also managed to finish the Fuel cell today. What a PITA that was. Got the hole wrong for the sender on the outer shell and had to botch a cut job with tin snips to fix it. It looks like crap, but it works, so F**K it! Or as we used to say in the Army, F.I.D.O. F**k It Drive On! I'm not building a show car so a few blotches won't make a hill-of-beans difference if it all functions properly.

I also took off the headlights and fenders up front to prepare for more CUTTING (sorry ZionXIX) :biggrin2:. Tomorrow (after the kid's open presents and begin to destroy my living room with toys and wrappers) I will finish rebuilding the transfer case and hopefully start on the Dana 60 front end.
:( so much destruction...........

Sent from my SM-G930T using Tapatalk
 
Merry Christmas!
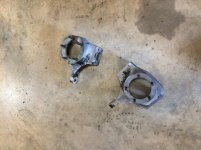
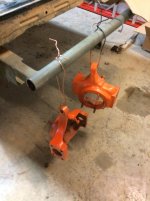
I got a little work done in the shop today. I pulled the Dana 60 knuckles out of the acid bath (left in for 24 hours or more) and with a quick wash in the parts washer, they came out great. Added some primer and paint and they look awesome. Then, after spilling acid all over my back yard accidently, :becky: I finished tearing down the transfer case then washed it in the parts washer and used Brake Clean on the stubborn parts. Then I proceeded to CUT some more and dovetailed the front end, well started to anyway. Yes, the AC worked, and yes it will work again. Everything will work when finished.
 

Attachments

  • IMG_7086.jpg
    IMG_7086.jpg
    127 KB · Views: 953
  • IMG_7087.jpg
    IMG_7087.jpg
    101.7 KB · Views: 953
  • IMG_7104.jpg
    IMG_7104.jpg
    93.5 KB · Views: 978
  • IMG_7105.jpg
    IMG_7105.jpg
    132.7 KB · Views: 1,019
  • IMG_7103.jpg
    IMG_7103.jpg
    107 KB · Views: 951
Very cool! If you want to neutralize your acid bath before disposal you can add soda ash. It's for raising ph in swimming pools and is pretty cheap.
 
Very cool! If you want to neutralize your acid bath before disposal you can add soda ash. It's for raising ph in swimming pools and is pretty cheap.

Thanks for the tip!

Muriatic acid is also used for adjusting ph levels in swimming pools. Water will dilute it and make it safe to toss in a drain or the ground. It's just another name for Hydrochloric Acid (HCI), the same stuff in our stomachs. It is used in food (Jello), PVC synthesis, purification of table salt and many other uses. I just pour it back into the containers and store it for future use. It works quite a few times. I skim the top of the buckets and dispose of the crud. The heavier stuff falls to the bottom.
 
More work today. I'm off all this week, so I'll be posting daily. Maybe twice daily if I get a lot done.

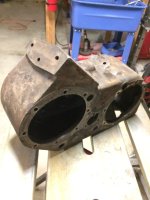
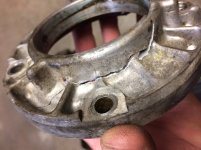
I stuck the NP205 case in the blast cabinet to get off some really gunked on grime the parts washer and significant elbow grease couldn't get. Sand-blasting did the trick. I washed it off then put on a coat of primer and finally some rubberized undercoating. Unfortunately while trying to yank out the seals from the output shaft bearing retainer plate, I cracked it. Whoops. I had to order another one, so I guess I won't be putting that back together anytime soon.

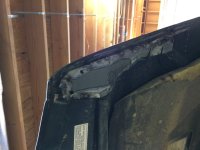
So, instead, I chopped up my hood. Took the edges off first to save and weld back on. Then cut the hood to match the angle of the inner fenders. I created some patches out of the old stripped away sheet metal (which I have plenty of) and tacked those in place to strengthen the hood back up. Tomorrow I'll reattach the inner fenders to the radiator support. Not going to close it all up until I'm done with front steering and axle. Having the extra space to get in the engine bay is awesome.

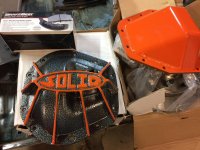
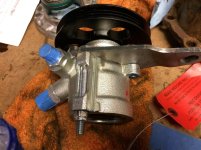
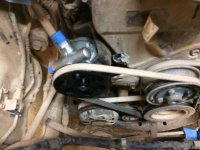
After that, I dug opened the Trail-Gear boxes and started to setup the steering system. This stuff is solid and beefy! I took off the old power steering pump and slapped on the Trail-gear supplied pump for this engine. Too bad the instructions were for a Tacoma 4 cyl which mounts the PS pump on the right. the 5VZ-FE mounts on the left very differently. I figured it all out though.
 

Attachments

  • IMG_7137.jpg
    IMG_7137.jpg
    105.5 KB · Views: 875
  • IMG_7138.jpg
    IMG_7138.jpg
    106.4 KB · Views: 863
  • IMG_7135.jpg
    IMG_7135.jpg
    125.5 KB · Views: 853
  • IMG_7160.jpg
    IMG_7160.jpg
    106 KB · Views: 848
  • IMG_7154.jpg
    IMG_7154.jpg
    129.9 KB · Views: 844
  • IMG_7157.jpg
    IMG_7157.jpg
    135.3 KB · Views: 845
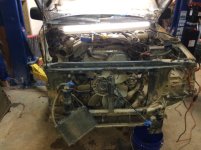
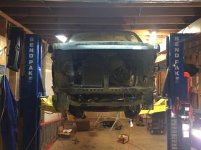
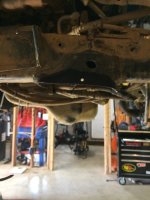
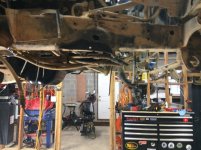
Today was get frustrated at all the damn dirt, mud, and RUST on the bottom of the 4Runner day! I guess I should have cleaned it before pulling it in the shop and yanking the axles off. :cry2: Oh well, too late now.

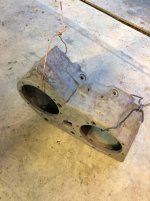
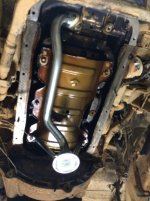
I spent quite a lot of time swapping out the oil pan. Should have been quick and easy, but noooooo, half of the M6-1 bolts had stripped heads or broke off entirely, which meant a trip to the hardware store, lots of drilling and grinding, then tapping new holes in the block. I hate it when a whole day goes by and I only accomplish one thing. Almost two, but we'll get to that in a minute.

So, why the oil pan swap? Easy! More clearance for the front solid axle. The first two pictures show the difference between the stock 4Runner sump and the T100 sump. Much more room now. :thumb3: If you have read any thread on SAS then that topic has come up I'm sure. You can spend some good money with Trail-Gear for their oil pan swap kit (which you probably should do if you have a 4 banger) but if you have the 5VZ-FE and want to be cheap, then go to Rockauto.com or your favorite parts house and order an oil pan and pickup tube for a 1997 Toyota T100. The sump is in the back. You have to trim the dipstick too. I thought about welding in baffles to keep the oil pump from starving when of off-camber slopes or hills, but Toyota says it accounts for up to 24 degrees of tilt with their sump design. Yeah, ok. I didn't do it because I was pissed about the bolt thing and decided I didn't feel like welding. I'll watch the oil pressure gauge and if it drops on steep hills, I'll put baffles in.

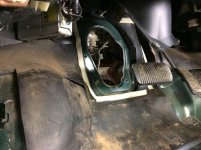
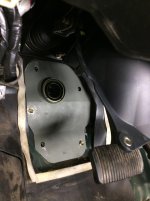
My next task was to tear out the rest of the IFS steering linkage. I decided to keep the stock dash (I want it to be identified as Toyota 4Runner) and steering column, so I got the Trail-Gear kit to install. Super beefy and super easy. I didn't finish, because I didn't have any more red thread locker. I'll finish it after another run to the parts store. It amazes me how efficient with space the Japanese are. Look how close the left head and the exhaust manifold are to the driver's feet. Separated by only 18 gauge sheet metal.

The last picture is just for ZionXIX. Doors are off now and more cutting! I love restyling sheetmetal. :bluejump:
 

Attachments

  • IMG_7166.jpg
    IMG_7166.jpg
    127.8 KB · Views: 808
  • IMG_7174.jpg
    IMG_7174.jpg
    130 KB · Views: 782
  • IMG_7172.jpg
    IMG_7172.jpg
    101.9 KB · Views: 780
  • IMG_7176.jpg
    IMG_7176.jpg
    118 KB · Views: 793
  • IMG_7180.jpg
    IMG_7180.jpg
    85.2 KB · Views: 788
  • IMG_7179.jpg
    IMG_7179.jpg
    141.2 KB · Views: 770
Last edited:
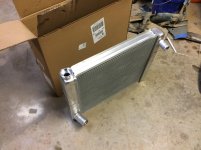
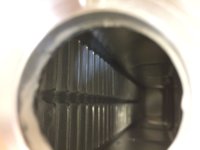
I decided that the stock cooling system wasn't going to cut it. Last time out it started getting hot at low speeds on the trail. Acted like the thermostat was sticking, so I got a new one. I also ordered a new radiator from Summit Racing. It's a 26"x19" all aluminum radiator with two cores part number SUM-380425. Should help keep things nice and cool on the trail. I also got a shroud and electric fan to replace the stock motor mounted fan. This way the fan can work at full power even at idle.
 

Attachments

  • IMG_7216.jpg
    IMG_7216.jpg
    112.9 KB · Views: 822
  • IMG_7218.jpg
    IMG_7218.jpg
    84.2 KB · Views: 765

Members online

Forum statistics

Threads
278,312
Messages
3,554,087
Members
248,016
Latest member
Advally Service

Trending content

Back
Top