Fedrlbiker Build Thread

Yesterday I pulled my sway bar off and I have to say... It really improved the ride quality with the heavy OME springs. Since I don't have they extra weight needed up front yet, it was super harsh, but now (still bumpy) the front wheels at least flex independently while driving. Before, a pothole on either front wheel jarred the whole car, but now it is significantly smoother.

As far as cornering / evasive maneuvers go, it handles great, but that may change once I get a bumper and winch. I recreated my (lame) flex test from last week and it's hard to see, but it does compress better than before and I was able to go several inches higher on the ramp before lifting the back wheel. You can also tell in the rear photo that the suspension "twist" from front to back is slightly better allowing the cab to angle less while still on a taller obstacle. I expect this will improve further as well with properly weighted front springs.

Front-Left.jpg~original


Back-Left.jpg~original
 
I finally welded up my sliders yesterday afternoon. I finished up in the dark so I didn't have time to clean up the welds and paint everything yet so don't mind the bare metal you can still see!

I really like the size of these sliders from Stubb's welding. They stick out just enough to use as a step, but not enough you smack your shin on them. I painted them with 2 coats of Rustoleum primer, 2 coats Rustoleum matte black, 2 coats Rustoleum rattle can bed liner...

photo11-1.jpg~original


photo2-9.jpg~original


photo1-5.jpg~original


photo21-1.jpg~original


photo3-9.jpg~original


photo5-4.jpg~original


photo4-8.jpg~original
 
Just ordered a Shrockworks bumper after much consternation... The price kinda scared me off and I needed a custom solution to add a receiver to the front for a bike rack. I was originally going to use Tactical Armor Group, but the bad reviews just kept pushing me away even after good communication with them. I also considered the Demello bumper, but they have not responded to me after numerous emails and voicemails asking about adding a receiver to the front. Pretty lame customer service on their part...

Anyway, here is the custom flush mount receiver bumper Shrockworks is making me. I'm a little bummed about a 3-4 month quoted lead time, but at least I'm in the pipeline now.

flushmountfront.jpg~original


flushmountinside.jpg~original
 
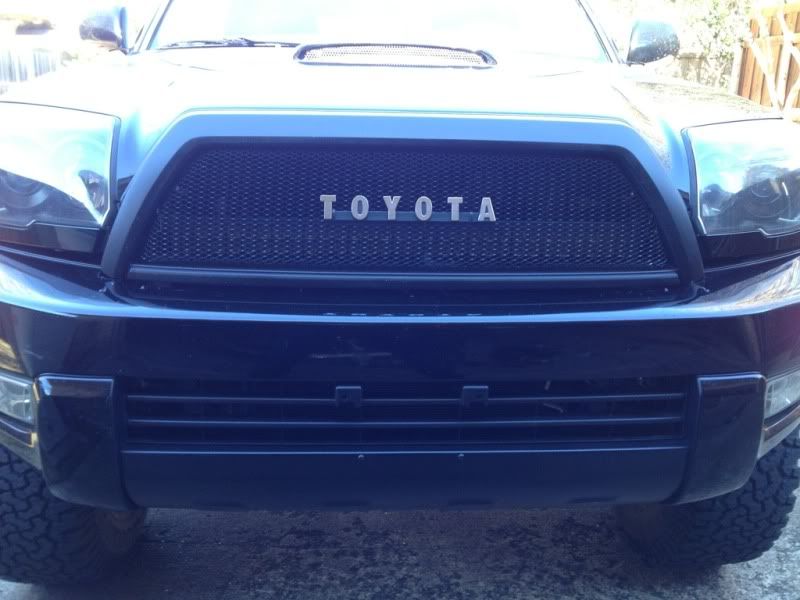
Had a pretty productive Thanksgiving weekend! Blacked out some 2006 lights, installed the facelift, rewired lights, did a satoshi mod on a 2006 grill, trimmed the 2005 bumper to accept it, installed everything including a custom hood latch bar and blacked out my lower front bumper... good times. Everything was pretty easy. Parts needed to do this to a 2003-2005 are listed below.
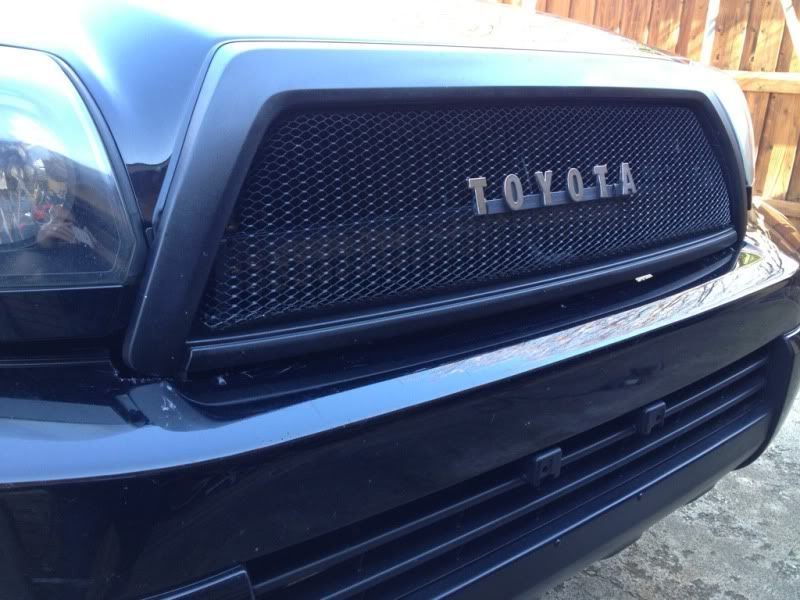
Aside from looks, one of the main reasons I upgraded to the 2006+ lights was to get the blinkers out of the bumper so that I don't need extra holes in the new steel one that's on order.

Ordering a 1958 Toyota Emblem off an FJ40 Today.
161-01Ai.jpg~original


PARTS LIST
2006+ headlights
H9 Bulbs
H9 Bulb Sockets
2006+ Bumper Filler Plates
2006+ Turn signal harness
2006+ Turn signal bulbs
Black Spray Paint
Sand Paper
2006 Grill
Drywall Mesh from Home Depot
Zip Ties
Wire Connectors

BEFORE
4BB10D23-FB6F-41AE-A103-C7862CEF1C15-380-0000001609EC2D4A_zps0e7c1e8b.jpg~original


AFTER
3DC4035D-3A76-4E52-B855-41AE6F819EBE-6198-0000062525B86F08.jpg~original


8A2D49D0-15DB-424E-851E-8B4D578F7881-6198-000006251B1120F9.jpg~original


2E280269-1767-4AB4-AE66-CAE3A91FE815-6198-000006250EFB2521.jpg~original


Here is the EXTREME trimming it took to make the grill fit. Note that I'm not worried about saving this bumper as I have a Shrockworks on order. You could remove the lights and be more detailed with this if you wanted to, but I just needed a quick and dirty solution...

28C98085-1C84-49DC-A190-EF41099AF621-6198-0000062DDC4079FA.jpg~original


A7D8731E-10DF-4C4D-93DF-46364DFD9B28-6198-0000062DCEF5E982.jpg~original
 
I may have missed it some where in your build thread but what wheels are those and what is the width of the wheel. I really like those
 
Well, I was hoping to install my dual battery system last weekend, but the separator didn't get here until this week. Anyway, one thing I've been pondering on it is how I want to monitor the batteries...

Today, I bought a 2 pod full a-pillar mount for 52mm battery gauges from Lotek here: www.gaugepods.com // Lotek Inc.

05tacoma.jpg


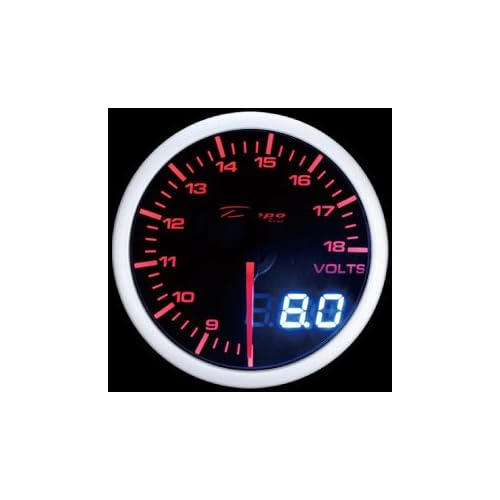
Then I hunted and hunted for the perfect gauges and decided on the Depo Racing amber / white volt meters. I bought 2, one for each battery. I found the best price on eBay.

41UiurBUjzL._SL500_SS500_.jpg


I already have some switches ready for everything that I bought from OTRATTW at: OTRATTW

2J1J6_S.jpg
SPOW.jpg


I plan to wire up the AUX switch to the gauges and have it powered as constant hot from the AUX battery. That way I can turn the gauges on without the truck running to check everything or turn them off when driving at night if the lights bother me.

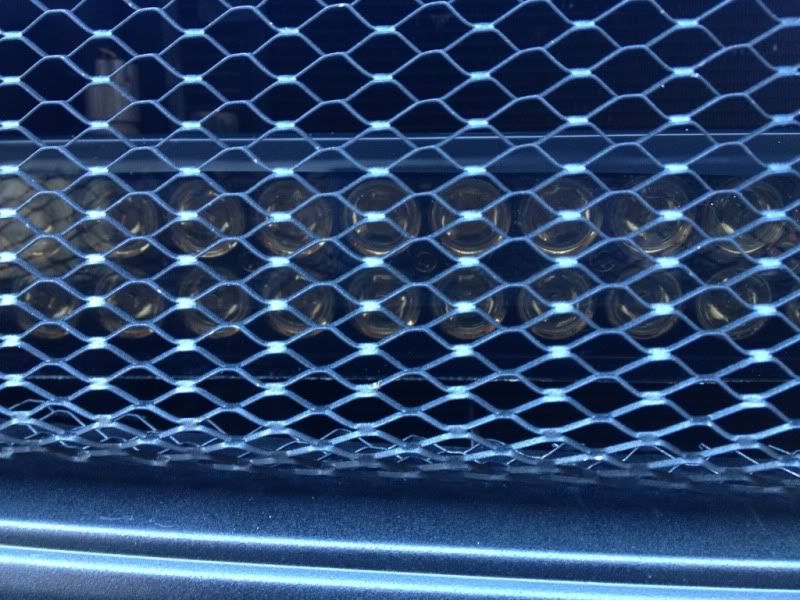
On top of all of that, I bought a 30" LED light bar from Gaterose that I plan to custom mount behind my satoshi grill and put a custom piece of smoked plexiglass over the lens (with some type of removable option). That should keep the stealth front end look and still add plenty of light output!

I'll post more info once I get everything installed.
 
Last edited:
I found some time to work on the truck last night and after putting the new battery tray in I discovered the the Everstart Marine battery I bought is too tall for the rear fender spot and the terminals are backwards for me to use in the stock location. SO... I put my original Die Hard battery back in the main position and moved my Optima Yellow top to the aux position. It fit great and I'm sure I'll upgrade the main battery later. Anyway, here is how the Optima fits. I'll be running cables soon.

84E50852-1305-4CF8-8EDC-54E3C7FF55F3-15482-00000BC72964AE7E.jpg~original
 
Well things have been crazy lately, but I finally got some work done yesterday. Finished up the dual battery install and finally installed so much needed extra outlets. I also decided to make them constant hot from the auxiliary battery also so they'll be useful when on trips.

Another note, the gauge pod that I ordered did not fit as stated. Lo-Tek didn't seem to know why it didn't fit saying, "Maybe it's different than the Tacoma..." Damn it! Why wouldn't they test this crap before stating what it will fit and selling it? Still waiting on a resolution from them and I have the gauges waiting on an installation location now...

Anyway, on to pictures of the dual battery setup. Note that I did not install inline fuses. I still may, but I wasn't happy with my options at the moment and didn't want to wait any longer. Before anyone says anything about not having split loom on the back wire, know the wire I used has almost a 1/4" housing.

612F207C-8903-447A-A359-241822584691-6945-000006CC92ED6C65.jpg~original


6F3F8D30-194A-41F8-9189-E5E1235F09CC-6945-000006CC847B90EF.jpg~original


D531FCFE-778A-4039-B498-4E34A23D5527-6945-000006CC8C296B61.jpg~original


465F2285-7B98-489D-B187-DB4F7F48783F-6945-000006CC98B41D51.jpg~original


Still working on mounting the new lights, but I thought I'd go ahead and fill the switch positions anyway.

BCD5C608-EC0B-40CD-B0E3-38539CD330AE-6945-000006CCA4B0205D.jpg~original


New 12v outlet under my iPhone mount. Now I can use a retractable charging cord and have it tucked away nice and neat at all times. I originally planned to add two outlets here, but there is a bunch of plastic I didn't want to cut away to fit the second one on the right site under the mount.

9E7AE304-AD9A-404F-B541-8DB0652A4B92-6945-000006CCAA6FB8E5.jpg~original


Instead... After taking apart the passenger glove box and panels to route wires, I decided to add the spare outlet into the hidden compartment. It'll work well for iPods or other stuff I want to leave charging, but be hidden out of sight.

C5954531-535C-42A7-9812-35242EFF0327-6945-000006CCB9241E02.jpg~original
 
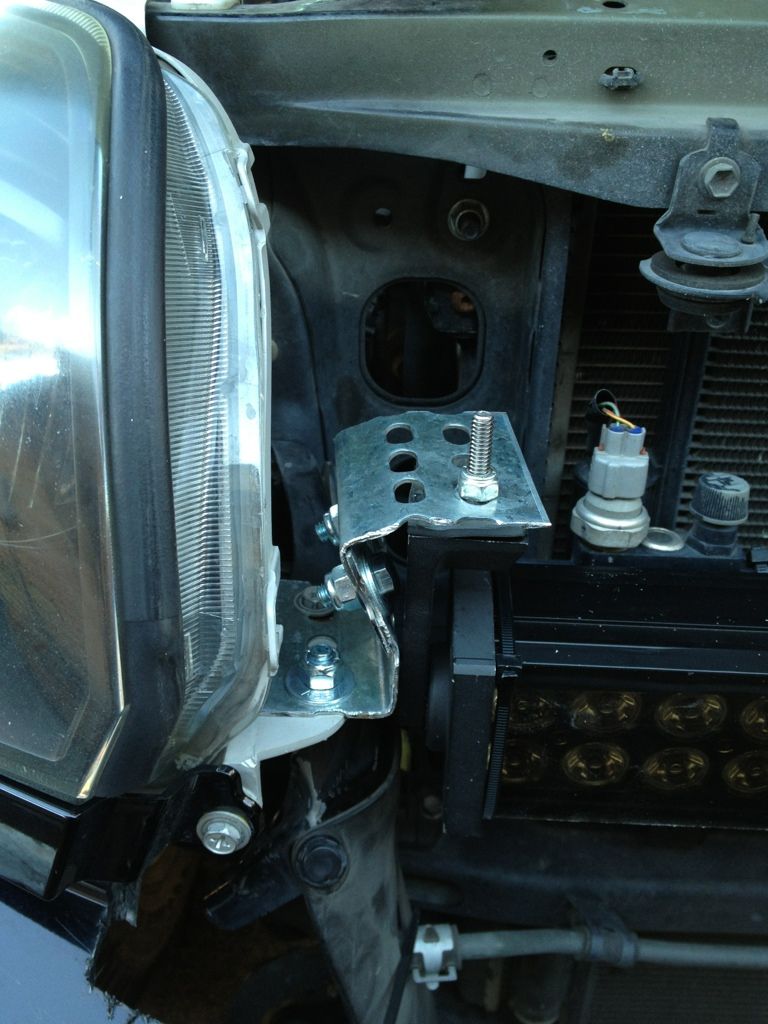
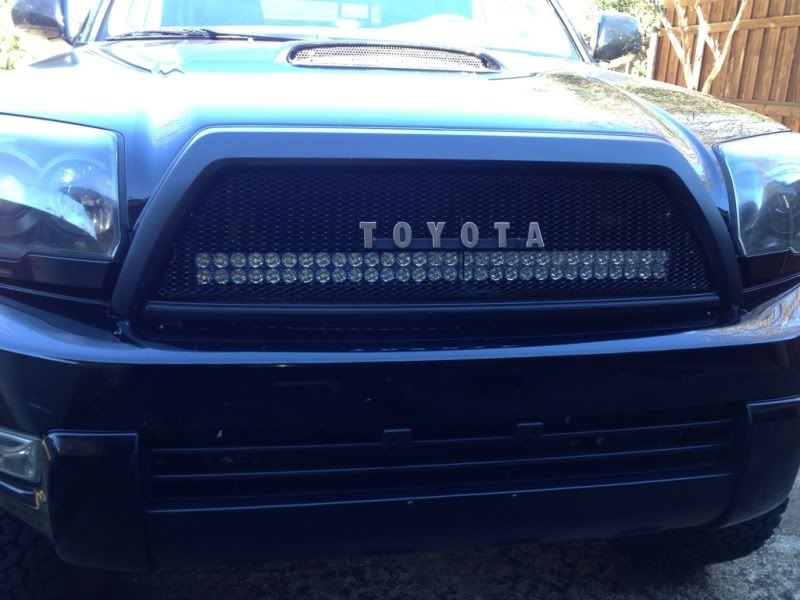
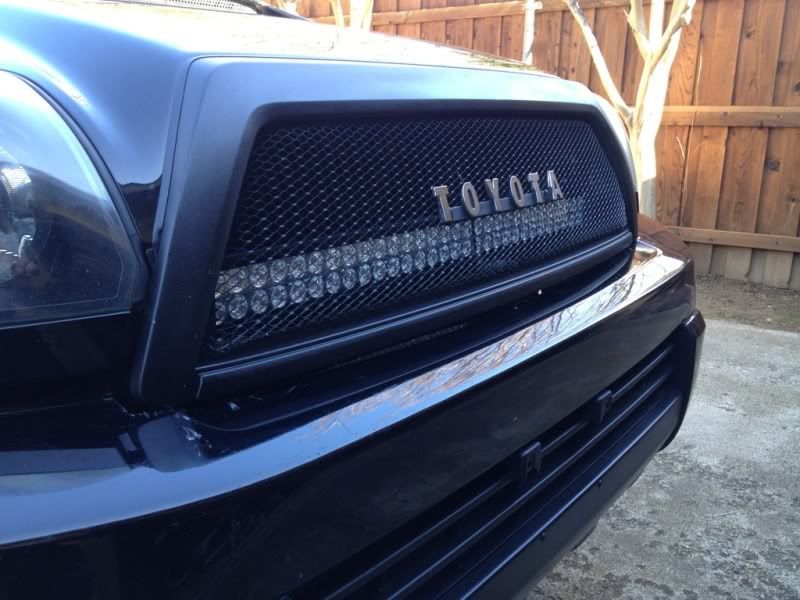
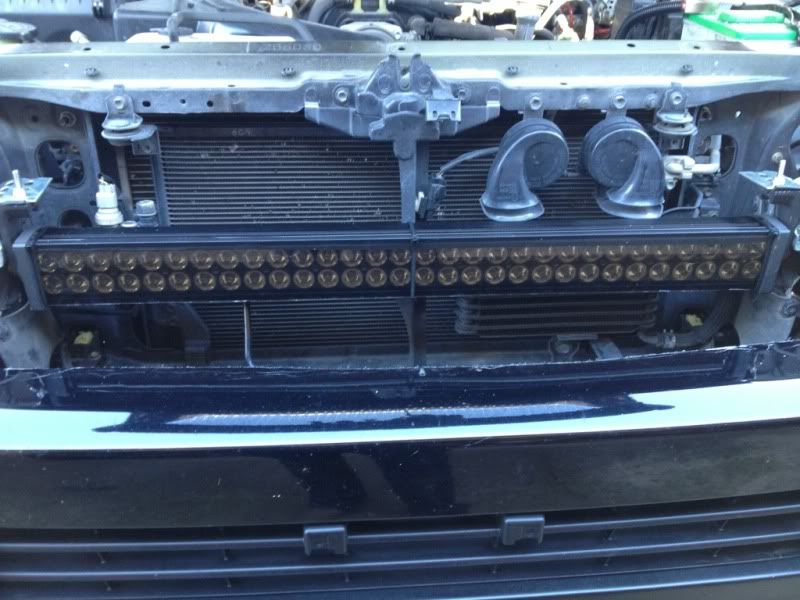
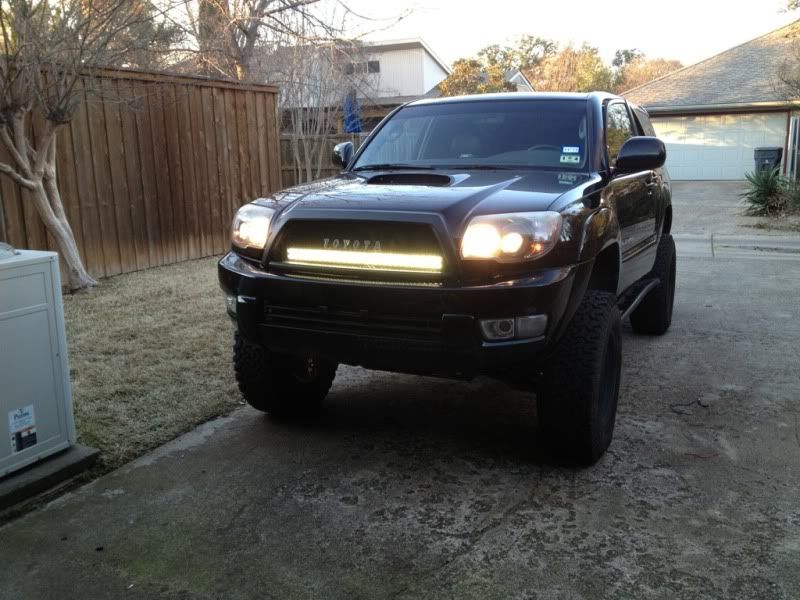
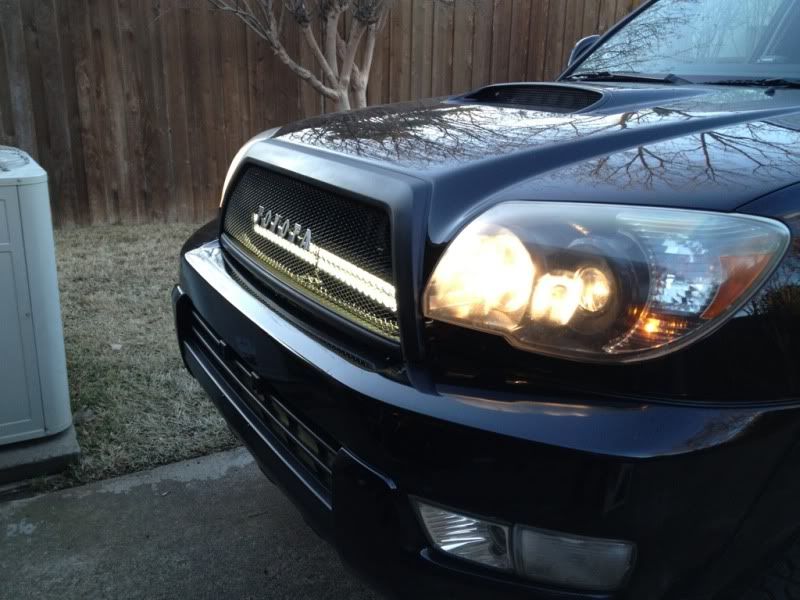
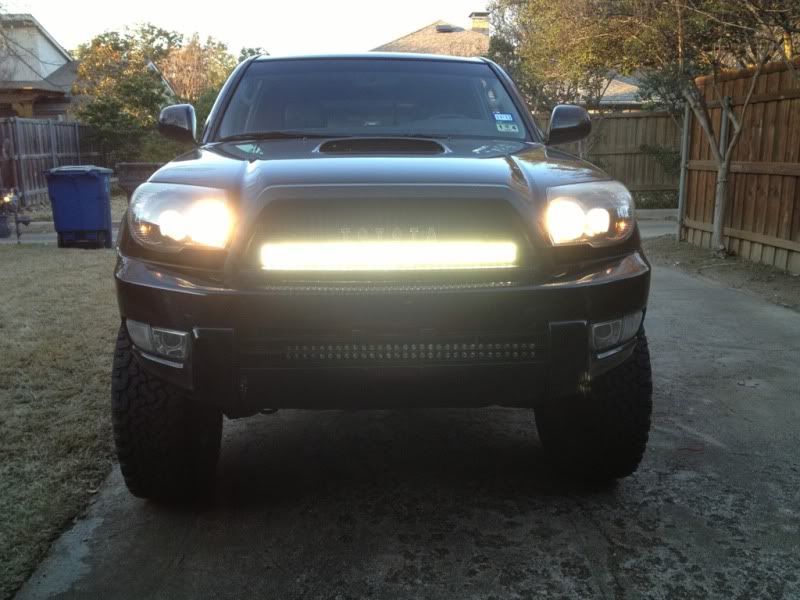
Mounted my light bar behind the Satoshi grill yesterday and installed the smoked plexi cover today to hide it. The mount is kinda ghetto, but it's all I could come up with to get it in the right spot.

The mount

6A722CA1-2FCC-41AD-91F8-7B432088EE23-10669-00000A80621A4188.jpg~original


Before the smoked lens

355FBB18-E60A-45CA-920D-F838A5930820-10669-00000A8031524B1C.jpg~original


65238BB7-F0E4-4A46-AD44-00C1B8739309-10669-00000A803D43067E.jpg~original


After the smoked lens

56053FD7-12C8-4ACE-906B-F0A9C78AA285-10669-00000A804C1A3EB0.jpg~original


5D36AA5C-C314-4854-A962-D81789CD58DE-10669-00000A80513A6DB1.jpg~original


AA6537CE-8F4F-4768-AA2A-DDE487310004-10669-00000A8056FADFDA.jpg~original


75F39EF6-1894-423A-98A2-A48713531B63-10669-00000A805CF7C405.jpg~original


I'll post some pics of it lit up as soon as I finish wiring it this evening. Also, the lens it held on by a strip of electrical tape up top and 3 zip ties. One at each end and one in the middle. That way I can remove it if I ever need just a little more light output and put it back on later.
 
Last edited:
Mounted my light bar behind the Satoshi grill yesterday and installed the smoked plexi cover today to hide it. The mount is kinda ghetto, but it's all I could come up with to get it in the right spot.

The mount

6A722CA1-2FCC-41AD-91F8-7B432088EE23-10669-00000A80621A4188.jpg~original


Before the smoked lens

355FBB18-E60A-45CA-920D-F838A5930820-10669-00000A8031524B1C.jpg~original


65238BB7-F0E4-4A46-AD44-00C1B8739309-10669-00000A803D43067E.jpg~original


After the smoked lens

56053FD7-12C8-4ACE-906B-F0A9C78AA285-10669-00000A804C1A3EB0.jpg~original


5D36AA5C-C314-4854-A962-D81789CD58DE-10669-00000A80513A6DB1.jpg~original


AA6537CE-8F4F-4768-AA2A-DDE487310004-10669-00000A8056FADFDA.jpg~original


75F39EF6-1894-423A-98A2-A48713531B63-10669-00000A805CF7C405.jpg~original


I'll post some pics of it lit up as soon as I finish wiring it this evening. Also, the lens it held on by a strip of electrical tape up top and 3 zip ties. One at each end and one in the middle. That way I can remove it if I ever need just a little more light output and put it back on later.

that's awesome!
 
Alright, keeping with the theme of "stealth", I mounted some rear facing rigid dually D2's today. I pulled down the headliner and mounted some bolts to the roof panel so that I would have fixed studs to mount to even if I removed the lights temporarily. Here they are... Photos with the rear window up and down!

D57D6F92-01F2-4954-B49F-009BF8320E69-11447-00000D972CB445EE_zps3f8d8522.jpg~original


9741A5EC-6C5A-4E3E-8146-8F42EA95A601-11447-00000D971D5A4229_zps1761deb3.jpg~original


97AD1901-0E3B-42C4-8836-12318375400E-11447-00000D97160EBBDB_zpsf8507380.jpg~original


3C76D565-1B8B-4078-938F-1AC6C71AA43B-11447-00000D97225EE945_zps3c4b0083.jpg~original


5DC88313-D275-4E0A-9605-4FA753B7A46D-11447-00000D970FB94FF1_zps7988cb54.jpg~original


0E8E499E-4BA7-4648-9CDA-C81853053820-11447-00000D9727774338_zpsc60d044f.jpg~original


73F4F143-C621-4A60-BFB0-666F1BECF1C6-11645-00000DB540CF68C7_zpsb8c01094.jpg~original
 
Last edited:
It wasn't the fender he cut to get the "Satoshi" to fit, it was the bumper cover... i believe he also did a retrofit to the 2006 headlights, and was awaiting the arrival of a steel front bumper.... the cutting is necessary to get the grill down in place, and get it where he could get the hood to close and latch.
 

Members online

Forum statistics

Threads
278,307
Messages
3,554,053
Members
248,016
Latest member
Advally Service

Trending content

Back
Top