Fiffa's "Get Lost" Build

Because the front strut attaches roughly halfway between the lower control arm bushings and the lower ball joint it acts as distance multiplier of X2. 1/4" increase at the strut will equal 1/2" increase at the lower ball joint.

Makes sense! This should be perfect then. Thanks for the insight!
 
Nice build camping rig. :) Looks like your having fun and that's what it is all about. I enjoy the build threads myself. It's great to see how folks make the rigs their own in their own way.

Sent from my SM-J337V using Tapatalk
 
Do keep in mind that the 210v's need some extra full-time weight to get them in the "comfort" sweet spot - at least in my experience. With just the stock weight you'll have a gigantic lift and a stiffer ride despite the progressive design. Even with ~350 lbs. of extra weight in back and up top, I still could add a bumper w/ swingout and armor before I expect to notice any real change in ride height/comfort. I was going to go with the OME 861's, but the static rate would've left things super stiff no matter what.

Enjoy your new obsession! ;)

I will probably at some point would like to put a rear bumper with swingout but not right away, so perhaps the 210v's will not work at first, can always change to them later as neede.

Thank you.
 
Nice build camping rig. :) Looks like your having fun and that's what it is all about. I enjoy the build threads myself. It's great to see how folks make the rigs their own in their own way.

Sent from my SM-J337V using Tapatalk

Danke!

I've always been a tinkerer and this 4Runner is ticking all of the boxes for me. I've never truly been smitten for a vehicle until this one.
 
I will probably at some point would like to put a rear bumper with swingout but not right away, so perhaps the 210v's will not work at first, can always change to them later as neede.

Thank you.

... I've got a set of mildly used OME 890's that could be for sale... :roll:
 
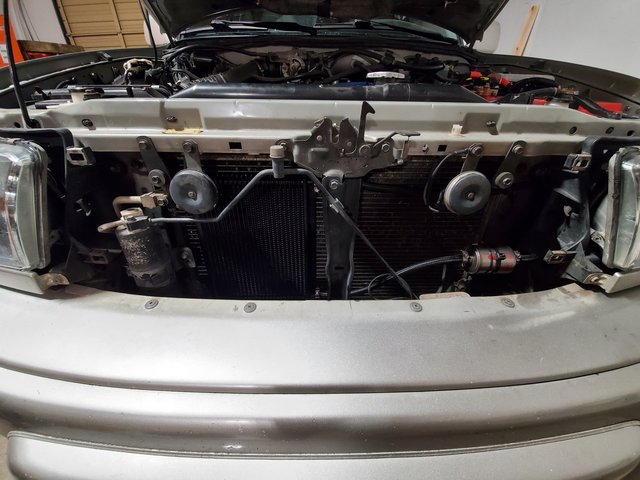
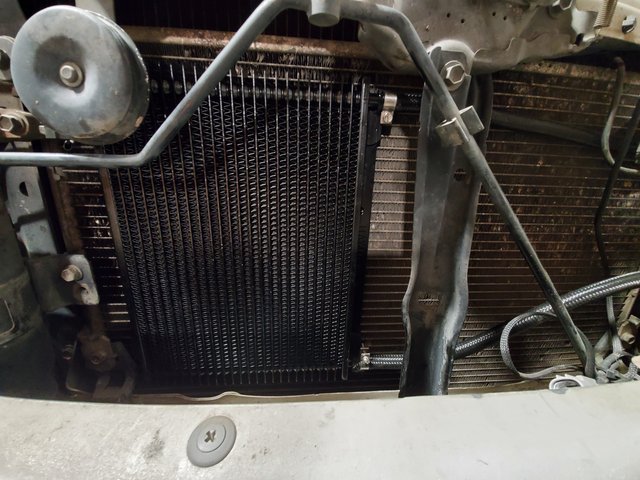
External trans cooler done!

20201230-203249.jpg


I opted for the Hayden 678 cooler and it has worked great on the 30-minute drive I've taken so far! Hills that use to put the temps into the low 200's are now barely getting to 165°F. I'm going to test it on the trails this weekend, but if the first drive was any indication I think the O/D button will be going back to obscurity. The nominal temp for the test trip was around 140°F.

Amazon.com: Hayden Automotive 678 Rapid-Cool Plate and Fin Transmission Cooler: Automotive

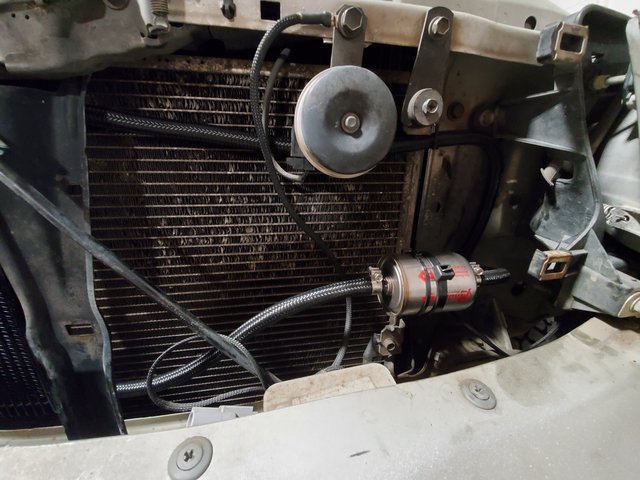
I also wanted to have some abrasion resistance built-in to the hoses, so I opted for nylon sleeved hose.

Amazon.com: theBlueStone -4AN -6AN -8AN -10AN Braided Fuel Line Hose 20FT -6AN Nylon Braided for 3/8" Tube Size: Automotive

Lastly, I was worried about heat soak (most likely for no reason) between the lines and because I'm apparently a stickler for cleanliness, I saw these hose separators that ended up helping with routing more than I thought they would.

Amazon.com: -6AN Hose Separator Clamp - Fuel line Mounting Clamps,Aluminum Hose Fitting Adapter, Great for 3/8 Fuel Hose, Oil Line, Brake Line, Water Pipe and Gas Line,4Pcs/Pack,Black: Automotive

As I was researching on here, I noticed that most everyone was going through the passenger side of the "bulkhead", but my test fits made the lines way too cramped with all of the A/C stuff around, so I figured I'd just go through the drivers side.

20201230-203240.jpg


The cool thing was that the Magnefine filter that was added had plenty of space to be mounted up front, too. There was a connection tab with two holes for something on the drivers side and I opted to zip-tie it there and added a hefty guy around the tab for security.

20201230-203244.jpg


Naturally, I had to do some finagling to the radiator connection to keep the hose from kinking with the 90° barb, but I think it turned out nice and the separators allowed me to run the send and return around the lower radiator hose without much fuss.

20201230-203223.jpg


I've got to hand it to the previous owner. By him changing the radiator already it made removing lines a breeze. The fluid that I drained (did the ~30k drain and fill at the same time) looked almost new despite the 240°F+ temps that it had been subjected to numerous times through the hills this summer. This was also the first time that I removed the factory skid plates even though I've done a few oil changes and I'm hoping that the oil wetness that I saw around the pan was from my sloppy filter removals and not something else. The engine hasn't really lost anything on the dipstick, so I have faith that it's most likely just residual mess.

All in all, this was an easier install than I thought it'd be and definitely something everyone should do!
 
Last edited:
Quick cooler update: did an official "hill test" today and it was crazy to see the trans temp stay below 171! The SR26 West highway from downtown Portland would consistently keep the temp over 210 within a half mile of the climb, and this is at least a mile and a half incline, so it has been an improvement to say the least. Looking forward to the trail runs this weekend!
 
Last edited:
Where about are you taking your rig over the weekend around Portland? Are you doing trails in Brown's camp area?

I have been going to Larch Mountain across the river in Camas/Washougal. I want to check out Browns camp once I get the LCA bushings installed (last piece of the suspension puzzle) because I hear the trails there are a little more technical. Larch is primarily hilly logging roads that have stayed relatively groomed. I like it as a "test track" because of that and the fact that there isn't a ton of traffic on the main parts.
 
I have been going to Larch Mountain across the river in Camas/Washougal. I want to check out Browns camp once I get the LCA bushings installed (last piece of the suspension puzzle) because I hear the trails there are a little more technical. Larch is primarily hilly logging roads that have stayed relatively groomed. I like it as a "test track" because of that and the fact that there isn't a ton of traffic on the main parts.

That's coo, I haven't been there much as I come from dirt bikes world, but most trails around Brown's camp are rated easy to moderate so don't think you're going to have any problem there.
Maybe we can get together to wheel there once I'll get my truck ready.
 
Hey nice rig man. Cool to see a couple more people from the PNW on here too!

Do you happen to know the part number for the 4 hole denso injectors?
 
Hey nice rig man. Cool to see a couple more people from the PNW on here too!

Do you happen to know the part number for the 4 hole denso injectors?

Thanks!

EDIT: I'm actually not sure where he got them from, lol! I'll ask the last owner and take a look for myself. There was a guy on Yotatech that was making them himself, but that was a few years before these got done.

5VZ-FE 4-hole upgrade injectors -free- - YotaTech Forums
 
Last edited:
Thanks!

EDIT: I'm actually not sure where he got them from, lol! I'll ask the last owner and take a look for myself. There was a guy on Yotatech that was making them himself, but that was a few years before these got done.

5VZ-FE 4-hole upgrade injectors -free- - YotaTech Forums

Yeah I saw that thread when I was looking around for the part number. Seems like there is some controversy to if his actually improved anything or not. Figured getting a better spray can't hurt anything.

You don't have to go as far as contacting the PO man I appreciate it though. I'll do some more searching after work tomorrow.

If either of you guys want to find some mud at some point hit me up! Don't have any wheeler friends haha.
 
Yeah I saw that thread when I was looking around for the part number. Seems like there is some controversy to if his actually improved anything or not. Figured getting a better spray can't hurt anything.

You don't have to go as far as contacting the PO man I appreciate it though. I'll do some more searching after work tomorrow.

Dig it. I went down a click-hole last night and couldn't find much at all on these. All I really did see was that it may have just been an injector model upgrade that kept the same part number, but that's based one two forum posts elsewhere. I'm just as curious as you now! lol

If either of you guys want to find some mud at some point hit me up! Don't have any wheeler friends haha.

Same. :lol:
 
I might go for easy 4 wheeling with my buddies at Brown's camp this Saturday, let me know if you might be interested to join.

I'm just now seeing this! Had I seen it before we met up I would've said yes, lol. Oh well! Just got done mapping all of the 4x4 trails at Tillamook OHV (including fire roads between them) in Gaia, so I'll have live guidance ready to go when you get your new sweet suspension installed.
 
I'll never get tired of wrenching on this thing, but I'm really losing my patience for not having my own garage where I can do tedious projects at my leisure, lol! Yet another "shouldn't take this long, but it is" weekend project: LCA bushings.

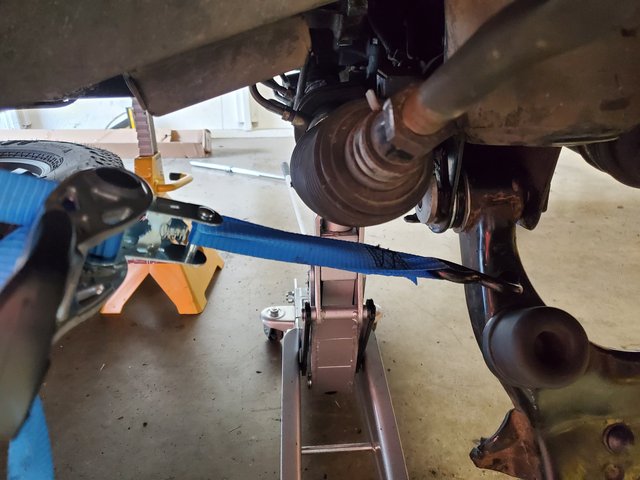
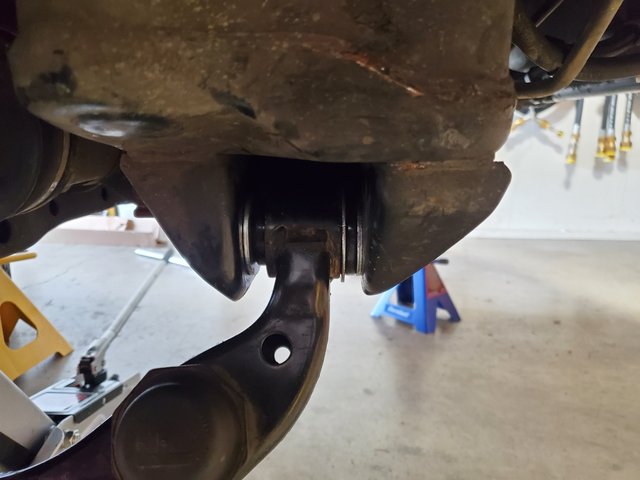
I mostly followed the "Part 1" guide from Timmy on YT, but some of my steps weren't so easy as his. First, it didn't dawn on me until the second side that I needed to remove my diff drop spacers in order to lift it out of the way of the horizontal bolt on the steering rack, but the passenger side wasn't too picky with it still being in anyway; just a little tight. Second, I didn't bother to preheat the bushing that was about to be pushed out with a 6-ton bottle jack, which most likely would've require less force to get it to break loose. Not so bad so far, but I don't think I got one of the bushings all the way by utilizing Timmy's channel-lock trick; it just bent the outer ring before I realized that I could use the ball joint service kit I have for it all to work perfectly on that front face side - 41mm wrench works awesome on the back.

The first major issue came when I went to put the passenger LCA back in. I could get the outer washer in with one side but there no room at all for the other. I messed with it longer that it took to do everything else up to that point and then called it quits after a few hours. After some rest, I had an epiphany that I could just ratchet one side to compress the bushing and then wedge the other sides washer in with the help of a pry bar. Success!

20210117-134503.jpg

20210117-134509-1.jpg


Now, the other side...

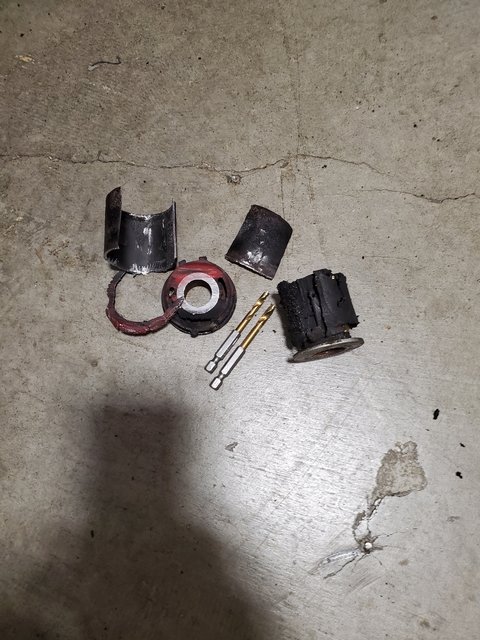
I thought I was on easy street! I had the rack out of the way, the LCA came out super quick, and then onto pressing out the old bushing... womp, womp. I could literally see the LCA flexing with the amount of force I was putting on it with the jack and no matter how much heat I applied (the internals were literally on fire at one point) it would not go! I tried to use the ball joint service kit, but that damned outer bushing lip was in the way! I tried to cut and smash it out, but the arm made it near impossible to do about half of it. Well, I needed to buy a reciprocating saw anyway, so off to HD I went!

latest


20210117-182737-1.jpg


Two drill bits and a whole lot of swearing later, this is what was left of that finnicky bushing. The crazy part was that once I cut two slits into the metal sleeve it pulled right out! All-in-all, I would not try this again without being able to do it on my own time in my own garage. I was at my company shop until 2 am THIS MORNING putting it all back together and cleaning up... and I still had to take the company truck home because the alignment was all wonky with the addition of Sonoran Steel 1/4" strut spacers done at the same time.

Speaking of the spacers...

They were supposed to give me about 1/2" of additional lift up front, which should've still kept about a 1" rake. At the moment, all four fenders at ~39" from the ground, which seems odd. I read a post on here about someone questioning if the UCA bushings could add a lift, with the general consensus was that is could offer a slight lift because of the droop you'd get with bad old bushings, which I had, but this seems a little excessive. If anyone has input then it'd be appreciated! Well, off for the alignment!

 
Last edited:
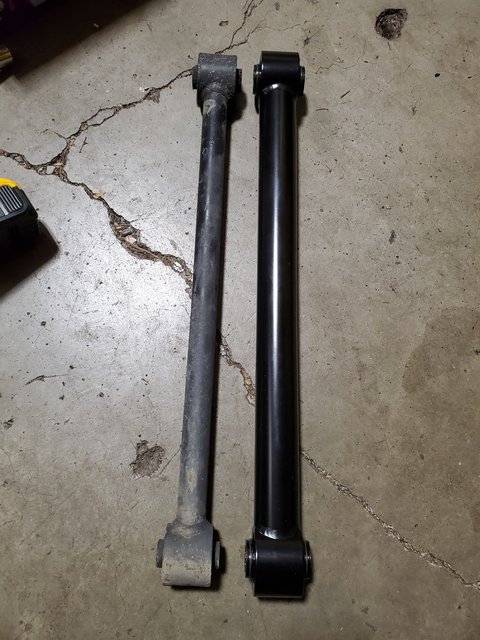
Changed out the lower trailing arms for some big boy Rokmens...

20210120-173346-1.jpg


Also put some Strongflex bushings in the panhard bar and re-installed in the lowest setting of the drop kit (was in the middle for the previous lift that was 1.5" lower). Have some more to put in the upper trailing arms tonight, too. Removal of the stock bushings is relatively easy with something like this:

Advance Auto Parts - Two-arm puller

I recommend finding a washer that goes out past the sleeve and has a smaller ID to put between the bushing sleeve and puller, though. I marred the first bit of threads on the puller because the sleeve ID was slightly too big. I used one of the bolts for the other side of the bar, but I gouged the middle as a result. :doh:

... I'm more of a "hulk smash" kind of guy, so forgive my lack of brainpower when it comes to auto work, lol.
 
Last edited:

Members online

Forum statistics

Threads
278,310
Messages
3,554,077
Members
248,016
Latest member
Advally Service

Trending content

Back
Top