
You are using an out of date browser. It may not display this or other websites correctly.
You should upgrade or use an alternative browser.
You should upgrade or use an alternative browser.
For those who want to know....
- Thread starter snow&surf
- Start date

Dlak
New member
Thanks to forum member Dlak, I was able to get my Demello Sliders installed today. A couple months ago I removed my rocker panels to give the truck a more aggressive looking stance but really hated the unfinished look of it. I've been waiting to see if there was someone who would fabricate sliders for Limited/SR5 owners where we would be able to keep our rocker panels on. Thanks to Jason and his team for doing just that!
These guys are super friendly and did fantastic and professional work. I blacked the chrome accents on my panels and his team trimmed them down cleanly before mounting the sliders. I think they look great, I know they'll work great, and they're very functional as a step (my wife will be very happy :reddance!
Some pics. First will be a before (without rocker panels and sliders) the rest are after (with panels and sliders).
Very nice, your rig looks awesome! Do you know if Jason sent out the bumper yet for paint? My wife too will be happy with the slider/STEP!

snow&surf
New member
Looks great!!!!!
Congrats, I know you have been patiently waiting for sliders. Now you have exactly what you want!!!!
Good work!
Indeed! I don't have the savvy or skills to fabricate my own like you or make a LE/TE combo like harper so the wait has been tough. I'm extremely happy that I did because it is exactly what I want!
Very nice, your rig looks awesome! Do you know if Jason sent out the bumper yet for paint? My wife too will be happy with the slider/STEP!
You and your wife will not be disappointed with these sliders. I can comfortably stand on them with the doors open or closed (5'10" at 165 lbs). Funny thing is my wife adapted to "hopping" into and out of the truck that she was finding it difficult to use the slider as a step yesterday because it "threw her off her enter/exit technique". She'll adapt again and will thank me later!
Jason has not sent your bumper out for paint as he needs to do some last minute touch-up work. The final production piece will be slightly different than yours so you will have a unique bumper. Don't sweat it and continue being patient, your truck will look awesome when all the work is done. Jason also said a 5th gen rear bumper will be in the works sometime in the future!!!
snow&surf
New member
Small mods
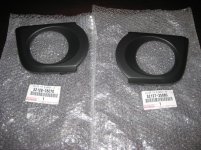
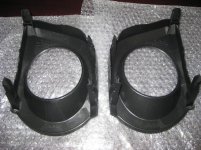
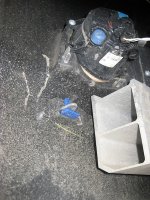
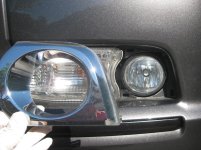
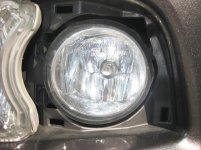
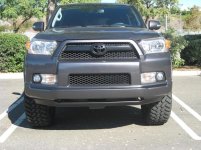
I replaced the chrome fog lamp covers for black TE covers today. Ordered the parts from ToyotaPartSales.com using the parts list manual provided by harper7. Parts took 9 days to arrive from Texas, but they had to special order the covers.
Below are some pics of the install in case any other members decide they want to replace theirs. Install was very easy especially since I trimmed a portion of my fender liner due to my tires. The covers are held into place by 4 tabs, 2 on top and 2 on the bottom. You can use your nail to push the tab lock in then pop each tab out one at a time. Align the new cover tabs with the holes in front of the fog light and push in until all 4 tabs click to lock in. Total time was 5 minutes. Truck looks better.
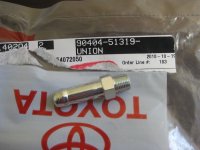
I also received the union to extend my rear diff breather. Now I need to get the fuel line and hose clamps.
I replaced the chrome fog lamp covers for black TE covers today. Ordered the parts from ToyotaPartSales.com using the parts list manual provided by harper7. Parts took 9 days to arrive from Texas, but they had to special order the covers.
Below are some pics of the install in case any other members decide they want to replace theirs. Install was very easy especially since I trimmed a portion of my fender liner due to my tires. The covers are held into place by 4 tabs, 2 on top and 2 on the bottom. You can use your nail to push the tab lock in then pop each tab out one at a time. Align the new cover tabs with the holes in front of the fog light and push in until all 4 tabs click to lock in. Total time was 5 minutes. Truck looks better.
I also received the union to extend my rear diff breather. Now I need to get the fuel line and hose clamps.
Attachments
snow&surf
New member
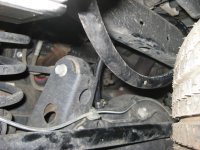
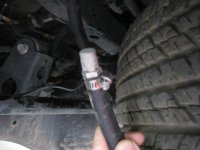
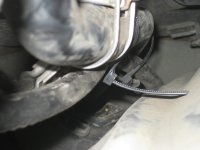
Rear differential breather extension
I don't know if I'll ever cross a stream or go mudding but I figured might as well extend the breather just in case and for peace of mind.
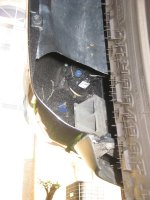
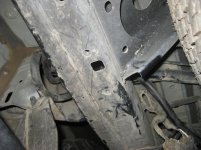
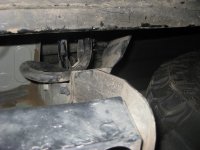
Got 6' of 3/8" ID fuel line, a couple of hose clamps and zip ties. Removed the OEM breather. Lined the union with teflon tape and screwed it in the OEM breather location. Attached and clamped the fuel line to the union. Attached the OEM breather to the opposite end of the fuel line. Ran the line above and along the frame behind the left rear tire fender liner where I attached it to the OEM fuel tube. Zip tied in a few spots and now the breather is approximately the same height as the bottom of my fuel tank lid.
Thanks to all for your previous write-ups and to those who answered my questions. Sorry for the blurry pics.
I don't know if I'll ever cross a stream or go mudding but I figured might as well extend the breather just in case and for peace of mind.
Got 6' of 3/8" ID fuel line, a couple of hose clamps and zip ties. Removed the OEM breather. Lined the union with teflon tape and screwed it in the OEM breather location. Attached and clamped the fuel line to the union. Attached the OEM breather to the opposite end of the fuel line. Ran the line above and along the frame behind the left rear tire fender liner where I attached it to the OEM fuel tube. Zip tied in a few spots and now the breather is approximately the same height as the bottom of my fuel tank lid.
Thanks to all for your previous write-ups and to those who answered my questions. Sorry for the blurry pics.
Attachments
snow&surf
New member
third time's a charm!
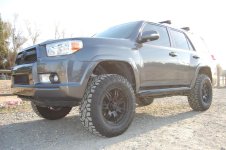
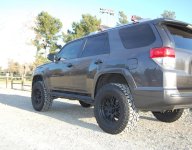
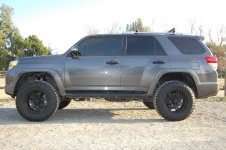
After 12k miles on the 20" Gauntlets and Trail Grapplers, I had to sell them. As expected, they performed great off-road. It was the on-road characteristics that finally led me to move on. The large rim and short sidewall made for a very stiff ride. Not jaw shattering but rough on every little bump/crack in the road. At highway speeds (>50 mph) there was a loud howl and depending on the road surface the intensity increased dramatically. One of the benefits of the lower profile was how great the truck handled the road. Great response and they gripped well when cornering at fast speeds. Tires drove well in the rain and snow too.
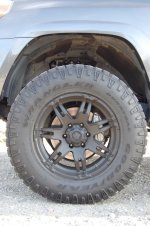
I knew what I was getting into with the 20s and lower profile MTs, but when enough is enough, time to get new meats! I sold the 20s and Trail Grapplers last week to my coworker who owns a Tundra and installed 295/65R18 Duratracs on Gauntlets (love this wheel too much). Overall diameter of the Duratracs is bigger plus I get much needed sidewall. I had 4 goals for making this change:
1. Increase on-road comfort -- Accomplished. The difference is night and day. Much of it has to do with the increased sidewall as it provides more area to absorb road imperfections. Also, Duratracs are ATs so the tread pattern is more conducive for on-road driving. My truck rides so much smoother.
2. Reduce road noise -- Virtually eliminated. Again, these are ATs so that is to be expected but I had concerns that the tread depth (18/32) would produce noise like the 19/32 tread depth of the Trail Grapplers. The Duratracs do hum a little which I like, but don't produce the howl at highway speeds.
3. Make my truck look more rugged -- The beefier tire due to smaller wheel diameter and increased sidewall height gets this done. I love that the Duratracs look like MTs with its tread pattern and depth, and aggressive sidewall. I don't know if any members have Duratracs on Gauntlets but they look just as bad@ss to me as my old setup. The beefier tire also seems to fill the wheel well better too.
4. Increase off-road capability -- The smaller wheel and increased sidewall height allows me to explore more difficult terrain now. I can also air down more to increase the tread contact area. Based on other members who have shared their off-road experience with Duratracs, I can't wait to hit the trails!
In the end, you learn from your experiences. I'm happy I was able to experience rolling on 20s with mud tires and I learned they weren't for me and for what I want to further experience with my truck. I couldn't be happier with my new setup, it only took me three tries to get it right! :lmao:
After 12k miles on the 20" Gauntlets and Trail Grapplers, I had to sell them. As expected, they performed great off-road. It was the on-road characteristics that finally led me to move on. The large rim and short sidewall made for a very stiff ride. Not jaw shattering but rough on every little bump/crack in the road. At highway speeds (>50 mph) there was a loud howl and depending on the road surface the intensity increased dramatically. One of the benefits of the lower profile was how great the truck handled the road. Great response and they gripped well when cornering at fast speeds. Tires drove well in the rain and snow too.
I knew what I was getting into with the 20s and lower profile MTs, but when enough is enough, time to get new meats! I sold the 20s and Trail Grapplers last week to my coworker who owns a Tundra and installed 295/65R18 Duratracs on Gauntlets (love this wheel too much). Overall diameter of the Duratracs is bigger plus I get much needed sidewall. I had 4 goals for making this change:
1. Increase on-road comfort -- Accomplished. The difference is night and day. Much of it has to do with the increased sidewall as it provides more area to absorb road imperfections. Also, Duratracs are ATs so the tread pattern is more conducive for on-road driving. My truck rides so much smoother.
2. Reduce road noise -- Virtually eliminated. Again, these are ATs so that is to be expected but I had concerns that the tread depth (18/32) would produce noise like the 19/32 tread depth of the Trail Grapplers. The Duratracs do hum a little which I like, but don't produce the howl at highway speeds.
3. Make my truck look more rugged -- The beefier tire due to smaller wheel diameter and increased sidewall height gets this done. I love that the Duratracs look like MTs with its tread pattern and depth, and aggressive sidewall. I don't know if any members have Duratracs on Gauntlets but they look just as bad@ss to me as my old setup. The beefier tire also seems to fill the wheel well better too.
4. Increase off-road capability -- The smaller wheel and increased sidewall height allows me to explore more difficult terrain now. I can also air down more to increase the tread contact area. Based on other members who have shared their off-road experience with Duratracs, I can't wait to hit the trails!
In the end, you learn from your experiences. I'm happy I was able to experience rolling on 20s with mud tires and I learned they weren't for me and for what I want to further experience with my truck. I couldn't be happier with my new setup, it only took me three tries to get it right! :lmao:
Attachments
Last edited:
snow&surf
New member
chrome black out complete!
Yesterday I used Plasti-dip for the front strip and gill/emblem with the hope that it would hold up better to rock chips than krylon fusion (my fourth time painting them). As others have reported, the texture is quite different, almost like textured powdercoat to me. Seems like it may do a better job, but we'll see (Satoshi mod pending on the results).
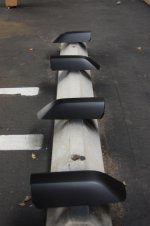
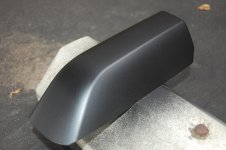
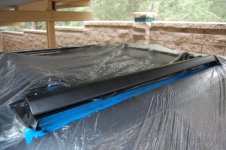
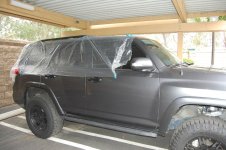
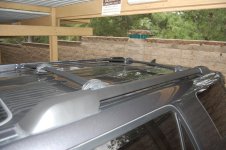
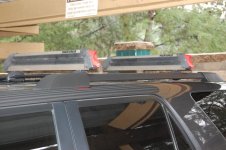
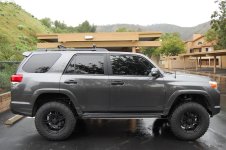
Because I like the texture of this stuff I decided to black out the OEM roof rack. Thanks to member W8kbrder for his roof rack delete write-up. I removed the 4 rail covers which made this process quite simple. After removing those I decided to leave the rails in place and covered the truck with plastic. Cut the plastic lengthwise and in parallel to the rails. Taped it up and went to work.
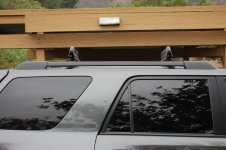
Makes a difference in the appearance. I think it looks pretty good!
Yesterday I used Plasti-dip for the front strip and gill/emblem with the hope that it would hold up better to rock chips than krylon fusion (my fourth time painting them). As others have reported, the texture is quite different, almost like textured powdercoat to me. Seems like it may do a better job, but we'll see (Satoshi mod pending on the results).
Because I like the texture of this stuff I decided to black out the OEM roof rack. Thanks to member W8kbrder for his roof rack delete write-up. I removed the 4 rail covers which made this process quite simple. After removing those I decided to leave the rails in place and covered the truck with plastic. Cut the plastic lengthwise and in parallel to the rails. Taped it up and went to work.
Makes a difference in the appearance. I think it looks pretty good!
Attachments
4RunnerTrail
New member
looks tough!

azn-sensation
New member
Yesterday I used Plasti-dip for the front strip and gill/emblem with the hope that it would hold up better to rock chips than krylon fusion (my fourth time painting them). As others have reported, the texture is quite different, almost like textured powdercoat to me. Seems like it may do a better job, but we'll see (Satoshi mod pending on the results).
Because I like the texture of this stuff I decided to black out the OEM roof rack. Thanks to member W8kbrder for his roof rack delete write-up. I removed the 4 rail covers which made this process quite simple. After removing those I decided to leave the rails in place and covered the truck with plastic. Cut the plastic lengthwise and in parallel to the rails. Taped it up and went to work.
Makes a difference in the appearance. I think it looks pretty good!
I like it! I may go this route if I dont go with the baja rack.


B'klyn_Mike
New member
Looking good...as usual snow&surf! :trophy:
Mike :artist:
Mike :artist:

harper7
Senior Member
New wheels and tires look so MUCH better with the extra sidewall.Your Limited is looking great! You nailed it .:cheers:
Anxious to see if how well plasti-dip holds up. I have black TE fog surrounds in now too and I'm taking the old chromed ones to work to see if I can strip that chrome paint off with paint stripper.
Anxious to see if how well plasti-dip holds up. I have black TE fog surrounds in now too and I'm taking the old chromed ones to work to see if I can strip that chrome paint off with paint stripper.
snow&surf
New member
Thanks all!
@Jesse - funny you say that, mother nature tricked me on Sunday. We were supposed to get wind & rain in the evening. I look outside at 8am and it's sunny, perfect! 20 minutes after I start painting....wind & rain :bash: Luckily we have the car ports and I parked under a good one, most of them leak but not the one I was under. Win!
@azn - I was really contemplating the Gobi or new design Baja rack from harper/IDriv but my truck is pretty tall and I already don't fit in most commercial parking structures/garages so I wanted to keep it at its current height. So far I'm really liking how the paint work changed the look. Also getting the new wheel/tire combo justified not getting a new rack. I think I still win!
@harper - I applied 5 coats of plasti-dip to the front , it better hold up! I'll keep you informed. Let us know if it is in fact black plastic under the chrome.
@Jesse - funny you say that, mother nature tricked me on Sunday. We were supposed to get wind & rain in the evening. I look outside at 8am and it's sunny, perfect! 20 minutes after I start painting....wind & rain :bash: Luckily we have the car ports and I parked under a good one, most of them leak but not the one I was under. Win!
@azn - I was really contemplating the Gobi or new design Baja rack from harper/IDriv but my truck is pretty tall and I already don't fit in most commercial parking structures/garages so I wanted to keep it at its current height. So far I'm really liking how the paint work changed the look. Also getting the new wheel/tire combo justified not getting a new rack. I think I still win!
@harper - I applied 5 coats of plasti-dip to the front , it better hold up! I'll keep you informed. Let us know if it is in fact black plastic under the chrome.
snow&surf
New member
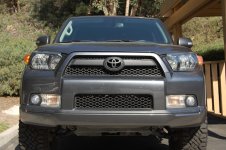
Headlight blackout
First off, I want to thank Gary (harper7) for his tips on this mod. Second, I want to thank philsey for his write-up on how to remove the front bumper as one piece which allowed me to do this mod. Third, this was the first time I ever attempted a mod like tthis, it was the hardest mod I've done on my truck to date, hopefully it will be the last time I attempt it (unless I do a projector retrofit).
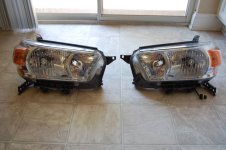
A couple weeks ago I changed my low beams and fogs from Sylvania Silverstars to 6000K HID lows + 3000K HID fogs (you can see the fog ballasts zip-tied to the steel bumper). I like these lights so much better. I have always wanted to black out the headlights or purchase TE headlights. The only issue with each of these choices is it required me to remove the front bumper and headlights anyway. So I checked my local Toyota dealer and they are selling TE headlights for $289 each, yikes! Another member, 11SR5teve0, is starting a service to do this for others but the price is also expensive for me, so I decided to tackle this myself.
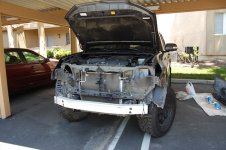
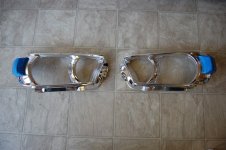
As stated earlier, this was a tough mod especially if you've never removed the front bumper or blacked out headlights before. Well, the entire job took me almost 8 hours, but I took my time to make sure I did it right. The hardest part of this mod was separating the headlight lens from the housing (I don't know why). Removing the front bumper wasn't too bad, just make sure you disconnect the DRL and fog light connections before you take the bumper off. Reinstalling everything was quick and everything fit back into place perfectly.
Overall, I'm very happy with the results. I saved a ton of money and know much more about my truck. Here's some pics:
First off, I want to thank Gary (harper7) for his tips on this mod. Second, I want to thank philsey for his write-up on how to remove the front bumper as one piece which allowed me to do this mod. Third, this was the first time I ever attempted a mod like tthis, it was the hardest mod I've done on my truck to date, hopefully it will be the last time I attempt it (unless I do a projector retrofit).
A couple weeks ago I changed my low beams and fogs from Sylvania Silverstars to 6000K HID lows + 3000K HID fogs (you can see the fog ballasts zip-tied to the steel bumper). I like these lights so much better. I have always wanted to black out the headlights or purchase TE headlights. The only issue with each of these choices is it required me to remove the front bumper and headlights anyway. So I checked my local Toyota dealer and they are selling TE headlights for $289 each, yikes! Another member, 11SR5teve0, is starting a service to do this for others but the price is also expensive for me, so I decided to tackle this myself.
As stated earlier, this was a tough mod especially if you've never removed the front bumper or blacked out headlights before. Well, the entire job took me almost 8 hours, but I took my time to make sure I did it right. The hardest part of this mod was separating the headlight lens from the housing (I don't know why). Removing the front bumper wasn't too bad, just make sure you disconnect the DRL and fog light connections before you take the bumper off. Reinstalling everything was quick and everything fit back into place perfectly.
Overall, I'm very happy with the results. I saved a ton of money and know much more about my truck. Here's some pics:
Attachments
-
 Front bumper removed.jpg103.1 KB · Views: 2,235
 -
 OEM headlights.jpg83.7 KB · Views: 2,140
 -
 Taped sidemarkers.jpg84.4 KB · Views: 2,124
 -
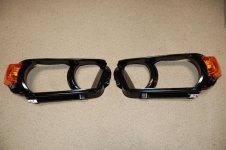 Painted bezels.jpg98.7 KB · Views: 2,139
 -
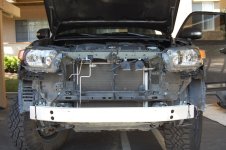 Headlights reattached.jpg96.3 KB · Views: 2,147
 -
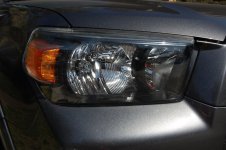 Closeup.jpg90.4 KB · Views: 2,124
 -
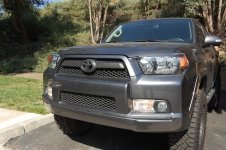 Completed 3:4 angle.jpg112.7 KB · Views: 2,115
 -
 Full view.jpg104 KB · Views: 2,181
snow&surf
New member
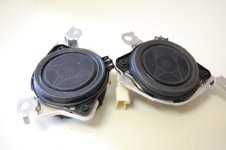
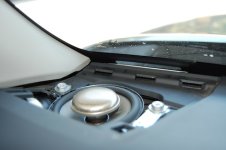
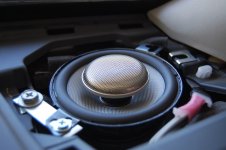
Infinity Kappa Install
Thanks to all who contributed to the write-up.
My impressions:
LE's come with the JBL system and I feel that the stock dash speakers produced louder sound than the Kappas at lower volume settings (I'm positive I connected everything correctly). However, the clarity produced between the two is very noticeable, and the Kappas are much better hands down. The highs are extremely crisp and the mids are much better balanced. I'm happy with the overall improvement in sound quality of the system. PARTY ON! :guitar3:
Thanks to all who contributed to the write-up.
My impressions:
LE's come with the JBL system and I feel that the stock dash speakers produced louder sound than the Kappas at lower volume settings (I'm positive I connected everything correctly). However, the clarity produced between the two is very noticeable, and the Kappas are much better hands down. The highs are extremely crisp and the mids are much better balanced. I'm happy with the overall improvement in sound quality of the system. PARTY ON! :guitar3:
Attachments
snow&surf
New member
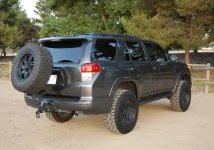
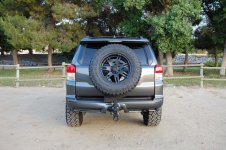
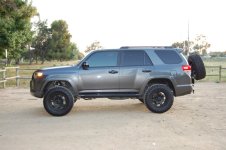
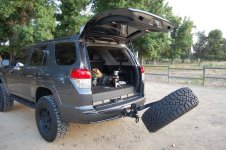
Rear Tire Carrier
I have always had apprehension when taking long road trips, driving up to the mountains for snowboarding, or trail driving because my spare tire is the factory spare. I've been fortunate that I haven't had to use the factory spare, especially since I lifted my truck and upsized my tires. I drive my truck on offroad trails about once a month, but more importantly my truck is my daily driver. Because of this, getting aftermarket bumpers is just not practical, yet :naughty:. Eventually I will be getting aftermarket front and rear bumpers, but not for several years when the truck will become my dedicated trail rig.
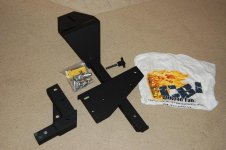
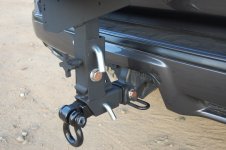
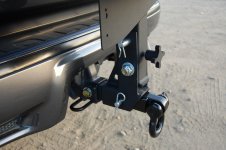
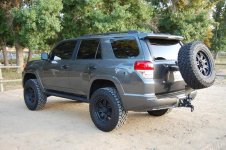
Well, I finally have peace of mind. I've been working with CBI Offroad for several weeks and just received my rear tire carrier! CBI Offroad was very helpful throughout the entire process and they produced exactly what I wanted. What I really like about this carrier is that it fits my needs perfectly. It mounts to the factory 2" hitch receiver. I can attach it only when I need it. I don't take on the extra weight of a full aftermarket rear bumper. I can fit a full size spare tire. It comes with license plate and hi-lift mounting points. It has an angled pass-through receiver which helps preserve the departure angle but also allows me to attach my receiver shackle. It folds down to allow full use of the liftgate without removing any parts :trophy:
Two grade 8 set bolts attach the carrier holder to the factory hitch receiver. These bolts attach the carrier to the receiver tightly and prevents any wobbling/movement while driving. The vertical carrier arm attaches to the carrier holder with another grade 8 bolt. Above this bolt is a hitch pin, when removed, the vertical arm folds down. In between the bolt and hitch pin is a hand-tightening grade 8 bolt which pushes the vertical carrier arm against the carrier holder to prevent wobbling/movement while driving. The spare tire mounts to the carrier using three grade 8 bolts.
The tire carrier is very stout and was powder coated exactly like my Demello sliders (flat black wrinkle). I had a chance to drive around downtown LA this weekend and the carrier did not wobble/move or make noise even when driving through all the potholes on Wilshire Blvd. Driving back to the OC from LA is about 30 miles and the carrier did not wobble/move or make noise on the freeways at 80mph. I'm hoping to take it offroad on the 18th for the SoCal meet-up/trail run, we'll see. Until then, here's some pics:
I have always had apprehension when taking long road trips, driving up to the mountains for snowboarding, or trail driving because my spare tire is the factory spare. I've been fortunate that I haven't had to use the factory spare, especially since I lifted my truck and upsized my tires. I drive my truck on offroad trails about once a month, but more importantly my truck is my daily driver. Because of this, getting aftermarket bumpers is just not practical, yet :naughty:. Eventually I will be getting aftermarket front and rear bumpers, but not for several years when the truck will become my dedicated trail rig.
Well, I finally have peace of mind. I've been working with CBI Offroad for several weeks and just received my rear tire carrier! CBI Offroad was very helpful throughout the entire process and they produced exactly what I wanted. What I really like about this carrier is that it fits my needs perfectly. It mounts to the factory 2" hitch receiver. I can attach it only when I need it. I don't take on the extra weight of a full aftermarket rear bumper. I can fit a full size spare tire. It comes with license plate and hi-lift mounting points. It has an angled pass-through receiver which helps preserve the departure angle but also allows me to attach my receiver shackle. It folds down to allow full use of the liftgate without removing any parts :trophy:
Two grade 8 set bolts attach the carrier holder to the factory hitch receiver. These bolts attach the carrier to the receiver tightly and prevents any wobbling/movement while driving. The vertical carrier arm attaches to the carrier holder with another grade 8 bolt. Above this bolt is a hitch pin, when removed, the vertical arm folds down. In between the bolt and hitch pin is a hand-tightening grade 8 bolt which pushes the vertical carrier arm against the carrier holder to prevent wobbling/movement while driving. The spare tire mounts to the carrier using three grade 8 bolts.
The tire carrier is very stout and was powder coated exactly like my Demello sliders (flat black wrinkle). I had a chance to drive around downtown LA this weekend and the carrier did not wobble/move or make noise even when driving through all the potholes on Wilshire Blvd. Driving back to the OC from LA is about 30 miles and the carrier did not wobble/move or make noise on the freeways at 80mph. I'm hoping to take it offroad on the 18th for the SoCal meet-up/trail run, we'll see. Until then, here's some pics:
Attachments

SeattleMike
New member
Great idea! I just think it's too far away from the door. It looks like it isn't pushed into the hitch receiver all the way. But I love the idea and the functionality.
Similar threads

- Replies
- 0
- Views
- 3K

- Replies
- 9
- Views
- 11K


- Replies
- 4
- Views
- 2K

Forum statistics
Trending content
-

-

-
-
-
Thread 'Fixed: Dead Instrument Cluster in 2003 Toyota 4Runner (Corrosion Issue)'
- TheSpeakGeek
Replies: 9