

89FourRunner
New member
If you have a 1st Generation Toyota Pickup or 4Runner you have most likely run into the intermediate horn issue. For those who are not familiar, this issue is described as a horn that only works when depressed in a certain position, say, at 10 o'clock, but will not function at every position, or will not function at all. Please ensure the horn itself is getting power and functioning before moving to this step.
I decided to do a small write up, even though a few already exist.
Tools Needed:
1. 19mm deep Socket and half Inch drive ratchet (or a standard socket with extension).
2. Philips Head Screw Driver
3. Dielectric grease
4. 22 cal bullet shell
5. Washers and/or Nuts
6. 800 grit sand paper (or any other fine grit to sand copper)
Procedure:
Park your car with the wheel straight and true.
Start by removing the small screw on the bottom of the steering wheel "horn pad". It is located here:
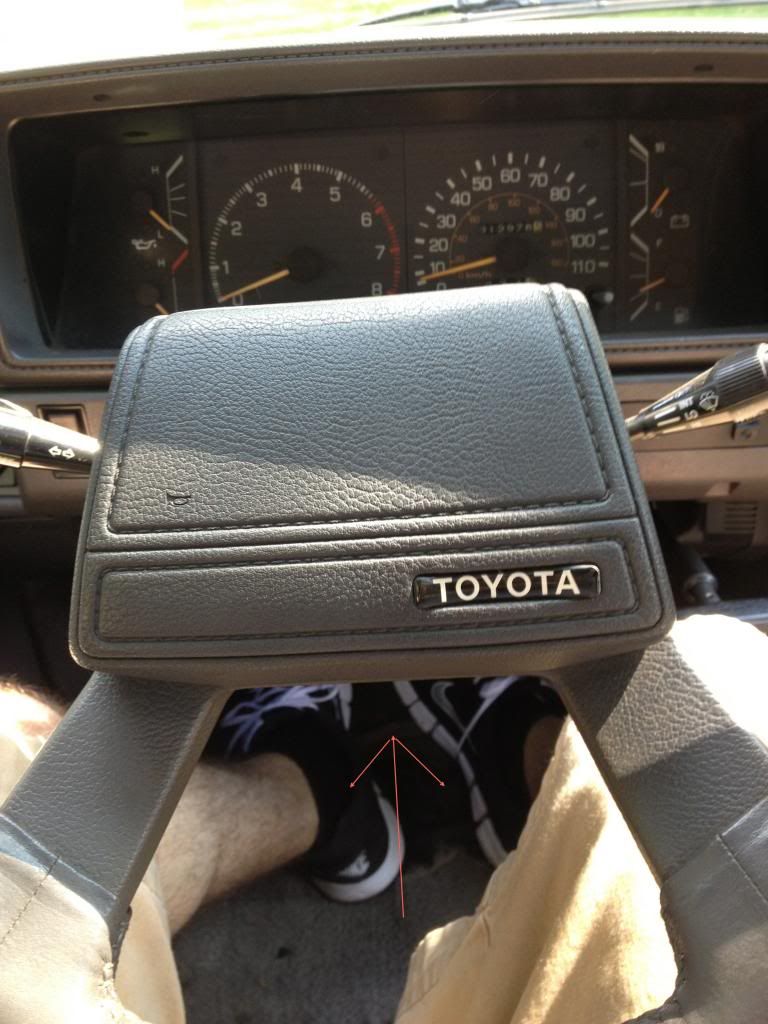
Once removed you can gently pull outward on the button, and then push up and the horn pad will pop off. Again, be gentle, there is a contact connector that you want to ensure you do not break. Disconnect the wire, and place the horn pad to the side.
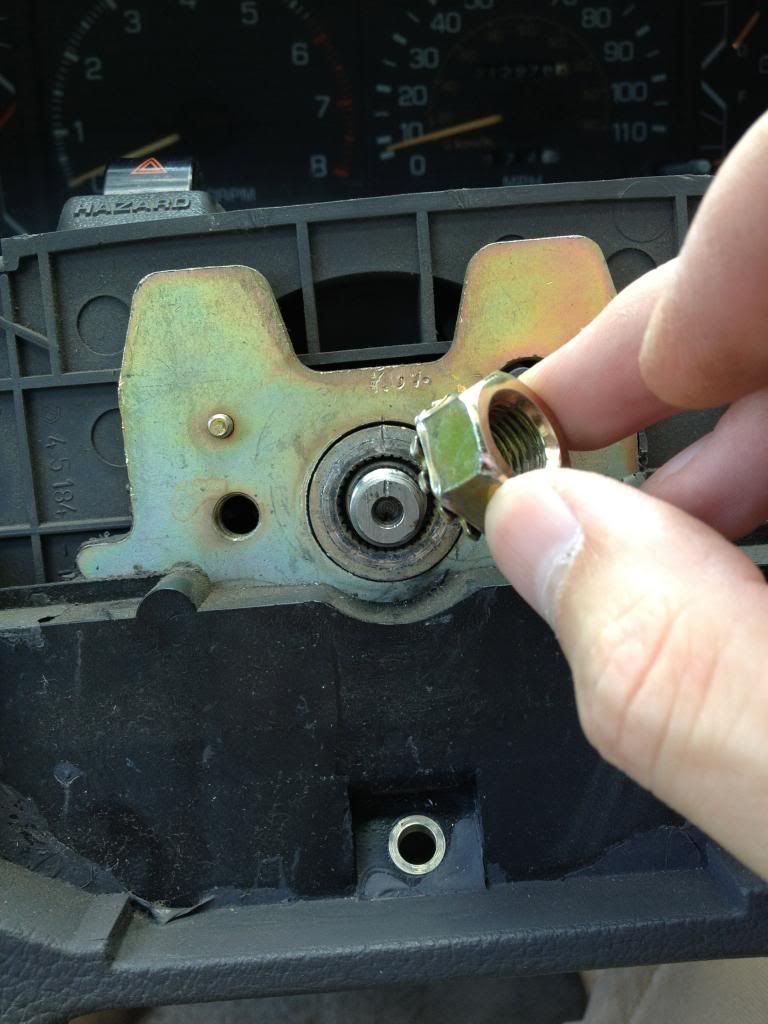
Next, you will see a 19mm nut that holds the steering wheel to the shaft. Before you remove it, mark the wheel and the shaft with a line using a permanent marker or grease pen to ensure when you replace the wheel, you replace it straight. Of course, you could scratch it in as well.
At this point you are going to want to loosen the nut for the shaft. Using a 19mm socket and 1/2" ratchet, remove the nut by firmly holding the steering wheel with one hand, and loosening the bolt with your free hand.
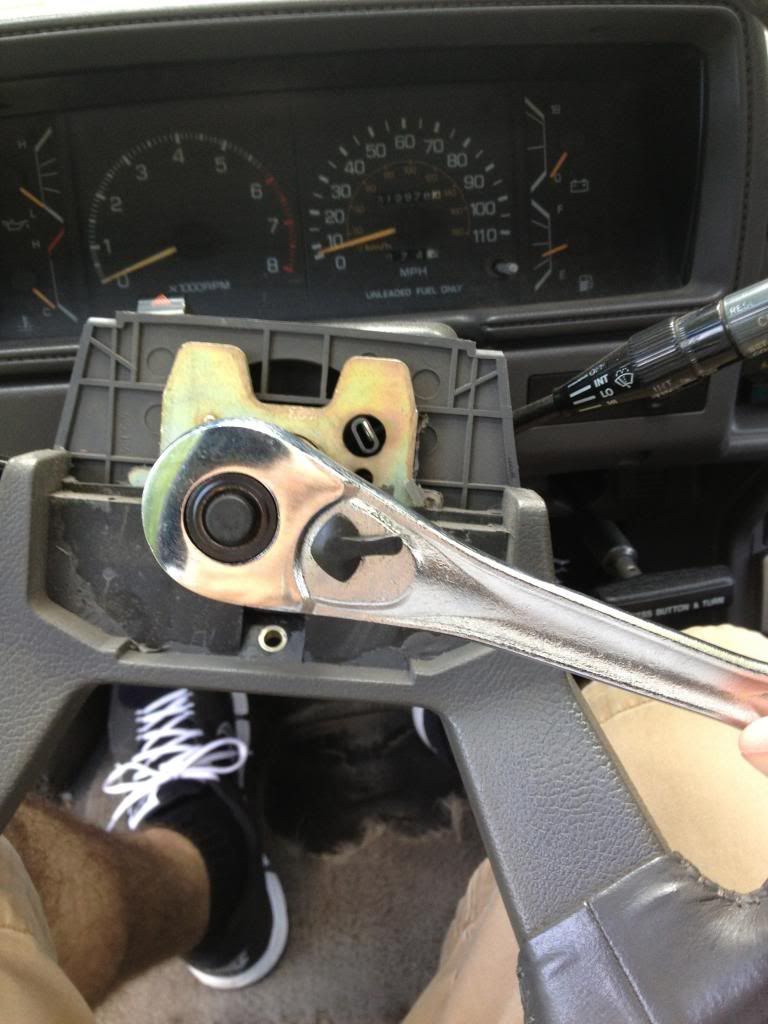
The bolt is supposed to be at 26ft lbs, so you shouldn't need a breaker bar. If you do, it is not the end of the world. Once the nut breaks free, loosen it about half way, but leave it on. Firmly pull up on the steering wheel until it breaks free of the spline's grip. The nut you left on the shaft will stop the steering wheel from breaking your nose.
Now that the wheel is free, remove the nut.
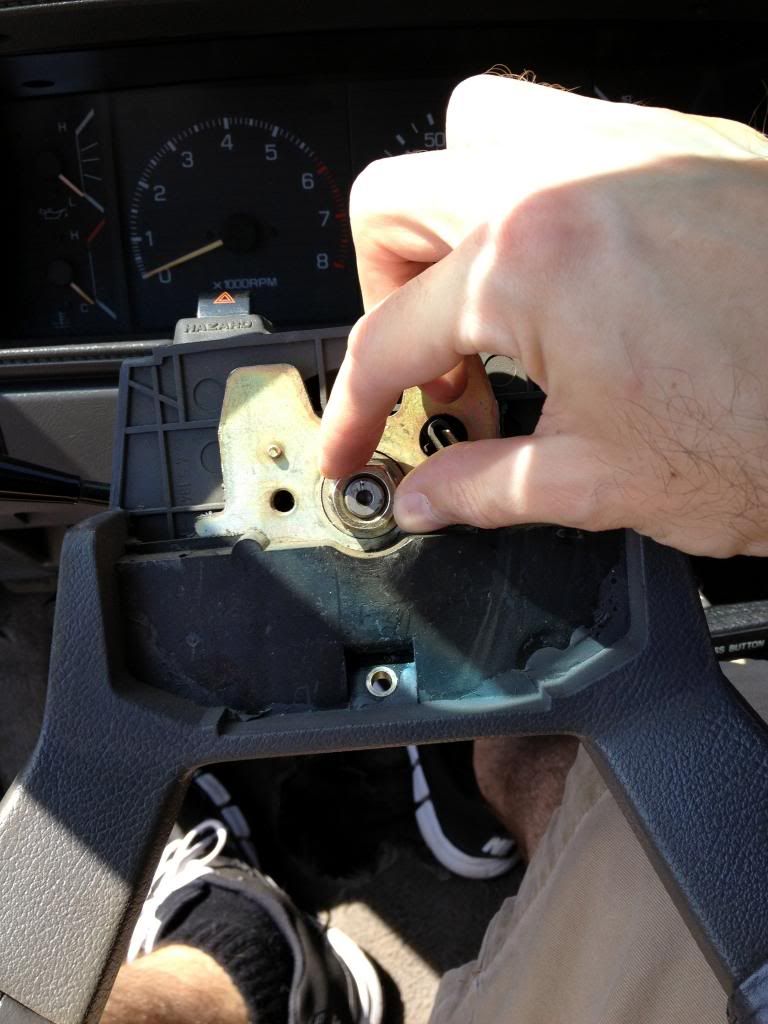
Remove the steering wheel to reveal the inside of the steering column.
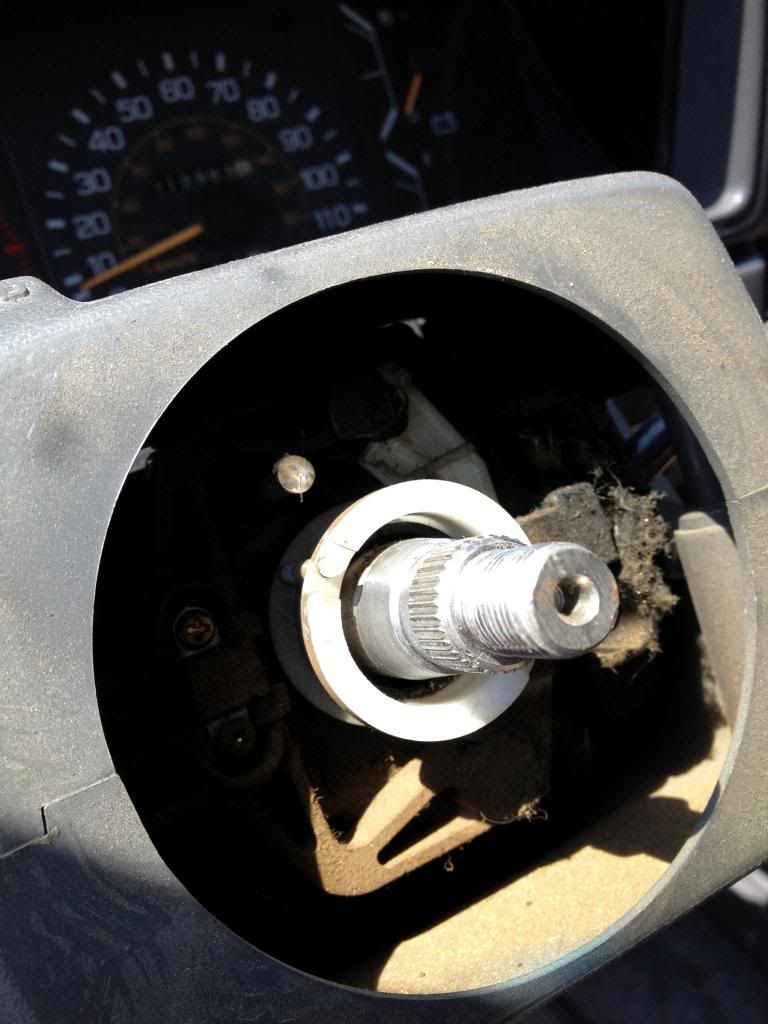
You will notice a small pin or spring tensioned bolt at about ten o'clock in relation to the shaft. This pin contacts a copper ring on the back side of the steering wheel.
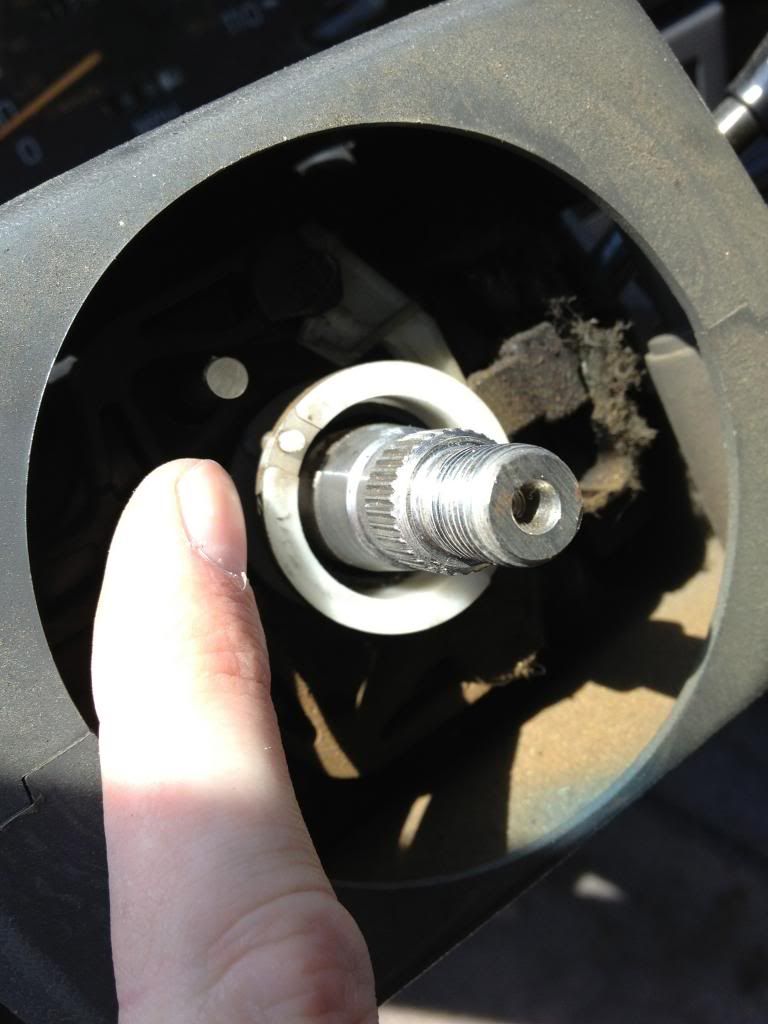
Over the years, the constant contact of this pin with the copper ring on the steering wheel causes the pin to wear down, shorter and shorter. Eventually the pin will no longer contact the ring. To stop the issue of the pin wearing down (because it will continue to wear down if you do not take this step) you will need a 22 cal bullet shell. First, if the pin's tip is dirty, sand it a bit until it shines. Fill the shell with a little dielectric grease, and push it on and over the pin. The shell will not wear down like the pin, and you can consider the pin "bullet proof" ha-ha-ha.
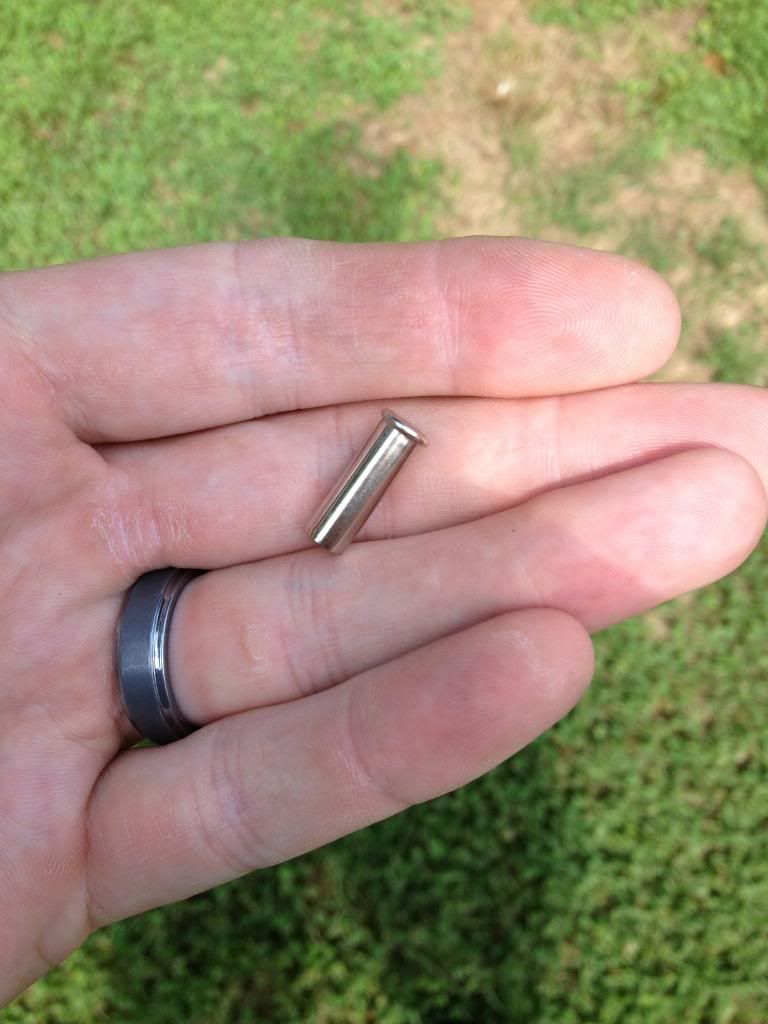
Put a dab of dielectric grease on the back of the shell for good luck (and for contact with the ring).
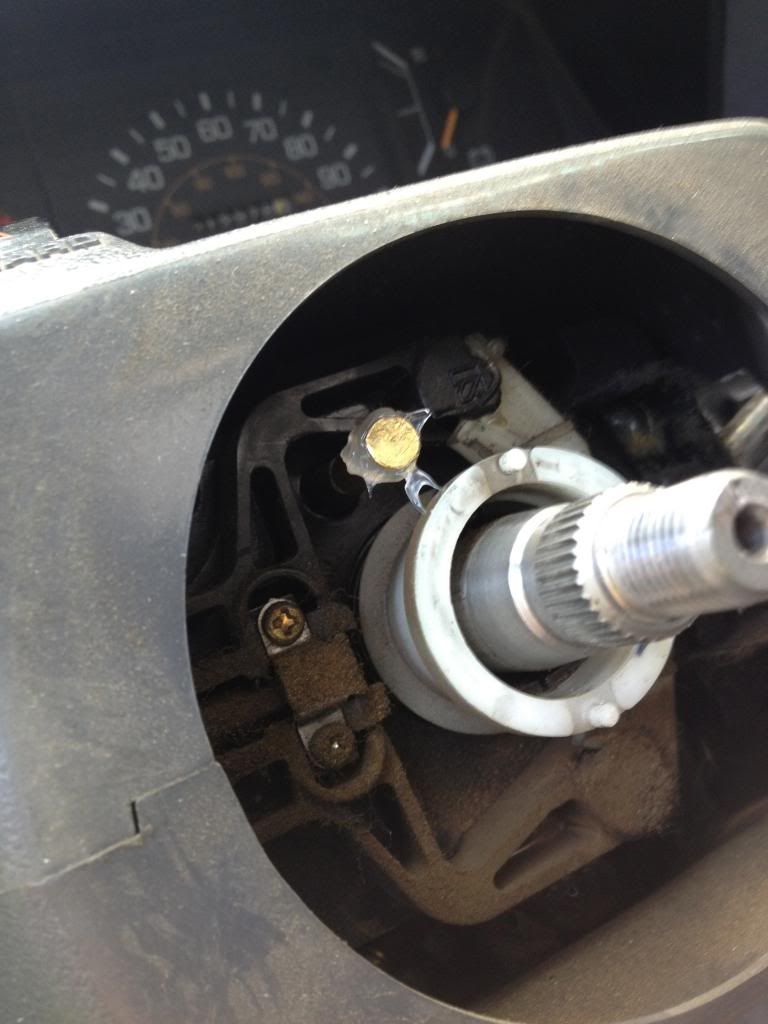
With the shell in place, you have completed repair of the steering column end of the job, and you can now move to the steering wheel.
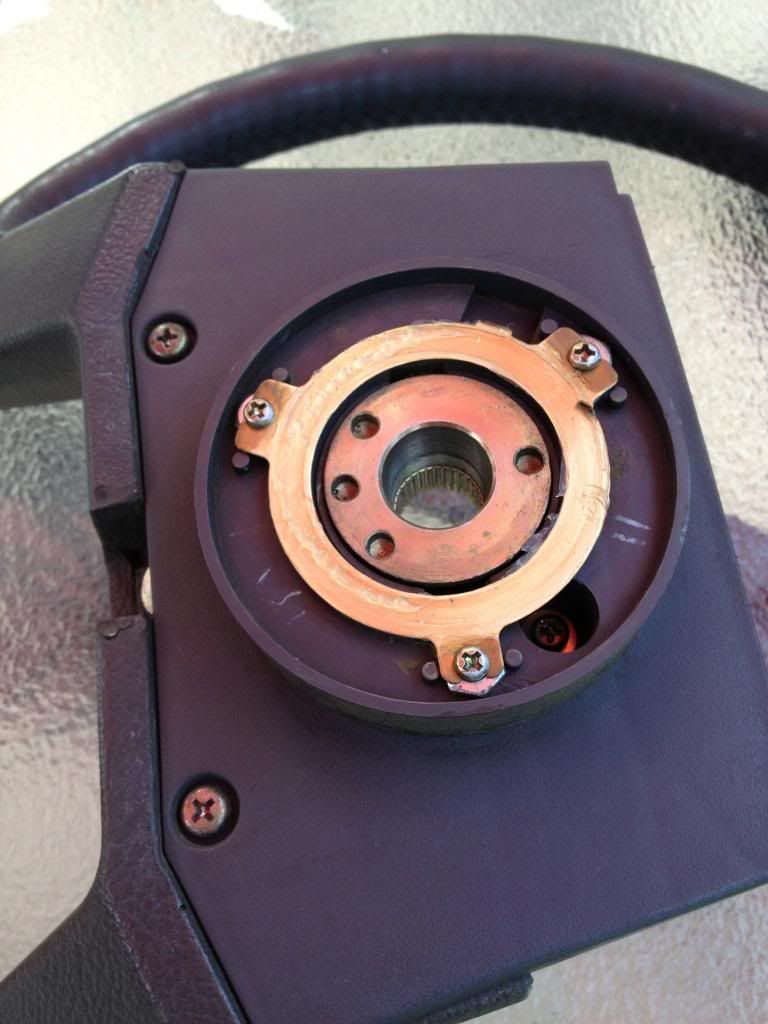
The steering wheel will have a ring installed that contacts the pin, and then moves to the front of the steering wheel via a copper arm where it awaits to be plugged in (what you unplugged earlier) to complete the ground when you press the horn pad.
Take the time to sand the ring. If it is dirty clean it first. Lightly sand it until it shines, removing all corrosion.
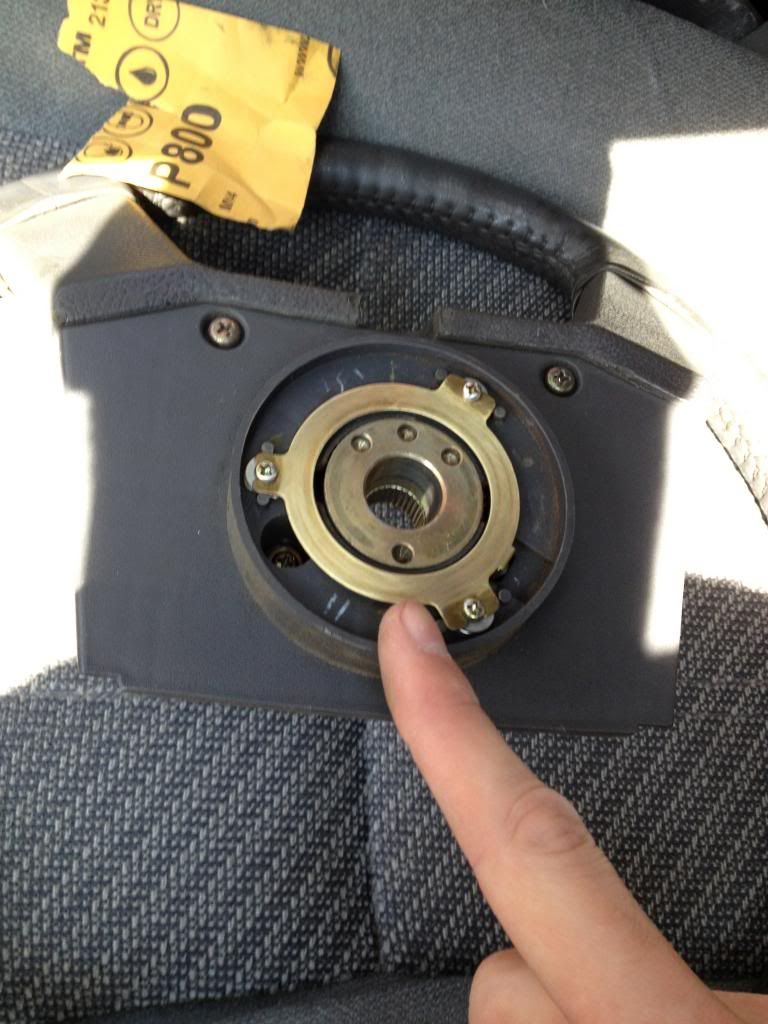
On my truck you can see the last owner had already installed washers to shim out the ring, and that is what we are going to do as well, but because this repair had been done before, by shimming out the ring WITHOUT using the bullet shell, my pin in the steering column was worn down once again, even shorter, and once again the horn stopped working. Your horn will most likely not be shimmed with washers, and just be held on by the three factory screws.
The goal is to make the ring rise, so it can contact the bullet shell covered pin. Some members have gone as far as creating a true shim with plastic, to ensure they do not bend the copper ring. This is not an issue however, as the pin is spring loaded, and should press in long before the copper ring bends, so washers or nuts are fine to use.
Remove the three screws and pull straight up on the ring, keeping in mind that there is a copper arm running through the wheel.
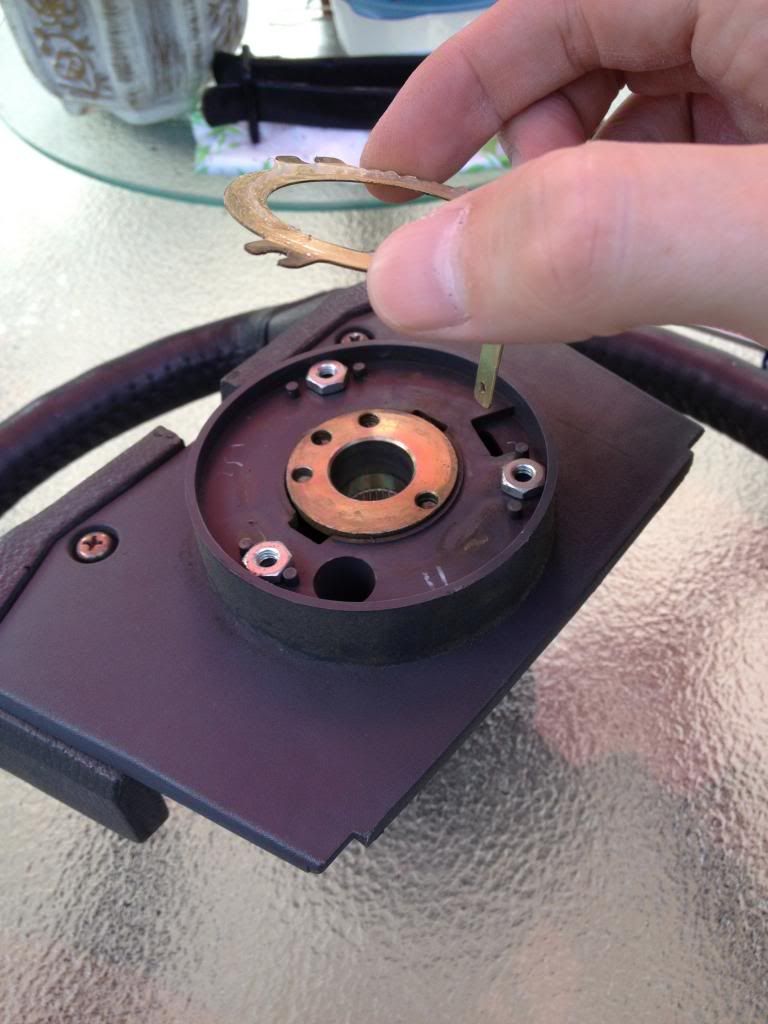
I used nuts, because the washer method was already done as explained earlier. Only shim as much as necessary, most likely a few washers will do the trick.
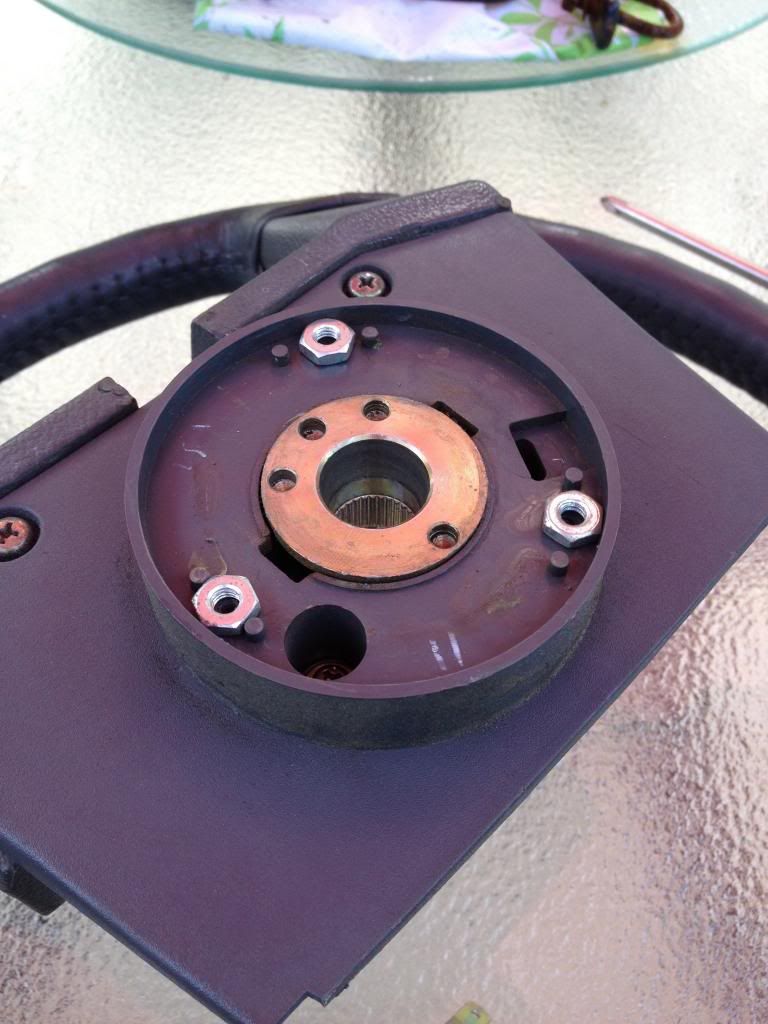
Insert your spacers (washers or nuts) and then re-install the screws. Do not over tighten these, barely hand tight, you do not want to press out the copper fingers and make a mess of the ring.
The ring should now be elevated, and you can begin applying a healthy coating of dielectric grease.
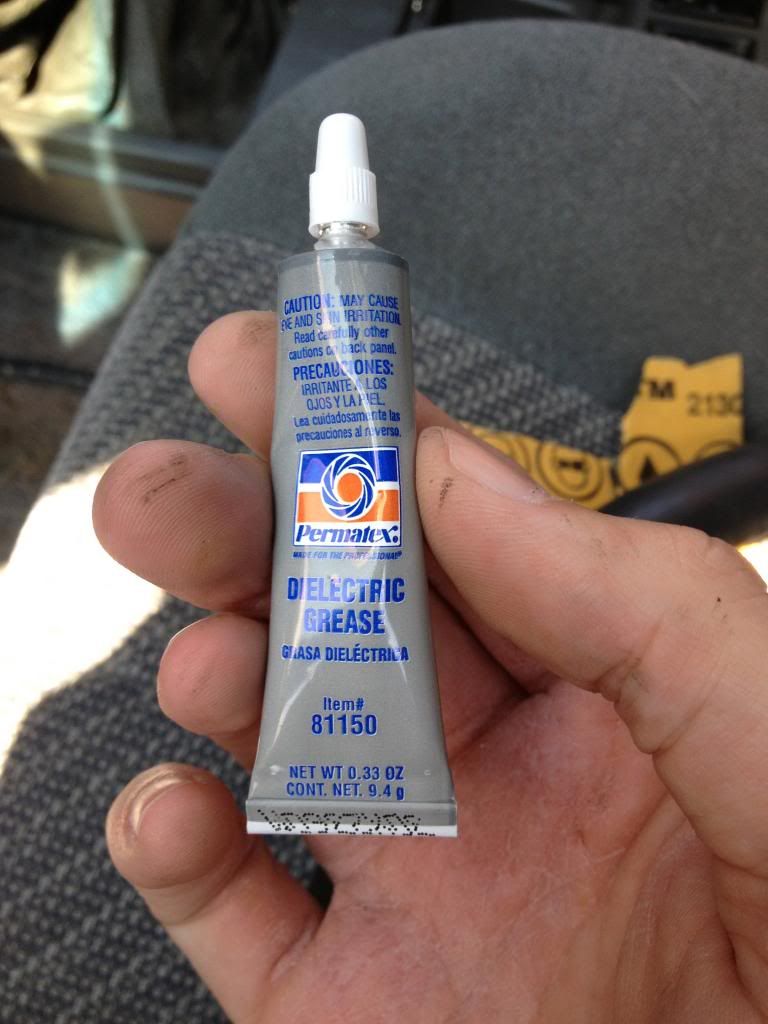
Make sure you get a coating around the entire ring. The grease is not a step worth skipping, as it will ensure that the ring and pin will not squeak and squeal when turning your wheel, and ensure smooth quiet operation. In addition, it prevents wear from metal to metal contact. It's grease it lubricates! Do not skip this step!
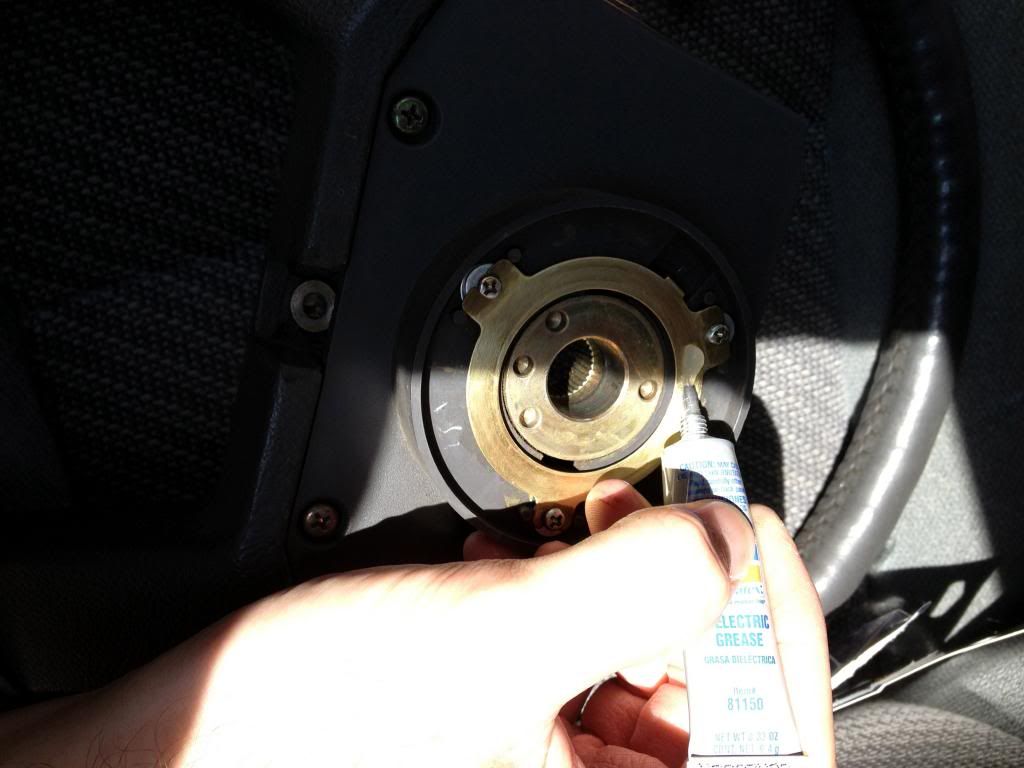
You can now replace the steering wheel. Before you do, you need to check a few things. Ensure the white plastic collar around the shaft (near the splines) matches the copper inner ring. The collar has two tiny plastic stubs, and the copper inner ring has the female ends to this. Just twist the collar to line it up. Then, ensure you match your alignment markings you made from the shaft to the wheel to ensure the steering wheel is straight. If you didn't make these, thats ok, you can always remove the wheel again to fix/fine tune the issue in the future.
When the wheel has been reinstalled, you can reinstall the 19mm nut. You could put a torque wrench on this nut, but hand tight with a 1/2" drive will do the trick, and there should be a lock washer that will bite well enough. Remember, this nut is only holding the steering wheel from being PULLED OFF, it has nothing to do with turning the wheel, all that torque is on the splines, so no need to over torque this bolt!
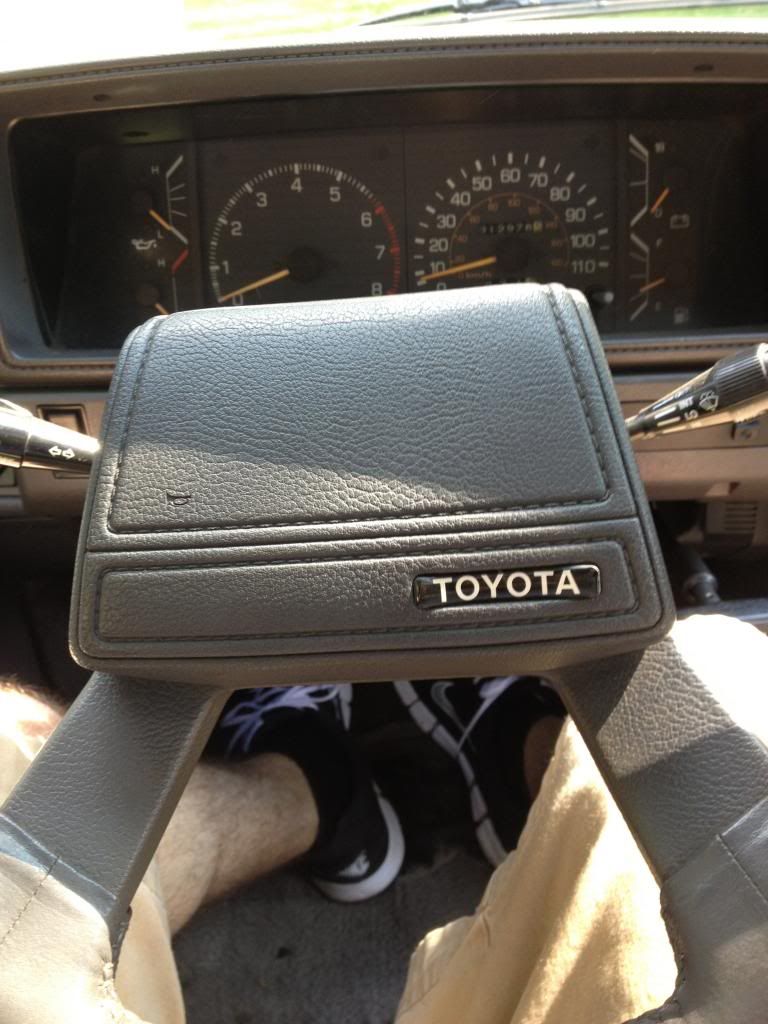
Grab the horn pad, reinstall the ground wire connector, and then slide the horn pad back on from the top down, ensuring that the two "hooks" properly go behind the steering wheel plate.
Re install the retainer screw on the bottom of the wheel.
Test the horn.
If the horn now works in all positions, you are finished. If it works but only in a few positions, or a few more positions, then you need to add more washers or a thicker nut. Trial and error.
Hopefully this write-up helps! Very important for the daily driver first gens!
BEEP BEEP!
I decided to do a small write up, even though a few already exist.
Tools Needed:
1. 19mm deep Socket and half Inch drive ratchet (or a standard socket with extension).
2. Philips Head Screw Driver
3. Dielectric grease
4. 22 cal bullet shell
5. Washers and/or Nuts
6. 800 grit sand paper (or any other fine grit to sand copper)
Procedure:
Park your car with the wheel straight and true.
Start by removing the small screw on the bottom of the steering wheel "horn pad". It is located here:
Once removed you can gently pull outward on the button, and then push up and the horn pad will pop off. Again, be gentle, there is a contact connector that you want to ensure you do not break. Disconnect the wire, and place the horn pad to the side.
Next, you will see a 19mm nut that holds the steering wheel to the shaft. Before you remove it, mark the wheel and the shaft with a line using a permanent marker or grease pen to ensure when you replace the wheel, you replace it straight. Of course, you could scratch it in as well.
At this point you are going to want to loosen the nut for the shaft. Using a 19mm socket and 1/2" ratchet, remove the nut by firmly holding the steering wheel with one hand, and loosening the bolt with your free hand.
The bolt is supposed to be at 26ft lbs, so you shouldn't need a breaker bar. If you do, it is not the end of the world. Once the nut breaks free, loosen it about half way, but leave it on. Firmly pull up on the steering wheel until it breaks free of the spline's grip. The nut you left on the shaft will stop the steering wheel from breaking your nose.
Now that the wheel is free, remove the nut.
Remove the steering wheel to reveal the inside of the steering column.
You will notice a small pin or spring tensioned bolt at about ten o'clock in relation to the shaft. This pin contacts a copper ring on the back side of the steering wheel.
Over the years, the constant contact of this pin with the copper ring on the steering wheel causes the pin to wear down, shorter and shorter. Eventually the pin will no longer contact the ring. To stop the issue of the pin wearing down (because it will continue to wear down if you do not take this step) you will need a 22 cal bullet shell. First, if the pin's tip is dirty, sand it a bit until it shines. Fill the shell with a little dielectric grease, and push it on and over the pin. The shell will not wear down like the pin, and you can consider the pin "bullet proof" ha-ha-ha.
Put a dab of dielectric grease on the back of the shell for good luck (and for contact with the ring).
With the shell in place, you have completed repair of the steering column end of the job, and you can now move to the steering wheel.
The steering wheel will have a ring installed that contacts the pin, and then moves to the front of the steering wheel via a copper arm where it awaits to be plugged in (what you unplugged earlier) to complete the ground when you press the horn pad.
Take the time to sand the ring. If it is dirty clean it first. Lightly sand it until it shines, removing all corrosion.
On my truck you can see the last owner had already installed washers to shim out the ring, and that is what we are going to do as well, but because this repair had been done before, by shimming out the ring WITHOUT using the bullet shell, my pin in the steering column was worn down once again, even shorter, and once again the horn stopped working. Your horn will most likely not be shimmed with washers, and just be held on by the three factory screws.
The goal is to make the ring rise, so it can contact the bullet shell covered pin. Some members have gone as far as creating a true shim with plastic, to ensure they do not bend the copper ring. This is not an issue however, as the pin is spring loaded, and should press in long before the copper ring bends, so washers or nuts are fine to use.
Remove the three screws and pull straight up on the ring, keeping in mind that there is a copper arm running through the wheel.
I used nuts, because the washer method was already done as explained earlier. Only shim as much as necessary, most likely a few washers will do the trick.
Insert your spacers (washers or nuts) and then re-install the screws. Do not over tighten these, barely hand tight, you do not want to press out the copper fingers and make a mess of the ring.
The ring should now be elevated, and you can begin applying a healthy coating of dielectric grease.
Make sure you get a coating around the entire ring. The grease is not a step worth skipping, as it will ensure that the ring and pin will not squeak and squeal when turning your wheel, and ensure smooth quiet operation. In addition, it prevents wear from metal to metal contact. It's grease it lubricates! Do not skip this step!
You can now replace the steering wheel. Before you do, you need to check a few things. Ensure the white plastic collar around the shaft (near the splines) matches the copper inner ring. The collar has two tiny plastic stubs, and the copper inner ring has the female ends to this. Just twist the collar to line it up. Then, ensure you match your alignment markings you made from the shaft to the wheel to ensure the steering wheel is straight. If you didn't make these, thats ok, you can always remove the wheel again to fix/fine tune the issue in the future.
When the wheel has been reinstalled, you can reinstall the 19mm nut. You could put a torque wrench on this nut, but hand tight with a 1/2" drive will do the trick, and there should be a lock washer that will bite well enough. Remember, this nut is only holding the steering wheel from being PULLED OFF, it has nothing to do with turning the wheel, all that torque is on the splines, so no need to over torque this bolt!
Grab the horn pad, reinstall the ground wire connector, and then slide the horn pad back on from the top down, ensuring that the two "hooks" properly go behind the steering wheel plate.
Re install the retainer screw on the bottom of the wheel.
Test the horn.
If the horn now works in all positions, you are finished. If it works but only in a few positions, or a few more positions, then you need to add more washers or a thicker nut. Trial and error.
Hopefully this write-up helps! Very important for the daily driver first gens!
BEEP BEEP!
Last edited:


 . If I remember right, I scared the crap out of myself once when a screwdriver touched that pin and the metal in the column and the horn went off. But maybe I'm making that up, it's been a while since I had to screw around in my steering column. Anyway, find a source of ground, connect the pin to it, listen for a honk.


