Gonna do the timing belt soon, any tips?

WallyWest

New member
I've read a bunch of threads on it, and watched a few videos. Just looking for any secret shortcuts that make the job easier and/or faster.

For instance, is removing the radiator necessary? It obviously gives you some more room to work, but is it doable without pulling it? I probably need to replace it anyway, but I didn't plan on doing that quite yet.

And do you have to remove the A/C compressor? I do plan on replacing the tensioner and idler pulleys. I thought I read somewhere on here about a method to swap those without having to move the compressor, but I couldn't find it again.

Mine has generic greenish coolant in it now, so I'm planning on switching to Toyota red as well.

So yeah, any clever tricks would be appreciated.
 
Register to hide this ad
If this is your first timing belt rodeo, remove the radiator and tape a piece of cardboard against the condenser.

To remove the crank bolt, I used the bump start method using a 1/2 19mm short impact socket, a 1/2 16" breaker bar inside a piece of 17" 3/4 cast iron pipe lying against the driver's frame rail.

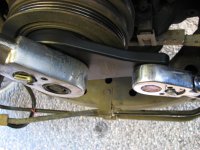
To get the tensioner out you may be able to use a 1/4 10mm flex socket. This didn't work for me so I had to take out the AC compressor using a stubby ratcheting 14mm wrench, which is worth its weight in gold.

If you haven't seen this one on YT take a look:
New Timing Belt Water-Pump 5vz-fe 3.4L Write-up for Review - Page 3 - YotaTech Forums
 
I've posted this in other threads. Wanted to mention again:
Some have a hard time getting the new timing belt on. The easiest way (and the way many Toyota master mechs do it) is to:
1) remove top idler pulley
2) put new belt on starting at the crank lining up the mark
3) wrap timing belt around the cams, lining up the marks
4) put top idler pulley in, torque to spec
5) double check your marks
6) pull tensioner pin
7) put crank pulley bolt in, rotate crank 4-6 times (2-3 revolutions of the cams)
8) check your marks again

As far as the AC compressor, I used swivel sockets on the bracket bolts and the gear wrenches on the compressor bolts.
 
Last edited:
I've done several. I finally bought the Schley tool to hold the harmonic balancer while you remove the crankshaft bolt. IT is worth it's weight in gold. I think it costs $60 but it sure makes the job easier. You can get the tensioner off without removing the AC compressor but if it's your first time, you should probably just bite the bullet and removed the compressor bolts. Take the radiator out. It's only a few bolts on the shroud and four on the radiator itself. The extra room makes the job much easier. Like the Previous poster said, protect the condenser with cardboard just in case. These are the two things that cause the most agony when changing the belt.

Joe
 
I've done several. I finally bought the Schley tool to hold the harmonic balancer while you remove the crankshaft bolt. IT is worth it's weight in gold. I think it costs $60 but it sure makes the job easier.

Joe


That tool looks like a godsend. Their website has a model with bolts and one with out. Does that matter? Also would 2 breaker bars be needed? 1 for the harmonic balancer holder and 1 for the crank bolt?
 
That tool looks like a godsend. Their website has a model with bolts and one with out. Does that matter? Also would 2 breaker bars be needed? 1 for the harmonic balancer holder and 1 for the crank bolt?

I usually use the bump the starter trick to loosen the bolt. It works great you just have to be really careful with it. And yes, you will need two breaker bars to tighten the bolt to 217 lbs. The one on Amazon you need is 64400. Here us the link:

https://www.amazon.com/gp/product/B009TCA758/ref=oh_aui_detailpage_o07_s00?ie=UTF8&psc=1#Ask
 
That tool looks like a godsend. Their website has a model with bolts and one with out. Does that matter? Also would 2 breaker bars be needed? 1 for the harmonic balancer holder and 1 for the crank bolt?

Yep, or two ratchets like this.

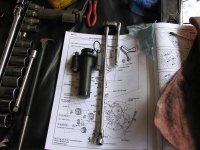
The second pic is my avatar which is what I used to take the tensioner off. It's 1/4 drive and the socket is a 6 point 1/2". I'm not positive of the actual bolt head size but it must be either 12 or 13 mm for the 6 point 1/2" socket to work.
 

Attachments

  • IMG_8647 (Medium).JPG
    IMG_8647 (Medium).JPG
    103.7 KB · Views: 1,177
  • IMG_8669 (Medium).JPG
    IMG_8669 (Medium).JPG
    79.6 KB · Views: 1,139
Here's my tip. The binder clips make putting the belt on so much easier.

IMG_1451.JPG


Just leave the bolt on the top idler loose so the pulley angles up, slide belt on, tighten bolt, pull tensioner clip, rotate crank twice to check and done.
 
Last edited:
Here's my tip. The binder clips make putting the belt on so much easier.

IMG_1451.JPG


Just leave the bolt on the top idler loose so the pulley angles up, slide belt on, tighten bolt, pull tensioner clip, rotate crank twice to check and done.

That tip has saved me a lot of time.
 
Here's my tip. The binder clips make putting the belt on so much easier.

Just leave the bolt on the top idler loose so the pulley angles up, slide belt on, tighten bolt, pull tensioner clip, rotate crank twice to check and done.

I put a pry bar under the tensioner and put the belt under tension, rotating the crank shaft like that first. After I make a few turns and see that things remain lined up, then I pull the tensioner pin.
 
Last edited:
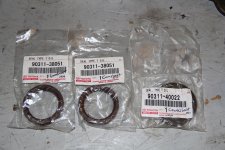
Nobody mentioned it in the thread but you may consider changing out your cam seals and your crank seal while you have everything disassembled. That's another 100K you don't need to worry about them leaking. If you do, loosen up the cam pulleys at the same time you're loosening up your HB.

Get yourself a sharpie and ziploc bags and place your hardware in there and label everything.

Take a ton of photos from different perspectives prior to disassembly.

Tape and protect all potential cavities in the event you drop something. Murphy never sleeps.

Soak your HB in PB Blaster for one night before you begin the job.

Get yourself a new HB bolt. (Yea I know, tons of arguments on this. Bottom line is they're cheap, it doesn't make sense to re-use it.) No harm no foul.

Take your time and enjoy it!

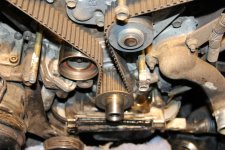
EDIT: There's a "timing belt guide" (FSM Page 824) that needs to go back on exactly the same way it came off. It's the big washer with holes around the perimeter.

EDIT 2 - Here's a few pics...If you don't install the guide correctly it will shred your new timing belt.

Everything else has been covered.
 

Attachments

  • timing belt_4.jpg
    timing belt_4.jpg
    129.5 KB · Views: 1,206
  • timing belt_5.jpg
    timing belt_5.jpg
    117.6 KB · Views: 1,055
  • timing belt_6.jpg
    timing belt_6.jpg
    102.8 KB · Views: 1,203
Last edited:
Yep, or two ratchets like this.

The second pic is my avatar which is what I used to take the tensioner off. It's 1/4 drive and the socket is a 6 point 1/2". I'm not positive of the actual bolt head size but it must be either 12 or 13 mm for the 6 point 1/2" socket to work.

Is that 3/8 ratchet really able to handle the "~1700 lbs" of force being exerted on it? Ive had a few encounters with stubborn bolts that i thought would surely end my 3/8, much like it did to my 1/4 ratchet. I dont even know if my 3/8 breaker bar can handle this job.

Here's my tip. The binder clips make putting the belt on so much easier.

IMG_1451.JPG


Just leave the bolt on the top idler loose so the pulley angles up, slide belt on, tighten bolt, pull tensioner clip, rotate crank twice to check and done.

I personally have never changed a 4runner timing belt. In you picture it appears that the belt has markings already on it. If so, then thats a relief. Im always concerned about missing a tooth somewhere and screwing up the timing.
 
Is that 3/8 ratchet really able to handle the "~1700 lbs" of force being exerted on it? Ive had a few encounters with stubborn bolts that i thought would surely end my 3/8, much like it did to my 1/4 ratchet. I dont even know if my 3/8 breaker bar can handle this job.

That's a 1/2" and 3/4 drive ratchet. :naughty:
 
Thanks everyone, putting together my Amazon order now.

Here's my tip. The binder clips make putting the belt on so much easier.

Cool idea! I'm currently using those things to silence my rattling catalytic converter heat shields.

I'm all for using the correct tools for the job, but that $70 piece of metal for removing the crank bolt doesn't interest me. Do you have a link to the 2X4 design I've read about in other threads?
 
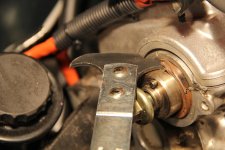
I do not like the way how rock_rat removes the cam seal (in the picture). That tool can damage the cam shaft and leads to lot of trouble down the road.
Instead, use a wood screw and gently tap it right in the middle of the oil seal and screw it on to the oil seal. Attach another on the other side and then slowly pull the two screws out. It will pull the oil seal out. See at 1:25 here:
https://www.youtube.com/watch?v=IYCqSs6fcPM
 
Here's my tip. The binder clips make putting the belt on so much easier.

IMG_1451.JPG


Just leave the bolt on the top idler loose so the pulley angles up, slide belt on, tighten bolt, pull tensioner clip, rotate crank twice to check and done.

I didn't have any trouble using the method I described without clips. I've done several of them on the 3.4. There is more than one way to skin a cat.
 

Members online

Forum statistics

Threads
278,314
Messages
3,554,093
Members
248,016
Latest member
Advally Service

Trending content

Back
Top