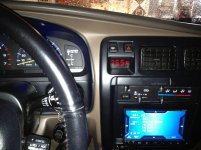
Got rid of my clock for an outside temp gauge

dgoll75

New member
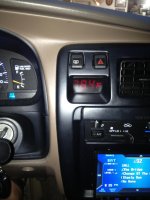
....just because of my OCD, It bothered me to have 2 clocks because my double din radio has one too. So I found an outside temp gauge on Ebay for $12 a few weeks ago. Painted it black and tinted the lens w/ lens tint spray to dim it down a bit. All I had to do was dremel the clock retaining ears off and put a small screw through the body of the new gauge. Tapped into my clock wires for power, then ran the temperature leads to the outside through the door wire harness grommets. Most of my dash is converted to blue, however I have a little red for contrast. May change it to blue. A good way to waste a rainy Sunday in my garage. EDIT Made a writeup below in this thread.
 

Attachments

  • IMG_0211.jpg
    IMG_0211.jpg
    133.2 KB · Views: 7,841
Last edited:
Register to hide this ad
This calls for being a DIY write-up, or at least put together a parts list for everyone.

To echo Nelsonmd, very nice job indeed.
 
Nice mod......But I must confess, my thoughts were where is it 75.5 degrees this time of year. I vaguely recall 75 degrees here in AZ. LOL
 
Last edited:
This something I REALLY want. Outside temp is very useful when I get to fishing spots, and nice to know when cruising around in the 100+ degree weather here.

Can you give a little more info like which vendor and item it is on ebay, and where you mounted the temp sensor?
 
This is installation instructions for this temp gauge:
Red Digital Thermometer with 1pcs DS18B20 Temp Probes | eBay

They also make Blue thermometers and Blue or Red volt meters.

Ok guys here goes:
1 remove radio bash bezel and unplug ashtray light, lighter leads, hazard lead, defrost lead and clock lead.
2 move to workbench or table backside up on a towel
3 remove clock
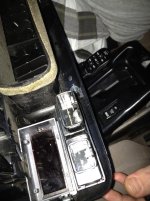
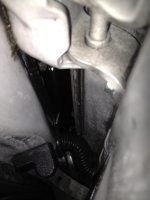
4 Use a dremel to cut the clock holder clips off of the bezel and slightly trim the plastic base of the metal tab (trim a little of this tab at a time, if you get it perfect the new faceplate will snap into place) just to the left of the clock tabs PIC 1
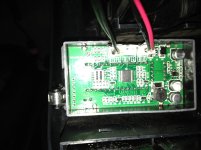
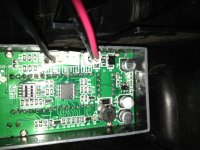
5 open the new temp gauge by pushing the 4 tabs on the back w a small screwdriver, then remove the 4 small screws from the led panel PIC 2 and take it out. I painted my faceplate black and sprayed the red lens (they come apart) with tinting spray at this point.
6 I now pushed/wedged the empty faceplate into the old clock spot
7 I then drilled a VERY small pilot hole through the empty casing into the a/c vent side and used a very small screw to secure it in placePIC 3, then reassembled the temp gauge into faceplate and snapped on backplate PIC 2
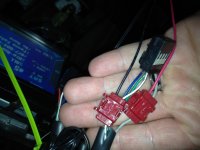
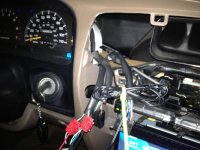
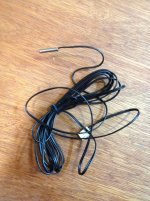
8 Ran the temperature probes down through the dash and out of the door wiring grommets to the inside of the fenderPIC 7 and 89 used wire taps to tap into the existing clock power, red to gray clock wire/ black to white with black stipe clock wire. These are the switched power leads. PIC 4
10 cut the dash tab off the dash where the clock tab would push into (same as top one), don't worry my bezel held on perfect without it. PIC 5
11 plugged all the wires in then put bezel back on. VOILA finished. PIC 6

 

Attachments

  • IMG_0217.jpg
    IMG_0217.jpg
    125.8 KB · Views: 4,902
  • IMG_0218.jpg
    IMG_0218.jpg
    133 KB · Views: 4,508
  • IMG_0226.jpg
    IMG_0226.jpg
    132 KB · Views: 4,641
  • IMG_0215.jpg
    IMG_0215.jpg
    124.1 KB · Views: 5,144
  • IMG_0221.jpg
    IMG_0221.jpg
    127.2 KB · Views: 4,466
  • IMG_0210.jpg
    IMG_0210.jpg
    126.8 KB · Views: 4,943
  • securedownload.jpg
    securedownload.jpg
    138.2 KB · Views: 4,428
  • securedownload-1.jpg
    securedownload-1.jpg
    120.5 KB · Views: 4,482
Last edited:
Can this be combined with a transmission temp sender? Use a toggle switch to flip from one to the other.

If you feed the air temp sensor into the air cleaner box in front of the air cleaner you will get an almost instant read on out side temps without exposing the sensor to the elements

You did a great job on mod.
 
Last edited:
This is a great mod. I have a $10 Wal Mart digital temp guage that I put the sensor in the fender well per the instructions, and I was getting hot readings because of the engine heat. I moved it up to the front of the vehicle to avoid this, but running it into the airbox like Drcoffee says might be a better idea.

The one I have I only use on occasion because that little b@s**** eats watch batteries like no other. I gotta get one of these!
 
Have a link to the ebay item?

The EBAY link is 2nd line in the installation instructions. :thumb3: And happy to share this mod, glad you guys see the usefulness of it. My wife thought it was pointless.....as she does with most of my mods.
 
Last edited:

Members online

Forum statistics

Threads
278,317
Messages
3,554,129
Members
248,016
Latest member
Advally Service

Trending content

Back
Top