Todays update:
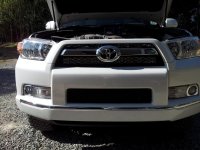
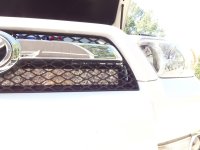
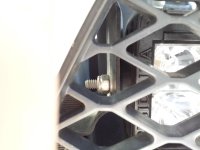
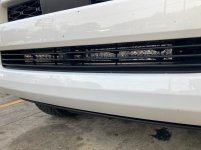
We installed the KC Cyclone under hood light kit. I used the same location as Kelly & Trevor from “Adventure Built” did (Ultimate Under Hood Work Light on 5th Gen Toyota 4Runner - KC HiLites Cyclone LED Light - YouTube)
These are great lights and using the same mounting location and push pins, it was very straightforward. I did tuck the wires in through the holes, keeping it cleaner and still had room for the pins.
Mine are wired to a lighted dash switch, located in the lower left switch blank on the dash. They are running off the battery with a 3a fuse, so available without ignition. (the kit comes with a simple weatherproof toggle, designed to be mounted under the hood near the battery).
I absolutely recommend this kit.


Next up, I found the Mob Armor “Mobnetic” mount was having trouble supporting my GMRS microphone. The adhesive disc kept coming off the dash, so the solution was to copy what I did for the cell phone mount, as detailed in a prior post. The only difference is we fabricated a 1” ball mounting plate for the Magnetic Mic brand attachment device. Works like it was factory.
It’s now secure and super handy. I’m happy.


Final thing for today, the OEM Toyota TRD Pro black hood bulge. Done.


*** One item I forgot to mention before: seat comfort…
I’m 6’3” and one of the other reasons I hesitated in buying a Gen5 4Runner was seat comfort. I found a noticeable lack of lower leg support and was concerned about longer drives like that. A bit of internet research took me to many many positive reviews of the Seat Jackers by Desert Does It, out of Nevada.
Bottom line: do this mod. I did on both front seats and it’s truly amazing. The stock drivers tilt function was not enough, but with the Seat Jackers it’s really nice, and I did 5 hours with no issue. My front seat passenger also finds the angle comfortable. I learned of this prior to purchase and I’m glad they worked as well as I hoped.
While I’m sure there will other little things that will be added along the way, this now completes everything I set out to achieve with this build.
Thanks for following along. If I can offer any assistance please PM me, I’ll be glad to help.
Hoppy
We installed the KC Cyclone under hood light kit. I used the same location as Kelly & Trevor from “Adventure Built” did (Ultimate Under Hood Work Light on 5th Gen Toyota 4Runner - KC HiLites Cyclone LED Light - YouTube)
These are great lights and using the same mounting location and push pins, it was very straightforward. I did tuck the wires in through the holes, keeping it cleaner and still had room for the pins.
Mine are wired to a lighted dash switch, located in the lower left switch blank on the dash. They are running off the battery with a 3a fuse, so available without ignition. (the kit comes with a simple weatherproof toggle, designed to be mounted under the hood near the battery).
I absolutely recommend this kit.
Next up, I found the Mob Armor “Mobnetic” mount was having trouble supporting my GMRS microphone. The adhesive disc kept coming off the dash, so the solution was to copy what I did for the cell phone mount, as detailed in a prior post. The only difference is we fabricated a 1” ball mounting plate for the Magnetic Mic brand attachment device. Works like it was factory.
It’s now secure and super handy. I’m happy.
Final thing for today, the OEM Toyota TRD Pro black hood bulge. Done.
*** One item I forgot to mention before: seat comfort…
I’m 6’3” and one of the other reasons I hesitated in buying a Gen5 4Runner was seat comfort. I found a noticeable lack of lower leg support and was concerned about longer drives like that. A bit of internet research took me to many many positive reviews of the Seat Jackers by Desert Does It, out of Nevada.
Bottom line: do this mod. I did on both front seats and it’s truly amazing. The stock drivers tilt function was not enough, but with the Seat Jackers it’s really nice, and I did 5 hours with no issue. My front seat passenger also finds the angle comfortable. I learned of this prior to purchase and I’m glad they worked as well as I hoped.
While I’m sure there will other little things that will be added along the way, this now completes everything I set out to achieve with this build.
Thanks for following along. If I can offer any assistance please PM me, I’ll be glad to help.
Hoppy
Last edited: