matthewkristof
Member
I recently acquired an E7019 navigation unit from a forum user here a few months ago and have really enjoyed using it. Despite its lack of bluetooth, multiple disc changer, and other features found on superior Toyota navigation models, it was a perfect fit for my 2007 Sport Edition with non-JBL setup.
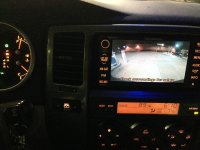
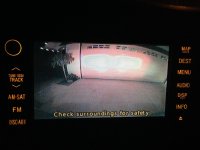
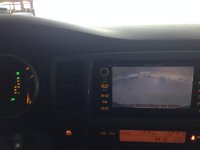
Perhaps its greatest flaw is the utter lack of a backup camera. A novelty, yes I know, but it is something that I wanted to add. I did lots of research into how to accomplish this but found several add-on systems that once catered to the Toyota navigations were either discontinued (NavTool) or not compatible with the E7019 (Coastaletech). I recently found a thread from Rav4World that detailed adding a backup camera to the E7019 (since it is compatible in Rav4, Corolla and Matrix models) simply by adding wires to the factory harness and connecting it to the backup camera. Out of options, I purchased the wires from Toyota and an Eclipse camera. I gave it a try and by golly...it worked!
Parts needed:
1. Eclipse backup camera, model number BEC-108. I'm guessing any camera can work, but I read great reviews on the Eclipse cameras, so I went with this one.
2. Female connectors for wire harness, "terminal repair w/w", part # 82998-24300 at a whopping $12 each
Method:
A detailed writeup can be found here.
All credit for the ingenuity of this mod is given to "pillpusher84" on the Rav4world forum. I'm posting on this forum to show others that this method is possible and does work flawlessly on my rig. I'm sure it will work on other T4R models with similar setups as well.
I'm currently working with "pillpusher84" on wiring an "anytime camera on" switch. If I accomplish this, I will post the results on this thread.
Perhaps its greatest flaw is the utter lack of a backup camera. A novelty, yes I know, but it is something that I wanted to add. I did lots of research into how to accomplish this but found several add-on systems that once catered to the Toyota navigations were either discontinued (NavTool) or not compatible with the E7019 (Coastaletech). I recently found a thread from Rav4World that detailed adding a backup camera to the E7019 (since it is compatible in Rav4, Corolla and Matrix models) simply by adding wires to the factory harness and connecting it to the backup camera. Out of options, I purchased the wires from Toyota and an Eclipse camera. I gave it a try and by golly...it worked!
Parts needed:
1. Eclipse backup camera, model number BEC-108. I'm guessing any camera can work, but I read great reviews on the Eclipse cameras, so I went with this one.
2. Female connectors for wire harness, "terminal repair w/w", part # 82998-24300 at a whopping $12 each
Method:
A detailed writeup can be found here.
All credit for the ingenuity of this mod is given to "pillpusher84" on the Rav4world forum. I'm posting on this forum to show others that this method is possible and does work flawlessly on my rig. I'm sure it will work on other T4R models with similar setups as well.
I'm currently working with "pillpusher84" on wiring an "anytime camera on" switch. If I accomplish this, I will post the results on this thread.