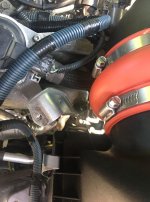
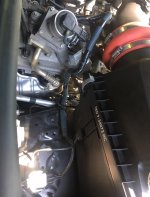
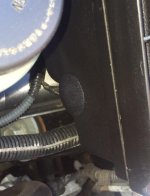
How-To-Guide (TRD CAI) Installation

Cool, I used the plastic push plug included in the kit to plug one hole, and I'm sure I looked around to see if I missed another, but didn't find one. I noticed while reading back on earlier posts on this thread that some people mention sealing the gap around one of the mounting points on the bottom of the filter box. I noticed that, too, but didn't think anything of it, so I didn't seal that up. I might try filling that gap up with some silicon and see if that helps. Thanks for the info

I think that gap should be left open so that if any water makes its way into the intake, it can drain out... The installation instructions make no mention of sealing that up.
 
I think that gap should be left open so that if any water makes its way into the intake, it can drain out... The installation instructions make no mention of sealing that up.

Good point, and I didn't get around to sealing it anyways, got lazy, haha. I kind of just got used to hearing the high pitch noise, I like to pretend it's my massive turbo spooling up
 
I sealed mine up at first with silicone, and all it did was create a big mess in there (dead bugs and leaves), so i got tired of cleaning my air box out with a vacuum cleaner, and have removed the silicone.....my airbox is a lot cleaner without the drian holes being covered.

FYI, I have a snorkel attached to the trd intake so YMMV.
 
Step 16: Once the fenderwell tubing is installed, install the new airbox (bottom) in using the (3) bolts from the previous airbox. You'll notice a new 3rd hole location (inside) the airbox vice outside. Bolt down the box and reinstall the wire harness into the side of the airbox.

has anyone noticed that 1 of the 3 12mm bolts is too long and bottoms out before it gets to the grommet in the new lower airbox?

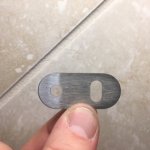
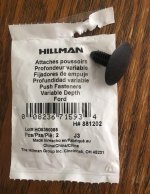
also what the heck is this thing for?.... i think it was in the bag with the rubber couplers and worm-gear clamps

sorry if these have been answered, i'm dirty and sweaty and don't want to scroll/read all the prior posts...
 

Attachments

  • IMG_2682.JPG
    IMG_2682.JPG
    33.4 KB · Views: 818
I just wanted to say thanks to the OP and many others who contributed here. I just ordered the CAI parts from Camelback Toyota including the TRD filter. I'll be looking forward to getting a few ponies back from the elevation in CO. :)
 
LOL so I just got my package from Cameltoe....this is so silly that the individual parts come in their own box inside a big box and it's still vastly cheaper than the full kit. They also screwed up and gave me the biggest part twice even though I only ordered one....guess I have a spare upper air box assembly lol
 
Thanks for all the write ups. I installed the CAI on my 2018 TRD Offroad without any issues.
 

Attachments

  • IMG_20180515_172048.jpg
    IMG_20180515_172048.jpg
    138.6 KB · Views: 1,354
Just ordered the individual parts for my 2009 Tacoma. Quick question...anybody have a PN for the stock OEM filter they are using? All the Tacoma OEM filters I see look like a different shape. I currently have a Volant CAI with a cone filter, so I can't compare.
 
Just ordered the individual parts for my 2009 Tacoma. Quick question...anybody have a PN for the stock OEM filter they are using? All the Tacoma OEM filters I see look like a different shape. I currently have a Volant CAI with a cone filter, so I can't compare.

PTR43-00083

If you are trying to order one I’d call who ever it may be from ahead of time to ensure they have it on hand. They are supposedly on back order to infinity and beyond right now.
 
I did the DIY install. All parts from Cameltoe came out to around $320 with taxes and shipping, and included the air filter. The air filter was on back order for about 3 weeks, but everything arrived eventually...

Like others, I did not appreciate the fact that only two clamps were used. The fender side of the box would not clamp or close. The thickness of the rubber gasket is exactly the same as the OEM filter, but it is very stiff and impossible to compress. This makes the box unsealed as-is, and you can easily lift the fender side of the box open. Not good if you're cruising through dusty roads!!!

One individual (who must be an engineer or scientist) ordered two clamps from McMaster Carr. It's an elegant and effective solution, and I highly recommend it. However, if you're like me and you don't want to have to deal with yet another thing, try the MacGyver method:

You had extra clamps (don't know why, but I had 6 extra ones). Take two of those, and pry open the little nubs at the bottom, just a tad:
nju9Pbr.jpg


Now clamp OVER the nubs, and with another pair of pliers, bend the whole clamp tighter. You may find it better to bend back (straighter) near the nubs first, clamp high, and bend forward (tighter) on the main arc.
nvsUNRM.jpg


Now you should have something like this:
xbYZAso.jpg


Guess what?? There's a small open gap under the lip of the lower box that the nubs can now fit into! And your custom-bent clamps will grab the top. Just keep adjusting the nubs and clamp until they grab firmly.

Front:
2SbGGUB.jpg


Back:
qOk8nb3.jpg


MUCH happier...
 
Last edited:
When buying parts separately (2015 & up):
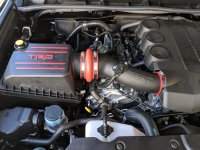
1. I have found good use for the elongated metal wire harness bracket. Installed it on top of engine as shown on Fig 3-1 of official install guide, then removed the plastic wire support clip from old intake manifold cover and pressed into the metal bracket’s slotted hole.
2. Instead of completely removing the resonator bracket I rotated it to provide support for the excess wire harness (ran zip tie thru threaded hole on top).
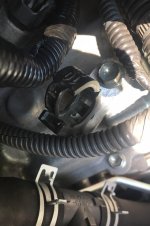
3. I tried multiple plugs from Lowe’s, part# 881202 was the best fit. The head is a bit too large but at least the surface pattern matches the intake housings’ and most importantly the ribbed body fits snug in the hole.
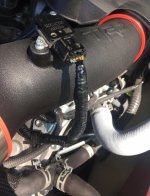
4. I cut the new vacuum hose to 20” length, it was hard to find a tie down location without pulling sideways on the 1/8” plastic nipple. About 21” hose length would have been better.

Install guide:
https://www.toyotapartsdeal.com/ins...0 4Runner-FJ Cruiser Cold Air Intake IssD.pdf
 

Attachments

  • 16CDFEAB-5246-42A6-B98E-F3368278CF2B.jpg
    16CDFEAB-5246-42A6-B98E-F3368278CF2B.jpg
    68.9 KB · Views: 1,078
  • A7ABF9D9-B310-4155-B46C-454B9271D25B.jpg
    A7ABF9D9-B310-4155-B46C-454B9271D25B.jpg
    101.8 KB · Views: 1,090
  • A2F1773D-624E-49D1-A3C2-BA7D94396FFC.jpg
    A2F1773D-624E-49D1-A3C2-BA7D94396FFC.jpg
    93.4 KB · Views: 1,092
  • FBF0F98E-3604-4D86-8624-A1819BAFCFC6.jpg
    FBF0F98E-3604-4D86-8624-A1819BAFCFC6.jpg
    82.8 KB · Views: 1,117
  • 2FD5DD04-BD17-4B19-B4D3-863B3E0F6122.jpg
    2FD5DD04-BD17-4B19-B4D3-863B3E0F6122.jpg
    100.9 KB · Views: 1,068
  • 7CA83843-D504-49C4-B896-5832DB0D912F.jpg
    7CA83843-D504-49C4-B896-5832DB0D912F.jpg
    63 KB · Views: 1,095

Members online

Forum statistics

Threads
278,312
Messages
3,554,083
Members
248,016
Latest member
Advally Service

Trending content

Back
Top