How-To-Guide (TRD CAI) Installation

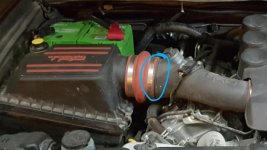
I mean this one circled in blue
 

Attachments

  • 280657158.jpg
    280657158.jpg
    118.2 KB · Views: 1,121
Last edited:
I would also try to loosen the coupling at the throttle body, 2nd clamp from tb, to see if it would give you a little more wiggle room to move the TRD tube closer to the airbox, or at least to be able to adjust that angle to align it better into the airbox. You could also gain more coupling room from the air box by sliding the coupling down towards the tube. If all else fails my offer still stands, too many parts just sitting around
 
Last edited:
I mean this one circled in blue

OK, no, mine could not come apart there if it wanted to. Your box hasn't shifted too far towards the fender has it. I seem to recall that coupling that went through the fender wall had a lip or something that needed to pressed in and then pulled back?

But on mine, that bellows fitting was / is a tight fit. Be sure the box has a not moved too far left.
 
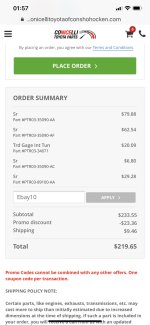
Thank you for this advise, the discount code still works. I guess even someone from Chicago is not all that bad after all. :caked:
Got all the above for $210 + $16 shipping.

The discount code still works!!

Just ordered everything to included the air filter for $315 including shipping!

Awesome savings!

:beer:
 
Still works, just ordered mine. Went with a K&N filter instead of the Toyota version. I may wait until I have to replace the paper filter.
 

Attachments

  • 761D1811-597D-4B20-BB7E-525848C9F898.jpg
    761D1811-597D-4B20-BB7E-525848C9F898.jpg
    123.6 KB · Views: 930
Thanks to all the info and help in this thread! I ordered piece by piece from Camelback coupon code still worked as of 3/16/19. Total came to $222.39 including $12 for shipping. And I got the free mug!

Anyhow install went smooth. The hardest part is dealing with the wire loom. Omg!

Here is some pics I took along the way.

42a6a0a4958a268a3421bf4cd3f77390.jpg

f227c3f823ff7f9cec25c35bb32a56b1.jpg

52e5d8b8f5c6b2cfb7cee649382a2c76.jpg

59e5f38eca7bd425a62f732f0eae7b83.jpg
 
Does anyone know the part number for the 3 rubber isolation grommets for the intake box mount? I had an airaid but lost the oem intake box :(
 
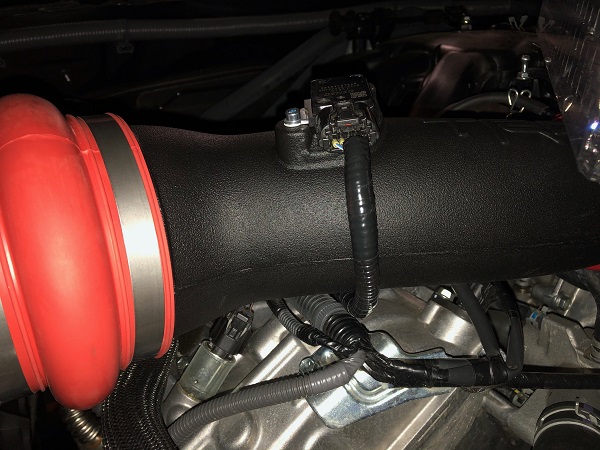
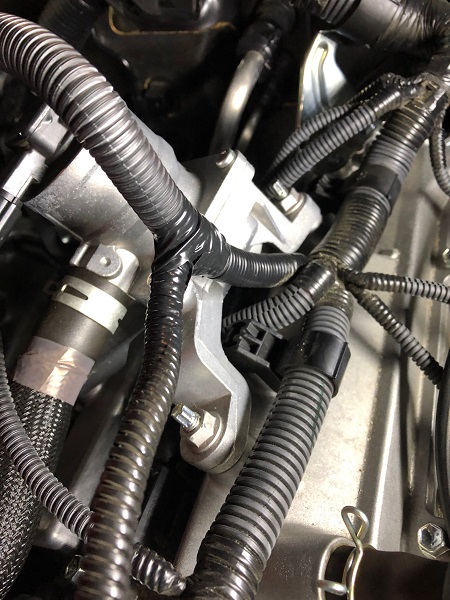
I just finished installing the TRD CAI. Fitment was easy even without silicon. One thing I ran into was securing the wires. The instructions indicated using the included tree zip ties but there didnt seen to be a suitable mounting location. The loom that the MAP wires came off on my truck (2017 pro) looked very different from the photo in the install guide. There was a small, two hole bracket that I mounted, that seems to do nothing at all?

I am not concerned about this...I can find a way to make them fast but was just wondering if anyone else ran into this issue.

I did search this but maybe not a carefully as I should have......
 
I just finished installing the TRD CAI. Fitment was easy even without silicon. One thing I ran into was securing the wires. The instructions indicated using the included tree zip ties but there didnt seen to be a suitable mounting location. The loom that the MAP wires came off on my truck (2017 pro) looked very different from the photo in the install guide. There was a small, two hole bracket that I mounted, that seems to do nothing at all?

I am not concerned about this...I can find a way to make them fast but was just wondering if anyone else ran into this issue.

I did search this but maybe not a carefully as I should have......

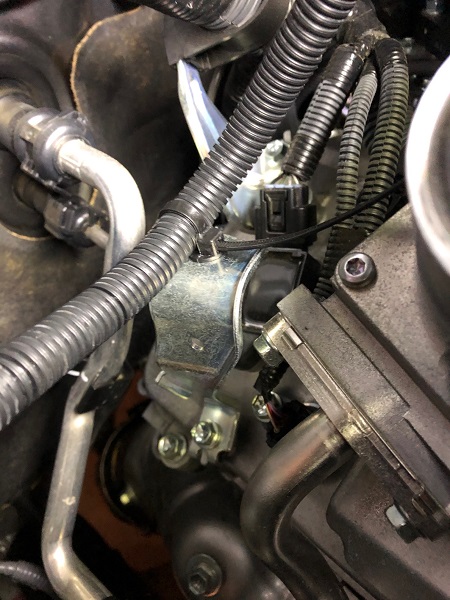
When Toyota moved the air pump, they put it on top of the valve cover, and it bolts to the spot where the instructions tell you to put the ziptie tree for the main wire bundle that the MAF sensor connects to.
I'm going to use the metal bracket that supported the air tube, moved to the back bolt hole on the valve cover and ziptie the wire bundle to that, and I will break the long leg from the plastic retainer that came off the old filter box, tape the bundle back to it, and clip it to the filter box. will look cleaner, and keep everything secure.
 
Last edited:
Just a quick update. Here is my fuel mileage data. Seems to be increasing. Although they are probably changing over from winter blends to summer blends too...


c496bcc993dcf92ec6f8a236c872a4d7.jpg
 
In case anyone is interested, this is how I did the wiring harness so it wasn't flopping around.

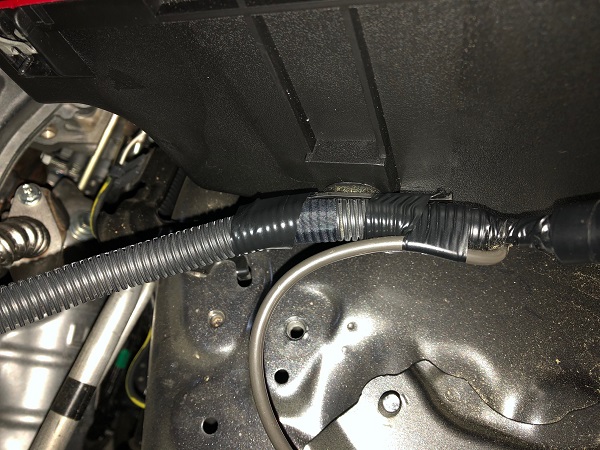
MAF harness routed under the air tube.
hydguy-albums-stuff-picture55088-trd2.jpg


retaped wiring harness
hydguy-albums-stuff-picture55089-trd3.jpg


Relocated the support bracket and used one of the zip ties with the tree on it to secure the harness. I did go back and tape the split loom and trim the zip tie tail.
hydguy-albums-stuff-picture55090-trd4.jpg


Secured the harness to the airbox. At first I was going to use the L clip from the original air box, and snapped the lower leg off, but then I noticed there was a flat clip that wasn't connected to anything, so I relocated it to clip the wire harness to the new air box.
hydguy-albums-stuff-picture55091-trd5.jpg
 
I did the DIY install. All parts from Cameltoe came out to around $320 with taxes and shipping, and included the air filter. The air filter was on back order for about 3 weeks, but everything arrived eventually...

Like others, I did not appreciate the fact that only two clamps were used. The fender side of the box would not clamp or close. The thickness of the rubber gasket is exactly the same as the OEM filter, but it is very stiff and impossible to compress. This makes the box unsealed as-is, and you can easily lift the fender side of the box open. Not good if you're cruising through dusty roads!!!

One individual (who must be an engineer or scientist) ordered two clamps from McMaster Carr. It's an elegant and effective solution, and I highly recommend it. However, if you're like me and you don't want to have to deal with yet another thing, try the MacGyver method:

You had extra clamps (don't know why, but I had 6 extra ones). Take two of those, and pry open the little nubs at the bottom, just a tad:
nju9Pbr.jpg


Now clamp OVER the nubs, and with another pair of pliers, bend the whole clamp tighter. You may find it better to bend back (straighter) near the nubs first, clamp high, and bend forward (tighter) on the main arc.
nvsUNRM.jpg


Now you should have something like this:
xbYZAso.jpg


Guess what?? There's a small open gap under the lip of the lower box that the nubs can now fit into! And your custom-bent clamps will grab the top. Just keep adjusting the nubs and clamp until they grab firmly.

Front:
2SbGGUB.jpg


Back:
qOk8nb3.jpg


MUCH happier...

I have been told you shouldnt see the red flange of the air filter. Is this true or not. I have tried few times with no luck to get the lid to go down futher.

JT
 
Just a quick update. Here is my fuel mileage data. Seems to be increasing. Although they are probably changing over from winter blends to summer blends too...


c496bcc993dcf92ec6f8a236c872a4d7.jpg

Any more updates on Mileage? thanks for posting. I came from a 12mpg truck to the runner and actually am one of the rare ones like you who likes getting a little savings on fuel when I can.:usa2:
 
I’m getting 15.8 right now previously 15.1 around town and some short trips on the highway. Hoping this offsets the dip when I upgrade my 275s for 285s


Sent from my iPhone using Tapatalk
 
^^ Your step 14.

You should have sleeve of reinforced gas tube, metal, plastic, something, over that small soft tube with the zip tie. Otherwise the zip can/will cut/crimp over time.
 
^^ Your step 14.

You should have sleeve of reinforced gas tube, metal, plastic, something, over that small soft tube with the zip tie. Otherwise the zip can/will cut/crimp over time.

I didn't make the article, just found it browsing the interwebs for pictures. You could always leave the zip tie off, it's really just there to hold it in place.
 
I have been told you shouldnt see the red flange of the air filter. Is this true or not. I have tried few times with no luck to get the lid to go down futher.

JT

The lid doesn't completely cover the red flange, and even with the stock filter from the non-TRD intake has some of the flange exposed.
 

Members online

No members online now.

Forum statistics

Threads
278,312
Messages
3,554,083
Members
248,016
Latest member
Advally Service

Trending content

Back
Top